Loading ...
Loading ...
Loading ...
11
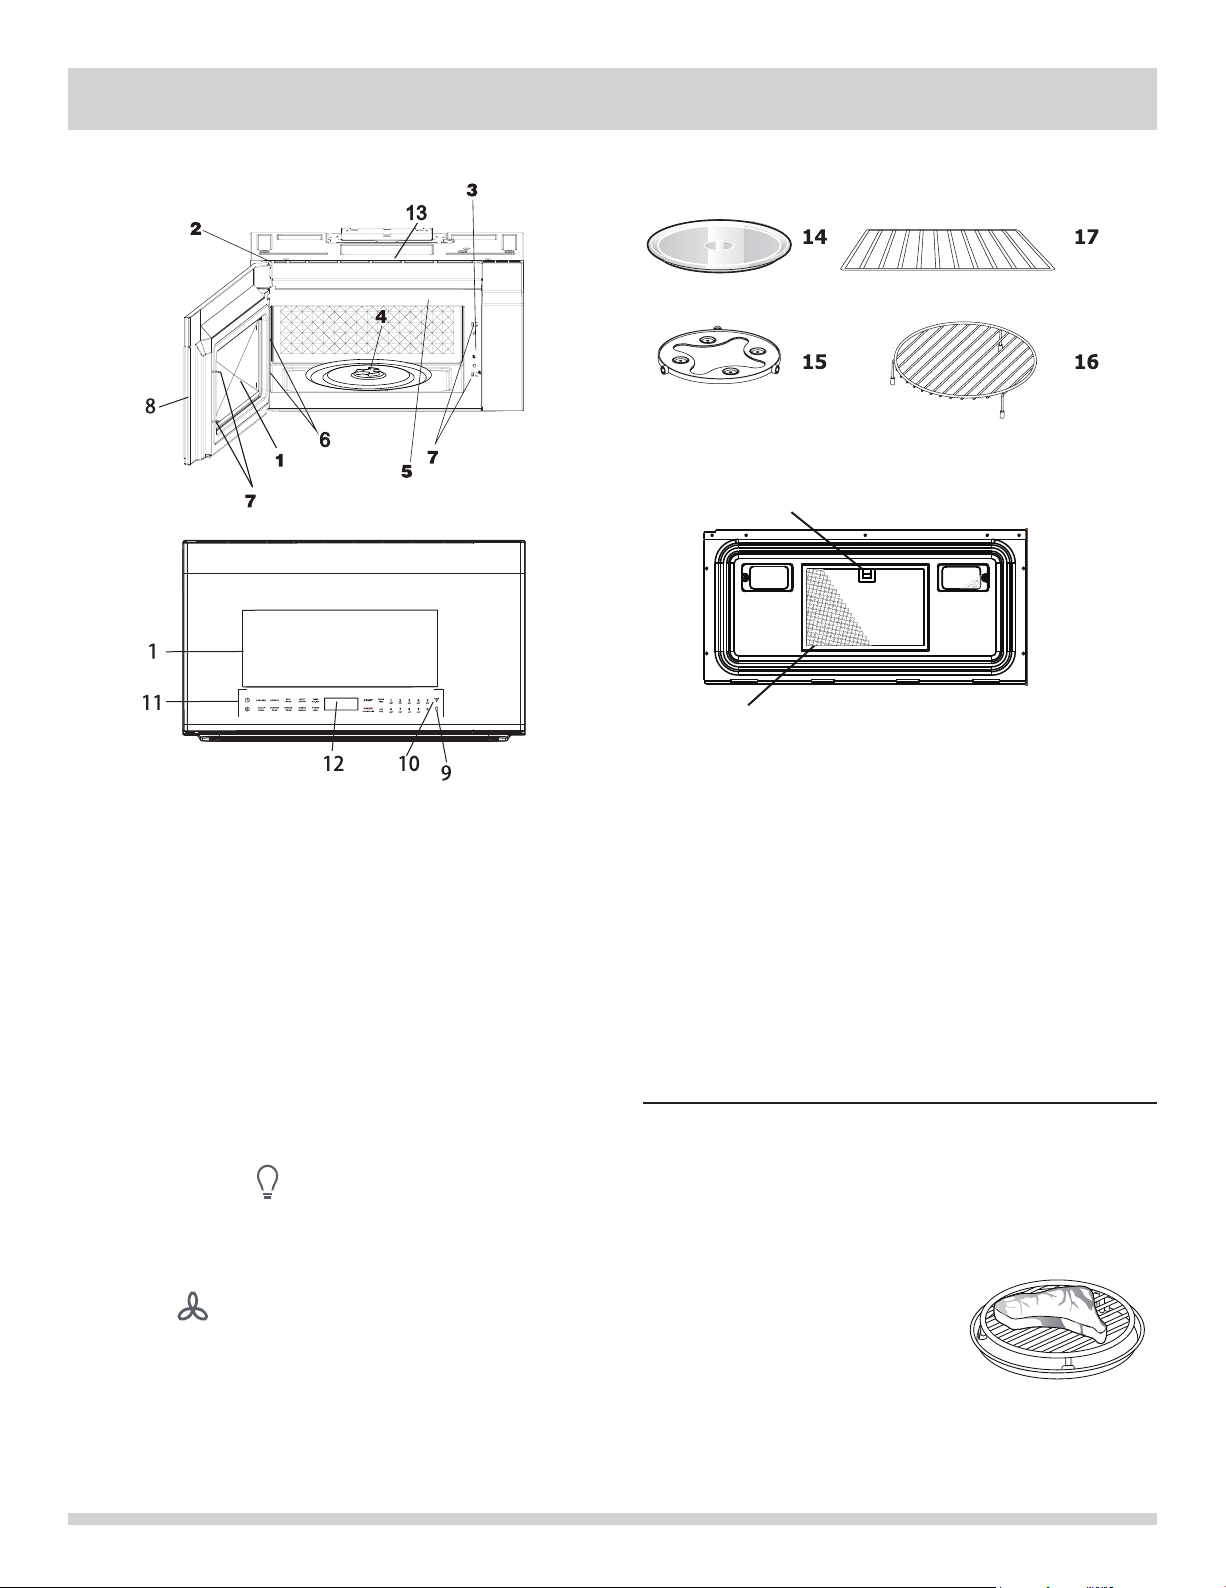
PART NAMES
FRONT VIEW
BOTTOM VIEW
Tab
(Front of microwave oven)
(Rear of microwave oven)Grease lter
1 Microwave oven door with see-through window
2 Door hinges
3 Waveguide cover:
DO NOT REMOVE.
4 Turntable motor shaft
5 Microwave oven light
It will light when microwave oven is operating or
door is open.
6 Metal rack holders
7 Safety door latches
The microwave oven will not operate unless the door
is securely closed.
8 Pocket handle
9 Light hi lo pad
Press light once for high, twice for low, three times
for light off.
10 Vent high/med/low/off pad
Press once
11 Auto-Touch control panel
12 Time display: Digital display, 99 minutes, 99 seconds
13 Ventilation openings
14 Removable turntable glass
Position glass tray on turntable motor shaft coupling.
15 Removable turntable support
Install the turntable support on the microwave oven
bottom, centering the turntable support around the
turntable coupling. Then place the turntable glass
tray unto the turntable motor coupling.
16 Low wire rack
Use for convection and combination cooking.
Place on glass turntable tray for proper operation.
17 Wire metal tray for cooking multiple levels of food.
Accessories
The accessory 16 is designed especially for use in the
microwave oven for convection, mix or broil cooking.
DO NOT USE FOR MICROWAVE ONLY COOKING. Do
not substitute similar types of racks for these specially
designed ones. High wire rack (Baking rack)–for
convection and fast bake.
• Place on the turntable and use
for roasting or broiling to allow
juices to drain away from food.
Loading ...
Loading ...
Loading ...