Loading ...
Loading ...
Loading ...
13
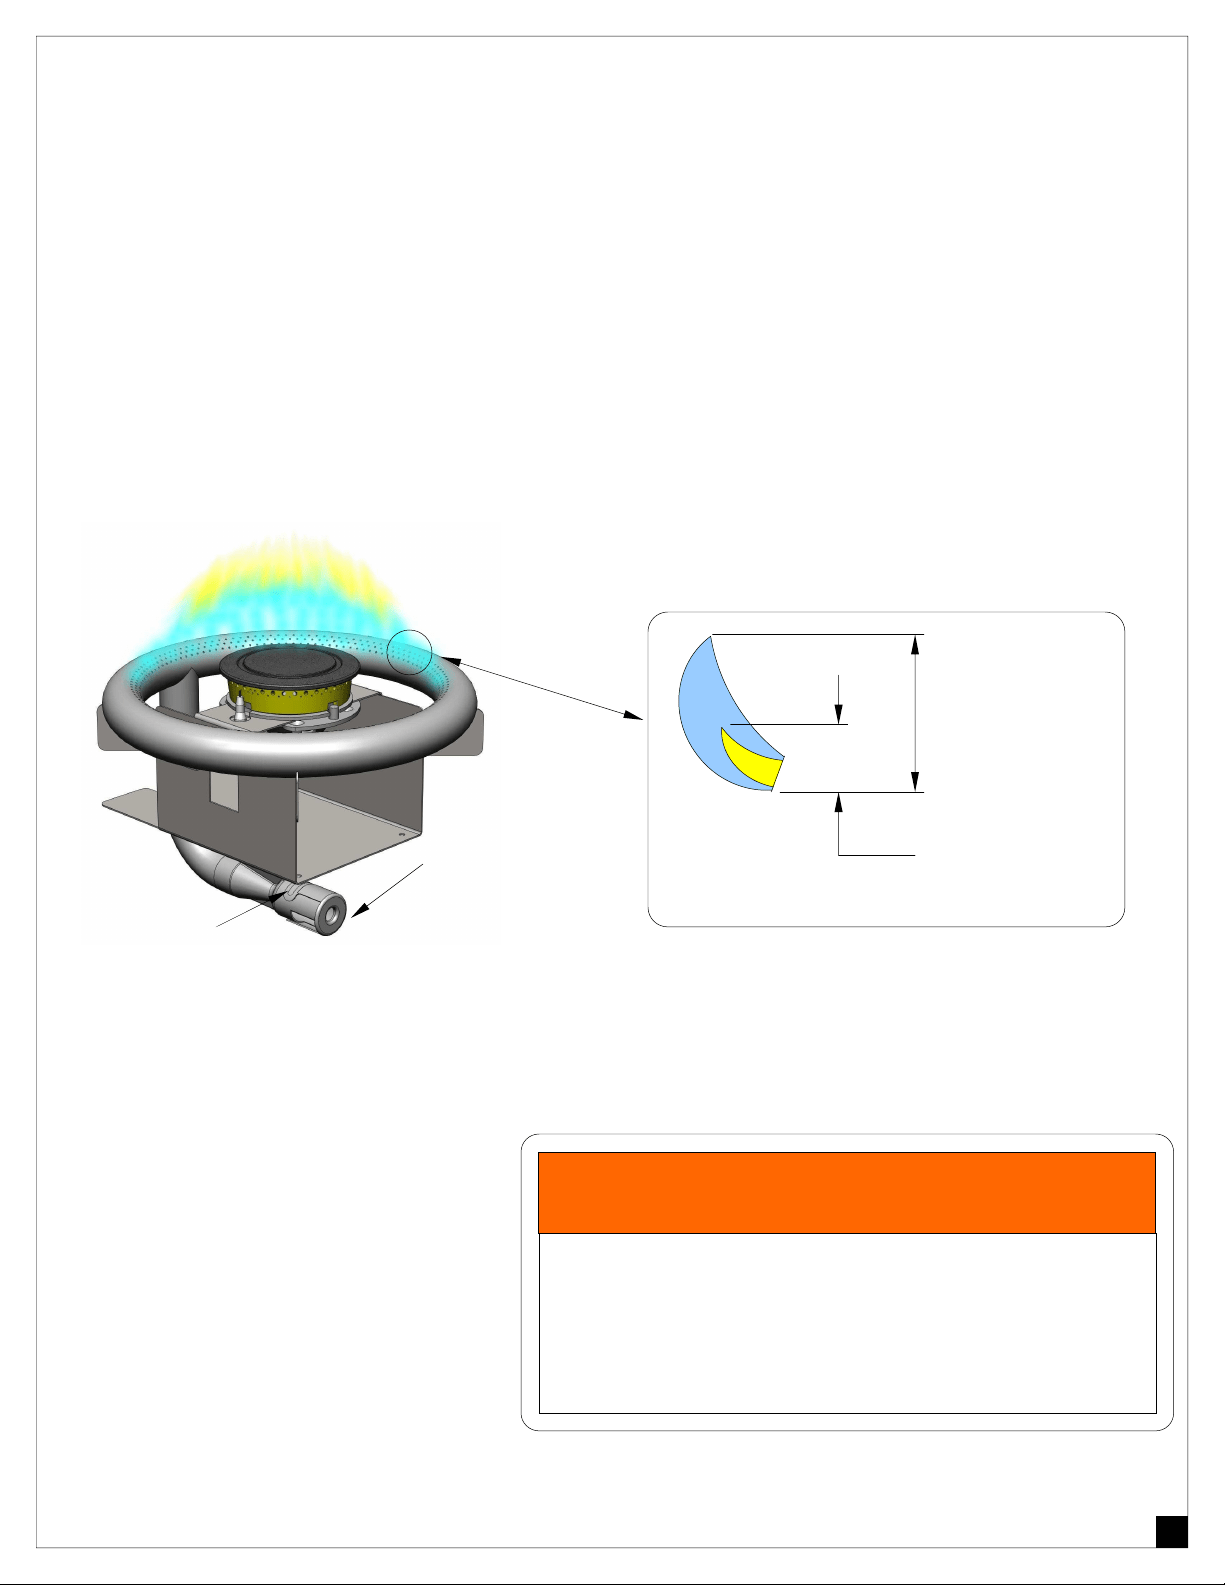
3” MAXIMUM
3
/
4
” MAXIMUM
Figure # 4
FLAME SIZE
AIR SHUTTER ADJUSTMENT:
A sheet metal cup at the inlet of the perimeter burner called the “AIR SHUTTER” regulates the amount of
air that enters into the burner for combustion.
The air shutter is locked in place by a set-screw, which must be loosened prior to lighting the burner for
adjustment. The air shutter adjustment screws are accessible with a flat screwdriver through the bottom
of the unit. Loosen the set-screw of the air shutter.
Light the burner and adjust according to the following directions:
•
Turn the valve on “HI”, light the burner and allow it to “WARM UP” for 10 minutes.
•
If the flame is yellow, indicating insufficient air, turn the air shutter counter-clockwise to
allow more air to the burner.
•
If the flame is noisy and tends to lift away from the burner there is too much air. Turn the
air shutter clockwise to reduce the amount of air to the burner.
NOTE: Be careful, as the burner could be and / or will become very hot after lighting it.
LOW HEAT SETTING ADJUSTMENT:
NOTE:
THE LOW HEAT SETTING ON YOUR
UNIT IS PRESET AT THE FACTORY.
ADJUST ONLY IF ALTITUDE OR ENVI-
RONMENTAL FACTORS ARE CAUSING
POOR LOW HEAT PERFORMANCE.
ADJUSTMENT STEPS:
1. Follow lighting instructions by setting the control knob on “HI” and allow the burner to preheat for
10 minutes.
AIR SHUTTER
PERIMETER BURNER
SET-SCREW
WARNING
NEVER ADJUST THE BURNER SO LOW THAT IT MAY
GO OUT DURING USE. DO NOT OPERATE THE UNIT
WITH THE LOW HEAT SCREW REMOVED.
GAS CAN ESCAPE AND CAUSE A POTENTIALLY
HAZARDOUS CONDITION.
Loading ...
Loading ...
Loading ...