Loading ...
Loading ...
Loading ...
Network settings
7
RQT9655
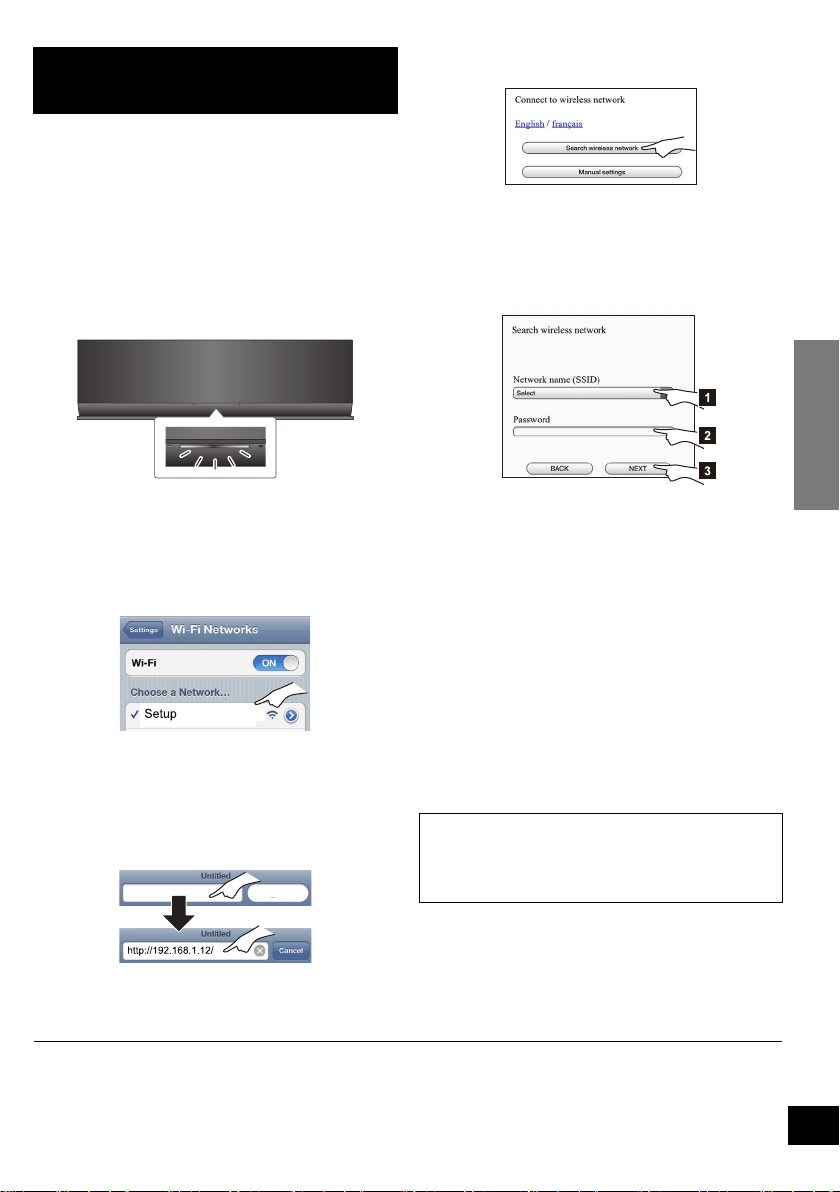
With this method, you will access this unit’s
wireless network settings from the Internet browser
of your compatible device.
≥ The following explanations are based on an iPhone.
Preparation
≥ Turn on your iPhone.
1 Press and hold both [VOLUME i] and
[– WPS] on this unit for more than 2
seconds.
≥ If the indicator blinks blue, turn the unit off and on
and repeat step 1.
2 Connect your iPhone to this unit’s wireless
network named
“Setup _ _ _ _ _ _”.*
1, 2
≥ Once “Setup _ _ _ _ _ _” is selected, continue to
step 3.
3 Start “Safari” on your iPhone and type
“http://192.168.1.12/” into the URL
address field and display the page.
{. This unit’s setup window is displayed.
4 Select “Search wireless network”.
5 Select and input the details.
≥ Check your home wireless network name
(Network name (SSID)) and password for
this network. This can often be found on the
wireless router itself.
6 Select “JOIN” to apply the settings.
{. In the pop-up screen, select “OK” to continue.
– Select “CANCEL” to return to the setup window.
{. The Wi-Fi
®
status indicator blinks blue.
– You can now close the Safari browser.
7 The unit’s settings are completed when
the Wi-Fi
®
status indicator stops blinking
after about 2 minutes and lights blue.
8 Make sure to connect your iPhone back to
your home wireless network.*
4
9 To use AirPlay, turn to page 9.
*1: “ _ ” stands for a digit that is unique to each set.
*2: Make sure that DHCP is enabled for the network setting on the iPhone.
*3: If you have set your wireless network to be invisible, select “BACK” and refer to “Alternative settings”. (> 8)
*4: To use the AirPlay function, connect the iPhone to the wireless network selected in step 5. (> above)
Method 2
If your wireless network router does not support
WPS.
Blinks purple
_ _ _ _ _ _
[1] Select your home wireless network
name.*
3
[2] Type the password.
[3] Select “NEXT”.
If the Wi-Fi
®
status indicator turns off, turn the unit
off and on again, check the wireless network
password and other settings and start again from
step 1.
SC-AP01PPC~RQT9655.book 7 ページ 2012年3月2日 金曜日 午後7時57分
Loading ...
Loading ...
Loading ...