Loading ...
Loading ...
Loading ...
50
Maintenance
Replacing the lamp
• To reduce the risk of electrical shock, always turn the projector off and disconnect the power cable
before changing the lamp.
• To reduce the risk of severe burns, allow the projector to cool for at least 45 minutes before replacing the
lamp.
• To reduce the risk of injuries to fingers and damage to internal components, use caution when removing
lamp glass that has shattered into sharp pieces.
• To reduce the risk of injuries to fingers and/or compromising image quality by touching the lens, do not
touch the empty lamp compartment when the lamp is removed.
• This lamp contains mercury. Consult your local hazardous waste regulations to dispose of this lamp in a
proper manner.
• To assure optimal performance from the projector, it is recommended that you purchase a qualified
projector lamp for lamp replacement.
• If lamp replacement is performed while the projector is suspended upside-down from the ceiling, make
sure that no one is underneath the lamp socket to avoid any possible injury or damage to the human eyes
caused by fractured lamp.
• Ensure good ventilation when handling broken lamps. We recommend that you use respirators, safety
glasses, goggles or face shield and wear protective clothing such as gloves.
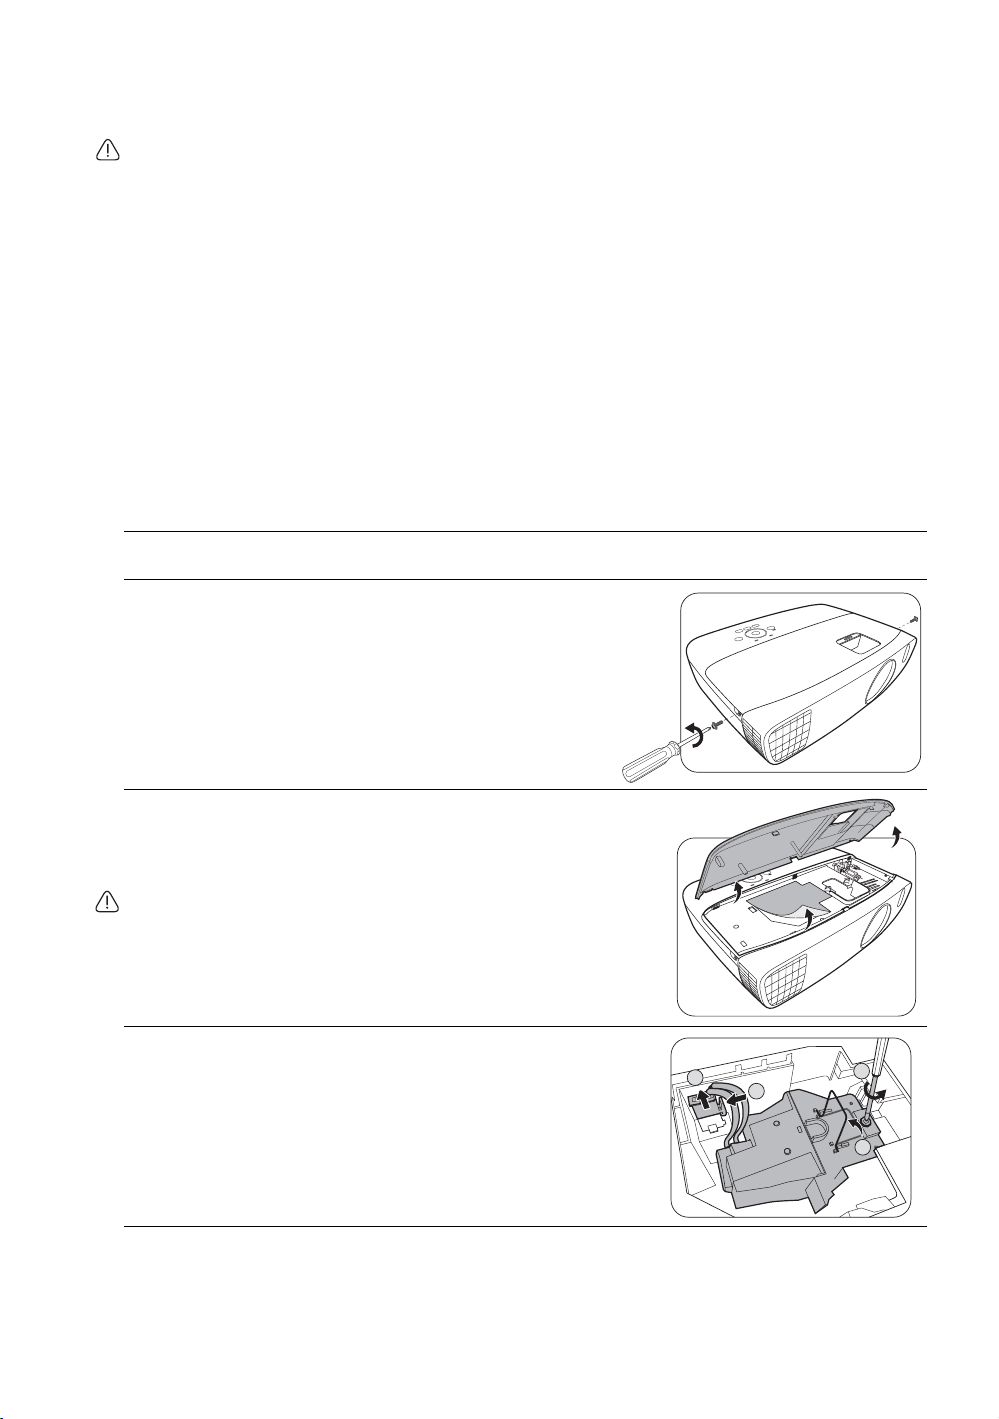
1. Turn the power off and disconnect the projector from the power outlet. If the lamp is hot, avoid
burns by waiting for approximately 45 minutes until the lamp has cooled.
2. Loosen the screws that secure the lamp cover on the top
of the projector until the lamp cover loosens.
3. Remove the lamp cover from the projector.
4. Confirm a position of the lamp protection film to put a
new film on the same position later, then remove and
dispose of the lamp protection film.
• Do not turn the power on with the lamp cover removed.
• Do not insert your fingers between the lamp and the
projector as the sharp edges inside the projector may cause
injuries.
5. Disconnect the lamp connector from the projector as
illustrated.
6. Loosen the screw that secures the lamp.
7. Lift the handle so that it stands up.
2
1
3
4
Loading ...
Loading ...
Loading ...