Loading ...
Loading ...
Loading ...
29
Installation
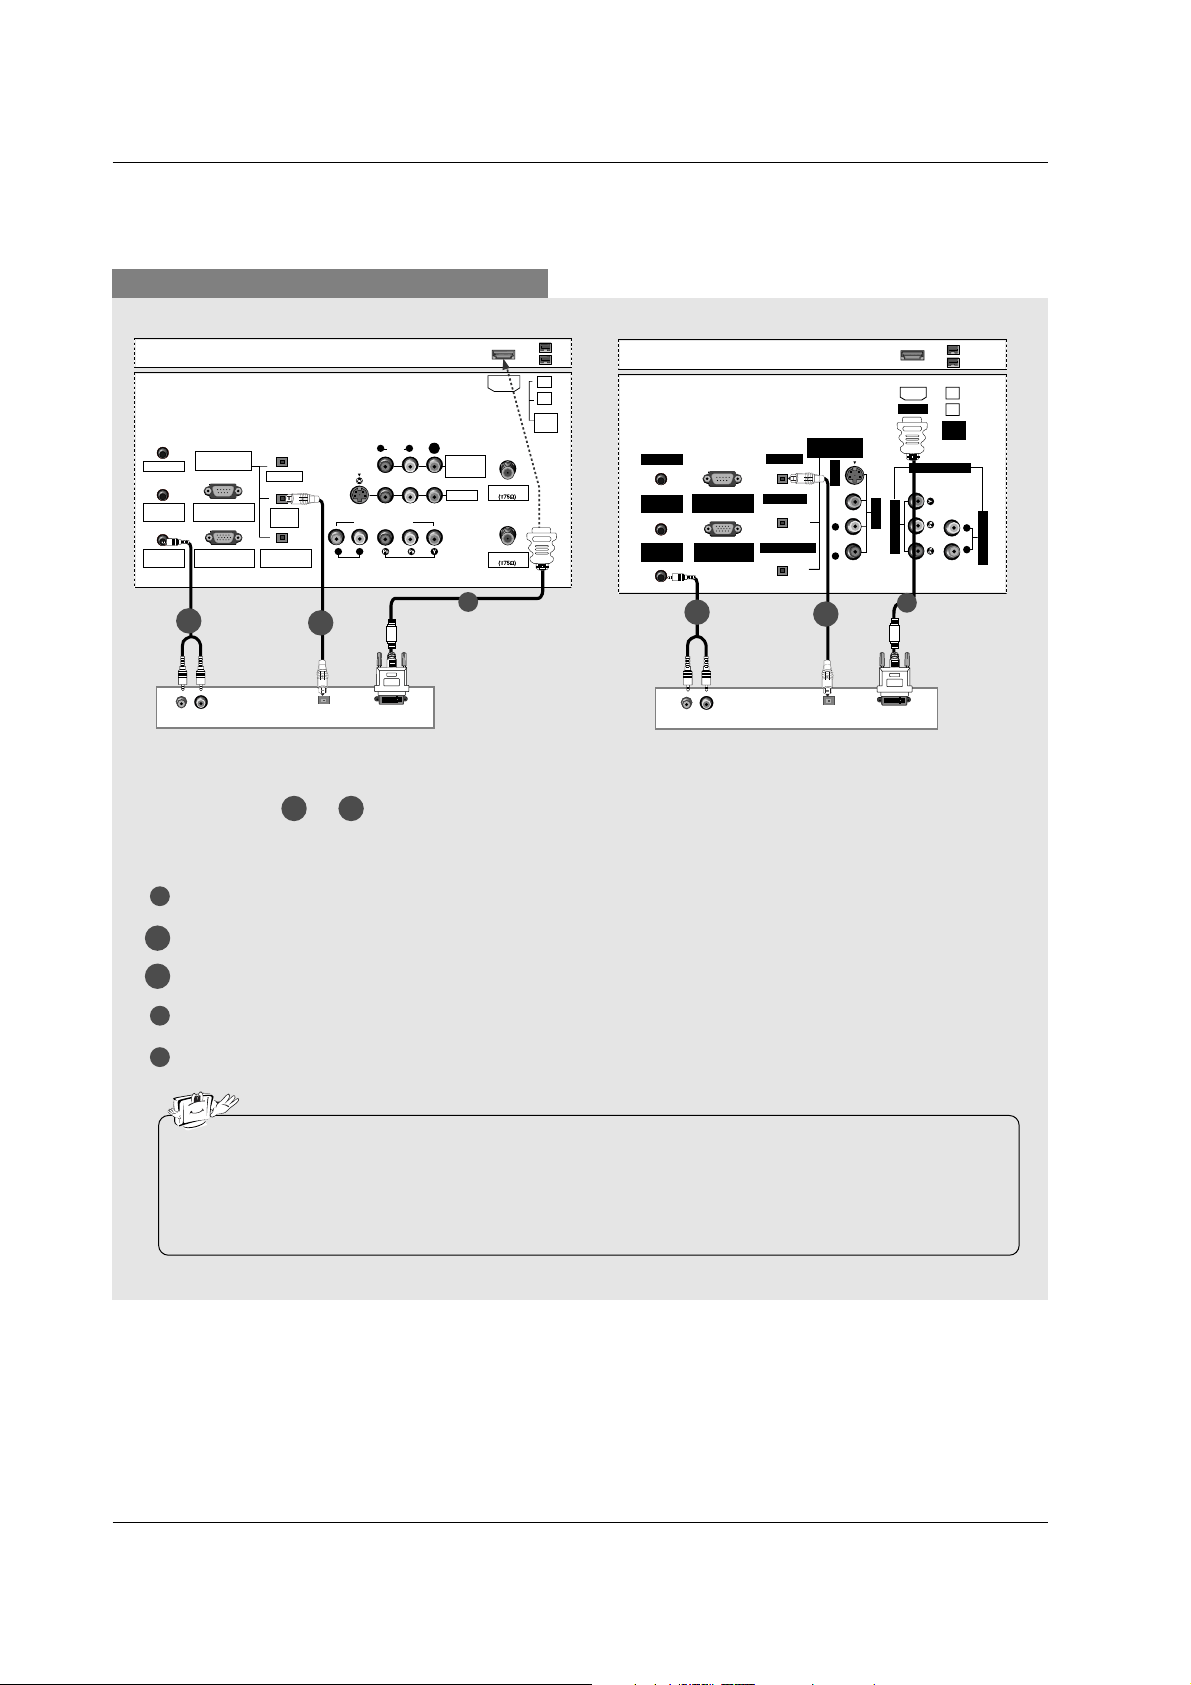
When connecting with a HDMI to DVI cable
1
4
5
Connect the DVI output of the digital set-top box to the HDMI jack on the set.
Connect the audio output of the digital set-top box to the PC AUDIO INPUT jack on the set.
Connect the optical audio output of the digital set-top box to the DIGITAL AUDIO DVI INPUT jack on the set.
Turn on the digital set-top box. (Refer to the owner’s manual for the digital set-top box.)
Select HDMI/DVI input source with using the TV/VIDEO button on the remote control.
(R) AUDIO (L)
DIGITAL AUDIO
OPTICAL
DVI-DTV OUTPUT
ANTENNA
G-LINK
DIGITAL AUDIO
(OPTICAL)
DVI
INPUT
COMPONENT1
INPUT
OUTPUT
VIDEO1
RGB INPUT
(PC/DTV INPUT)
RS-232C INPUT
(CONTROL/SERVICE)
AUDIO INPUT
AUDIO
(MONO)
VIDEO INPUT
COMPONENT1
RL
RL
PC AUDIO
INPUT
REMOTE
CONTROL
S-VIDEO
CABLE
MONITOR
OUT
VIDEO
IEEE
1394
HDMI
(R) AUDIO (L)
DIGITAL AUDIO
OPTICAL
DVI-DTV OUTPUT
G-LINK
DIGITAL AUDIO
(OPTICAL)
OUTPUT
VIDEO1
RGB INPUT
(PC/DTV INPUT)
RS-232C INPUT
(CONTROL/SERVICE PORT)
AUDIO INPUT
VIDEO INPUT
RL
PC AUDIO
INPUT
REMOTE
CONTROL
S-VIDEO
IEEE
1394
AUDIO VIDEO
(MONO)
RL
HDMI
DVI INPUT
COMPONENT1 INPUT
COMPONENT1
Digital Set-top Box Digital Set-top Box
1
2-1
2-2
1
2-1
2-2
Select or , depending on your digital set-top box connector.
2-1 2-2
• If the digital set-top box has a DVI output and no HDMI output, a separated audio connection is necessary.
• If the digital set-top box supports Auto DVI function, the output resolution of the digital set-top box will be auto-
matically set to 1280x720p.
• If the digital set-top box does not support Auto DVI, you need to set the output resolution appropriately. To get the
best picture quality, adjust the output resolution of the digital set-top box to 1280x720p.
2-1
2-2
32, 37, 42 inch TV Back
26 inch TV Back
Loading ...
Loading ...
Loading ...