Loading ...
Loading ...
Loading ...
24
Installation
DVD Setup
When connecting with a S-Video cable
VIDEO1
AUDIO INPUT
AUDIO
(MONO)
VIDEO INPUT
COMPONENT1
RL
RL
S-VIDEO
MONITOR
OUT
VIDEO
S-VIDEO
(R) AUDIO (L)
DIGITAL AUDIO
(OPTICAL)
OUTPUT
VIDEO1
AUDIO INPUT
VIDEO INPUT
RL
S-VIDEO
IEEE
1394
AUDIO VIDEO
(MONO)
RL
HDMI
DVI INPUT
COMPONENT1 INPUT
COMPONENT1
S-VIDEO
(R) AUDIO (L)
DVD
DVD
1
1
2
2
1
2
3
4
5
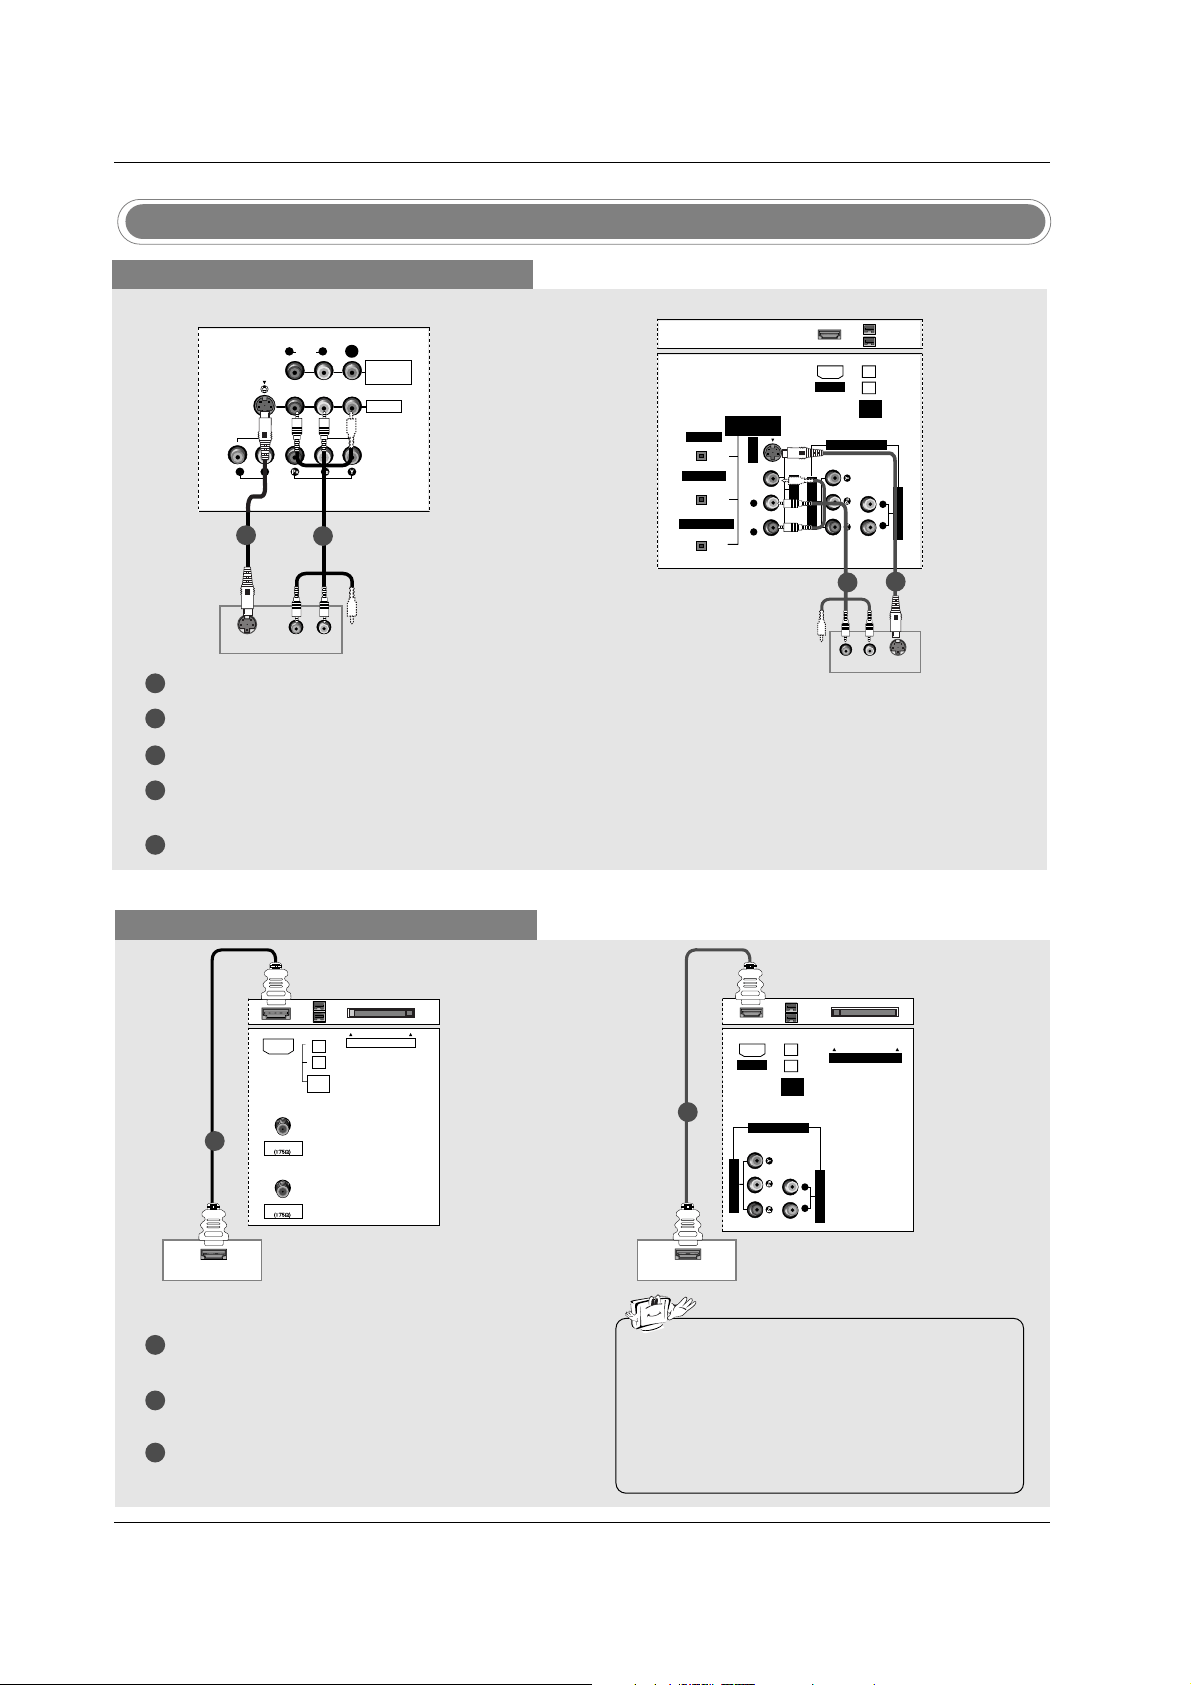
Connect the S-VIDEO output of the DVD to the S-VIDEO input on the set.
Connect the audio outputs of the DVD to the AUDIO input jacks on the set.
Turn on the DVD player, insert a DVD.
Select Video1 input source with using the TV/VIDEO button on the remote control.
- If connected to VIDEO2, select Video 2 input source.
Refer to the DVD player's manual for operating instructions.
When connecting with a HDMI cable
1
2
3
Connect the HDMI output of the DVD to the HDMI
jack on the set.
Select HDMI input source with using the
TV/VIDEO button on the remote control.
Refer to the DVD player's manual for operating
instructions.
ANTENNA
CableCARD
IEEE
1394
CABLE
HDMI
HDMI-DVD OUTPUT
HDMI-DVD OUTPUT
AUDIO INPUT
VIDEO INPUT
RL
CableCARD
IEEE
1394
HDMI
COMPONENT1
DVD
DVD
1
1
• TV can receive the video and audio signal simulta-
neously with using a HDMI cable.
• If the DVD supports Auto HDMI function, the DVD
output resolution will be automatically set to
1280x720p.
• If the DVD does not support Auto HDMI, you need
to set the output resolution appropriately. To get the
best picture quality, adjust the output resolution of
the DVD to 1280x720p.
32, 37, 42 inch TV Back
26 inch TV Back
32, 37, 42 inch TV Back
26 inch TV Back
Loading ...
Loading ...
Loading ...