Loading ...
Loading ...
Loading ...
70
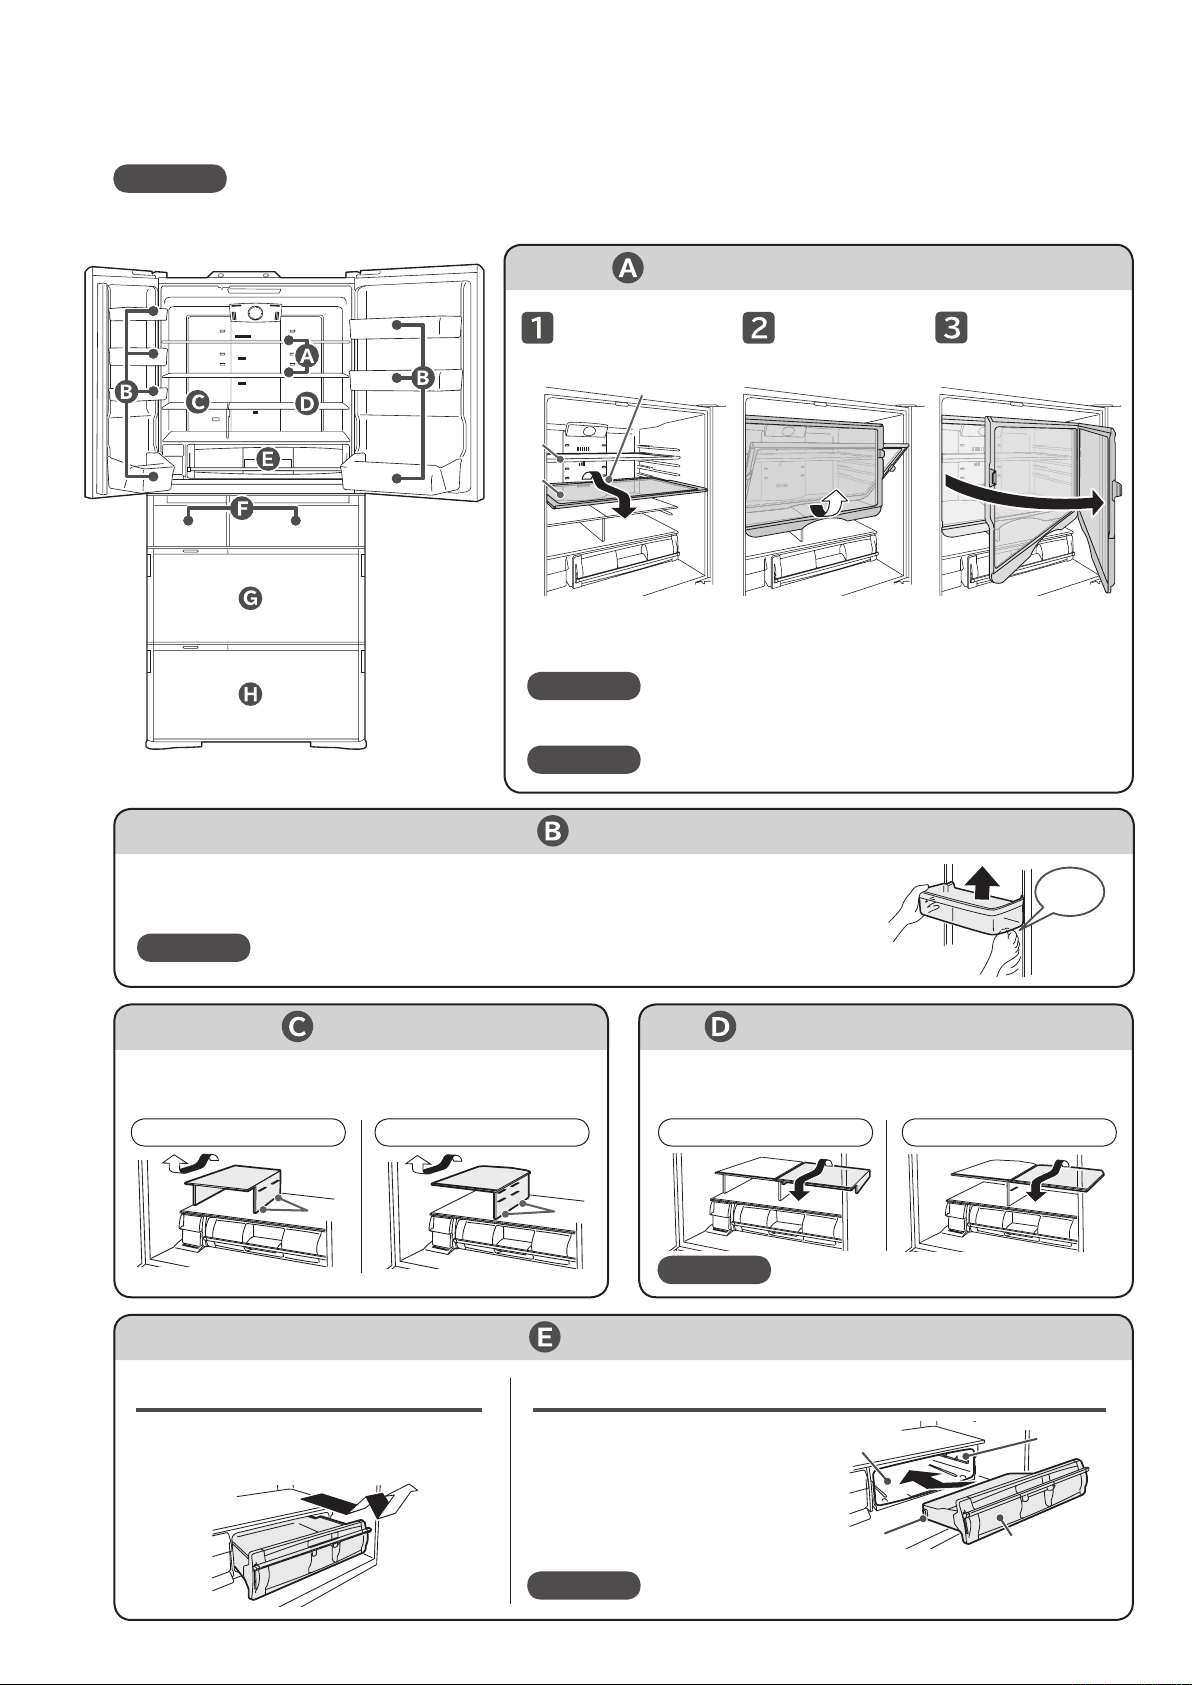
● Before removing parts, take out all the foods on the parts.
● Do not remove parts except the ones listed here.
Please contact with a Hitachi customer service centre for cleaning such parts after removing them.
HOW TO REMOVE/ATTACH PARTS
Caution
Height adjustable upper and middle shelf
When installing the shelf, slide it until it reaches to the interior wall, then slightly lift up
the back of the shelf and push it in.
(hitch the forks of the shelf to the parts on the back of the shelf)
Slightly lift up the back
of the shelf and draw it.
Raise the shelf,
as shown in the
drawing.
Rotate and
remove it.
Forks of the shelf (Right / Left)
Door may be damaged if you draw the shelf without turning it.
Be careful to attach/remove the glass shelf because it is heavy.
If it drops, it may break and cause bruise or injury.
Before removing the upper shelf, remove the middle shelf.
Check if it is fixed properly by taking it in and out a few times.
Notice
Request
Request
Door pocket
Fixed shelf
Vacuum Case
Height adjustable lower shelf
Draw the shelf, and pull off the 2 pins on the
lower right and remove it.
Pull out the Vacuum Case by slightly
lifting up and moving up and down.
Insert the Vacuum Case so that both
right and left convex ribs on the case
can slide under the guide rail of the
Vacuum Container.
Lastly, hold down the handle to lock.
How to remove How to attach
Remove the shelf by slightly lifting up the rear of
the shelf.
Tap
Tap
If you pull out the shelf straight, it may hit the door.
Caution
Lift up the door pocket while tapping the left/right of its bottom surface, and remove it.
(It is fixed a little tightly.)
Caution
Insert the door pocket fully to the end when installing it.
If it drops, it may break and cause bruise or injury.
Forks Forks
R-X670G type, R-G670G type R-X670G type, R-G670G typeR-X730G type, R-G620G type R-X730G type, R-G620G type
Upper
shelf
Middle
shelf
Guide rail
Vacuum Case
Vacuum Container
Convex rib
Loading ...
Loading ...
Loading ...