Loading ...
Loading ...
Loading ...
69
Maintenance
(Continued)
Water supply container
Once a week
Ice tray
Once or twice a year
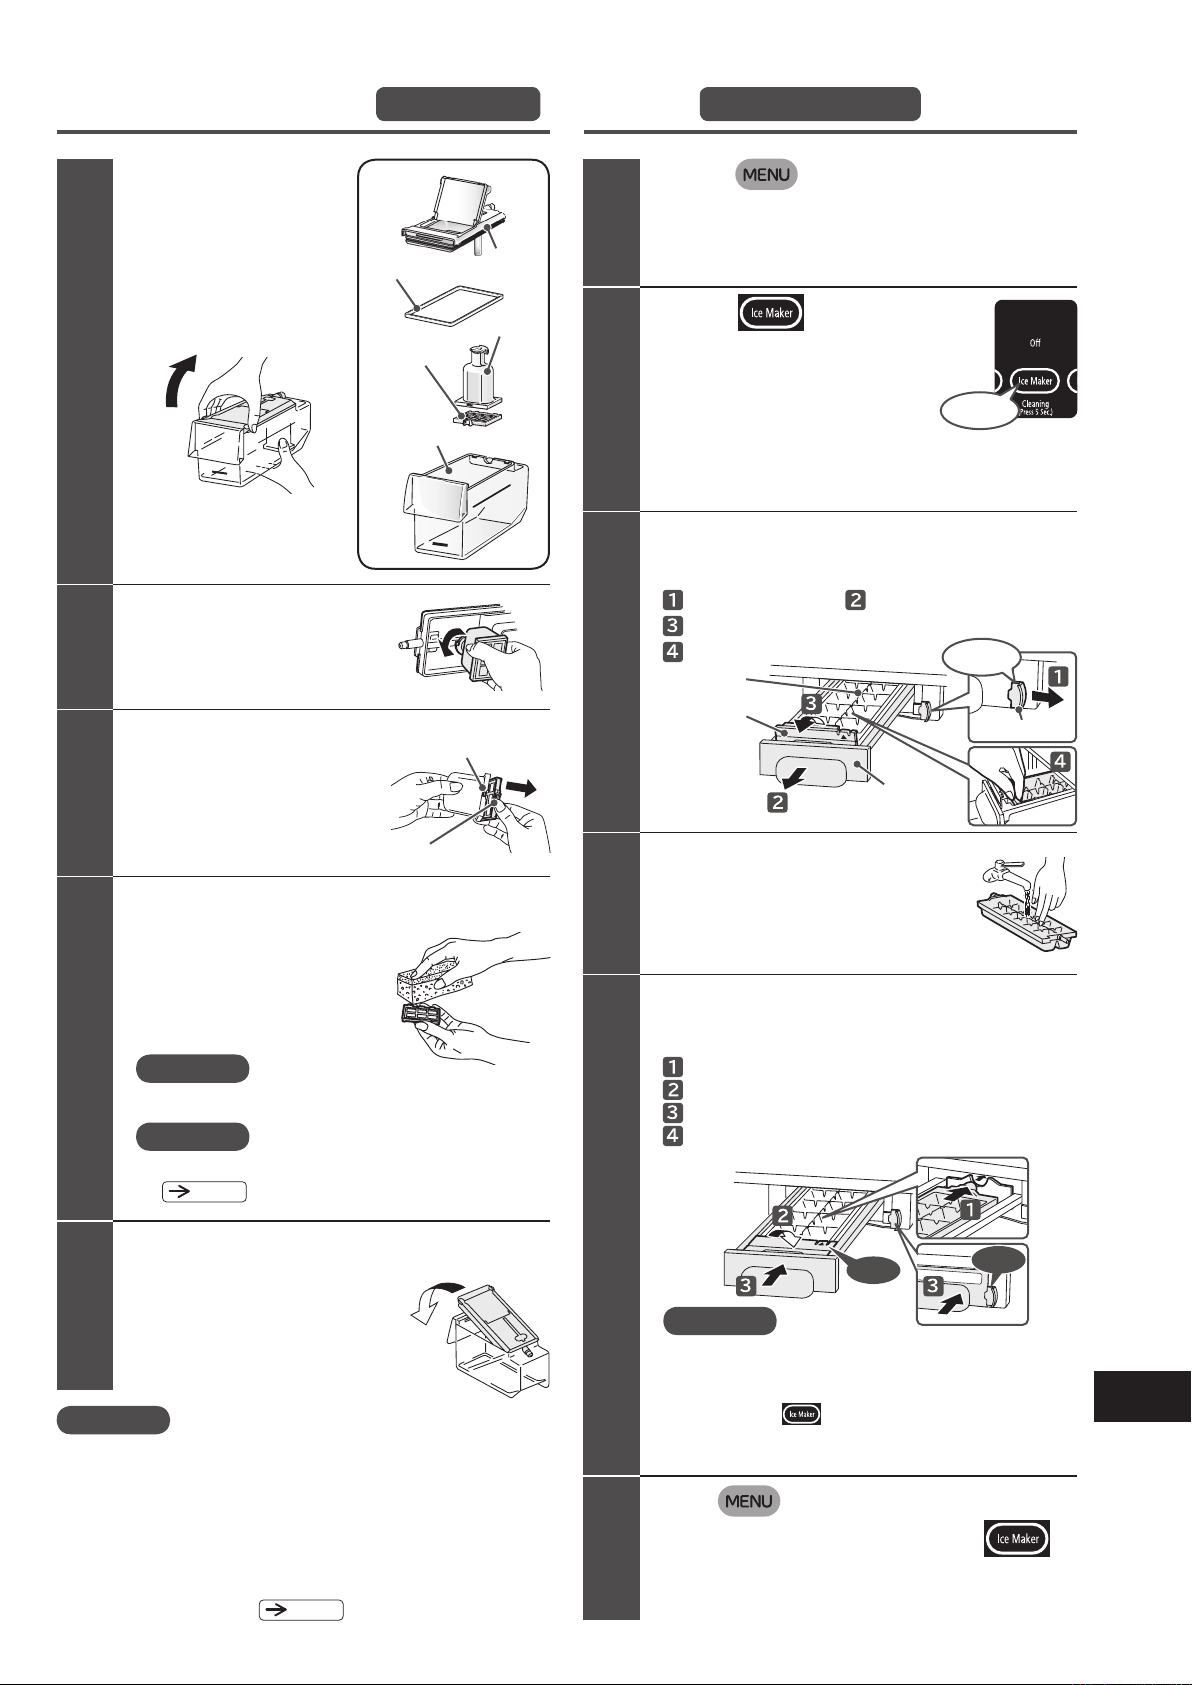
Remove the water
supply container,
and then the lid.
Take up the near side of the lid
toward in the direction of the
arrow, and then remove it.
Remove the gasket from
the lid and then the case.
Turn the case and remove it from the lid.
Remove the water filter
from the case.
Pinch the tab of the water filter with
fingers to unset it from the fork, and
then remove the case.
Rinse each part of the water supply
container in water.
Wash it with a soft wash sponge etc.
Do not use the detergents etc.
Attach each part to the water supply
container, pour water
in and then set it.
Insert the lid from its rear side and
close it in the direction of the arrow.
Touch button on the Control
Panel to turn on the indicator lamp.
All indicator lamps turn on, and then the current settings are
displayed.
Open the door of the Ice Compartment,
and take out the ice tray.
Push the level laterally. draw the frame.
Raise the cover ( ▲ part) in the direction of the arrow.
Remove the ice tray from the frame.
Empty the ice tray and wash
it lightly in the stream.
Do not use a sponge / cleanser, etc.
Be sure not to scarify.
Open the Ice Compartment, and then
attach the ice tray.
Set the ice tray
Hold down the cover to the end until it snaps.
Push the frame to the end until it snaps.
Move the frame back and forth to check that it is fixed
securely.
Touch button on the Control Panel to turn
on the indicator lamp, and then touch
button to turn on the
“
On
”
indicator lamp.
Automatic Ice Making starts.
Touch button to turn
on
“
Off
”
indicator lamp.
It stops water supply to the ice tray.
※ When
“
Off
”
indicator lamp blinks,
wait for about 1 minute for it to turn
on, and then follow the next steps.
Note that the frame cannot be pulled out.
1 1
3
4
5
6
2
3
4
5
2
Gasket
Lid
Case
Water filter
Water supply
container
Tab
●
Dechlorinated water such as mineral water, well water, filtered water,
cooled boiled water and others tends to cause water stain / slime compared
with tap water. So it is recommended to maintain once every 3 days.
●
When the Ice Maker is not used for more than 1 week, dry out the water
supply container, and then set it in place (dry out the water filter, among
others).
When not used for more than 1
week, it is recommended to start Ice
Maker Cleaning before use.
Pg.68
●
When the frame for the ice tray cannot be pushed into the back,
the motor that drives the ice-tray may have operated. Remove
the ice tray once and then push the frame alone into the back,
and then touch
button with all the doors closed to turn
on
“
Off
”
. After 1 minute, the ice-tray driving motor gets ready,
allowing you to mount the ice-tray.
Notice
Notice
Ice tray
Cover
Frame
Lever
Click
Click
Touch it
Fork
● Dry out the water filter to prevent molds and guck.
● Replace the water filter normally every 3 - 4 years.
Pg.77
Request
Notice
Slide
Loading ...
Loading ...
Loading ...