Loading ...
Loading ...
Loading ...

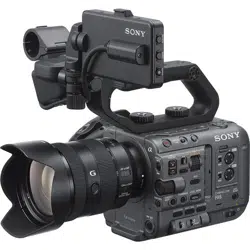
1. Overview: Location and Function of Parts
7
Handle, Rear, and Connector Block
11
10
8
7
6
5
4 3 2 1
21
16
10
10
10
9
17
18
19
22
23
20
24
25
26
1 4
1 3
1 2
15
20
1. Handle HOLD switch
Use to disable operation of the controls on the
handle.
2. Handle record START/STOP button
3. Handle internal microphone
4. Multi-interface shoe
For details about accessories supported by
the multi-interface shoe, contact your sales
representative.
5. Handle assignable dial (page 48)
6. Handle zoom lever (page 93)
7. ASSIGN (assignable) 7 to 8 buttons
(page 48)
8. Multi selector (8-way D-pad and apply
buttons)
9. Accessory shoe (page 7)
10. Accessory attachment screw holes
(1/4inch)
Compatible with 1/4-20 UNC screws (length of
6mm or less).
[Note]
Use of screws longer than 6mm may damage the
exterior surface.
11. Recording/tally lamp (rear) (page 34)
12. BATT RELEASE button (page 17)
13. Air inlet
[Note]
Do not cover the air inlet.
14. Battery pack attachment (page 17)
15. USB-C connector (page 60)
16. INPUT2 (audio input 2) connector
(page 46)
17. INPUT1 (audio input 1) connector
(page 46)
18. INPUT2 (LINE/MIC/MIC+48V) switch
(page 46)
19. INPUT1 (LINE/MIC/MIC+48V) switch
(page 46)
20. Screw holes for external devices
Compatible with M3 screws (length of 4mm
or less).
[Note]
Use of screws longer than 4mm may damage the
exterior surface.
21. HDMI OUT connector (page 106)
22. SDI OUT connector (page 106)
23. TC IN/TC OUT (timecode input/output)
connector (page 107)
24. REMOTE connector
Connect to general-purpose LANC jack
accessory.
25. USB/multi connector (page 108)
26. DC-IN connector (standard DC jack)
(page 18)
Attaching the accessory shoe
1 Lift the front edge of the shoe spring, and
pull the spring in the opposite direction to
the arrow engraved on the spring.
Shoe spring
Accessory shoe
1
2 Position the accessory shoe on the
accessory shoe mount, aligning the
protrusions on the shoe with the
corresponding points on the mount, and
tighten the four screws.
Loading ...
Loading ...
Loading ...