Loading ...
Loading ...
Loading ...

2. Preparation: Attaching Devices
22
When operating the zoom
A: Operate the zoom lever using your index
finger and middle finger.
B: Firmly hold the grip using your thumb.
C: Firmly hold the grip using your ring finger
and little finger.
Removing the grip
[Note]
When removing the grip, be sure to place the camcorder
on a flat surface, such as a desk.
1 Disconnect the cable from the grip remote
control connector.
2 Press and hold the grip remote control
release button of the camcorder, and
rotate the grip clockwise until it detaches.
Grip remote control release button
[Tip]
A rosette can be attached to both the grip attachment
point on the unit and the corresponding attachment
point on the grip.
For details about purchasing rosettes, contact your Sony
dealer.
– Camcorder side: 4-546-932- (option)
– Grip side: 4-547-089- (option)
– Attachment screws*
Camcorder side: 7-627-556- (option)
Grip side: 7-627-556- (option)
* Four screws are required for each rosette (screw holes
are indicated by the circles in the following diagram).
Use of screws other than those specified may
damage the exterior surface.
Camcorder
side
Grip side
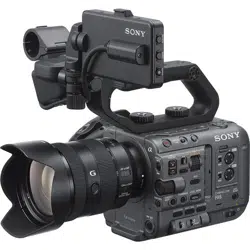
Attaching a Lens
[CAUTION]
Do not leave the lens facing the sun. Direct
sunlight can enter through the lens, be
focused in the camcorder, and may cause a
fire.
[Notes]
Attach/remove a lens while the camcorder is turned
off.
A lens is a precision component. Do not place the lens
on a surface with the lens mount face down. Attach
the supplied lens mount cap.
[Tip]
For details about lenses supported by the camcorder,
contact your Sony service representative.
Attaching an E-mount lens
1 Remove the lens cap and cover from the
camcorder and the lens.
2 Align the lens mount mark (white) with
the camcorder, carefully insert the lens,
and then turn the lens clockwise.
A click sound can be heard when it locks
into position.
Mount marks (white)
[Note]
Do not press the lens release button when attaching a
lens.
Attaching an A-mount lens
To use an A-mount lens, attach a lens mount
adaptor (option) and then attach the A-mount
lens.
[Note]
When using an A-mount lens, the iris is set manually
and focus is set to MF.
Removing a lens
Remove a lens using the following procedure.
1 Press and hold the lens release button
and turn the lens counterclockwise while
supporting the lens.
2 Pull the lens out in the forward direction.
[Notes]
When removing a lens, align the mount mark on the
lens lock ring with the mount mark on the camcorder.
Grasp the lens securely in your hand to prevent the
lens from falling.
If another lens will not be attached immediately,
always attach the body cap.
Iris adjustments for lenses with Auto Iris
switch
When the lens Auto Iris is set to AUTO, the
iris is adjusted automatically and can also be
adjusted manually from the camcorder.
When the lens Auto Iris is set to MANUAL,
the iris can only be adjusted using the lens
ring. Iris operation from the camcorder has
no effect.
Loading ...
Loading ...
Loading ...