Loading ...
Loading ...
Loading ...
38
@5CABINET TRIMS INSTALLATION—[A] FLEXIBLE SPRING CLIP METHOD
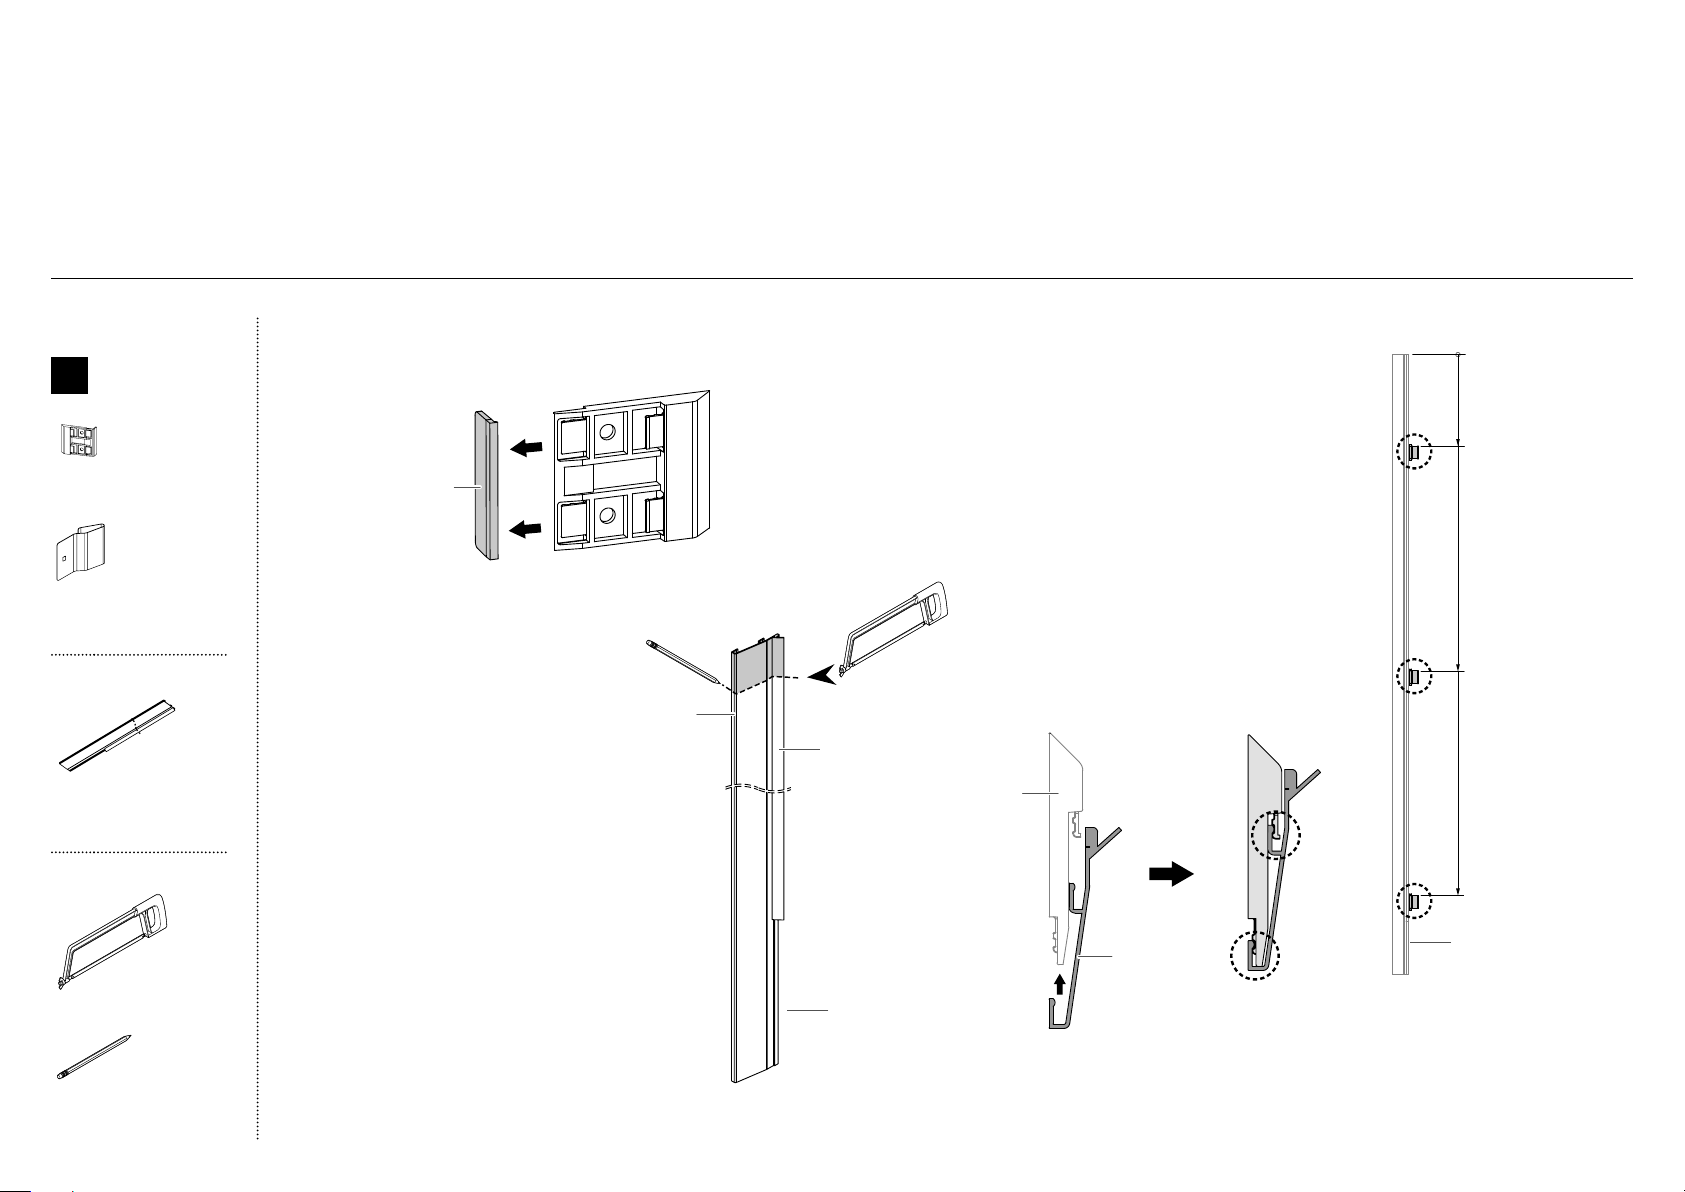
4
Place 3 side trim brackets onto
eachside trim.
Note: Measure from the top of the
trim, with the short lip at the bottom.
Refer to (B) for 80" and 84" bracket
locations and trim orientation.
IMPORTANT!
Each bracket has two engagement
points for the side trim to locate.
Ensure the trim is engaged in both
points (C).
Repeat for all side trims.
80 = 9" (229mm)
84 = 13" (330mm)
80 = 36" (914mm)
84 = 40" (1016mm)
80 = 65" (1651mm)
84 = 69" (1753mm)
0
B
1
Break off the datum lip to each side trim bracket and discard.
Repeat for all side trim brackets.
Discard
Top view of side trim engaged
correctly in side trim bracket
C
Side trim
bracket
Side trim
TWO METHODS ARE AVAILABLE FOR ATTACHING CABINET SIDE TRIMS:
[A] FLEXIBLE SPRING CLIP METHOD — RECOMMENDED METHOD
[B] FIXED SCREW METHOD — METHOD TO USE IF CABINET IS NOT TO SPECIFICATION
(Attempt method [A]. If method [A] results in poor fitment of side trims due to cabinetry that is uneven or out of specification, use method [B]).
For 80 (2032mm) cavity installation only
2
Measure 4" (102mm) from the top of
theside trim with a square ruler and mark
acutting line (A).
3
Cut along the line using a fine tooth
hacksaw to a length of 76" (1930mm) (B).
IMPORTANT!
Ensure the cut is straight and square
asthis is an exposed surface.
Ensure the plastic part does not bend
asthis can causevisual stressmarks.
Repeat for all sidetrims.
short lip
short lip
A
Plastic
Aluminum
B
Internal box
D
Cabinet side
trim install kit
Side trim bracket
(6)
Spring clip
(6)
External box
Cabinet side trim
(2)
Tools
Hacksaw
Pencil
Loading ...
Loading ...
Loading ...