Loading ...
Loading ...
Loading ...
32
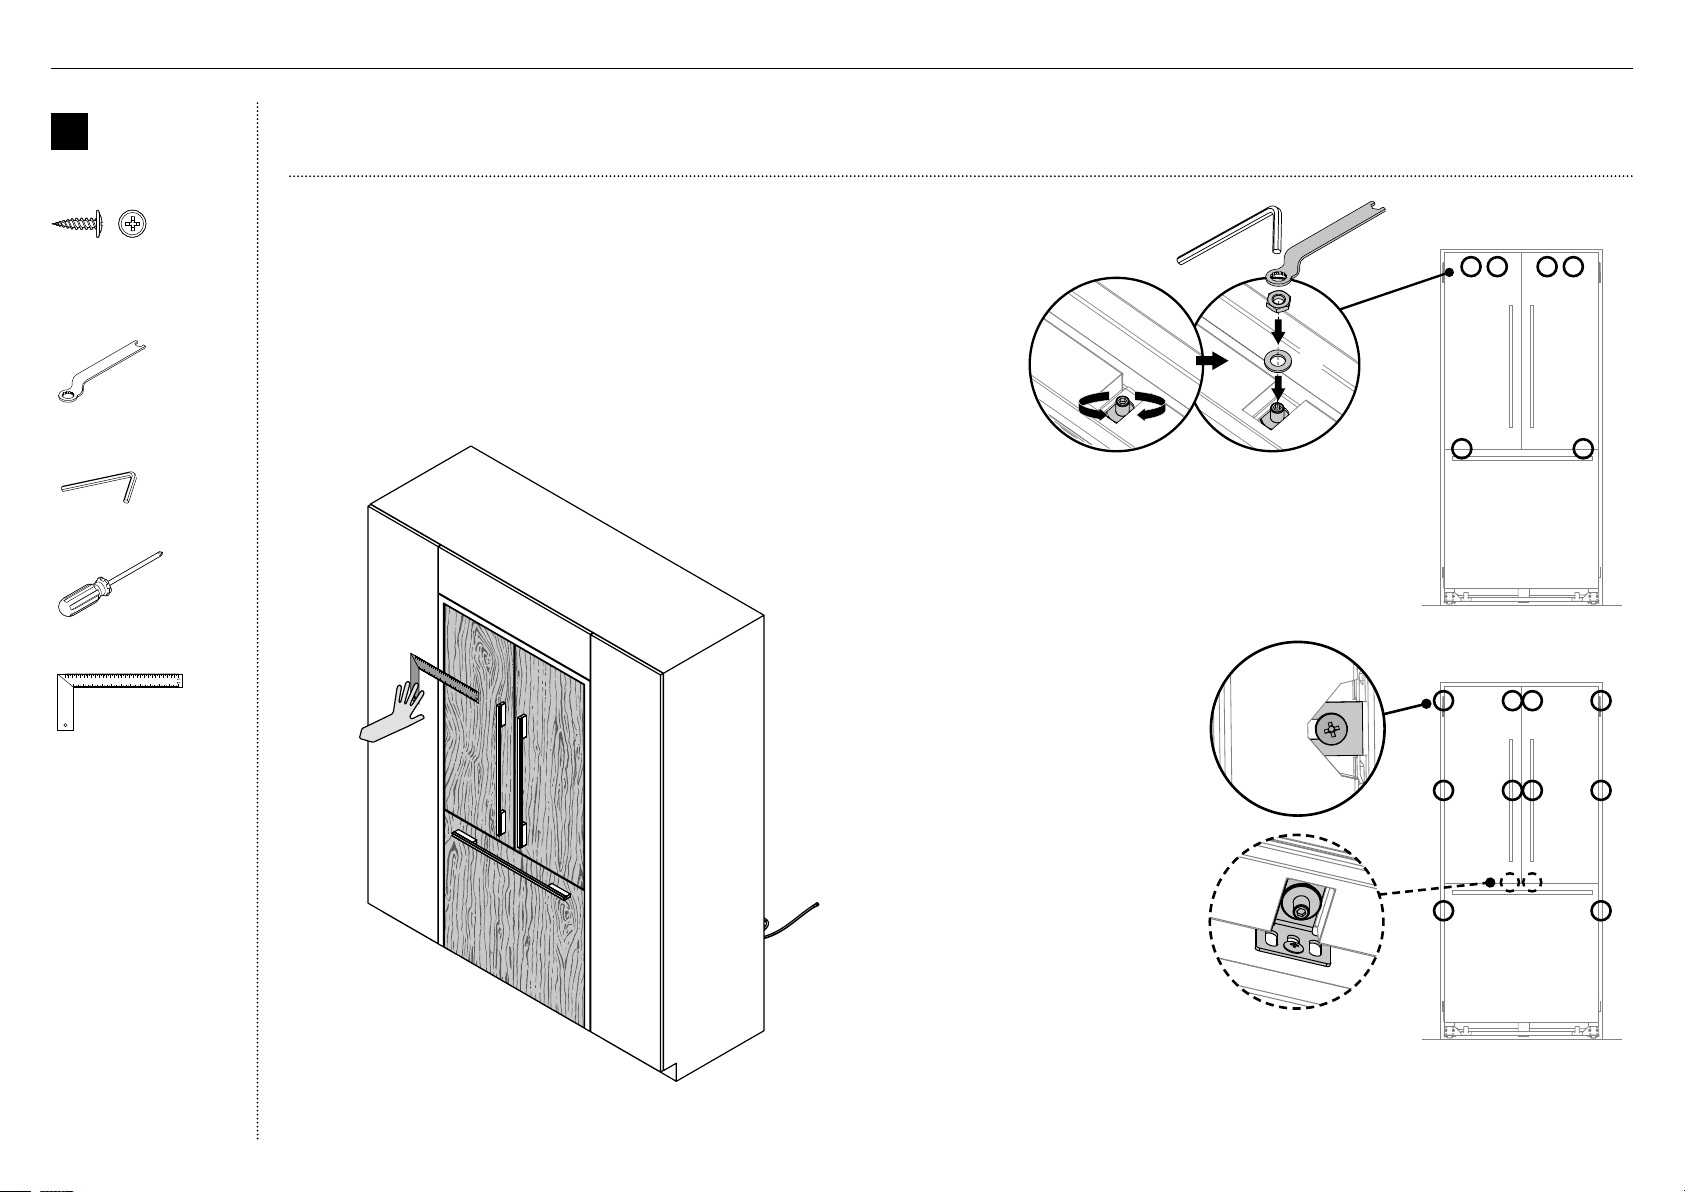
Adjust the door panels
1
Place a ruler on the front of the appliance to check
flushness top and bottom, left and right.
– Ensure the gap between the top of the door panel
and the top cabinetry is not more than 1/4" (7mm).
– To reduce this gap, raise the appliance by turning all
four adjustment nuts the same number of turns.
IMPORTANT!
Follow these steps to avoid difficulties in door panel adjustment and cosmetic cap fitment.
B
Door panel
attachment
kit
#8 x 16
Mush Washer
Twin Thread
Philips Screw
#8 x 16
Mush Washer
Twin Thread
Philips Screw
8x16 mush washer
(Custom) screw (2)
Tools
FPA spanner
Hex key
Cross-head screwdriver
Ruler
@0DOOR PANEL INSTALLATION - CUSTOM
2
Each door panel has full axis adjustment to ensure
flushness with adjacent walls. To adjust the height of
the panel, turn the stud clockwise to raise or counter-
clockwise to lower the door panel (A).
3
Once satisfied with the alignment, secure M8 studs with
M8 washer and M8 nut (B). The top of the stud must
remain below the top face of the door panel.
4
Secure side bracket forks by
tightening side screws(C).
Repeat for all door panels.
Note:
– For depth adjustment,
loosen the side screws(10),
adjustthe panels and then
retightenoncesatisfied.
– Further adjustment of door
panels can be achieved by
removing door panels then
looseningthe fixing screws
for the hanging bracket and
moving the bracket sideways
to suit.
5
Loosen the M8 stud (D) so that
locking bracket can slide freely
back to front.
– Slide the locking bracket out until it touches the
back of the door panel. Fully tighten the M8 stud.
– Screw in place using a #8x16 screw through one
ofthe three slotted holes.
C
B
A
D
Loading ...
Loading ...
Loading ...