Loading ...
Loading ...
Loading ...
19
~13" (330mm)
~13" (330mm)
WARNING!
Be careful when working with the appliance outside of the finished enclosure.
Ensure that the appliance is secured to prevent tipping forward. Tipping of appliance can lead to serious injury or death.
Internal box
E
Top trim
install kit
Cabinet top trim bracket
(2)
M5 Nut
M5 Nut
M5 nut
(6)
M5 x 10
Pan Head
Philips Screw
M5 x 10
Pan Head
Philips Screw
M5x8 cross-head screw
(12)
External box
Top trim
(1)
Tools
Cross-head screwdriver
Powered driver (optional)
3
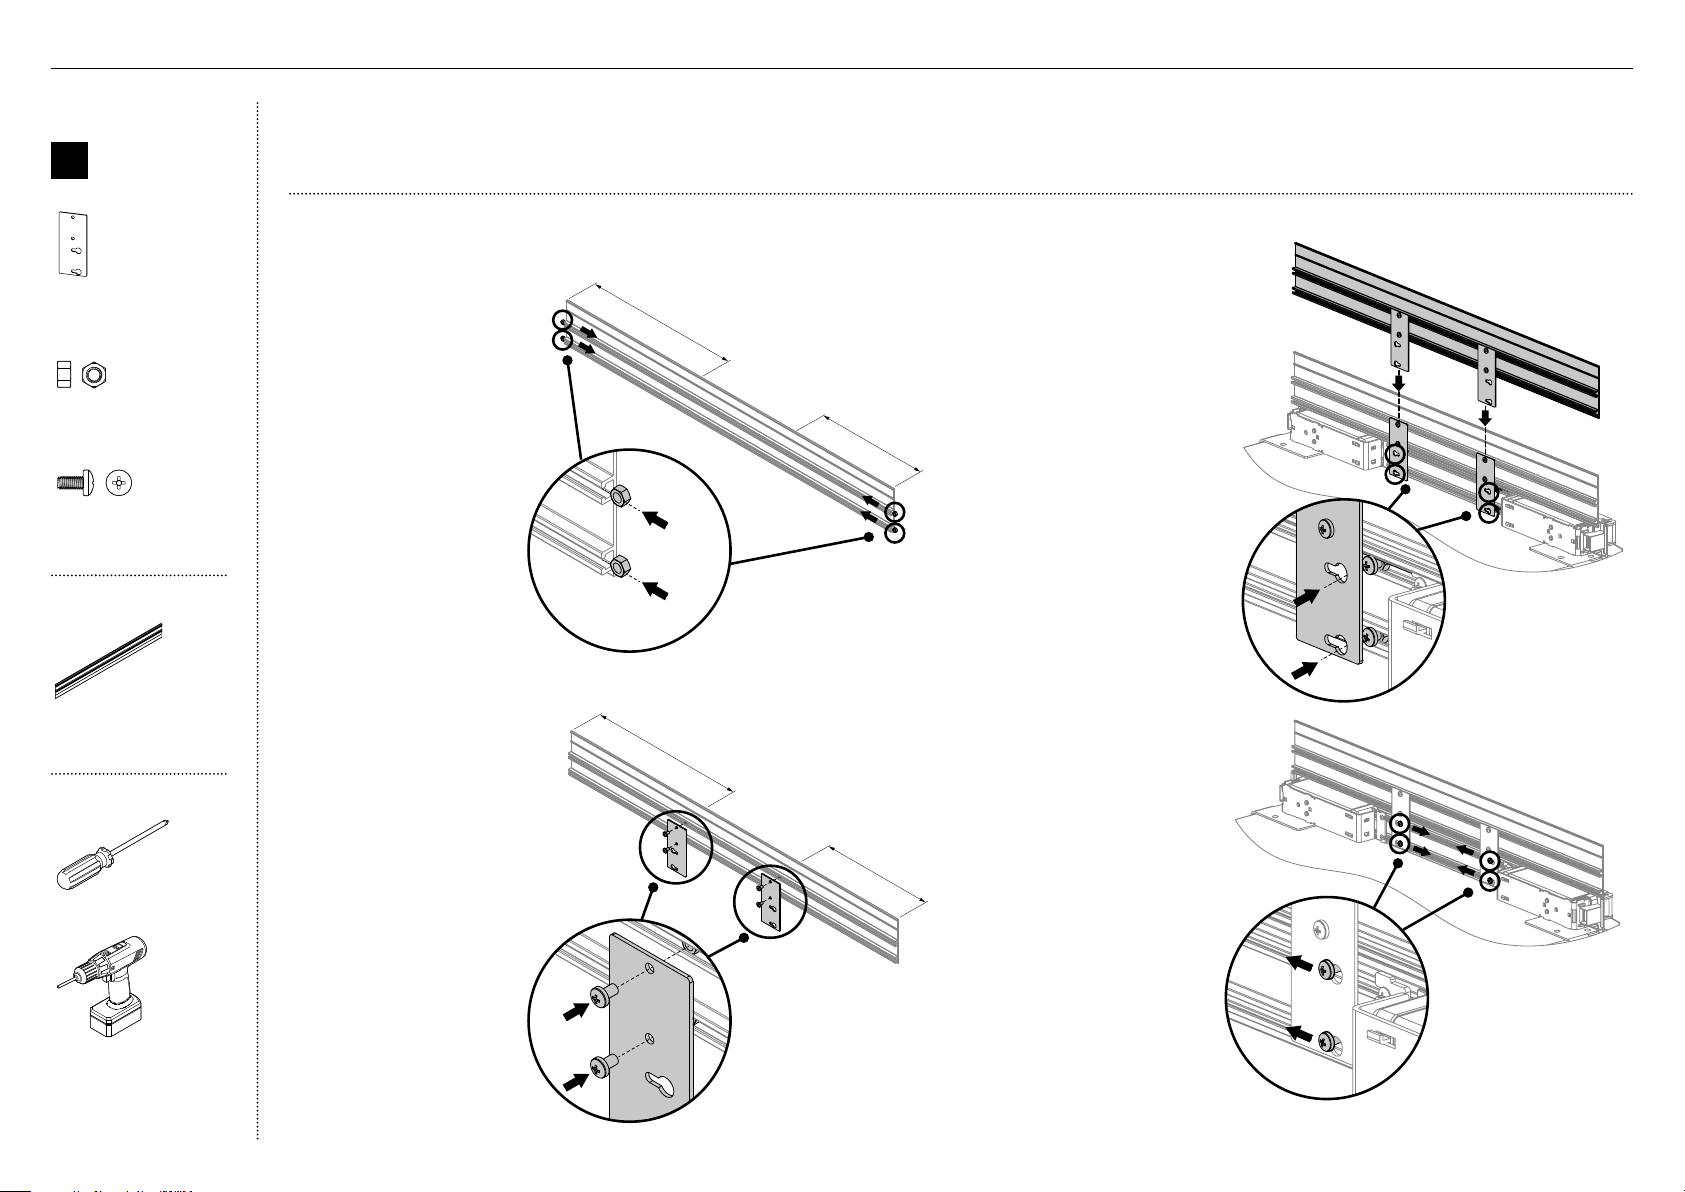
At the top of the
appliance, place the
assembled toptrim behind
the existing appliance trim.
Positionthe top trim so
that screw heads in the
appliance trim insert
through the key holes
ofthe brackets (C).
4
Slide the screws of the
appliance trim towards
the narrow side of
the key holes of the
brackets, and tighten
the screws to lock the
top trim in position (D).
2
Position the top trim
brackets over the M5 nuts.
FastenM5x8 cross-head
screws (B) through
brackethole and secure.
1
Insert M5 nuts (A) into
the top and bottom
side of the left and right
ends of the top trim.
Slidethe nuts towards
the center of the trim,
~13" (330mm).
~13" (330mm)
~13" (330mm)
A
B
C
Install top trim—for 84" (2134mm cavity only)
D
!5TOP TRIM INSTALLATION
Loading ...
Loading ...
Loading ...