Loading ...
Loading ...
Loading ...
34
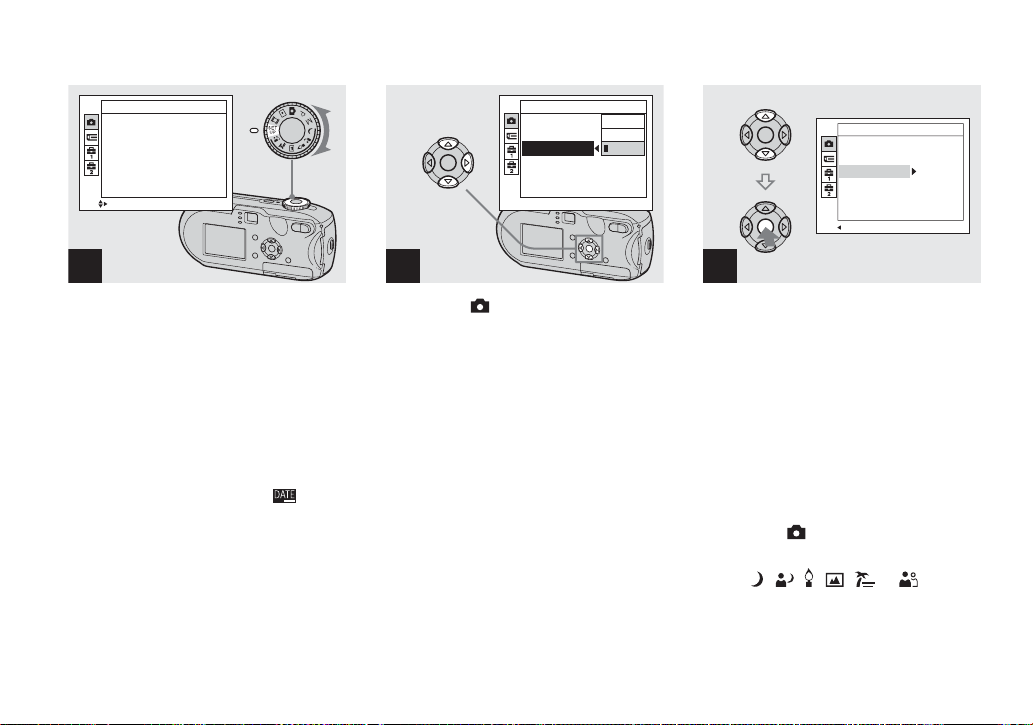
Inserting the date and time on a still image
, Set the mode dial to SET UP.
The SET UP screen appears.
• The date and time cannot be inserted in Multi
Burst mode.
• When images are shot with the date and time
inserted, the date and time cannot be removed
later.
• When shooting images with the date and time
inserted, the actual date and time are not
displayed on the LCD screen, and is
displayed on the LCD screen instead. The
actual date and time are indicated in red on the
lower-right corner when the image is played
back.
, Select (Camera) with v on
the control button, then press
B.
Select [Date/Time] with v/V on
the control button, then press
B.
, Select the date and time setting
with v/V on the control button,
then press z.
Day&Time: Inserts the date and the time of
shooting into the image
Date: Inserts the year, the month and the
date of shooting into the image
Off: Does not insert date/time data into the
image
After the setting has been completed, set the
mode dial to to shoot your image.
• You can shoot even when the mode dial is set to
P, M, , , , , or .
• When you chose [Date], the date will be
inserted in the order set in “Setting the date and
time” (page 18).
• This setting is maintained even when the power
is turned off.
1
SELECT
Camera
AF Mode:
Digital Zoom:
Date/Time:
Red Eye Reduction
:
AF Illuminator:
Single
Smart
Off
Off
Auto Review: Off
Auto
2
Camera
AF Mode:
Digital Zoom:
Date/Time:
Red Eye Reduction
:
AF Illuminator:
Auto Review:
Day&Time
Date
Off
3
PAGE SELECT
Single
Smart
Date
Off
Off
Auto
Camera
AF Mode:
Digital Zoom:
Date/Time:
Red Eye Reduction
:
AF Illuminator:
Auto Review:
Loading ...
Loading ...
Loading ...