USER MANUAL Printers
Unpack the machine and check the components
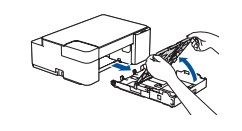
Remove the protective tape or film covering the machine and the supplies.
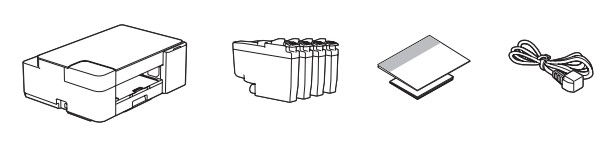
* Use these inbox (starter) ink cartridges for the initial installation.
NOTE
- The components included in the box may differ depending on your country.
- Save all packing materials and the box in case you must ship your machine.
- You must purchase the correct interface cable for the interface you want to use. We recommend using a USB 2.0 cable (Type A/B) that is no more than 6 feet (2 meters) long.
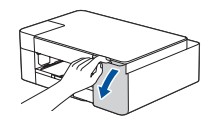
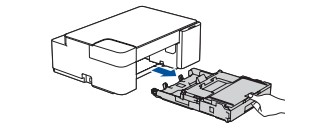
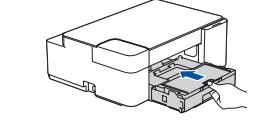
Load plain Letter paper in the paper tray
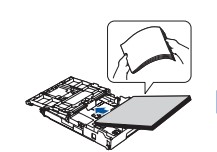
- Pull the paper tray completely out of the machine, and then open the output paper tray cover.
- Fan the paper well and load it in the tray.
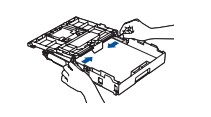
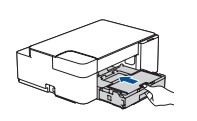
- Close the output paper tray cover, and then slowly push the paper tray completely into the machine.
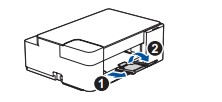
- Pull out the paper support 1, and unfold the paper support flap 2 so that the printed pages do not fall.
Connect the power cord and install the inbox (starter) ink cartridges

- Open the ink cartridge cover.
- Unpack and install the inbox (starter) ink cartridges.
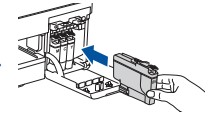
NOTE: The first time you install the ink cartridges, the machine will use extra ink to fill the ink delivery tubes. This is a one-time process that enables high-quality printing.
Check the print quality
- The machine prints the Print Quality Check Sheet.
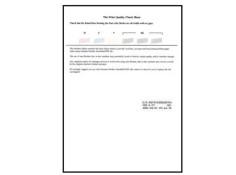
- Check the print quality of the four color blocks on the sheet.

Connect your computer or mobile device to your machine
Follow these steps to complete the setup using one of the connection types available on your machine
Visit setup brother website to download and install Brother software.

Follow the on-screen instructions and prompts.
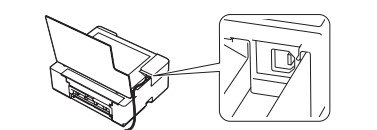
NOTE: For USB Connection, locate the USB port inside the machine as shown.
Important Notice for Network Security: The default password to manage this machine’s settings is located on the back of the machine and marked “Pwd”. We recommend immediately changing the default password to protect your machine from unauthorized access.
Reference and Troubleshooting
Basic Operations
Change the paper settings from the control panel
- You can print or copy using the following paper settings, depending on the number of times you press
 ( 1 )
( 1 )
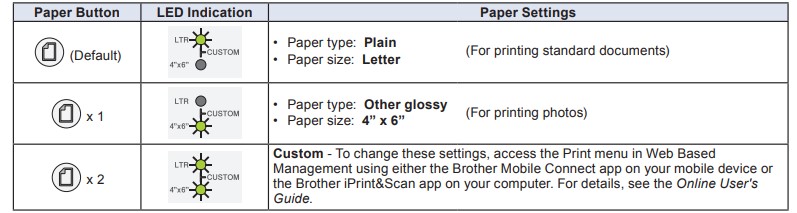
Print
- Go to your application’s print dialog box, make sure your machine is selected and online, and then click Print. To change the print settings (for example, 2-sided printing), click the printing properties or preferences button.
Copy (6/7)
- To print a single copy, load your document, and then press 6 or 7 once.
- To print multiple copies, load your document, and then press 6 or 7 repeatedly, depending on the number of copies you want.
Scan
- To scan a single page, load your document, and then press 6 and 7 simultaneously. For scanning multiple pages or other scanning features, use your preferred scanning software/application. For details, see the Online User’s Guide.
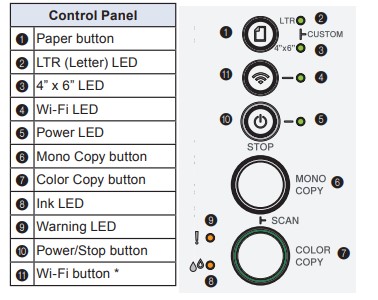
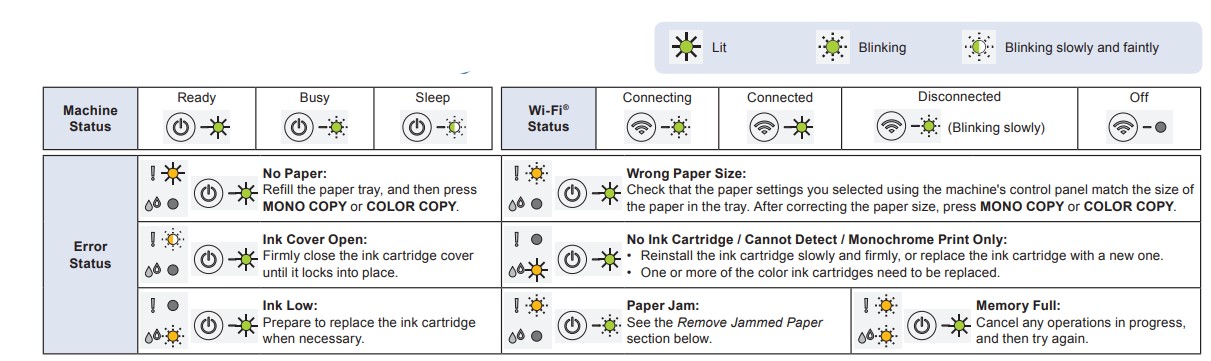
LED Indications
Improve Print Quality

Press and  simultaneously. The Ink LED blinks.
Do one of the following:
- For cleaning only black, press MONO COPY
- For cleaning all colors, press COLOR COPY.
The machine cleans the print head, and then prints the Print Quality Check Sheet.
Check the print quality of the four color blocks on the sheet.
If the print quality is still poor after cleaning several times, try the Special cleaning:
- Press and simultaneously, and then release.
- Press and hold MONO COPY and COLOR COPY simultaneously for five seconds.
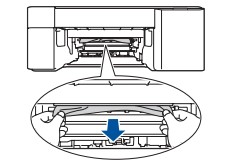
Remove Jammed Paper
- Pull the paper tray completely out of the machine.
- Slowly pull the jammed paper out of the machine. If ink gets on your skin or clothing, immediately wash it off with soap or detergent.
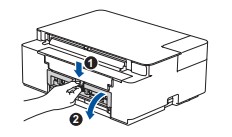
- Open the Jam Clear Cover at the back of the machine.
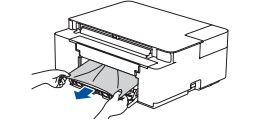
- Slowly pull the jammed paper out of the machine.
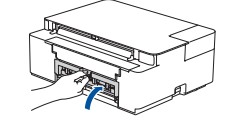
- Close the Jam Clear Cover.
- Push the paper tray firmly back in the machine.
- Press to clear the Paper Jam error. If the machine has not completed a job due to the paper jam, try again.