Loading ...
Loading ...
Loading ...
9
en
Overview
Overview
Please fold out the illustrated pages.
Fig. A:
1 Base
a Handle
b Marking Ç
c Drive shaft
d Marking Æ
2 Container
a Catch lock
3 Lid
a Feed chute
b Marking >
c Catch lock
4 Pusher
5 Multifunction blade
a Blade guard
6 Cutting discs
a Reversible slicing disc – thick/thin
b Reversible shredding disc –
coarse/ne
c Grating disc – mediumne
7 Disc holder
Before using for the rst
time
Before the new accessory can be used,
it must be fully unpacked, cleaned and
checked.
Caution!
Never operate a damaged accessory!
■ Remove all accessories from the
packaging and dispose of all packing
materials.
■ Check that all the parts are present and
examine them for obvious damage.
X Fig. A
■ Thoroughly clean and dry all parts
before using for the rst time.
X“Cleaningandmaintenance”see
page11
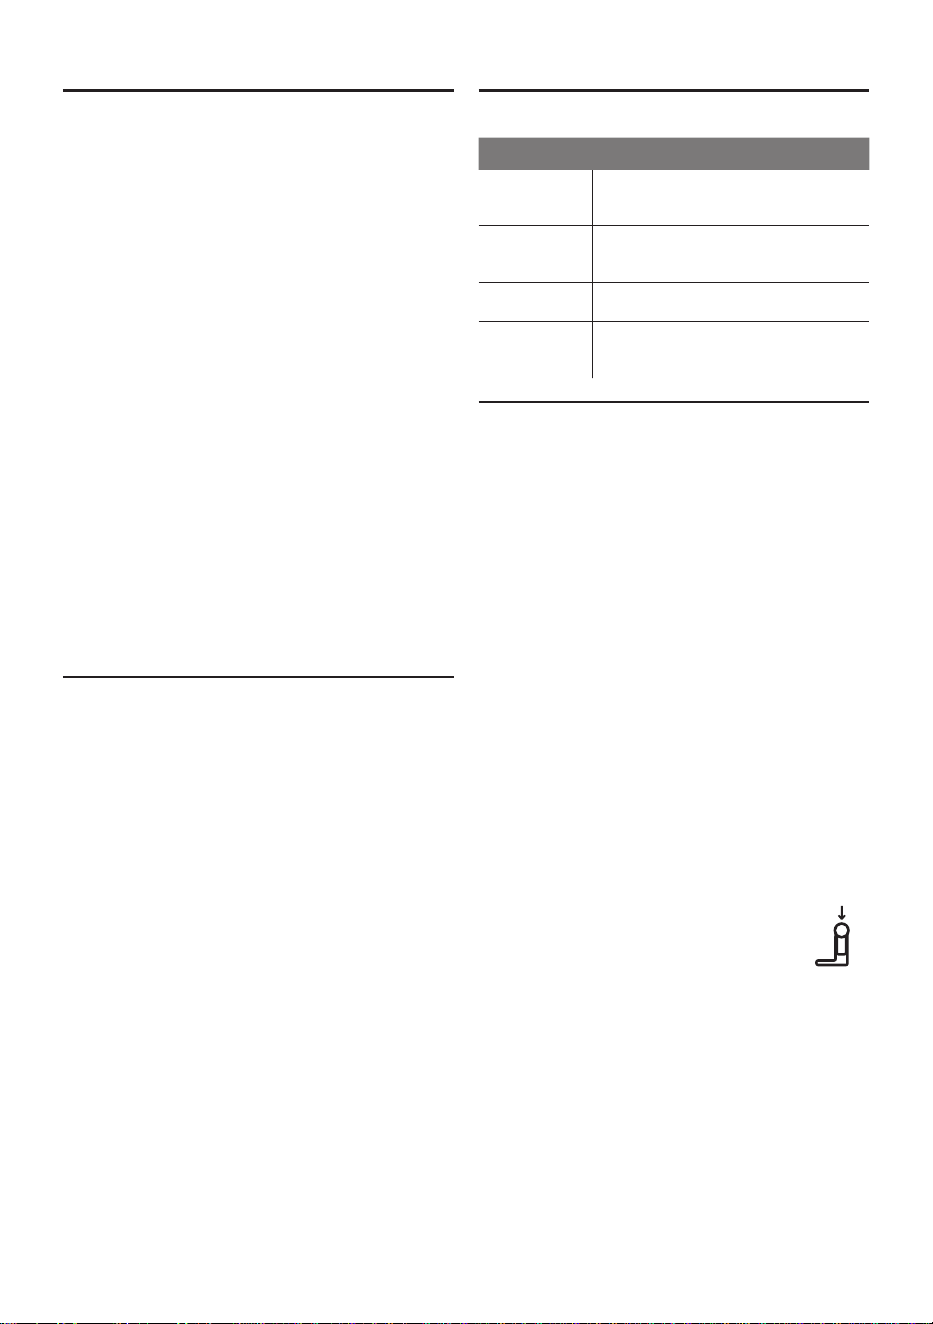
Symbols and markings
Symbol Meaning
W
Caution! Rotating tools. Do
not reach into the feed chute.
>
Fit the lid (,) and screw
on securely (-).
Ç
Marking for tting the lid.
Æ
Marking for tting onto the
base unit.
Use
W Risk of injury!
Do not touch the edges of the multifunction
blade with bare hands. Grasp the multifunc
tion blade by the plastic part only. When
not in use, always cover the blades with
the blade guards.
Caution!
Only when the multimixer has been
completely assembled and the lid rotated
to the stop (-) can the multimixer
be attached to the food processor and
operated. The lid cannot be removed while
the appliance is running and if the multi
mixer is attached to the food processor.
Preparing base unit
■ Place the base unit on a at, clean
surface.
■ Remove the bowl.
■ Press the Release button and
move the swivel arm to
position 3. Remove the blender
drive cover.
Loading ...
Loading ...
Loading ...