Loading ...
Loading ...
Loading ...
Westinghouse Portable Power | 17
1
1
1
2
2
2
ADDING / CHECKING ENGINE
FLUIDS AND FUEL
BEFORE ADDING/CHECKING ENGINE
FLUIDS AND FUEL, REVIEW SAFETY
SECTION STARTING ON PAGE 5.
DANGER
Filling the fuel tank with gasoline while
the generator is running can cause
gasoline to leak and come in contact
with hot surfaces that can ignite the
gasoline.
Before starting the generator, always check the level of:
• Engine oil
• Gasoline in the fuel tank
Once the generator is started and the engine gets
warm, it is not safe to add gasoline to the fuel tank or
engine oil to the engine while the engine is running or
the engine and muer are hot.
CHECKING AND / OR ADDING ENGINE OIL
WARNING
Internal pressure can build in the
engine crankcase while the engine
is running. Removing the oil ll plug/
dipstick while the engine is hot can
cause extremely hot oil to spray out
of the crankcase and can severely
burn skin. Allow engine oil to cool for
several minutes before removing the
oil ll plug/dipstick.
The unit as shipped does not contain oil in the engine.
You must add engine oil before starting the generator
for the rst time. See Checking Engine Oil and Adding
Engine Oil on page 22 for instructions on checking
engine oil level and the procedure for adding engine oil.
NOTICE
The engine does not contain engine oil as shipped.
Attempting to start the engine can damage
engine components. The owner of the generator
is responsible to ensure the proper oil level is
maintained during the operation of the generator.
Failure to maintain the proper oil level can result in
engine damage.
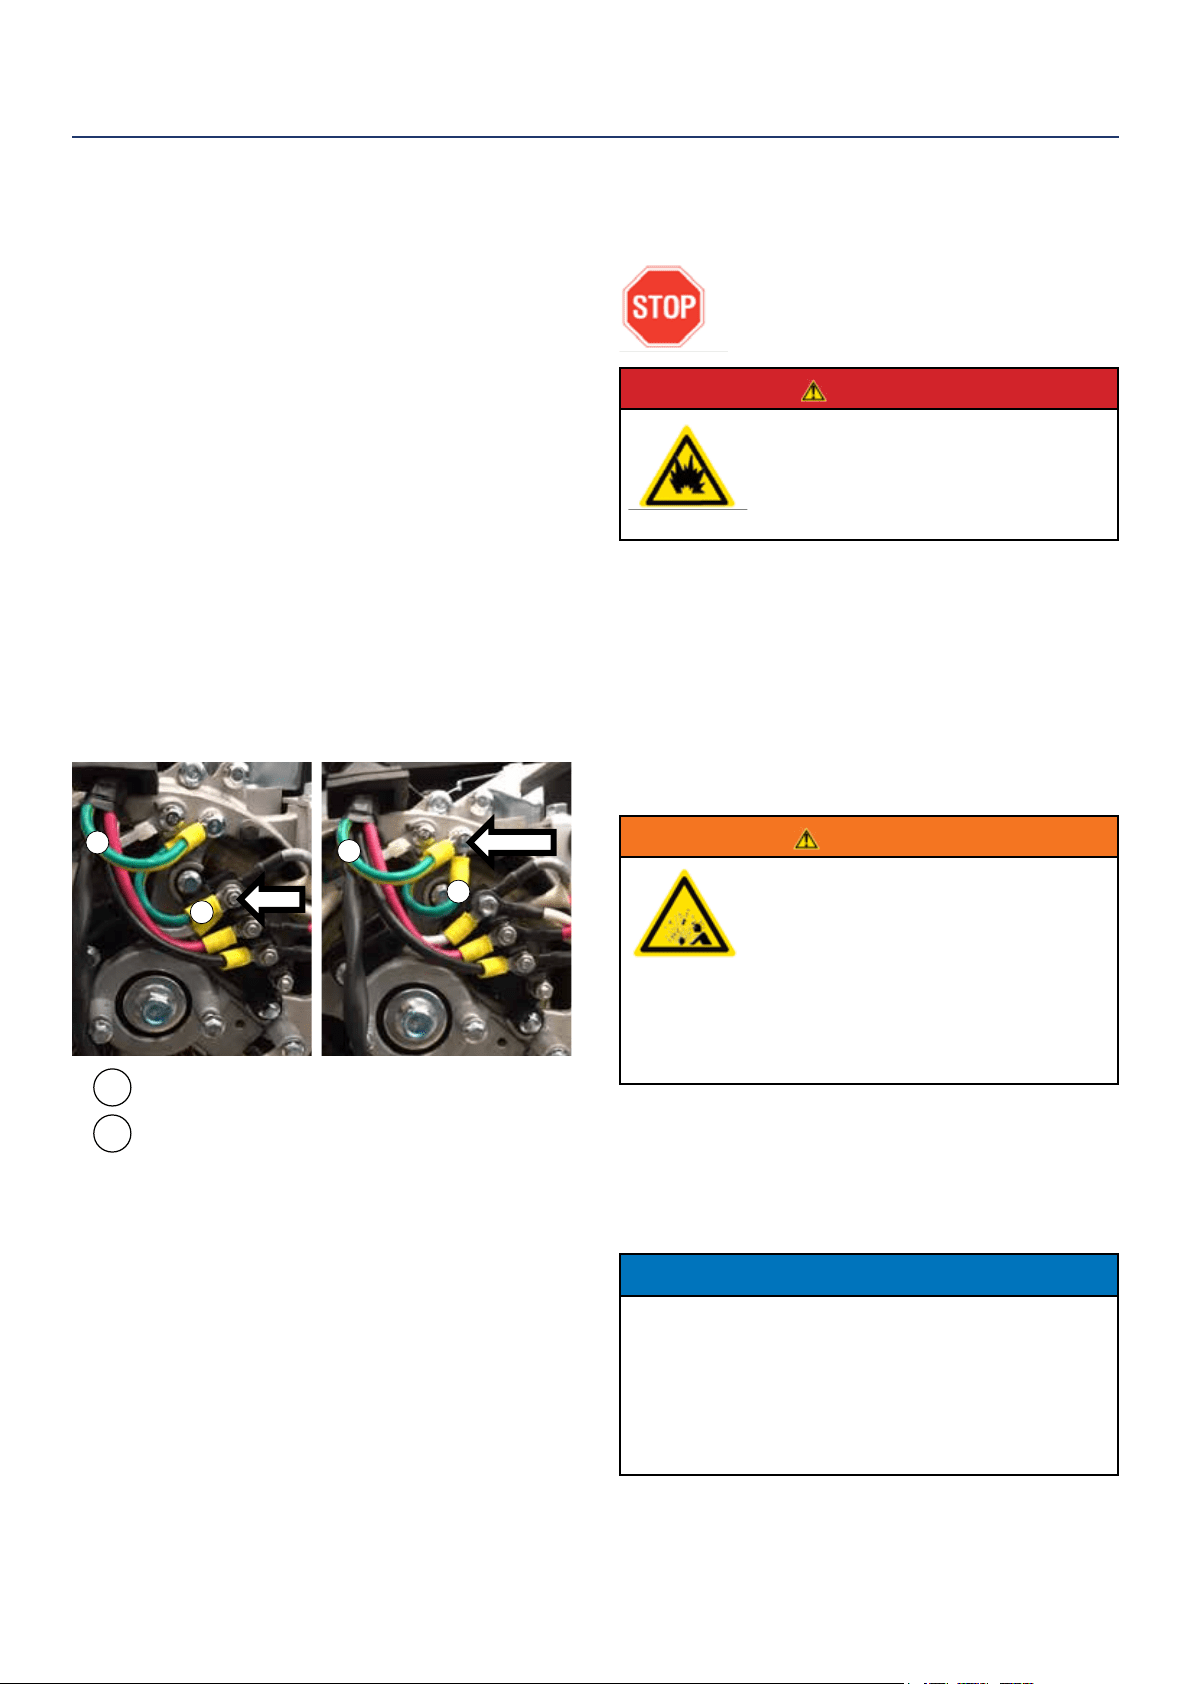
TRANSFER SWITCH CONNECTIONS
The Westinghouse generator is wired with the neutral
bonded to ground. If you are connecting your generator
to a panel board transfer switch, a licensed electrician
will need to consider removing the bonded neutral to
ensure proper operation of household GFCI circuits.
This is done by rst removing the nut that holds the
bonded ground jumper wire (see “2” in Figure 5).
Once the nut is removed take the bonded jumper wire
o and re-secure the nut. Next remove the screw holding
the neutral ground wire (see “1” in Figure 5). Attach the
bonded jumper wire (2) to the neutral ground (1) and
tighten the screw.
If the bonded neutral is removed the generator must be
relabeled as oating neutral on the control panel.
If your generator is equipped with GFCI receptacles,
removing the bonded neutral may not allow proper
operation of the GFCI receptacles. Always keep the
jumper wire in case it is needed for future use when not
connected to a transfer switch.
OPERATION
Figure 5
REMOVE
MOVE WIRE HERE
Alternator Neutral Ground Wire (white/Green)
Alternator Bonded Jumper Wire (white/Green)
Loading ...
Loading ...
Loading ...