Loading ...
Loading ...
Loading ...
EN
EN - 71
Auto Chapter
The Unit Inserts Chapter Marks periodically during Recording.
Using the Auto Chapter menu, you can set this function Off or
Change the Time Period.
1.
Select a desired Item using [ / ] , then
press [ OK ].
Off: Select if you Do Not want Auto Chapter.
5 Minutes: Insert Chapter Marks by every 5 Minutes.
10 Minutes: Insert Chapter Marks by every 10 Minutes.
15 Minutes: Insert Chapter Marks by every 15 Minutes.
20 Minutes: Insert Chapter Marks by every 20 Minutes.
30 Minutes: Insert Chapter Marks by every 30 Minutes.
60 Minutes: Insert Chapter Marks by every 60 Minutes.
Note(s)
• The Interval for Auto Chapter may be up to 2 Minutes
different from the Time Option you Set.
Other
1.
Select a desired Item using [ / ] , then
press [ OK ].
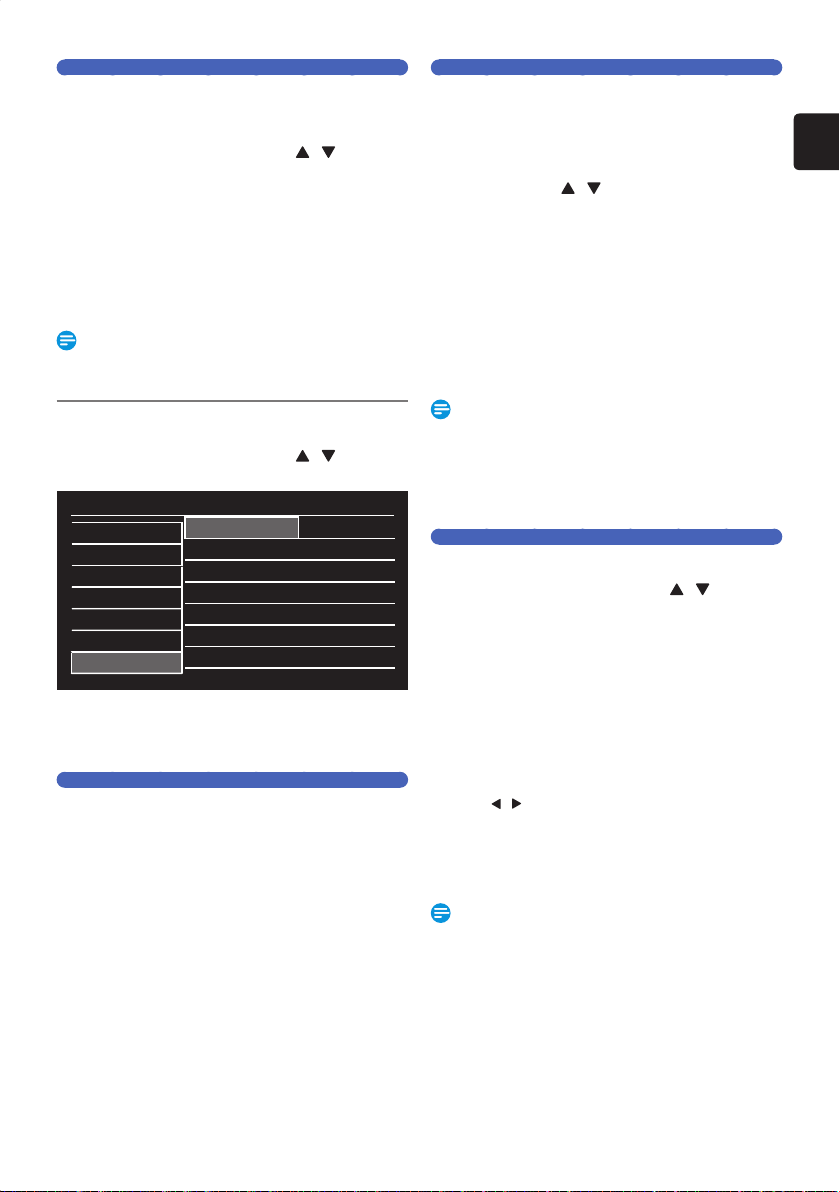
Setup
Video / Audio
Display
HDMI
Playback / Recording
Network
Software
Other
Auto Power Off • On
Remote Control • Code1
Initialization • Initialize Settings
• Sub Menu will appear.
2.
Set the selected Item in references below.
Auto Power Off
Set for the Auto Power Off function to Turn Off the Unit
automatically when the unit has been inactive for 3 hours.
Confirmation Message will be displayed 3 minutes before the
Unit is automatically Turned Off.
Off: Select if you Do Not want Auto Power Off.
On: Sets the Auto Power Off to Activate.
Remote Control
Sets the Code 1 or 2 for your Remote Control.
By setting the Remote Control Code to this Unit, you can
prevent other devices from responding when you use the
Remote Control.
1.
Select your preferred Remote Control
Code using [
/ ] .
• If the Unit and the Remote Control’s Remote Control
Code does Not match, an Error Message will appear
on the TV Screen and REC and Power-ON Indicators
on the Front Panel blink. Follow the instructions on the
TV screen.
2.
Keep pressing [ TITLE LIST ], then press
the Remote Control Code you selected.
Code1 : Sets the Remote Control Code to 1.
Code2 : Sets the Remote Control Code to 2.
Note(s)
• You need to set both the Unit and the Remote Control to
the Same Code.
• The Default setting for the Remote Control is “Code1”.
• If the Unit is turned into Standby with unmatched Remote
Control Code, the REC Indicator will blink.
Initialization
Initializes Settings on the Unit.
1.
Select a desired Item using [ / ] , then
press [ OK ].
Initialize Settings:
You can Reset the Status of
Setup Menu.
Initialize for Network
Setting:
You can Reset the Status of
Network Settings.
Initialize for Personal
Information:
You can Reset your Personal
Information to the Factory
Default.
2.
Press [ OK ].
• Confirmation Message will appear. Select “Yes” using
[
/ ] , then press [ OK ].
• When “Initialize for Personal Information” is selected,
PIN Code entry window will appear. Enter the current
4-digit PIN Code number using [ the Number
buttons ].
Note(s)
• These Settings listed below will remain Unchanged even
after the “Initialize Settings”.
–
Network Settings
–
Remote Control
–
Installation
• When “Initialize for Personal Information” is performed, all
Recorded Titles in HDD and Registered USB-HDDs will
be DELETED.
EEC30UHPhilipsSmartDVRv1EN.indb71EEC30UHPhilipsSmartDVRv1EN.indb71 2013/09/1315:39:102013/09/1315:39:10
Loading ...
Loading ...
Loading ...