When using electrical appliances, basic safety precautions should always be followed to reduce the risk of fire, electric shock, and/or injury, including the following:
READ ALL INSTRUCTIONS BEFORE USING.
Do not touch hot surfaces. Use handles or knobs.
To protect against electrical shock, do not immerse cord, plug, or appliance in water or other liquid.
Close supervision is necessary when any appliance is used by or near children.
Unplug from outlet when not in use and before cleaning. Allow time to cool before putting on or taking off parts.
Do not operate any appliance with a damaged cord or plug, or if the appliance malfunctions or has been damaged in any manner. Contact consumer support at the toll-free number listed in the warranty section. • The use of accessory attachments not recommended by the appliance manufacturer may cause injuries.
Do not use outdoors.
Do not let the cord hang over the edge of the table or counter, or touch hot surfaces.
Do not place on or near a hot gas or electric burner, or in a heated oven.
Extreme caution must be used when moving an appliance containing hot oil or other hot liquids.
To disconnect, turn the timer control to OFF (O), then remove plug from wall outlet.
Do not use appliance for other than intended use.
Use caution when removing the tray or disposing of hot grease.
Do not clean oven with metal scouring pads. Pieces can break off the pad and touch electrical parts, causing risk of electric shock.
Do not attempt to clean the heating elements.
Oversized foods or metal utensils must not be inserted in a toaster oven, as they may create fire or risk of electric shock.
A fire may occur if the toaster oven is covered or touching flammable materials including curtains, draperies, walls, and the like, when in operation. Do not store any item on top of the unit while in operation.
Extreme caution should be exercised when using containers constructed of material other than metal or glass.
Do not store any material, other than manufacturer’s recommended accessories, in this oven when not in use.
Do not place any of the following materials in the oven: paper, cardboard, plastic, and other items not constructed of oven safe metal and glass pans.
Do not cover crumb tray or any part of this oven with metal foil. This will cause overheating in the oven.
This appliance is not intended for use by persons (including children) with reduced physical, sensory or mental capabilities, or lack of experience and knowledge, unless they have been given supervision or instructions concerning use of the appliance by a person responsible for their safety.
Children should be supervised to ensure that they do not play with the appliance.
The appliance is not intended to be operated by means of an external timer or separate remote-control system.
Do not leave unattended while in operation. Food ignition may occur. If this happens, unplug the unit, but DO NOT open the door. To reduce the risk of fire, keep oven interior completely clean and free of food residues, oil, grease, and other combustible materials.
SAVE THESE INSTRUCTIONS.
This product is for household use only.
GROUNDED PLUG
As a safety feature, this product is equipped with a grounded plug, which will only fit into a three-prong outlet. Do not attempt to defeat this safety feature. Improper connection of the grounding conductor may result in the risk of electric shock. Consult a qualified electrician if you are in doubt as to whether the outlet is properly grounded.
TAMPER-RESISTANT SCREW
Warning: This appliance is equipped with a tamper-resistant screw to prevent the removal of the outer cover. To reduce the risk of fire or electric shock, do not attempt to remove the outer cover. There are no user-serviceable parts inside. Repair should be done only by authorized service personnel.
ELECTRICAL CORD
a) A short power-supply cord is provided to reduce the risks resulting from becoming entangled in or tripping over a longer cord.
b) Extension cords are available and may be used if care is exercised in their use.
c) If an extension cord is used:
The marked electrical rating of the extension cord should be at least as great as the electrical rating of the appliance;
If the appliance is of the grounded type, the extension cord should be a grounding-type 3-wire cord; and
The cord should be arranged so that it will not drape over the countertop or tabletop where it can be pulled on by children or tripped over.
Note: If the power cord is damaged, please contact the warranty department listed in these instructions.
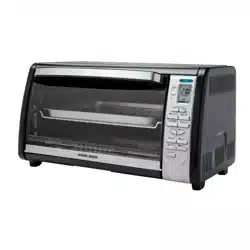
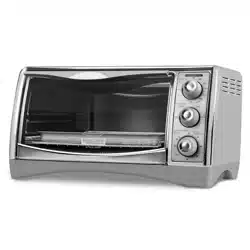
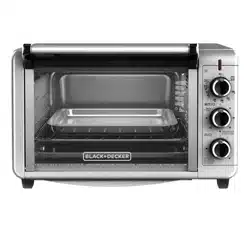
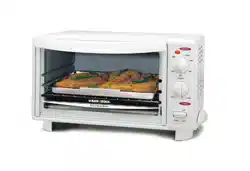
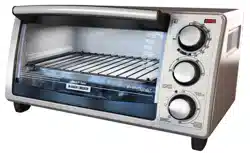
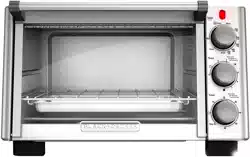
GETTING TO KNOW YOUR CONVECTION COUNTERTOP OVEN
Slide rack (Part# 129001-013)
Baking pan (Part# 129001-304)
Slide out crumb tray (Part# 129001-007)
Door handle
Easy view glass door
Power indicator light
Temperature/cooking function knob
Light-to-dark Toast/Timer knob
Bake/Broil 60-minute timer knob
Product may vary slightly from what is illustrated.
HOW TO USE
This appliance is intended for household use only.
GETTING STARTED
Remove all packing material, any stickers, and the plastic band around the power plug.
Remove and save literature.
Please go to pro protect/applica to register your warranty.
Wash all removable parts as instructed in the Care and Cleaning Section.
Select a location where this unit is to be used, allowing enough space from the back of the unit and wall to allow heat flow without damage to cabinets and walls.
IMPORTANT INFORMATION ABOUT YOUR OVEN
This oven gets hot. When in use, always use oven mitts or potholders when touching any outer or inner surface of the oven.
When using the oven for the first time, you may notice smoke or a slight odor during the first few minutes. This is normal.
Be sure food or baking dishes do not come within 1½ inches (3.81cm) of the top heating elements.
D not allow food to extend beyond the edges of the baking pan/drip tray. This helps to prevent drippings from falling onto the heating elements.
The provided baking pan can be used in two ways:
Insert it under the slide rack to catch drips and crumbs.
Place your food inside the pan and place on top of the slide rack.
Use only metal, oven-proof glass or ceramic cookware in this oven.
OPERATING YOUR OVEN
TOASTING
No preheat is needed for the toasting function.
Set the temperature selector knob to the toast position.
Open the oven door and insert the slide rack into the top slot.
Place items to be toasted directly onto the slide rack and close the oven door.
Turn the toast shade selector knob, at a minimum to the middle and then to the desired toast shade.
The power indicator light will turn on and will remain lit until the toasting cycle is complete.
An audible signal will alert you when the toasting cycle is complete. At this time, both the oven and the power indicator light will turn off.
Open the oven door. Using an oven mitt or pot holder, slide the rack out of the slot.
Unplug your appliance when it is not in use.
COOKING/BAKING
For best results when baking or cooking, preheat the oven for 10 minutes at your desired cooking/baking temperature setting.
Set temperature selector knob to your desired temperature.
In order to begin preheating, set the timer knob to 10 minutes. To do so, turn dial to the 20 minute mark and then back to 10 minutes.
Once the oven has preheated, open the oven door and insert your food. Close oven door.
Turn the timer selector knob to your desired cooking/baking time. If this is less than 20 minutes, turn the dial to the 20 minute mark and then back to your desired cook/bake time. Note: To cook/bake longer than 60 minutes, or to control the cooking/baking time yourself, turn timer selection dial to Stay On.
While cooking/baking, the power indicator light will turn on and remain lit.
If using the oven timer, an audible signal will sound to alert you when your selected cooking/baking time is complete. At this time, the oven and the power indicator light will turn off. If you choose not to use the oven timer, observe the cooking/baking cycle and turn the oven off once you’re satisfied with the results.
To remove your food from the oven, open the oven door and use an oven mitt or pot holder to remove the slide rack from the oven’s cavity.
Unplug your appliance when it is not in use.
BROILING
Ensure the slide rack is placed into the top rack position.
Set the temperature selector knob to broil.
Open oven door and place food directly onto the slide rack.
Turn timer selector knob to you desired broil time. If this is less than 20 minutes, turn dial to the 20 minute mark and then back to your desired broil time.
If using the oven timer, an audible signal will sound to alert you when your selected broiling time is complete. At this time, the oven and the power indicator light will turn off. If you choose not to use the oven timer, observe the cooking/baking cycle and turn the oven off once you’re satisfied with the results.
To remove your food from the oven, open the oven door and use an oven mitt or pot holder to remove the slide rack from the oven’s cavity.
Unplug your appliance when it is not in use.
SIMPLE BAKED PORK CHOPS
Prep Time: 2 minutes
Cook Time: 30 minutes
Total Time: 32 minutes
Servings: 4
Serving Size: 1 pork chop
Ingredients:
4 (½ lb.) pork chops
Pork seasoning*
Directions:
Preheat toaster oven to 350°F.
Season the pork chops with the pork seasoning and place on the cooking tray and place in the preheated toaster oven.
Bake for 28–30 minutes, or until the pork reaches an internal temperature of 145°F.
Serve with a side of steamed vegetables and roasted new potatoes.
*Pork Seasoning:
1 tsp. salt
½ tsp. black pepper
1 tsp. smoked paprika
1 tsp. chili powder
1 ½ tsp. onion powder
1 ½ tsp. garlic powder
2 tsp. granulated sugar
4 tsp. brown sugar
2 tsp. cinnamon
CARE AND CLEANING
This product contains no user serviceable parts. Always refer service to qualified service personnel.
CLEANING
Be sure the oven is turned off, unplugged, and cool before beginning cleaning.
Clean the glass door with a sponge, soft cloth, or nylon pad and sudsy water. Do not use a spray cleaner.
Remove slide rack and bake pan; wash in soapy water. To remove stubborn spots, use a polyester or nylon pad.
Remove crumb tray using the handle and dispose of crumbs. Wipe tray with a damp cloth and dry thoroughly before placing back into the oven.
Wipe the outside of the oven with a damp cloth or sponge. Dry thoroughly.
Do not attempt to clean the heating elements. Any food that comes into contact with the elements will burn off on its own.
COOKING CONTAINERS
Only metal, oven-proof glass or ceramic cookware without glass lids are recommended for use in this oven. Follow the manufacturer’s cleaning instructions to clean each of these products.
If additional assistance is needed, please contact our consumer service team at
WARRANTY INFORMATION
For service, repair or any questions regarding your appliance, call the appropriate 800 number listed within this section. Please DO NOT return the product to the place of purchase. Also, please DO NOT mail product back to manufacturer, nor bring it to a service center. You may also want to consult the website listed on the cover of this manual.
Two-Year Limited Warranty (Applies only in the United States and Canada)
What does it cover?
Any defect in material or workmanship provided; however, Spectrum Brands, Inc.’s liability will not exceed the purchase price of product.
For how long?
Two years from the date of original purchase with proof of purchase.
What will we do to help you?
Provide you with a reasonably similar replacement product that is either new or factory refurbished.
How do you get service?
Save your receipt as proof of date of sale.
Visit the online service website at prodprotect/applica, or call toll-free 1-800-231-9786, for general warranty service.
If you need parts or accessories, please call 1-800-738-0245.
What does your warranty not cover?
Damage from commercial use
Damage from misuse, abuse or neglect
Products that have been modified in any way
Products used or serviced outside the country of purchase
Glass parts and other accessory items that are packed with the unit • Shipping and handling costs associated with the replacement of the unit • Consequential or incidental damages (Please note, however, that some states do not allow the exclusion or limitation of consequential or incidental damages, so this limitation may not apply to you.)
How does state law relate to this warranty?
This warranty gives you specific legal rights. You may also have other rights that vary from state to state or province to province.

 and then to the desired toast shade.