
Loading ...
Loading ...
Loading ...
5-77
SCANNER/INTERNET FAX
Contents
This section explains special modes that can be used in scan send mode.
SPECIAL MODES
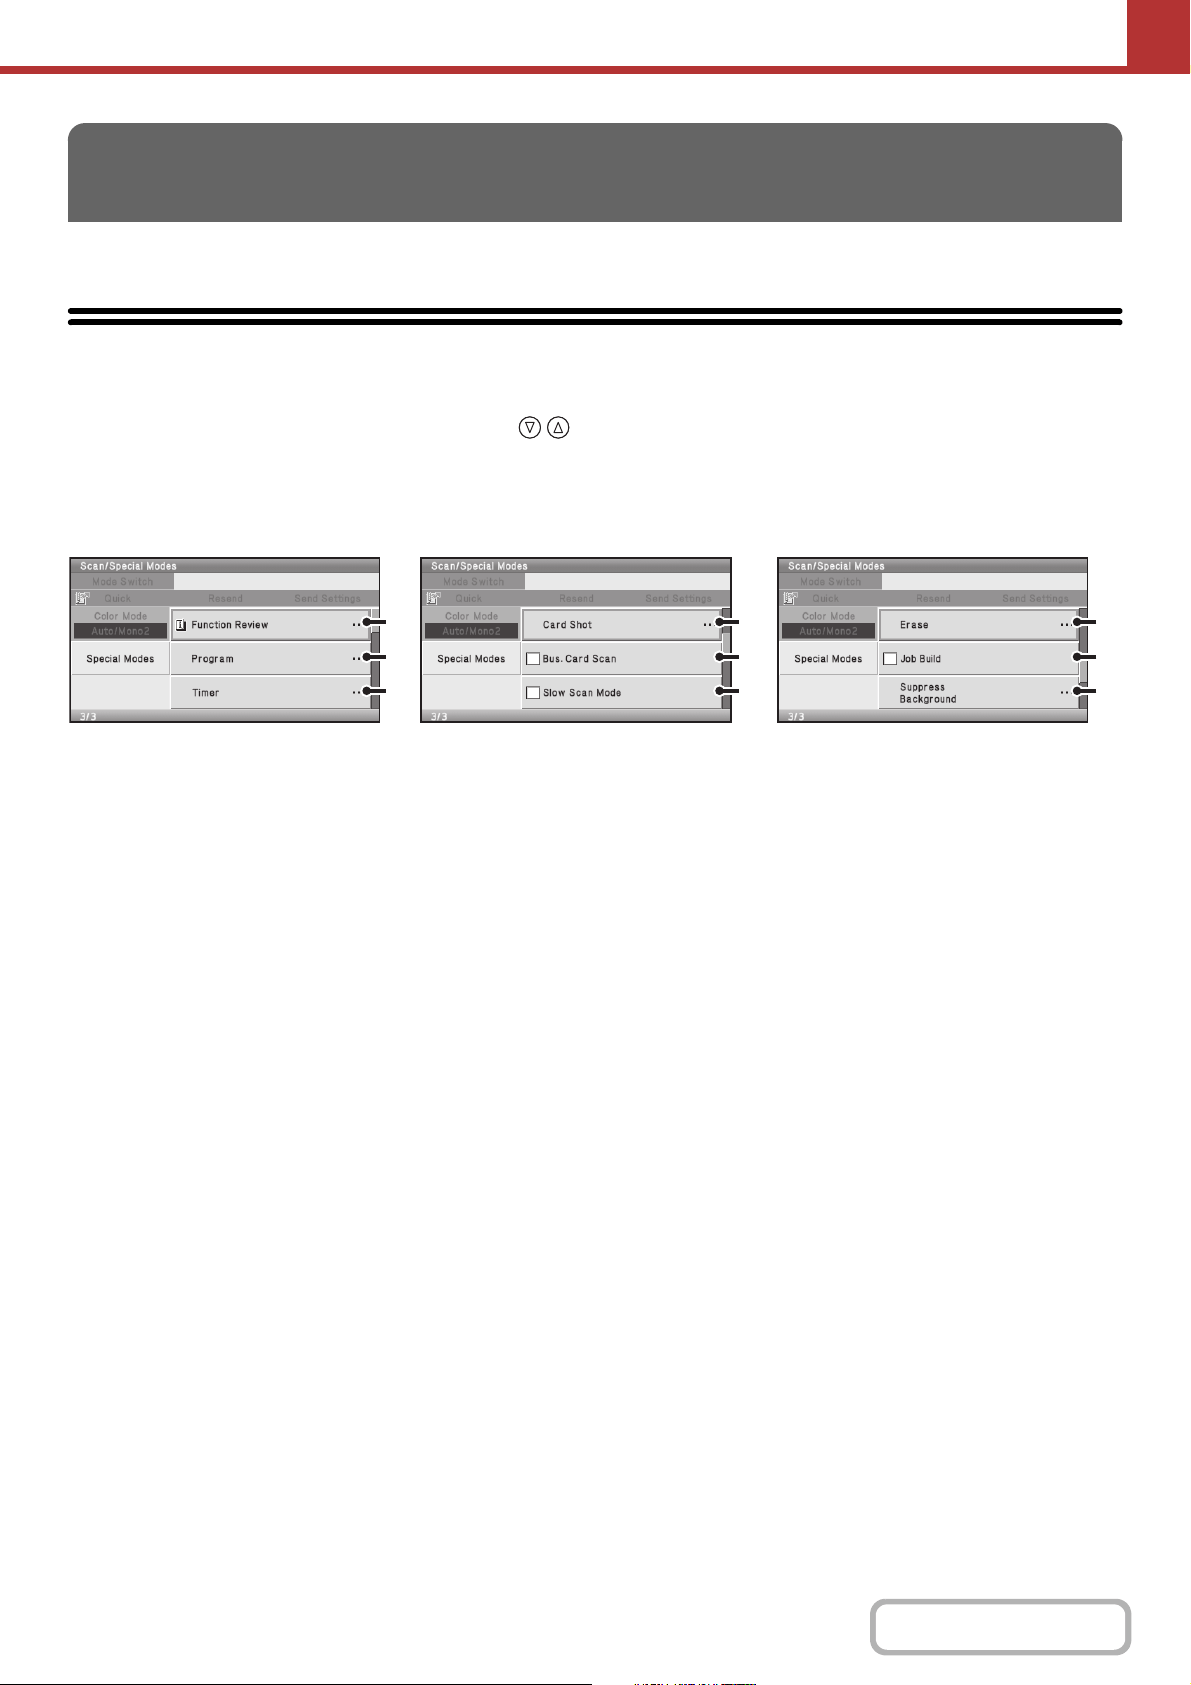
When the [Special Modes] key is selected in the base screen, the special modes menu screen appears. The special
modes menu consists of three screens. Select the key to switch between the three screens. When the [Basic
Menu] key is selected in the special modes screen, the selected settings are entered and the base screen reappears.
☞ Internet fax mode (page 5-78)
Scan mode, USB memory mode, Data entry mode
(1) [Function Review] key*
1
Select this key to check the special mode settings.
(2) [Program] key*
2,
3
☞ STORING SCAN OPERATIONS (Programs) (page
5-79)
(3) [Timer] key*
2
☞ SENDING AN IMAGE AT A SPECIFIED TIME
(Timer Transmission) (page 5-83)
(4) [Card Shot] key
☞ SCANNING BOTH SIDES OF A CARD ONTO A
SINGLE PAGE (Card Shot) (page 5-85)
(5) [Bus. Card Scan] checkbox*
4
☞ SCANNING BUSINESS CARDS (Business Card
Scan) (page 5-88)
(6) [Slow Scan Mode] checkbox
☞ SCANNING THIN ORIGINALS (Slow Scan Mode)
(page 5-89)
(7) [Erase] key
☞ ERASING PERIPHERAL SHADOWS ON THE
IMAGE (Erase) (page 5-91)
(8) [Job Build] checkbox
☞ SCANNING MANY ORIGINALS AT ONCE (Job
Build) (page 5-94)
(9) [Suppress Background] key
☞ WHITENING FAINT COLORS IN THE IMAGE
(Suppress Background) (page 5-96)
*1
This cannot be selected when a special mode has not been enabled.
*2 Does not appear in USB memory mode.
*3 Does not appear in data entry mode.
*4 The optional business card feeder must be attached and "Business Card Scan Option" must be enabled in the
system settings (administrator).
SPECIAL MODES
(1)
(2)
(3)
(4)
(5)
(6)
(7)
(8)
(9)
Loading ...
Loading ...
Loading ...