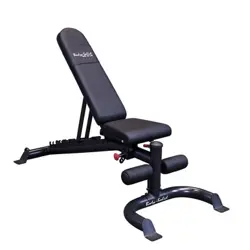
MX BENCH - ASSEMBLY
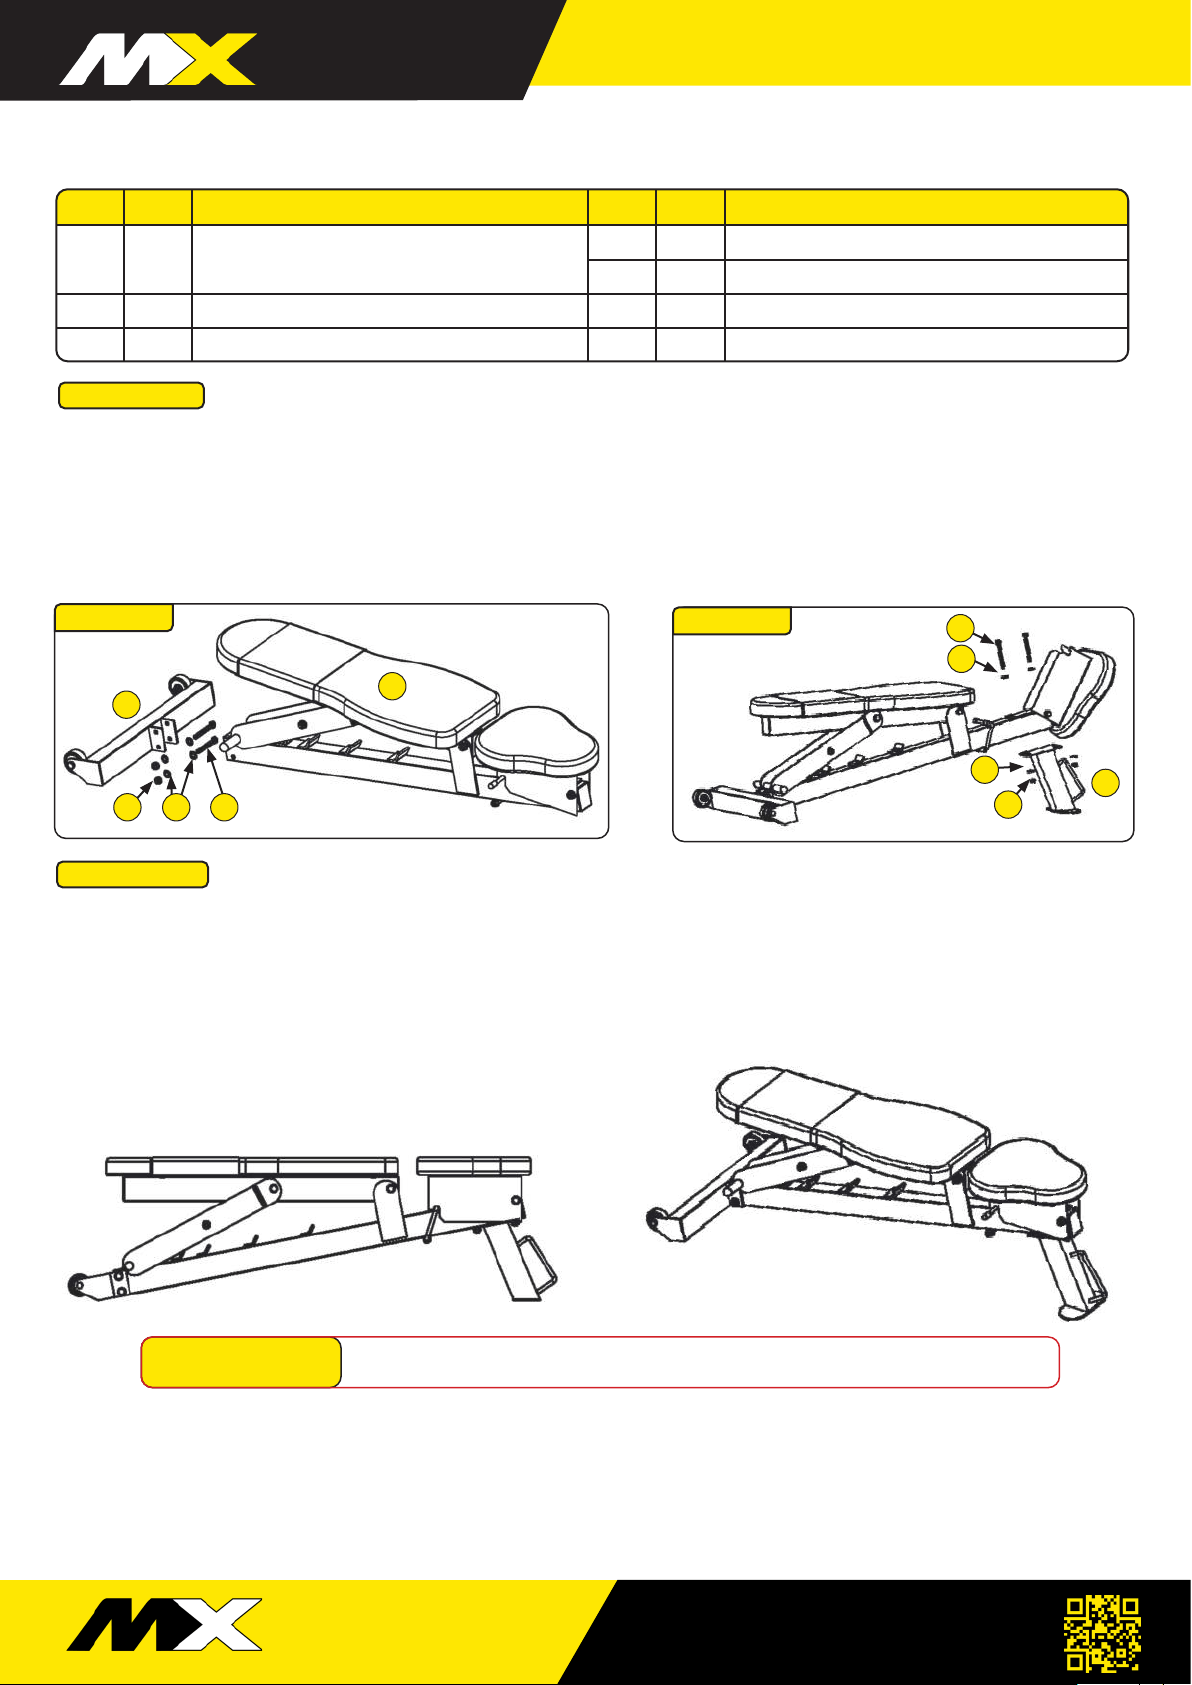
STEP ONE: The image below shows the Wheel Base in position to fasten to the Bench Frame. Place the
Wheel Base with the wheels towards the top of the base. Insert the Bench Frame, with the Upholstery facing
up, into the brackets on the Wheel Base. Place one flat washer onto each of the two M10 x75 mm bolts. Align
holes of Wheel Base and Bench Frame, insert each bolt adding a flat washer and locknut. Very firmly tighten
bolts/nuts with 17 mm or 11/16 in wrench.
+ Inspect equipment before each use for loose or worn parts (including frame, nuts, bolts and adjustment points).
+ DO NOT use if it appears worn or damaged and rectify any loose component before use.
+ Be mindful about the possibility of injury to yourself and others. Do not be careless.
+ Children should not be allowed near this equipment. Supervise teenagers.
+ If you have any questions on proper use of the equipment, do not use until you have had professional advice.
WARNING
SERIOUS INJURY CAN OCCUR ON THE EQUIPMENT.
YOU MUST FOLLOW THESE PRECAUTIONS TO MINIMIZE INJURY.
NO. QTY PART DESCRIPTION NO. QTY PART DESCRIPTION
1 1
MAIN BENCH FRAME WITH
UPHOLSTERY PADS ATTACHED
4 2 BOLT M10 x 75 mm (Rear Frame)
5 2 BOLT M10 x 95 mm (Front Foot)
2 1 WHEEL BASE 6 8 FLAT WASHER M14
3 1 FRONT FOOT 7 4 LOCKNUT M10
1
3
2
67 4
6
5
6
7
STEP ONE
STEP TWO
UPDATED - 160621
RAPID CHANGE
WEIGHT SYSTEMS
www.mxselect.com
RAPID CHANGE WEIGHT SYSTEMS
SELECT
STEP ONE
STEP TWO: Place the Front Foot tight against Bench Frame. Place one flat washer on to the each of the
two M10 x 95 mm bolts. Align holes of the Front Foot and Bench Frame, insert each bolt adding a flat washer
and locknut. Very firmly tighten bolts/nuts with 17 mm or 11/16 in wrench. Check and tighten all the bench
back pad and seat pad bolts before use. IF BACK PAD MOVES OR FEELS LOOSE, TIGHTEN BACK PAD BOLTS.
NOTE: Wheels should be just above floor when the MX Bench assembly is finished. If wheels are touching the
floor, remove the Wheel Base, flip over and reassemble.
STEP TWO