Loading ...
Loading ...
Loading ...
WATERMAZE SERIES OPERATOR’S MANUAL
23
WB • 8.913-984.0-N
A
D
B
C
Bucket
(Not Included)
E
F
4. On/Off/ Full Speed Switch
Now that the system is adjusted, turn the pump on.
The pump will come on and inject “anti-foam” into the
waste stream when the wastewater pump comes on.
The Full Speed setting can be used to fill the feed
lines more quickly.
Sludge Removal:
Remove the doors on the right side of the WATER MAZE.
At the bottom of the evaporation tank you will find a
1-1/2" ball valve. Connect a hose to the valve and place
the other end into a container. Open the valve and flush
out the sludge. If nothing comes out, you may need to
run a wire into the valve to break loose the sludge that
has collected in the evaporation tank. Once the sludge
has been drained, close the valve.
NOTE: Drain water level below the sparger tube before
removing item E (See figure on page 23).
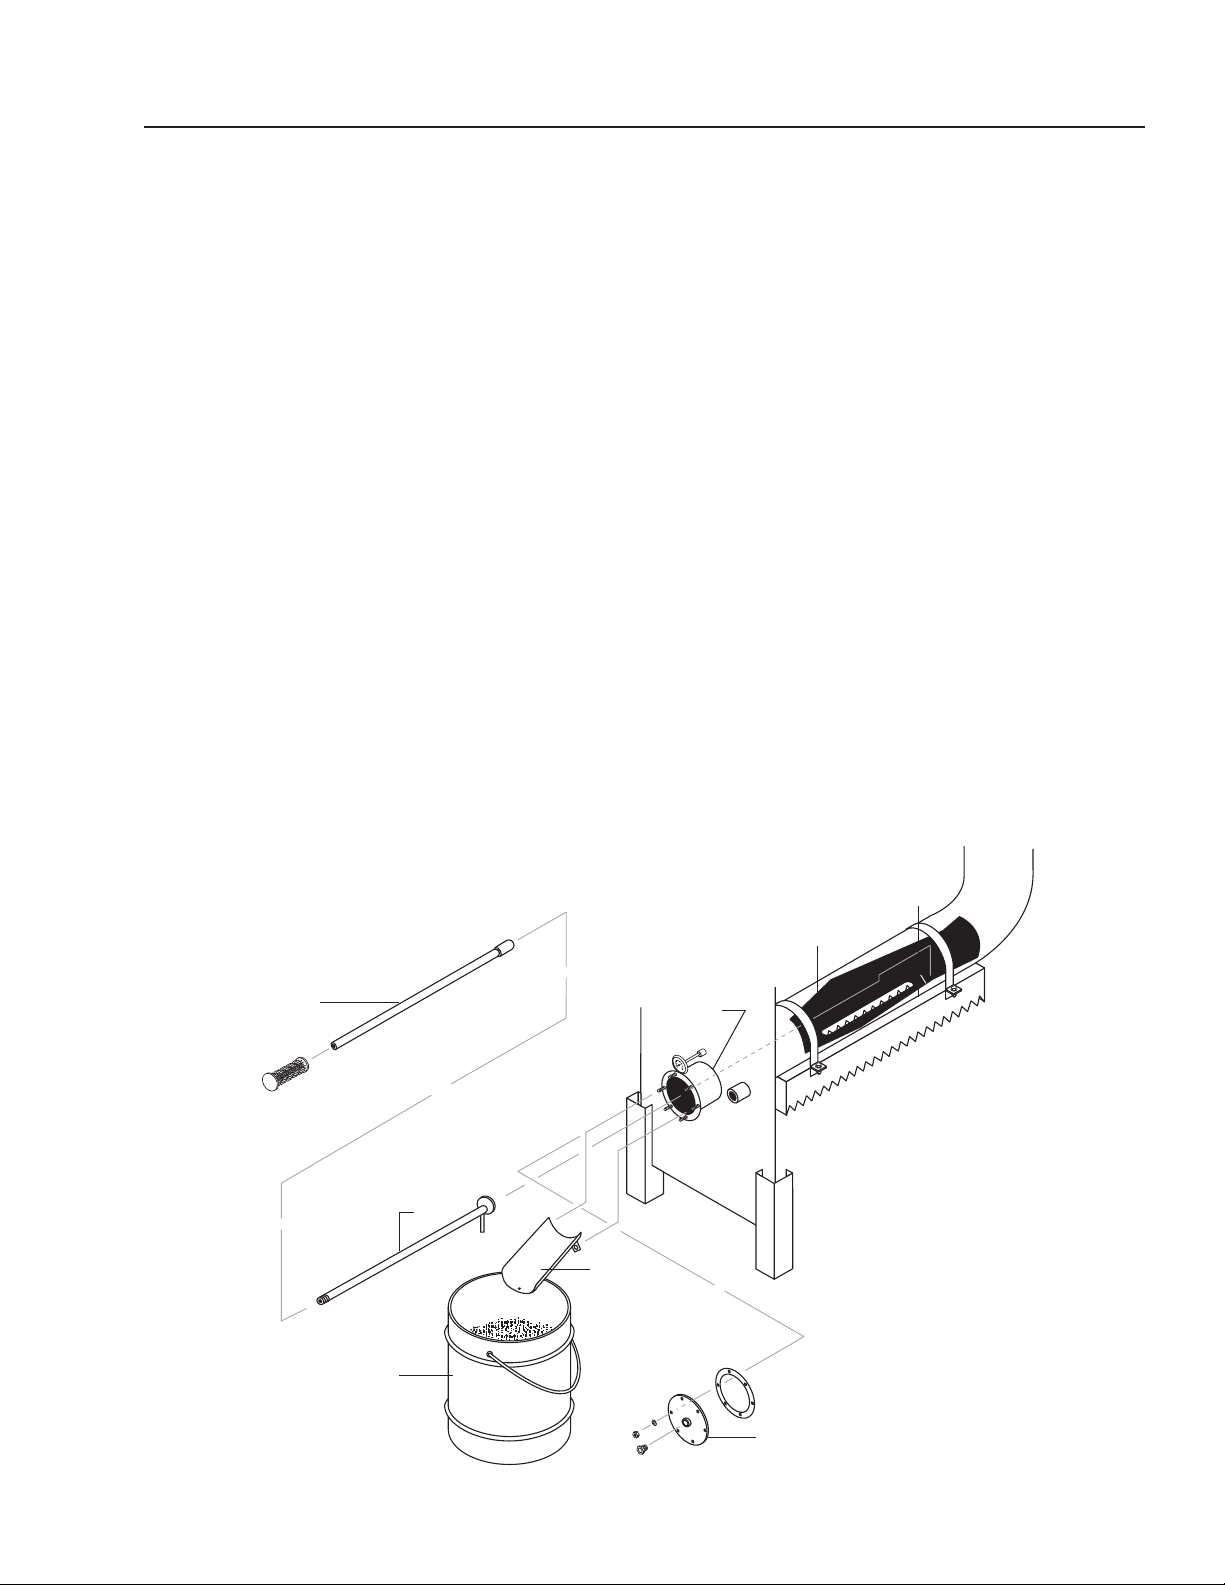
Sparger Tube Cleaning:
The tool kit, (8.903-719.0), consists of four items. Check
to ensure that the kit is complete (refer to the drawing).
A. Tool handle (2 pc.)
B. Probe/scraper
C. Trough assembly
Remove the panel that covers the flange assembly (this
cover is not shown in this drawing). Use a 3/4" socket to
remove the nuts holding the front of the flange assembly
(E) from the rear flange assembly (D). Also remove the
gasket and check it for damage or wear.
Next, place the trough assembly (C) onto the bottom
two studs of the rear flange (D) and replace the nuts to
hold it securely in place. Assemble the tool by screwing
the tool handle (A) into the probe/scraper (B). Place the
probe/ scraper tool as far back into the sparger tube as
possible. While pulling the scraper forward, scrape out all
of the buildup that has accumulated inside of the sparger
tube (H) and direct it into the slot of the sparger tube.
Continue until the sparger is clean. Clean out the slot (F)
inside the sparger tube. Remove sludge from the bottom
of the tank monthly.
Once this is completed, remove the probe/scraper and
the trough assembly (C). Make sure the gasket is clean
along with the surface area between the front flange (E)
and the rear flange assembly (D). Place the gasket over
the studs on the rear flange assembly and then do the
same with the front flange assembly (E). Use the 1/2"
nuts to secure the flange assembly. Refill the evaporator
tank and check the flange assembly for leaks. Replace
the panel that covers the flange assembly.
Figure 9
H
Loading ...
Loading ...
Loading ...