Loading ...
Loading ...
Loading ...
13ENGLISH
C
2 Put the tool holder in the bowl.
C
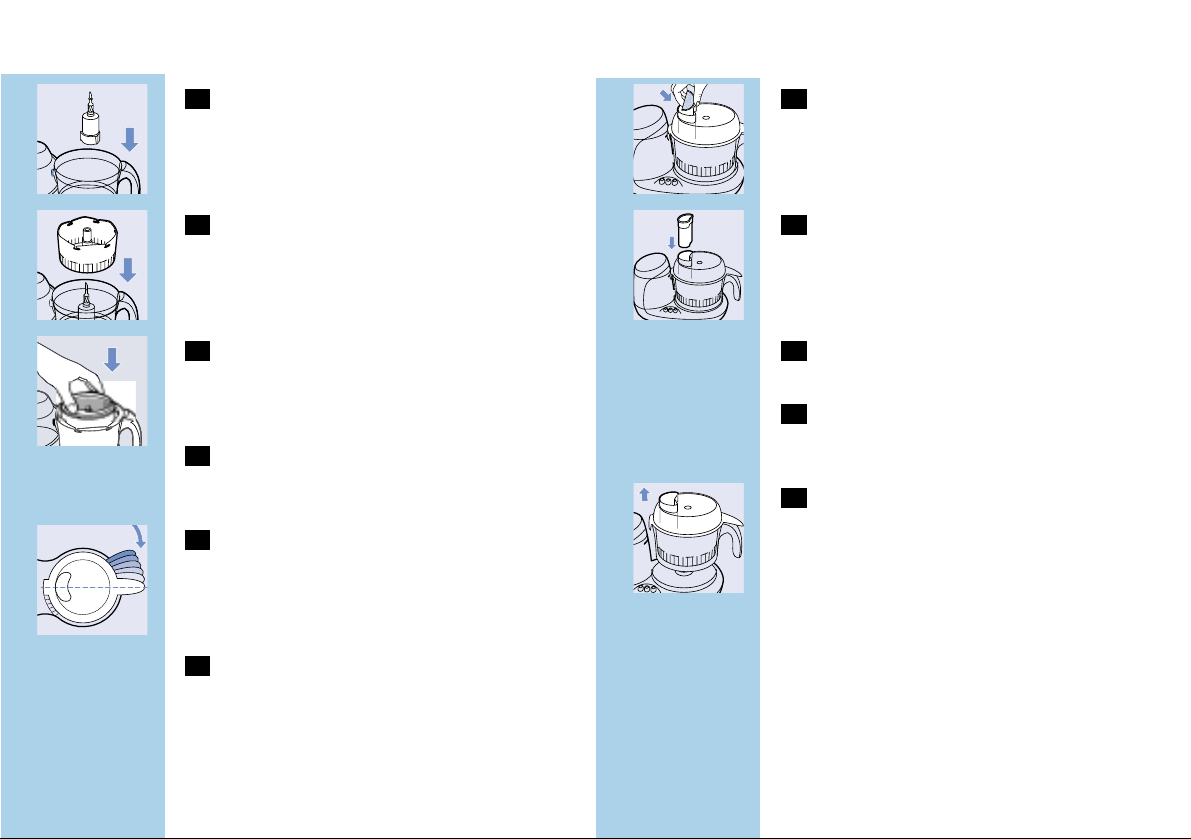
3 Put the sieve holder on the tool holder.
C
4 Place the sieve on the sieve holder by
aligning the three protrusions on the rim
of sieve into the sieve holder slots.
5 Put the lid on the bowl. Turn the lid in the
direction of the arrow until you hear a
click (this requires some force).
C
6 Make sure that the mark on the lid and
the arrow on the bowl are directly
opposite each other. The projection of the
lid will now cover the opening of the
handle of bowl.
7 Select the appropriate speed setting to
switch on the appliance. See the
recommended speed settings to obtain
optimal results:
Process maximum 350g of fruit each time.
Use speed 1 for grapes and tomatoes.
Use speed 2 for other kinds of fruit.
C
8 Lay fruits into the juice extractor through
the feed tube. Pre-cut large chunks to
make them fit into the feed tube.
C
9 Press the ingredients slowly and steadily
down the feed tube with the pusher. Do
not exert too much pressure on the
pusher; this could affect the quality of the
end result and it could even halt the sieve.
10 Keep the pusher in the feed tube as often
as possible to prevent splattering.
11 Let the appliance run for another 20
seconds to obtain any juice still left in the
ingredients.
C
12 To avoid spilling juice on the appliance,
remove the bowl along with the juice
extractor accessory after use.
Tips
◗ The juice extractor accessory is particularly
suitable for processing carrots, apples, grapes,
watermelons, beetroots, pears, tomatoes,
pineapples, guavas, mangoes and honeydew
melons.
◗ For best results use only ripe fruits.
◗ Thin peels or skins do not have to be
removed. Only thick peels of, for example,
pineapples, melons and uncooked beetroots;
stalks on fruits have to be removed.
Loading ...
Loading ...
Loading ...