8. Position indicator of current playback/recording
9. Playback/recording time / Remaining recording time
10. File name of current playback/recording
11. Selected folder, depending on the selected sttorage medium ( – internal memory, / – microSD card) / number of the current recording / total number of recordings in the folder
Menu overview
File menu:
Repeat a file / repeat a sequence
Protecting a recording / lock file
Recording settings:
Setting microphone sensitivity
Setting recording quality
Setting the timer
Enabling/disabling voice-activated recording
Setting auto divide
Display settings:
Select language
Adjusting the display contrast
Enabling/disabling the background light
Device settings:
Set date & time AUTO-OFF
Memory formatting
Enabling/disabling the record indicator
Enabling/disabling key and signal tones
Set file location
Display device information
Device reset
Radio settings
Radio mode
Saving a radio station pre-set
First steps
Use the installation guide on the following pages to start using your device quickly and easily.
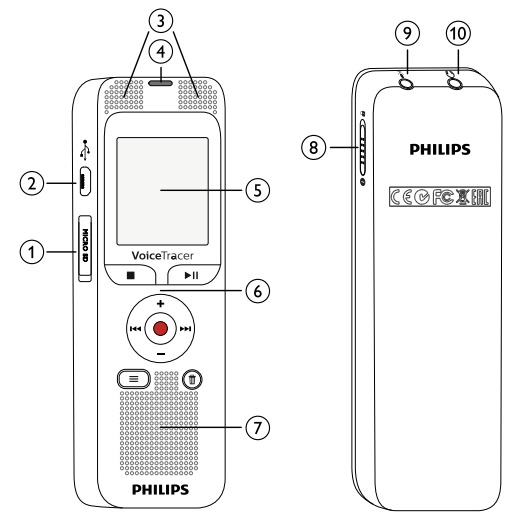
Charging the battery
Power on/off
Slide the on/off switch on the side of the device downwards for approximately two seconds. The device turns on and the start-up screen is displayed.
To power off, pull down the power switch on the side of the device again and hold for about two seconds.
Enabling/disabling the keypad lock
The keypad lock deactivates all keys on the device. The timer function of the device continues to function.
Slide the on/off switch switch up into the position to lock the keypad of the device. The display briefly shows ‘Hold’.
Slide the Power on/off switch down to the Off position to disengage the keypad lock.
Inserting a microSD card
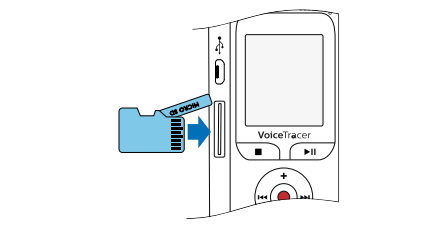
Flip the memory card slot cover to the side.
Insert the microSD card into the card slot with the contacts facing upwards.
Insert the memory card until it snaps into place.
To remove the card press the memory card slightly until the snapping mechanism unlocks and the card is ejected.
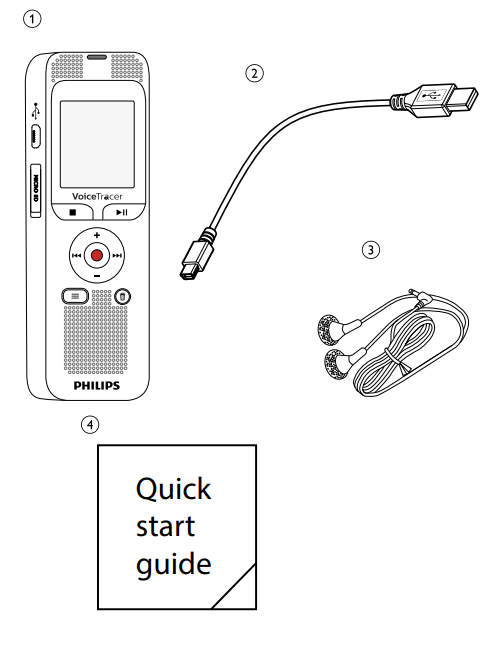
Accessories
Depending on the type of the device, the product package may include various accessories. Additional accessories may be obtained directly from your retailer.
How to connect headphones
Turn down the volume of the device before you plug in the headphones.
Insert the stereo jack into the headphone connection on the top of the device.
Turn up the volume until you reach a comfortable listening level. The speaker is switched off when headphones are connected.
Connecting an external microphone
Stop the recording currently in progress.
Insert the jack into the microphone connection on the top of the device.
Connecting to a computer
You can select one of the following options once you have connected the device to a computer
A USB mass storage device: You can use the File Explorer to access the device data without installing additional software. The device is automatically displayed as a mass storage device. It is a convenient way to store, back up and and move files
Plug the USB connector into a USB port on your computer.
Insert the micro USB plug into the USB port on the side of the device. The device is displayed as a mass storage device in File Explorer.
Transferring files from or to the device
You can use the File Explorer to access the device data without installing additional software. The device is automatically displayed as a mass storage device.
Connect the device to the computer as described.
Open File Explorer. The device is automatically displayed, similarly to a USB memory stick or card, as a mass storage device. Use the Voice folder for recordings and the Music folder for music files.
Copy or move files to your computer or delete files to archive recordings and free up space on the device.
Disconnecting from a computer
Select Eject USB in File Explorer.
Disconnect the USB cable from the computer.
Record
The device offers many features that you can use during recording or to improve the quality of a recording. Use the timer and the voice activation functions to start a recording automatically
Creating a recording
Before starting a recording, set the required recording quality and microphone sensitivity.
When you record in environments with lots of noise in the background (e.g. while in a crowd or during a train or car journey), you can enable the noise reduction function to reduce the background noise
In stop mode (start-up screen), press the key to select the desired folder for the recording
Point the built-in microphone toward the sound source and press
Press to pause recording. The record/play indicator will blink red.
Press the key to resume recording
Press the key to stop recording. The device returns to stop mode.
Recording using an external microphone
If you connect an external microphone to the device, the recording source will switch automatically and the device's microphone will be turned off.
If you connect an external microphone, the device will record stereo sound. The integrated microphone only records mono sound.
Starting recording automatically
You have two options to start automatic recording: Timer function and voice activation.
Use Timer function
You can use this function to start a recording at a specified date and time. The device can record from the device's microphone or an external microphone
Customize the timer settings in the Settings menu and turn on the feature. The device will start recording at a specified time. The device can be switched off at this time or the keypad can be locked.
Use voice activation
When voice-activated recording is enabled, recording will start when you begin speaking. When you stop speaking, the device will automatically pause recording after three seconds of silence, and resume only when you begin speaking again. Use the voice activation level to set the volume at which the device should begin recording
Customize the voice-activated recording settings in the Settings menu and turn on the feature. If this feature is on, the symbol is displayed.
Press the key. The devices switches to standby mode. The () symbol will be displayed. Recording will start when you begin speaking. When you stop speaking, the device will automatically pause recording after three seconds of silence.
Press the key to stop recording. The device returns to stop mode.
Troubleshooting
The device does not turn on
The built-in battery is empty. Recharge the battery.
The device does not playback recordings
The keypad lock may be enabled. Slide the on/off switch to the "Off" position.
No recordings are saved in the device.
The microSD card cannot be selected as a recording location
There is no memory card in the device. Insert a memory card into the device.
The memory card is not formatted (file system FAT32). Format the memory card in the device.
I cannot hear anything from the speaker.
A headset is connected to the device.
The volume is at the lowest setting
The recording session does not start
Pre-recording or voice-activated recording mode may be enabled.
The keypad lock may be enabled. Slide the on/off switch to the "Off" position.
The maximum number of recordings may have been reached or the available space for recording is full. Delete some recordings or move them to an external device. Select another location folder
I cannot hear anything from the headphones.
The headphones are incorrectly connected. Check the headphone connection.
The volume is at the lowest setting.
External microphone records mono sound only
Switch the external sound source to stereo microphone.
Appendix
The information in this user manual has been produced to the best of our knowledge. It (particularly the technical data) may be modified or updated at any time without prior notice.
 Short press: jump to the next index mark
 Volume down, menu navigation: Select menu functions
 Short press: jump to the previous recording
 Stop playback (stop key), close menu
 Play recording (playback key), Pause playback (pause key)
 Start recording (record key), confirm selection
 Delete recording (delete key)
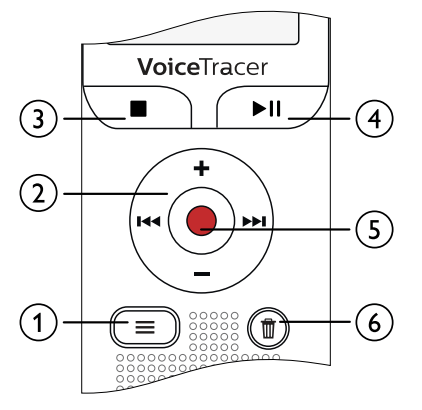
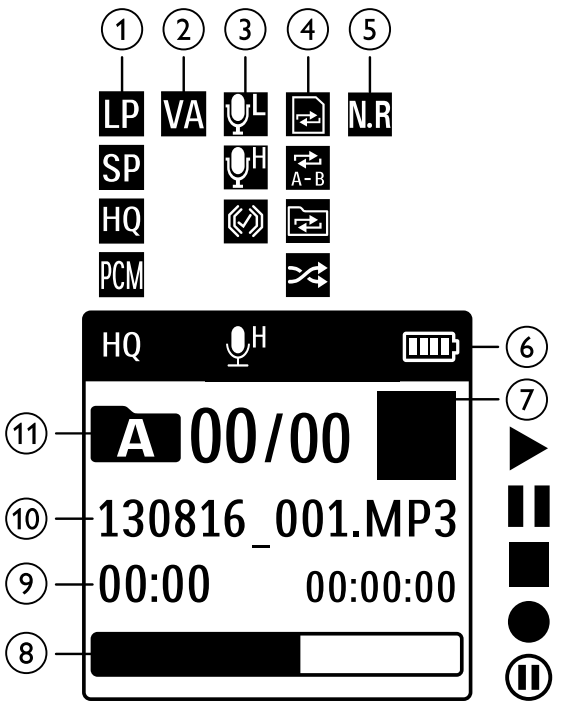
 Set recording quality:
  – LP,
– LP,  – SP,
– SP,  – HQ,
– HQ,  – PCM
– PCM – Voice activation switched on
 Microphone sensitivity:
  – low sensitivity (shorter distance),
  – Line-in source
 – Repeat file playback,
  – Repeat selection/sequence,
  – Repeat folder playback,
 – Random repeat mode
 – Noise reduction on
 Battery charge level
 – Playback,
  – Pause,
  – Stop,
  – Record,
 – Pause record
 Selected folder, depending on the selected sttorage medium (
 File menu:
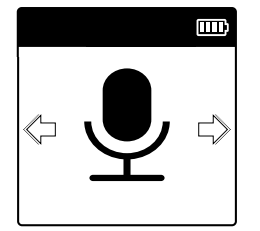
 Recording settings:
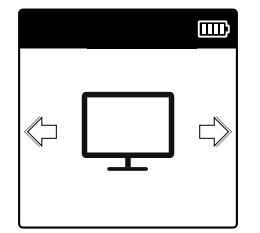
 Display settings:
 Device settings:
 Radio settings
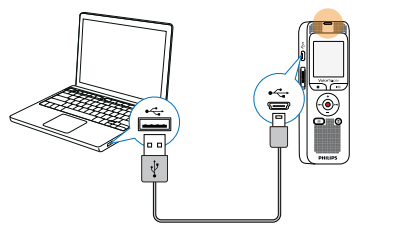

 position to lock the keypad of the device. The display briefly shows ‘Hold’.
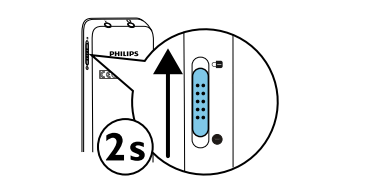
 on the top of the device.
 on the top of the device.
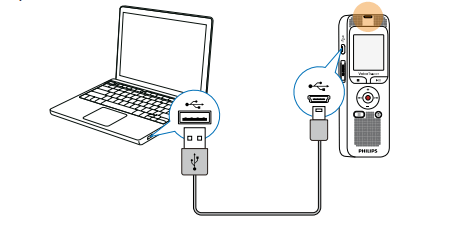
 key to select the desired folder for the recording
 symbol is displayed.
 ) symbol will be displayed. Recording will start when you begin speaking. When you stop speaking, the device will automatically pause recording after three seconds of silence.