
Loading ...
Loading ...
Loading ...
7
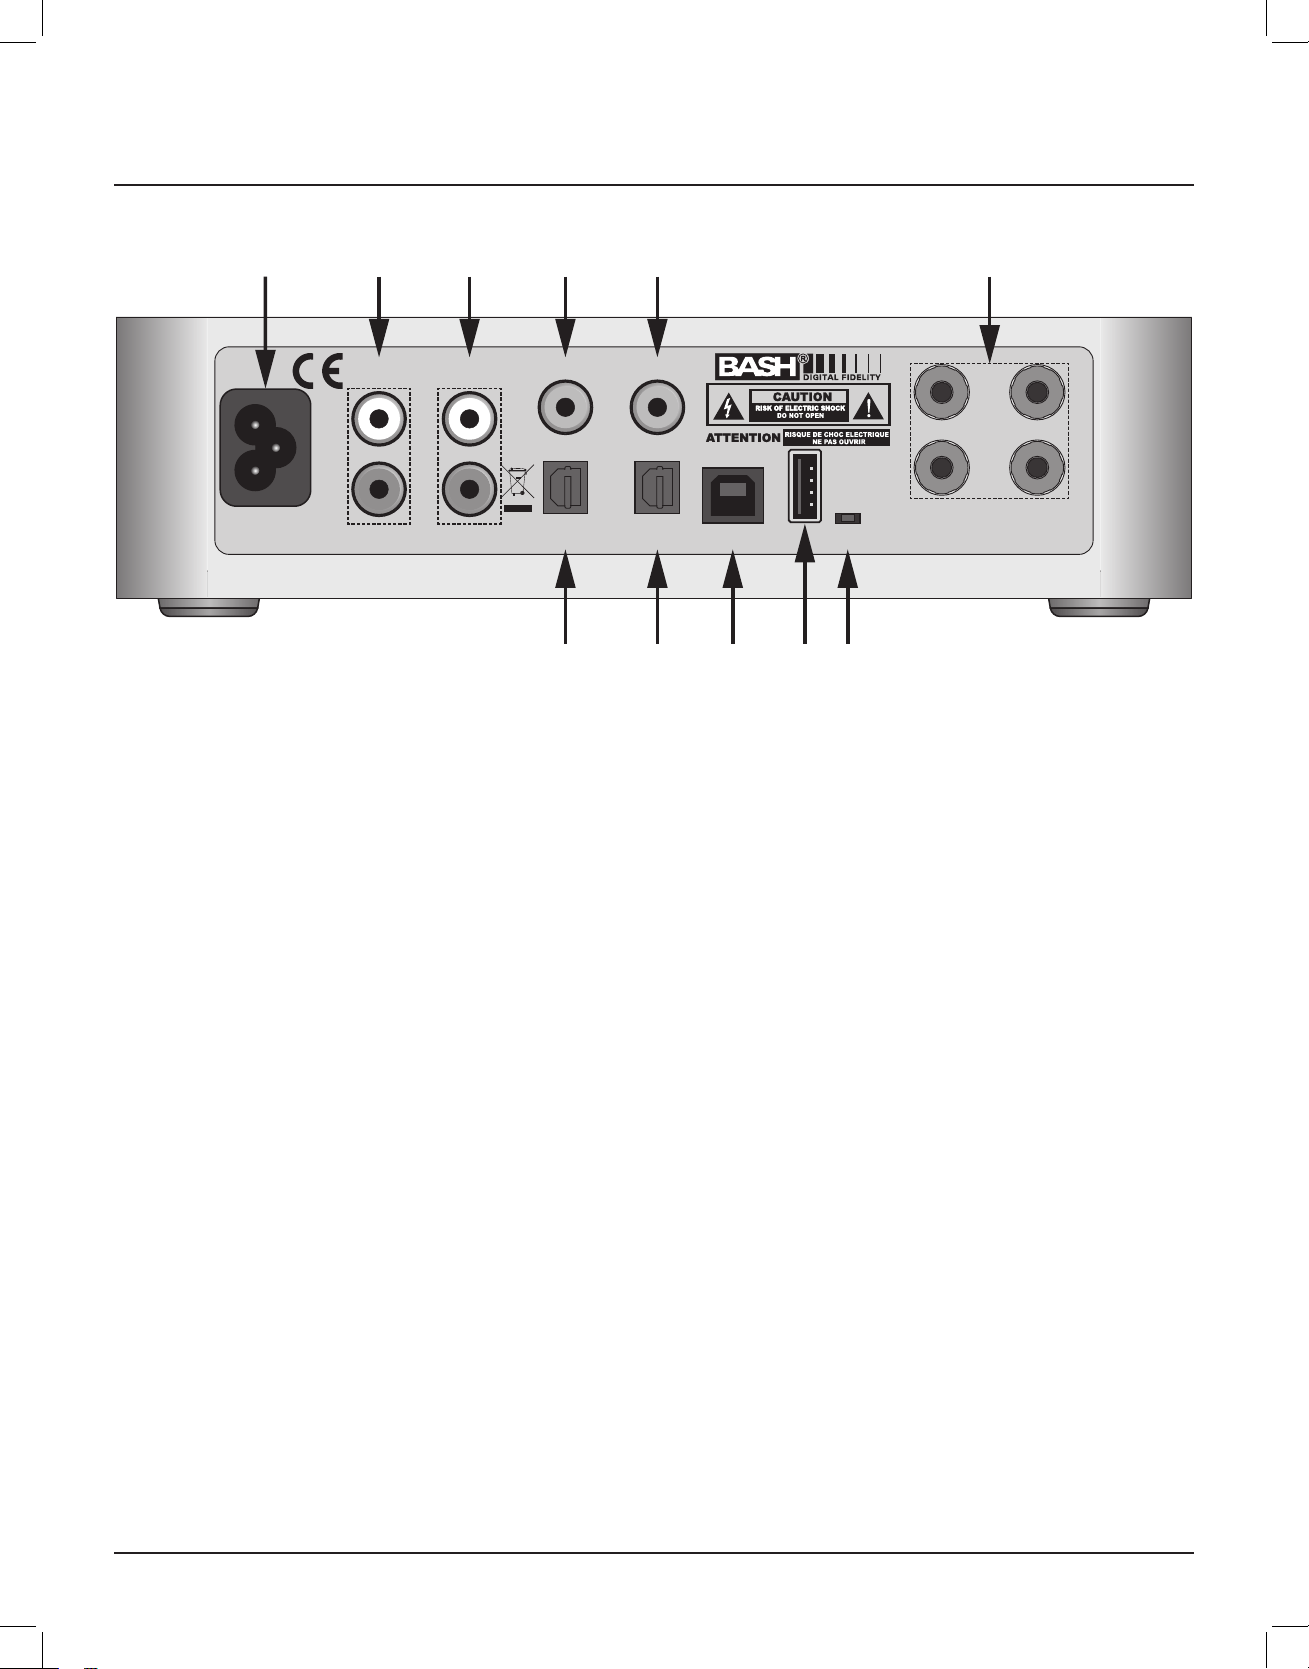
Rear Panel Features
SPEAKER OUT
RIGHT LEFT
RESETUSB IN
OPTICAL
IN 2
OPTICAL
IN 1
SERVICE
COAX INSUB OUTLINE IN
1
LINE IN
2
L
R
100-120V/220-240V
~50/60Hz 1.6A
CAUTION: FOR CONTINUED PROTECTION
AGAINST RISK OF FIRE,REPLACE ONLY
WITH SAME TYPE FUSE AND RATING.
ATTENTION: UTILISER UNE
FUSIBLE DERECHANGE
DE MEME TYPE ET CALIBRE.
7 8 9 10 11 12
1314151617
Figure 2 EA101EQ-G Rear Panel Features
7. AC MAINS - Afterallotherconnectionshavebeenmadeandconrmed,usingthe
included power cord, connect the AC Mains on the EA101EQ-G to an unswitched AC
outlet.
8. LINE IN 1 - Using a quality stereo RCA to RCA cable, connect the L&R outputs on a
stereo audio source to the Line IN 1 L&R inputs on the EA101EQ-G. This input can be
selected by pressing Ana 1 on the remote or by tapping the front panel Source button.
9. LINE IN 2 - Using a quality stereo RCA to RCA cable, connect the L&R outputs on a
stereo audio source to the Line IN 2 L&R inputs on the EA101EQ-G. This input can be
selected by pressing Ana 2 on the remote or by tapping the front panel Source button.
10. SUB OUT - Using a quality RCA to RCA cable, connect the SUB OUT on the EA101EQ-G
to the SUB IN on a powered subwoofer or sub amp. Once the initial sub settings have
been made, the Volume Control will adjust both Speaker and Sub Out levels as a master
control.
11. COAX IN - Using a quality digital coaxial audio cable, connect the Coaxial OUT on a
source component to the Coax IN on the EA101EQ-G. The Dolby logo will appear in the
front panel display when Dolby Digital signals are present. This input can be selected by
pressing Coax on the remote or by tapping the front panel Source button.
12. SPEAKER OUT - Using 16AWG (min) speaker wire, connect the Right and Left Speaker
terminals on the EA101EQ-G to the appropriate speaker terminals on left and right
speakers. Before connecting the speaker wires, twist the ends of the speaker wire
so there are no strays that can cause shorts. See section: Connections/Speaker
Connections for additional information.
Loading ...
Loading ...
Loading ...