
© 2006 Sony Corporation

The CAV-M1000ES Setup Application enables you
to configure the CAV-M1000ES main unit using
your PC and an RS232 interface. The setup
software allows you to do many key functions:
• Tell the CAV-M1000ES what "input" and
"common" sources are connected by specifying
the source type and manufacturer.
• Control the source selection on a Sony ES Series
receiver connected to the CAV-M1000ES via
RS232.
• Build "Second Page Macros" to be issued from
the RMR-K100 in-wall keypads.
• Save and Load infrared remote control files for
both input and common sources.
• Specify 12V triggers to activate the power of
other peripherals.
• Control RS232 devices from the Aux port of the
CAV-M1000ES.
• Configure the ID of the RM-TP100 radio
frequency remote control so that the RF signal
does not interfere with other devices.
• Back up and restore data stored inside the
CAV-M1000ES.
The CAV-M1000ES Setup Application saves, recalls
and processes setup information as PC files. This
makes it easy to copy a custom setup from one
CAV-M1000ES and "clone" it to others. These files
can also be exchanged as email attachments and
pulled down from the Internet. All told, the
application works with four types of files:
• MSS files. Memory Setup Save files use the
"MSS" file extension. The files contain Input
Source, Common Source, 12V Trigger, 2nd Page
Macros, RS232 Command Strings and Main
Remote RF ID information.
• MSE files. Input Source Infrared Command
files use the "MSE" file extension. Each file
represents infrared control commands for a
specific Input Source component that is not
preprogrammed into the CAV-M1000ES. MSE
files are normally "learned" by the CAV-
M1000ES using the handheld IR remote control
of the Input Source equipment and the front
panel of the M1000ES. To save the tedium of
repeated manual programming, MSE files can
also be saved to your PC, recalled for later use,
or even downloaded from the Internet.
• MCE files. Common Source Infrared
Command files use the "MCE" file extension.
Each file represents infrared control commands
for a specific Common Source component that
is not preprogrammed into the CAV-M1000ES.
MCE files are normally "learned" by the CAV-
M1000ES using the handheld IR remote control
of the Common Source equipment and the front
panel of the M1000ES. To save the tedium of
repeated manual programming, MCE files can
also be saved to your PC, recalled for later use,
or even downloaded from the Internet.
• MBU files. Memory Backup files use the
"MBU" file extension. The files contain the
entire memory of the CAV-M1000ES, including
MSS, MSE and MCE files and individual RMR-
K100 keypad settings.
!
Download the CAV-M1000ES Setup Software
installer from the web.
"
Run the installation program by double clicking
on the executable file, CAV-M1000ES
Setup.exe.
#
After the program finishes installing, you can
launch the software by double-clicking on the
CAV-M1000ES Setup desktop icon or by
choosing Start/Programs/CAV-M1000ES Setup.
NOTE: The CAV-M1000ES application is
approximately 4MB because most supporting DLL
files are compiled into the executable file.
#
Configuring the CAV-M1000ES for the first time
using the CAV-M1000ES Setup Application is quick
and simple. There are seven steps:
Step 1: Read Setup Data from the M1000ES
Step 2: Configure Sources
Step 3: Build Second Page Macros (Optional)
Step 4: Configure RS232 Devices (Optional)
Step 5: Configure 12 Volt Triggers (Optional)
Step 6: Configure the Main Remote RF ID
Step 7: Write Setup Data into the M1000ES
NOTE
:
An
RS232 null modem cable is
required to connect the CAV-M1000ES to
your PC. The cable is not included with the
unit and must be obtained separately.
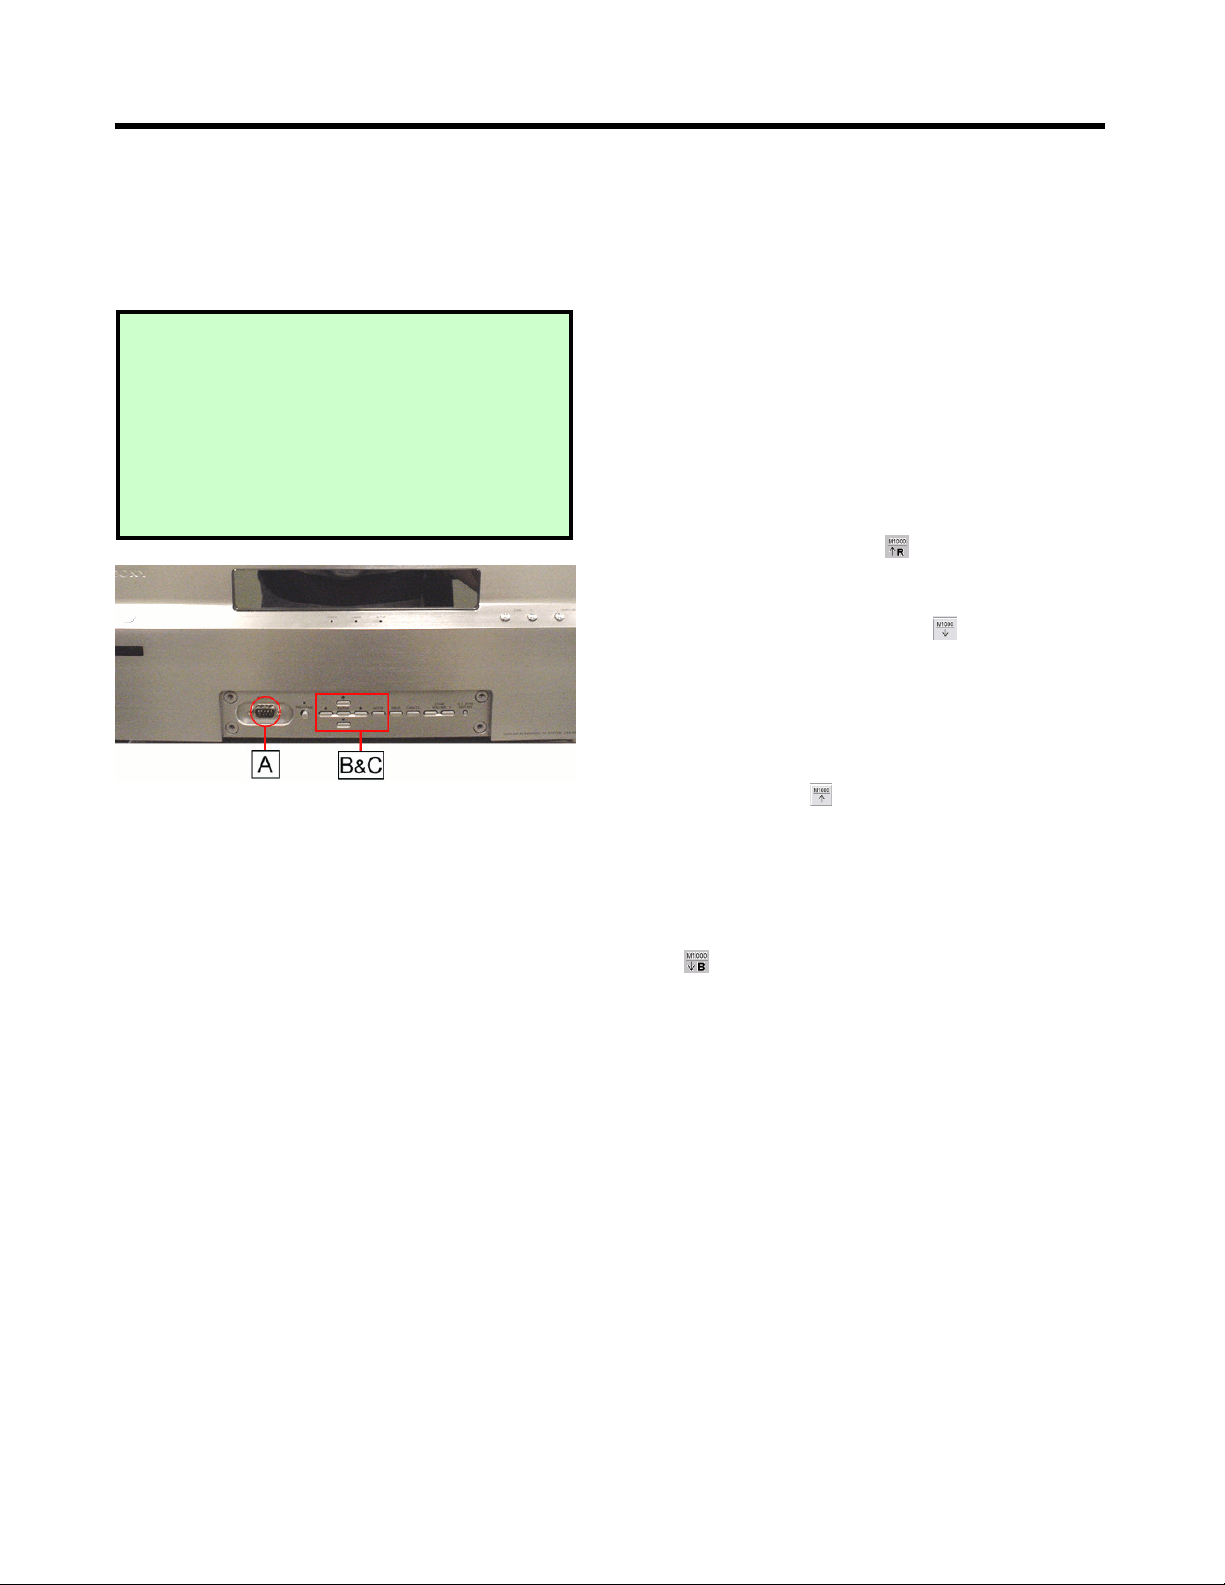
!
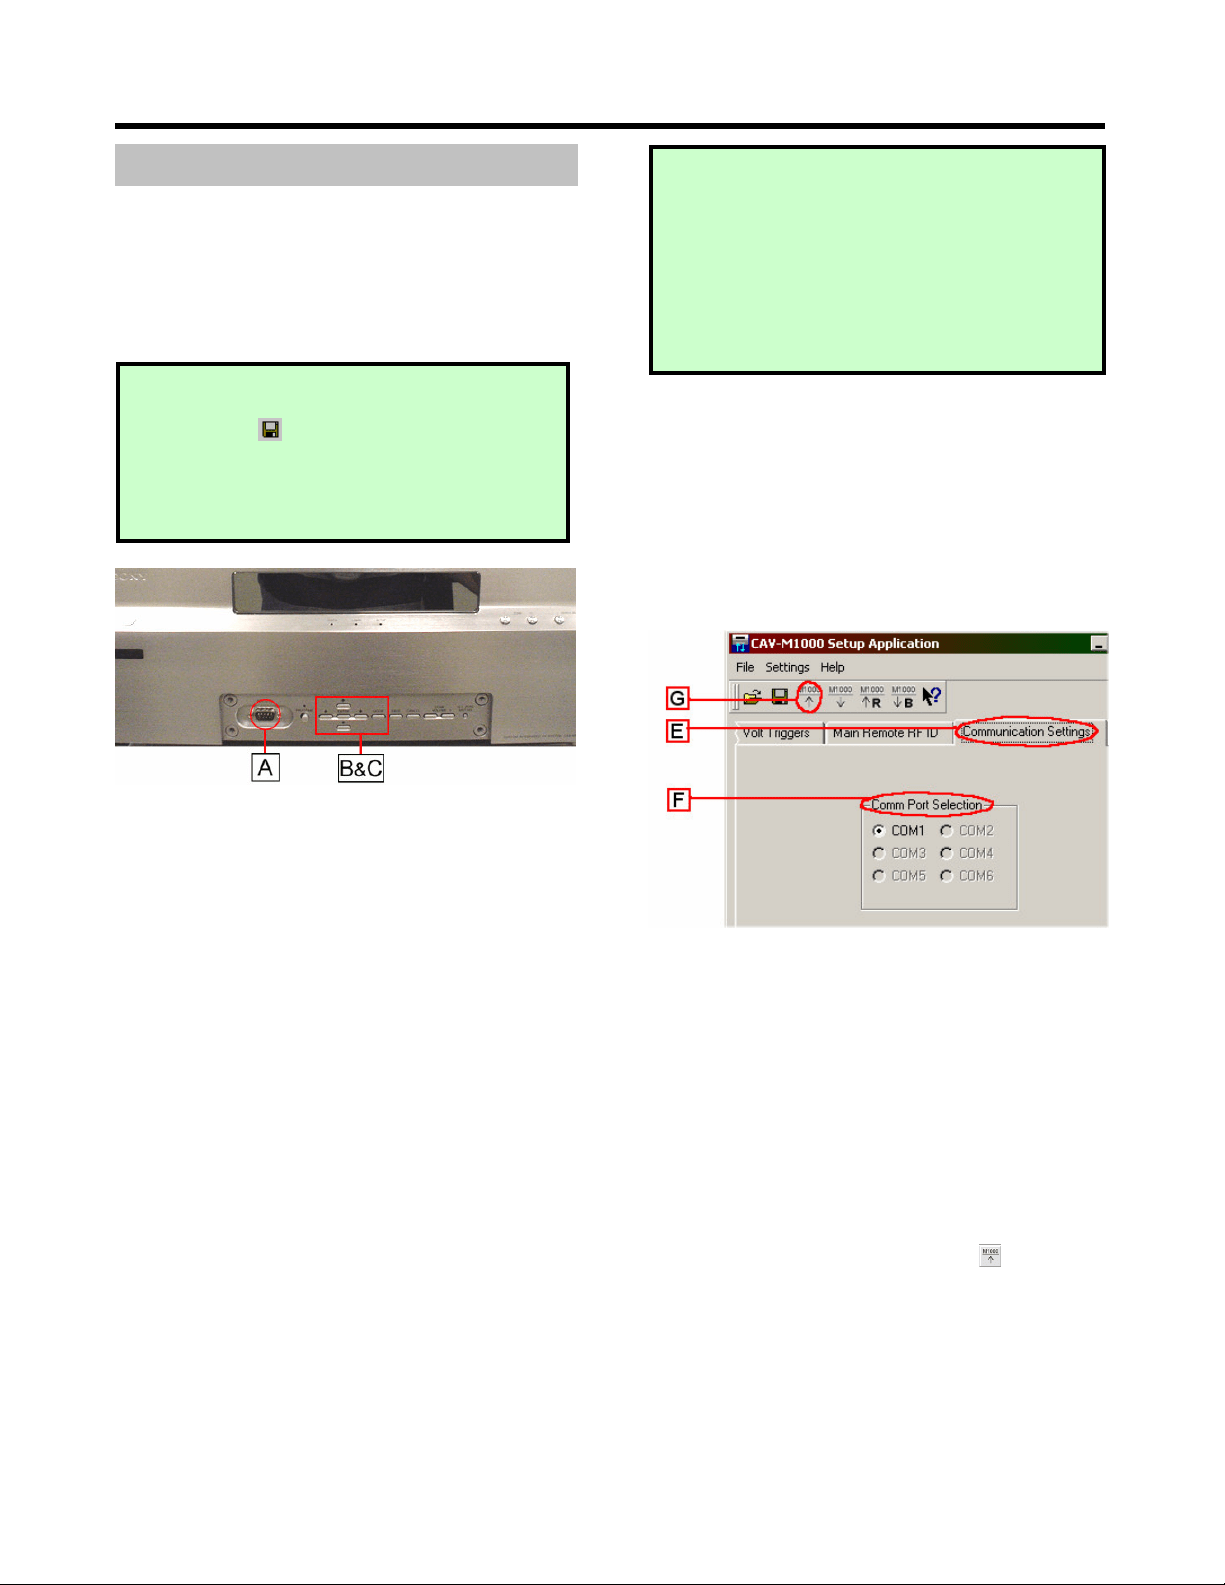
Snap open the front sub-panel of the CAV-
M1000ES and connect an RS232 null cable from
your PC to the front panel RS232 terminal.
"
Switch on the CAV-M1000ES power.
#
Confirm that the baud rate is set to 57600.
a. Press the Mode button until the display
says <SETUP>, and press the Enter button.
b. The display will now read <WHICH
MENU?>. Press the down arrow button
until it says <BAUD RATE SET>, and press
Enter.
c. The display will now read <WHICH
PORT?>. Press the down arrow button
until the display reads <FRONT RS232C>,
and press Enter.
d. Use the up/down buttons to make sure that
the speed is set to <57600 bps> and press
Enter.
$
Next, prepare the CAV-M1000ES for connecting
to the PC.
a. Press the Mode button until the display
reads <SETUP> and press Enter.
b. The display will now shows <WHICH
MENU?>. Press the down arrow button
until it says <PC SETUP> and press Enter.
c. The screen should now read <READY!>.
%
Go to the setup software and click on the
Communication Settings tab on the top right
side.
Select the COM port on your PC that the CAV-
M1000ES is connected to. Note that unavailable
COM ports will be grayed out. If the CAV-
M1000ES does not display <READY!> or if the
unit is not properly connected to the PC, then a
“CAV-M1000ES not connected” message will be
displayed on the bottom left portion of the
screen.
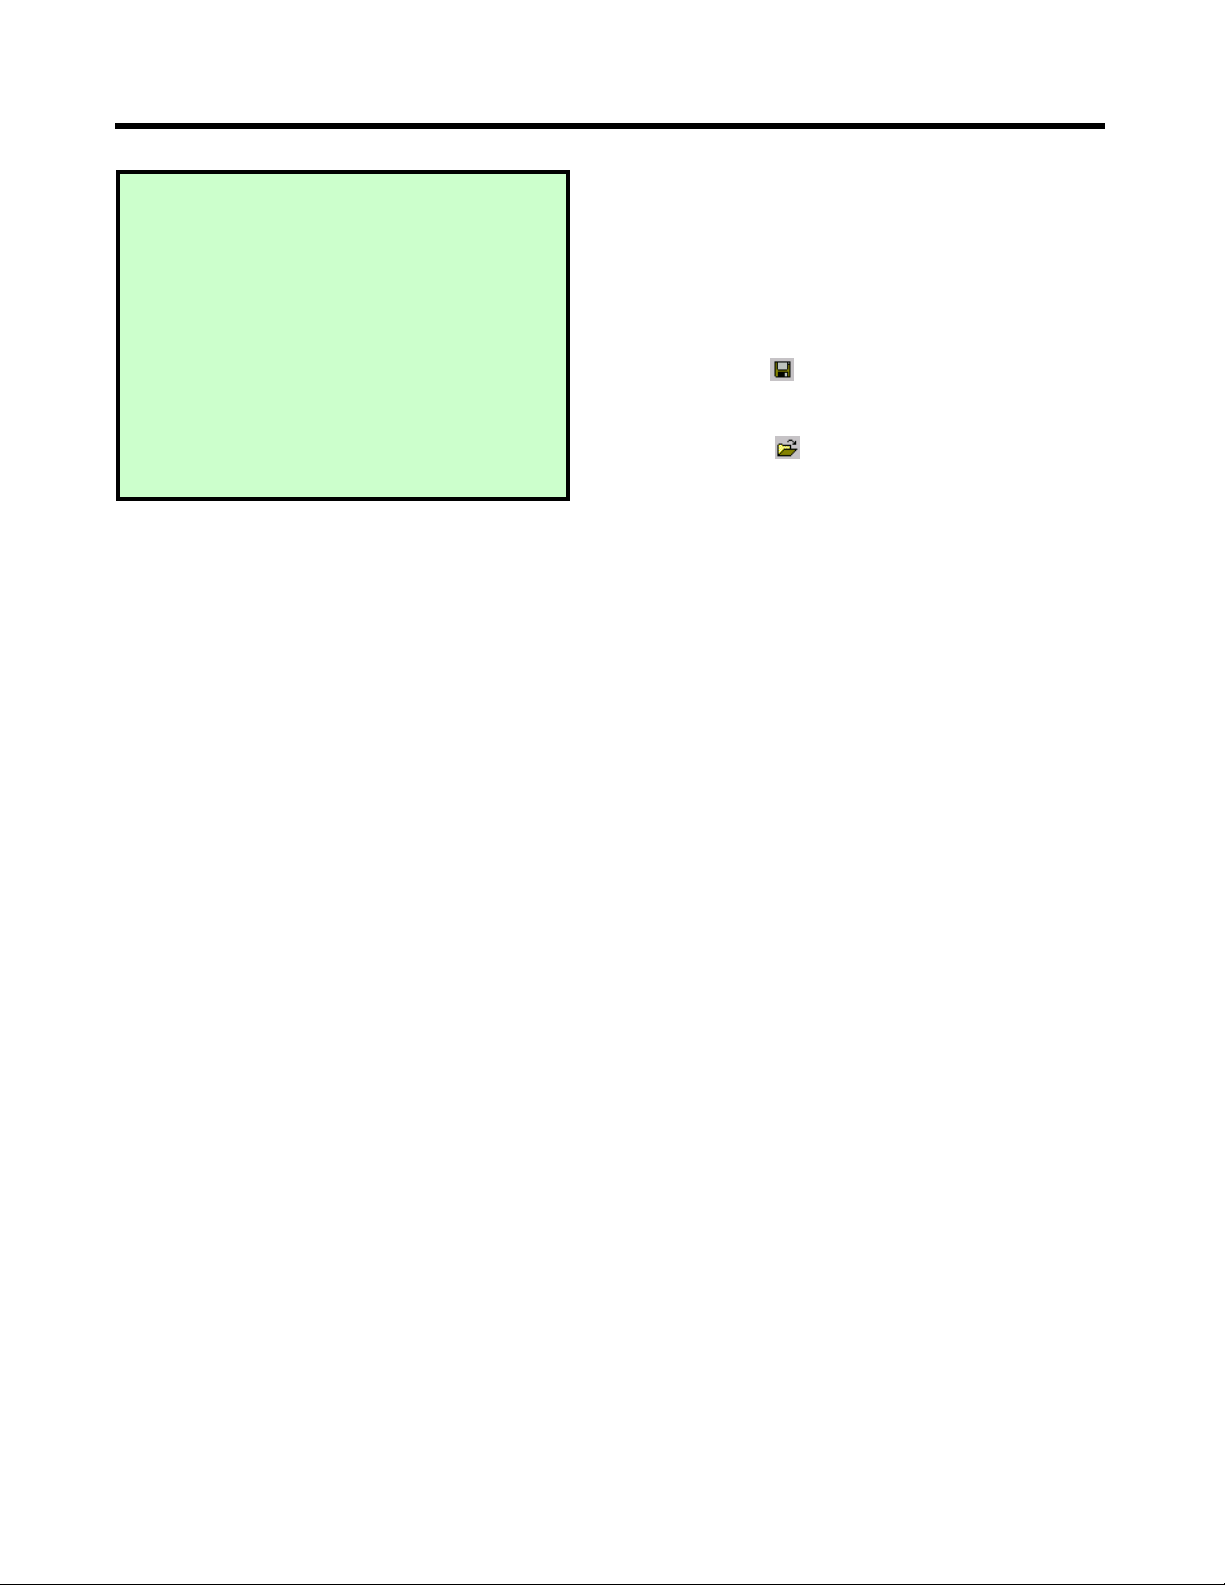
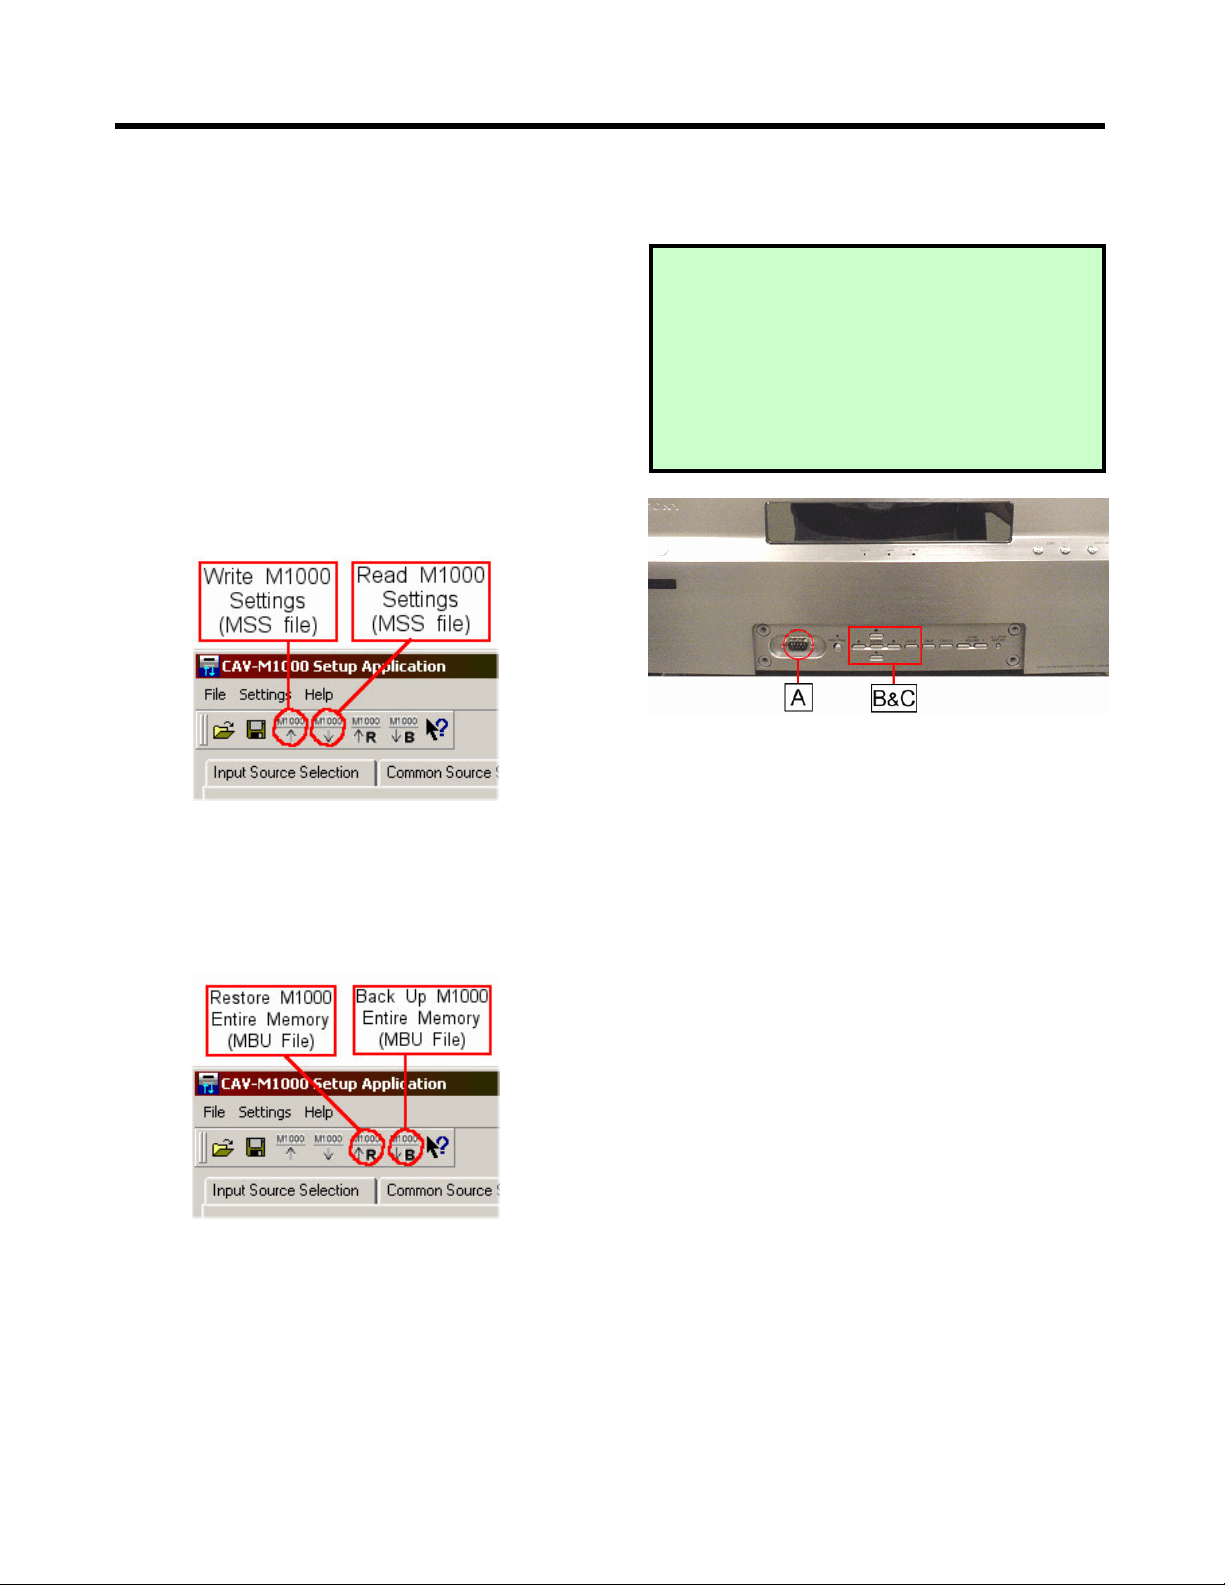
&
Click on the Read Settings icon to transfer
the configuration from the CAV-M1000ES main
unit to the PC.
'
The M1000 Setup Application will confirm
when the transfer is complete.
Because you may need to restore the original
settings later, it's smart to save the current
configuration as a PC file. To save this
configuration file, click on the File Save icon
and specify a name for the file you want to save.
TROUBLESHOOTING
THE CONNECTION
:
If you are unable to connect, check for the
following sources of error.
• CAV-M1000ES is not set to <Ready>.
• The baud rate on the CAV-M1000ES is not
set to 57600 bps.
• Incorrect serial communications port is
selected in the PC setup application.
• Null modem cable is not used when
connecting to the PC.
• Latest firmware is not being used.
WARNING
S
:
• Writing data into the CAV-M1000ES with the
incorrect baud rate can permanently
damage the unit and make it unusable!
• Writing data into the CAV-M1000ES while
having the Program button next to the front
serial port pressed during setup data
transfer can permanently damage the unit
and make it unusable!
($ )
*%
+
Now that the CAV-M1000ES settings have been
loaded into the Setup Application and saved, you
can start making any necessary changes. Two types
of sources can be used with the CAV-M1000ES.
"Input Source" refers to equipment such as DVD
players that feed signals into the CAV-M1000ES.
"Common Source" refers to equipment such as
projectors that do not feed the CAV-M1000ES but
can be operated by the RM-TP100 RF remote
control.
Start by configuring the "Input Sources."
!
From the main screen, click on the Input
Source Selection tab on the top.
"
Select the Source 1 sub-tab.
#
Configure the Source 1 device by specifying:
•
Alias Input Name: Enter the source name
that will be displayed on the in-wall
keypads for selecting the Source 1 device.
Alias input names can be up to seven
characters long. These names will appear
in the LCDs of the RMR-K100 keypads.
•
Product: Select the type of device.
•
Manufacturer: Select the maker.
•
Main STR Function: A Sony ES Series
receiver is connected to the CAV-M1000ES
via RS232. This drop down enables you to
configure the input source that the receiver
will automatically select when Source 1 is
selected on the RM-TP100 remote.
•
Load IR From File: Input Source infrared
(IR) remote commands that are not
preprogrammed can be "learned" by the
CAV-M1000ES using the handheld IR
remote control of the input source
equipment and the front panel of the
M1000ES. These commands form separate
Source IR files that use the file extension
"MSE." Once learned, these MSE files can
be saved as a separate PC file for use with
other CAV-M1000ES main units. Sony will
also post MSE files on our CAV-M1000ES
support website for easy downloading and
exchange.
a. To load input source infrared remote
commands from a saved PC file, click
the Load IR From File button.
b. To save the current IR commands to a
PC file, click the Save IR To File button
and supply a name for the file you wish
to save.
c. To clear input source infrared
commands from the current
configuration, click the Clear IR File
button.
$
Repeat the above steps for every input source
that needs to be configured by going through
the remaining Source tabs. You can configure
up to 8 unique input sources.
Next, configure the "Common Sources" by
following similar steps.
!
Click on the Common Source Selection tab on
the top.
"
Select the Common 1 sub-tab.
#
Configure the Common 1 device by specifying:
•
Product: Select the type of device.
•
Manufacturer: Select the maker.
•
Load IR From File: Common Source
infrared (IR) remote commands that are not
preprogrammed can be "learned" by the
CAV-M1000ES using the handheld IR
remote control of the common source
equipment and the front panel of the
(#

,
M1000ES. These commands form separate
Common IR files that use the file extension
"MCE." Once learned, these MCE files can
be saved as a separate PC file for use with
other CAV-M1000ES main units. Sony will
also post MCE files on our CAV-M1000ES
support website for easy downloading and
exchange.
a. To load common source infrared
remote commands from a saved PC file,
click the Load IR From File button.
b. To save the current IR commands to a
PC file, click the Save IR To File button
and supply a name for the file you wish
to save.
c. To clear input source infrared
commands from the current
configuration, click the Clear IR File
button.
$
Repeat the above steps for every common
source that needs to be configured by going
through the remaining Common tabs. You can
configure up to 10 common sources.

-
"Macros" are automated strings of multi-step
infrared remote commands. For each source, the
RMR-K100 in-wall keypads can display a "second
page" of up to eight macros, with a maximum of
nine steps each. This feature can simplify many
every-day operations:
• Cable/Satellite TV favorite channels
• AM/FM Tuner preset stations
• XM Satellite Radio preset stations
• DVD or CD direct access to discs
• Preset playlists from a music server
If your system includes Second Page Macros, the
CAV-M1000ES Setup Software enables you to set
up these quickly and easily.
!
From the main screen, click on the Input
Source Selection tab on the top.
"
Select the Source sub-tab for the any source for
which you want to provide Second Page
Macros. (In this example, we've selected Source
4, SAT.)
#
Select the check-off box for Enable 2nd Page
Macros.
$
You can customize the IR code duration and
the step interval between IR codes, in
increments of 25 milliseconds (ms). The default
IR duration is 4 x 25 ms (which equals 100 ms
or 1/10 second). The default step interval is 10
x 25 ms (which equals 250 ms or 1/4 second).
To customize these times, type the desired
numbers into the boxes.
%
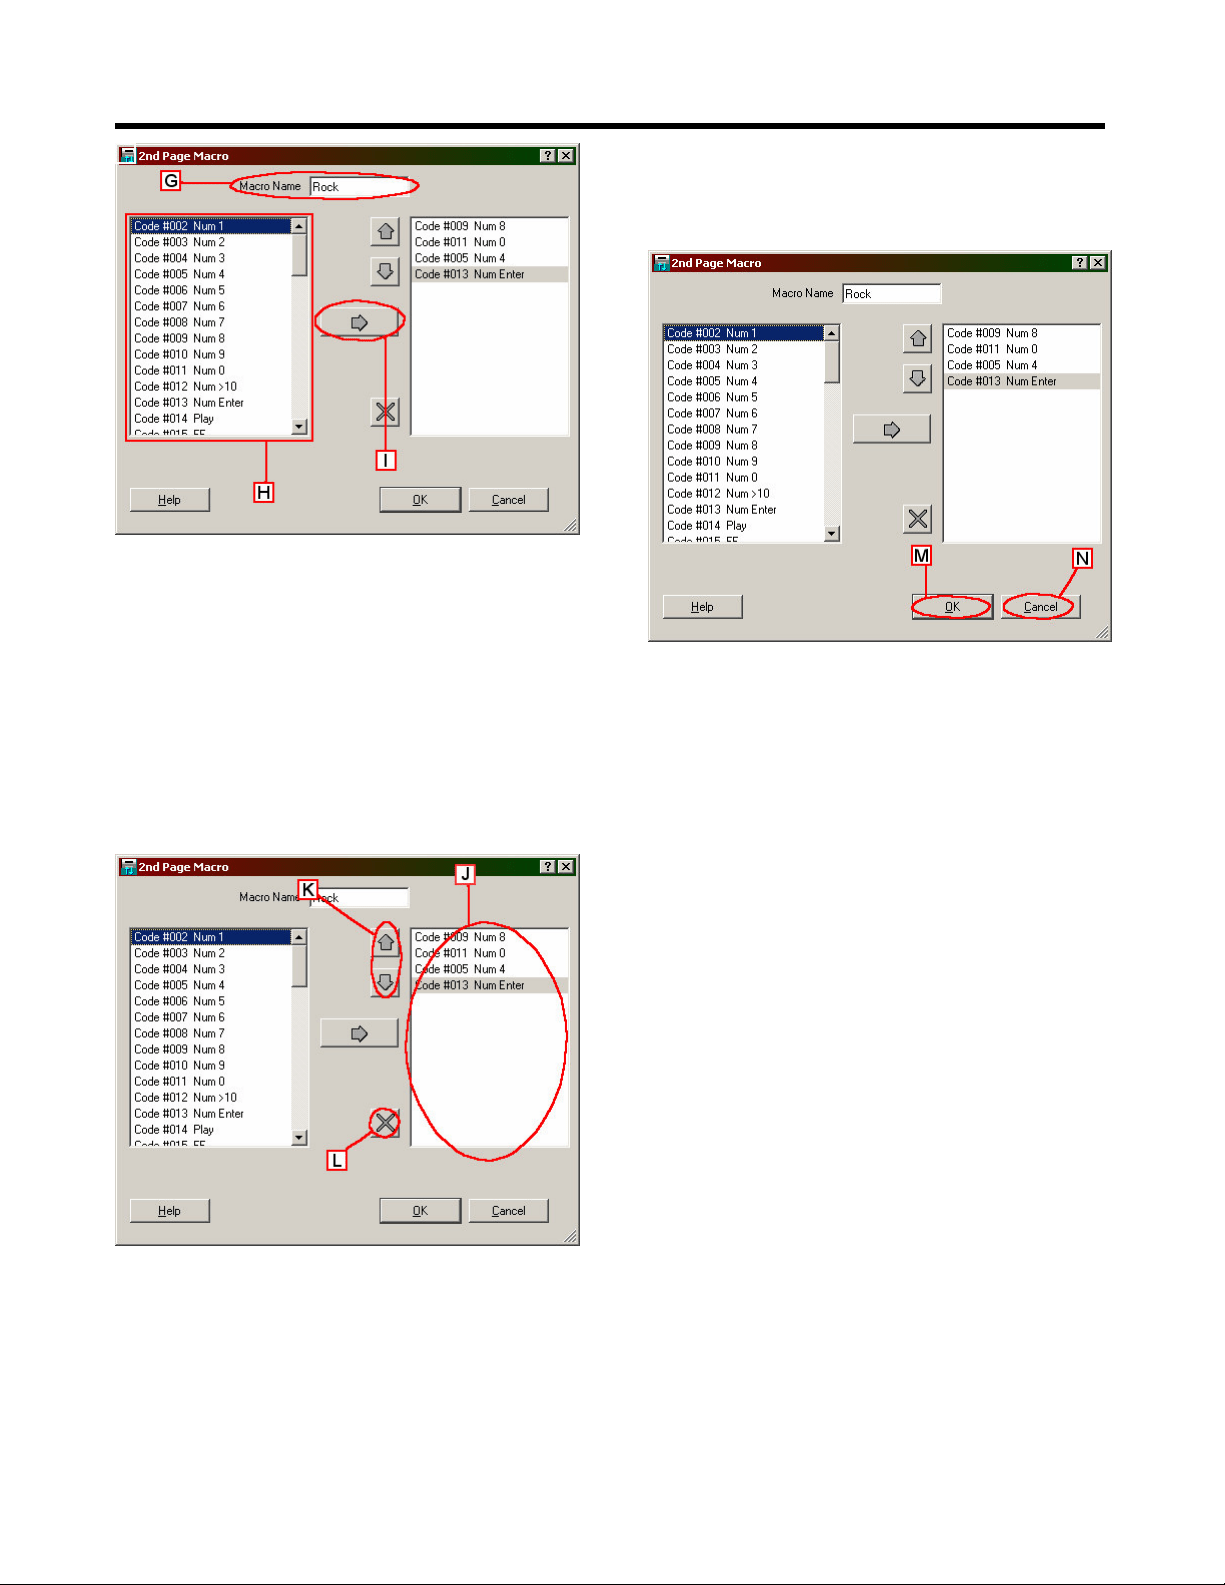
Each Second Page offers a maximum of eight
macros. Name your macros by typing in names
in these text boxes. Names can be up to seven
characters long. These names will appear in the
LCDs of the RMR-K100 keypads.
To program each macro, start by clicking the
corresponding button. For example, to
program the ROCK macro, click the Macro 1
button.
(".*
/0
1
&
Clicking a Macro button takes you to the macro
programming page. You can see your selected
macro name at the top of the screen.
'
Build the macro by selecting infrared remote
control codes and adding them to your macro
list. Start by finding the desired infrared
remote control code in the scroll box on the left.
Then select the code by clicking on it.
To add the selected code to your macro, click
the Right Arrow button. The code will then
appear on the macro list on the right.
2
The box on the right shows your macro list,
with your selected infrared remote control
codes in your selected sequence.
3
To move a code up or down in the macro list,
first click on the desired code and click the
Up/Down arrows to move the code.
4
To delete a code from the macro list, first click
on the code you wish to delete and click the X
button.
*
When you've finished programming your
macro list, click the OK button.
5
To cancel the macro list click the CANCEL
button.
To program other macros for the currently
selected source component, repeat steps F
through N.
.
To program macros for other source
components, repeat steps B through N.
6
You can configure the CAV-M1000ES to control
compatible equipment, such as Lutron lighting
systems, via the Aux RS232 port. The CAV-
M1000ES can issue up to 30 command strings of up
to 30 characters, each. Characters can be either
ASCII or hex. In order to denote hex bytes in the
text entry window, you must precede the byte with
a “0x”. For example, “0x10 0x22 0x44 0x77” would
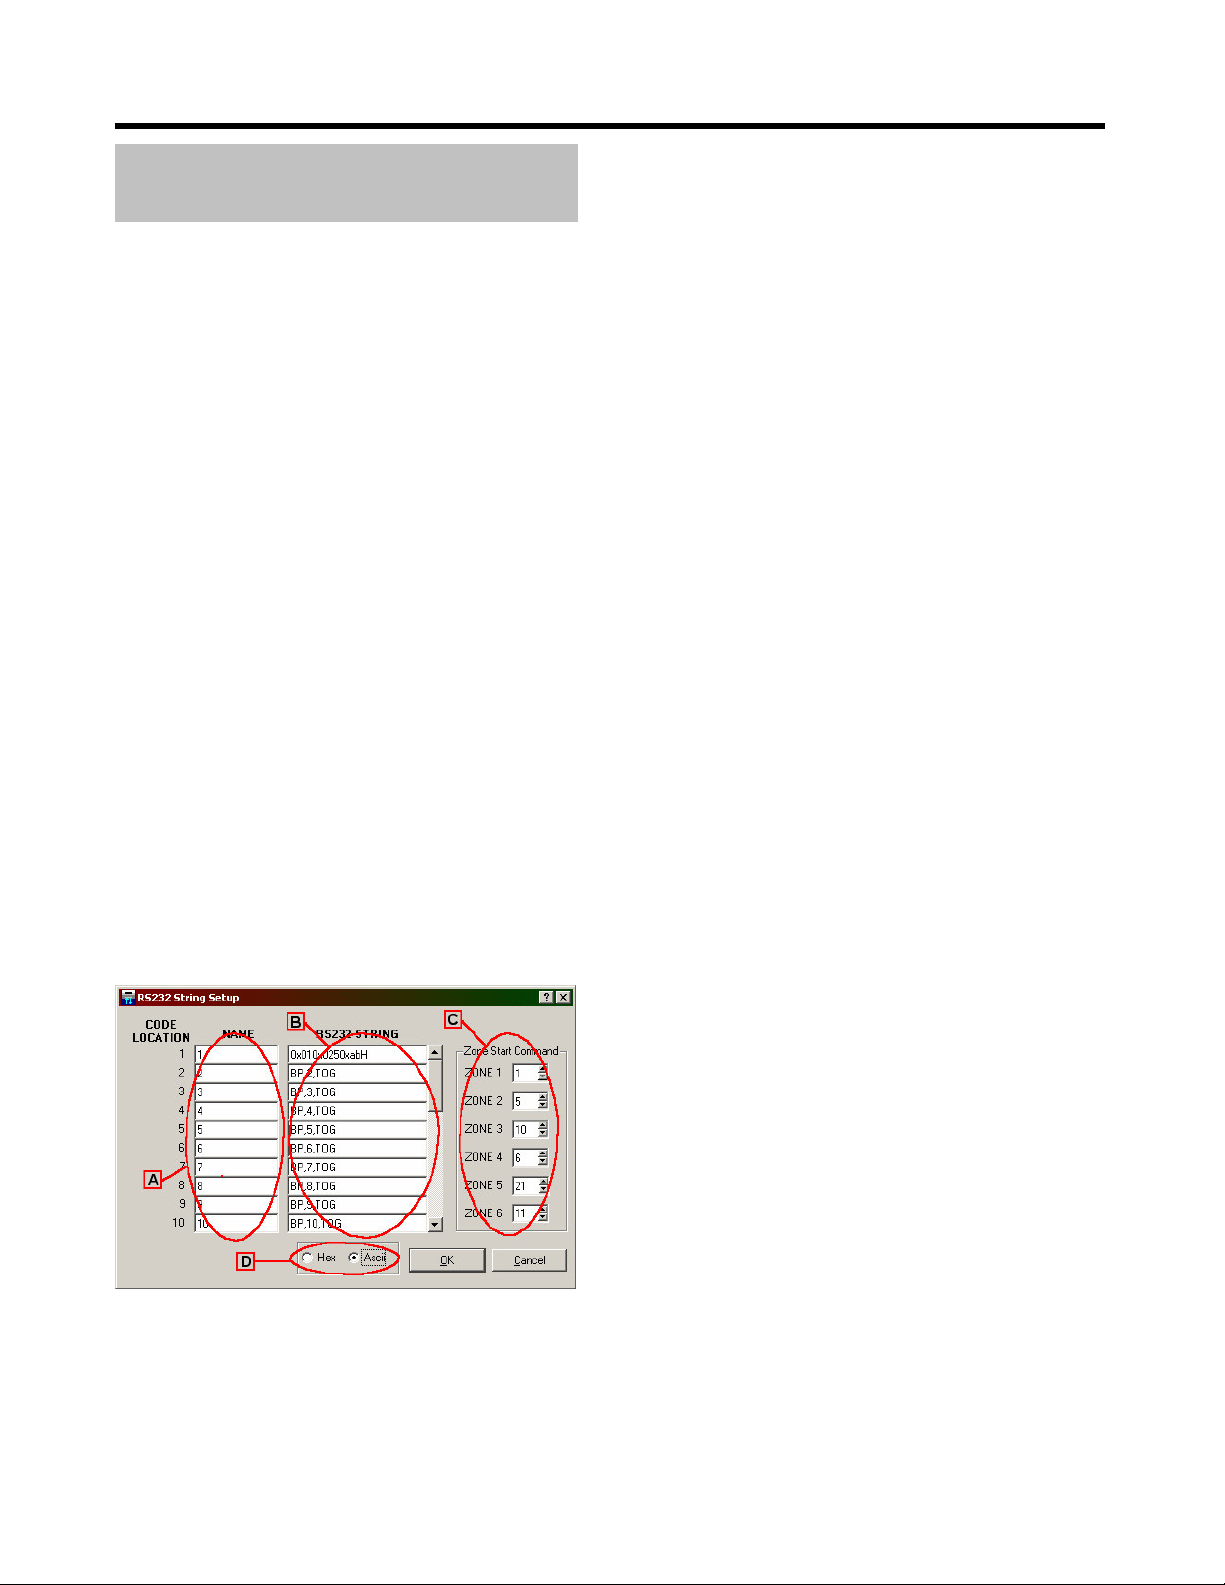
send out four bytes: 10 22 44 77.
The controlled RS232 device can be connected as
either a Source Device or a Common Device.
• For the RM-TP100 RF remote to control the
device, it must be installed as a Common
Device.
• For the zone RMR-K100 keypads to operate the
device, it must be installed as a Source Device.
!
Open the RS232 String Setup Window:
• Select the Input Source Selection or Common
Source Selection tab, as appropriate.
• Then select the Source or Common sub-tab
that corresponds to the device connected to the
AUX RS232 port.
• Click on the RS232 String Setup button over
the manufacturer drop list.
"
Use the NAME text boxes to enter names up to
15 characters long for commands when the
RS232 equipment is connected as a Source
Device. These names will appear RMR-K100
keypads.
#
Use the RS232 STRING text boxes to enter the
actual RS232 string to be sent out. RS232
strings for Lutron lighting systems are pre-
loaded into the configuration. If you need to
control other equipment, simply type in the
new text strings. Each string can have a
maximum of 30 hex or ASCII characters. The
system supports a maximum of 30 strings. Use
the scroll bar to the right of the RS232 STRING
text boxes to scroll to the additional strings.
$
Use the Zone Start Command box to determine
the commands that appear first in the RMR-
K100 zone keypad. For example, setting the
Zone 1 start command to 1 means that the
Zone 1 keypad display will initially show
commands 1, 2, 3, and 4, with the ability to
scroll to the remaining commands. As another
example, setting the Zone 5 start command to
10 means that the Zone 5 keypad display will
initially show commands 10,11, 12, and 13, with
the ability to scroll to the remaining commands.
%
The Hex and ASCII buttons change the way the
data is displayed in the “RS232 String” text
boxes. These buttons do not change the way
commands are sent via RS232. After reading in
the contents of the CAV-M1000ES, the hex data
that is out of ASCII range will not be displayed.
To see the actual hex data, you must click the
Hex button.
+(# $
/0
7
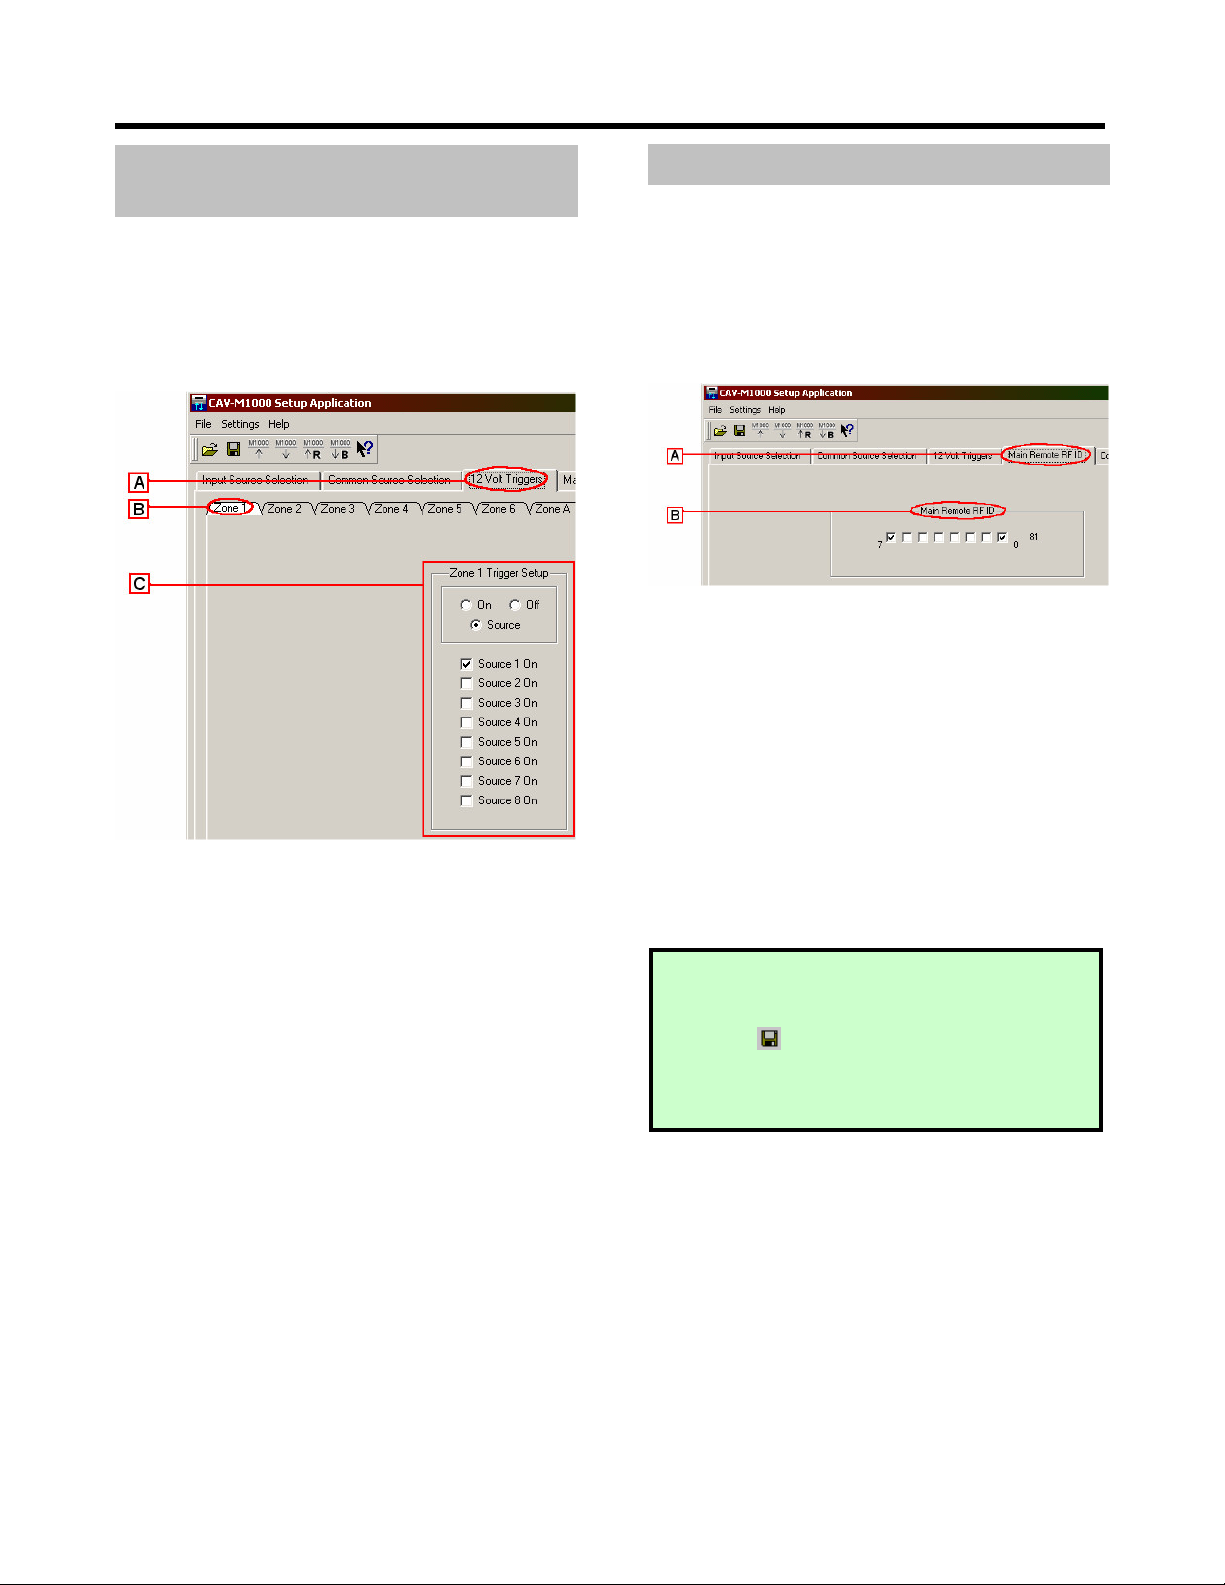
The CAV-M1000ES can trigger a 12V signal for each
of the 6 different zones. The triggers can activate
power (such as turning on the projector) or events
(such as rolling down the projection screen)
whenever a specific zone or source is activated.
To configure the triggers:
!
Click on the 12 Volt Triggers tab on the top.
"
Select the Zone 1 sub-tab.
#
Configure the trigger by selecting the option:
•
On: The trigger will always stay on as long
as the zone is activated.
•
Off: The trigger will always remain off
regardless of zone activation status.
•
Source: The trigger will turn on if the
current zone is activated and at least one of
the selected sources is on. For instance, if
Source 1 is checked off (as shown in the
example above), then the trigger will go on
only if Zone 1 is activated and if Source 1 is
on.
$
Repeat the steps above to specify additional
triggers for different zones.
The CAV-M1000ES Main Unit uses an RF ID to
communicate with a specific RM-TP100 remote
control. You can set up a unique RF ID for a given
remote so that the RF communication occurs only
between the remote and the CAV-M1000ES with
matching RF ID.
To modify the RF ID of the CAV-M1000ES main
unit, do the following:
!
Click on the Main Remote RF ID tab from the
top.
"
The RF ID is an 8-bit sequence labeled from 0 to
7 (right to left). Turn on or off parts of the RF
ID key by clicking on the boxes.
To modify the RF ID on the RM-TP100 remote
control, see the documentation for the RM-TP100
RF remote.
,(# 8
/0
NOTE:
Before you continue with the data
transfer, we recommend that you save your
configuration data. Do this by clicking on the
save icon at the top section of the screen.
If the data transfer crashes for any reason, you
will be able to retrieve your configuration
information from the saved file later on.
-
(
# *)
$
After completing Steps 1 through 6, your
configuration is complete. You are now ready to
write the setup information to the CAV-M1000ES.
First, you need to prepare the CAV-M1000ES
hardware to connect with your PC.
!
Snap open the front sub-panel of the CAV-
M1000ES and connect an RS232 null cable from
your PC to the front panel RS232 terminal.
"
Switch on the CAV-M1000ES power.
#
If you have not configured the baud rate to
57600, do so now.
a. Press the Mode button until the display
says <SETUP>, and press the Enter button.
b. The display will now read <WHICH
MENU?>. Press the down arrow button
until it says <BAUD RATE SET>, and press
Enter.
c. The display will now read <WHICH
PORT?>. Press the down arrow button
until the display reads <FRONT RS232C>,
and press Enter.
d. Use the up/down buttons to make sure that
the speed is set to <57600 bps> and press
Enter.
$
Next, prepare the CAV-M1000ES for connecting
to the PC.
a. Press the Mode button until the display
reads <SETUP> and press Enter.
b. The display will now shows <WHICH
MENU?>. Press the down arrow button
until it says <PC SETUP> and press Enter.
c. The screen should now read <READY!>.
%
Go to the setup software and click on the
Communication Settings tab on the top right
side.
Select the COM port on your PC that the CAV-
M1000ES is connected to. Note that unavailable
COM ports will be grayed out. If the CAV-
M1000ES does not display <READY!> or if the
unit is not properly connected to the PC, then a
“CAV-M1000ES not connected” message will be
displayed on the bottom left portion of the
screen.
&
Click on the Write Settings icon to transfer
the configuration you have created into the
CAV-M1000ES main unit.
'
Wait just a few seconds while the transfer takes
place, and press the CAV-M1000ES Enter
button when the M1000ES display instructs you
to do so.
WARNING
S
:
• Writing data into the CAV-M1000ES with the
incorrect baud rate can permanently
damage the unit and make it unusable!
• Writing data into the CAV-M1000ES while
having the Program button next to the front
serial port pressed during setup data
transfer can permanently damage the unit
and make it unusable!
NOTE
:
If you haven't done so already, save
your configuration data. Do this by clicking on
the save icon at the top section of the
screen. If the data transfer crashes for any
reason, you will be able to retrieve your
configuration information from the saved file
later on.
1(9$*%
:#
The setup software allows you to save your current
configurations on the PC or load previous
configurations from a PC file to the CAV-M1000ES.
Configuration files can be saved or retrieved
through the following:
• To save a configuration file, click on the file
save icon and specify the file name you want
to save.
• To open a configuration file, click on the file
open icon and specify the file name you
want to open.
TROUBLESHOOTING
THE
CONNECTION
:
If you are unable to connect, check for the
following sources of error.
• CAV-M1000ES is not set to <Ready>.
• The baud rate on the CAV-M1000ES is not
set to 57600 bps.
• Incorrect serial communications port is
selected in the PC setup application.
• Null modem cable is not used when
connecting to the PC.
• Latest firmware is not being used.
*) ";<
Steps 1 through 7 of this manual describe how to
create and write "configuration files" to the CAV-
M1000ES main unit. These files have the file
extension "MSS," which stands for Memory Setup
Save. The files contain the Input Source, Common
Source, 12V Trigger, 2nd Page Macros, RS232
Command Strings and Main Remote RF ID
information that you establish using the software.
However, additional information resides in the
CAV-M1000ES, including the learned IR codes and
individual RMR-K100 keypad settings. You can
save the entire CAV-M1000ES memory in files with
the file extension "MBU," which stands for Memory
Backup.
Use MSS files when you don't want to disturb
learned remote control codes that reside on the
CAV-M1000ES. When you write MSS files to the
M1000ES, only the learned remote control codes
that you've specifically changed during your
configuration session will be transferred.
Use MBU files when you want to back up and/or
restore the entire memory of a CAV-M1000ES,
including learned remote control codes. The MBU
files are particularly useful for creating a standard
setup that you can replicate in dozens of CAV-
M1000ES main units.
. ) *) ";
!
Snap open the front sub-panel of the CAV-
M1000ES and connect an RS232 null cable from
your PC to the front panel RS232 terminal.
"
Switch on the CAV-M1000ES power.
#
If you have not configured the baud rate to
57600, do so now.
a. Press the Mode button until the display
says <SETUP>, and press the Enter button.
b. The display will now read <WHICH
MENU?>. Press the down arrow button
until it says <BAUD RATE SET>, and press
Enter.
c. The display will now read <WHICH
PORT?>. Press the down arrow button
until the display reads <FRONT RS232C>,
and press Enter.
d. Use the up/down buttons to make sure that
the speed is set to <57600 bps> and press
Enter.
$
Next, prepare the CAV-M1000ES for connecting
to the PC.
a. Press the Mode button until the display
reads <SETUP> and press Enter.
b. The display will now shows <WHICH
MENU?>. Press the down arrow button
until it says <PC SETUP> and press Enter.
c. The screen should now read <READY!>.
WARNING
S
:
• Writing data into the CAV-M1000ES with the
incorrect baud rate can permanently
damage the unit and make it unusable!
• Writing data into the CAV-M1000ES while
having the Program button next to the front
serial port pressed during setup data
transfer can permanently damage the unit
and make it unusable!
%
Go to the setup software and click on the
Communication Settings tab on the top right
side.
Select the COM port on your PC that the CAV-
M1000ES is connected to. Note that unavailable
COM ports will be grayed out. If the CAV-
M1000ES does not display <READY!> or if the
unit is not properly connected to the PC, then a
“CAV-M1000ES not connected” message will be
displayed on the bottom left portion of the
screen.
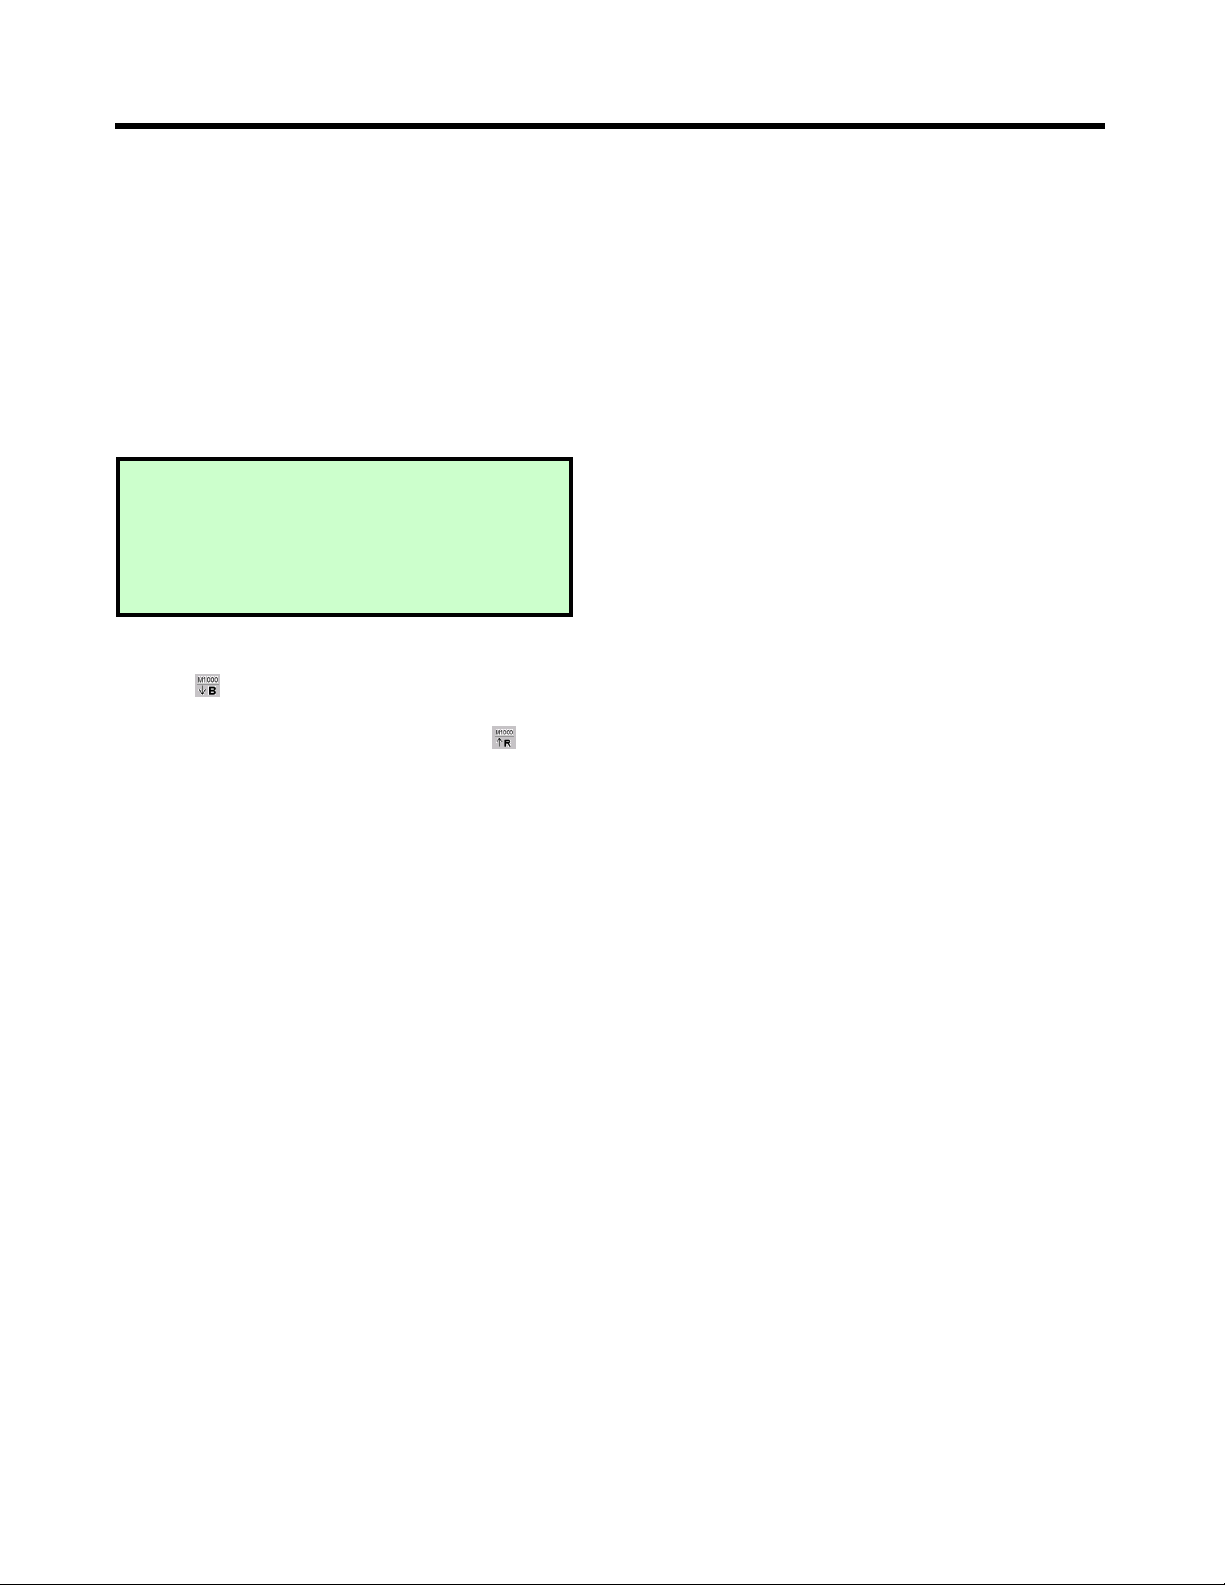
&
To back up the memory, click on the Backup
icon on the top icon menu, and specify the
file you want to back up the data to. To restore
the memory, click on the Restore icon and
specify the file you want to restore.
'
Wait for a few moments while the data transfer
takes place, and you are done!
WARNING:
Memory Restore will replace the entire
contents of the CAV-M1000ES memory,
including any "learned" infrared remote
commands.
+
##) =#!8
*%9
=>"
) >
!
Snap open the front sub-panel of the CAV-
M1000ES and connect an RS232 null cable from
your PC to the front panel RS232 terminal.
"
Switch on the CAV-M1000ES power.
#
If you have not configured the baud rate to
57600, do so now.
a. Press the Mode button until the display
says <SETUP>, and press the Enter button.
b. The display will now read <WHICH
MENU?>. Press the down arrow button
until it says <BAUD RATE SET>, and press
Enter.
c. The display will now read <WHICH
PORT?>. Press the down arrow button
until the display reads <FRONT RS232C>,
and press Enter
d. Use the up/down buttons to make sure that
the speed is set to <57600 bps> and press
Enter.
$
Next, prepare the CAV-M1000ES for connecting
to the PC.
a. Press the Mode button until the display
reads <SETUP> and press Enter.
b. The display will now shows <WHICH
MENU?>. Press the down arrow button
until it says <PC SETUP> and press Enter.
c. The screen should now read <READY!>.
%
Go to the setup software and click on the
Communication Settings tab on the top right
side.
Select the COM port on your PC that the CAV-
M1000ES is connected to. Note that unavailable
COM ports will be grayed out. If the CAV-
M1000ES does not display <READY!> or if the
unit is not properly connected to the PC, then a
“CAV-M1000ES not connected” message will be
displayed on the bottom left portion of the
screen.
&
Click the Restore icon and copy the "base
system" MBU file from your PC to the CAV-
M1000ES.
'
Use the Read Settings icon to copy the
MSS file from the CAV-M1000ES to modify it
on the PC.
Edit the MSS file using the CAV-M1000ES
Setup Software
2
Following steps A though F, use the Write
Settings icon to copy the revised MSS file
back to the CAV-M1000ES.
3
Program any additional IR commands that you
may need into the CAV-M1000ES main unit,
using the front panel.
4
Follow steps A through F, use the Backup icon
and make an archival copy on your PC of
the entire CAV-M1000 MBU file, including the
remote control codes you just programmed in
Step K.
WARNING
S
:
• Writing data into the CAV-M1000ES with the
incorrect baud rate can permanently
damage the unit and make it unusable!
• Writing data into the CAV-M1000ES while
having the Program button next to the front
serial port pressed during setup data
transfer can permanently damage the unit
and make it unusable!

,
:'
Additional help is available by using the help tool
within the software. Click on the help icon from
the icon menu bar, and then click on any item
within the program you need assistance with. A
help box will appear with information on the item
you have clicked on.
If you need any further assistance please contact:
Louis Iacovelli
Software Applications Engineer
Sony Electronics Inc.
Email: louis.iacovelli@am.sony.com
Tel: 201-476-8839
http://www.cavm1000.com

-
%8:4!)
YOU SHOULD CAREFULLY READ THE
FOLLOWING AGREEMENT BEFORE USING
THIS SOFTWARE. USING THIS SOFTWARE
INDICATES YOUR ACCEPTANCE OF THIS
AGREEMENT.
IMPORTANT - READ CAREFULLY:
This End-User License Agreement ("EULA") is a
legal agreement between you and Sony Electronics
Inc. ("SONY"), the licensor of your CAV-M1000ES
setup software and related materials ("SONY
SOFTWARE"). This EULA covers the SONY
SOFTWARE. The SONY SOFTWARE includes
computer software, whether stored on any media
or downloaded from the designated site of SONY
for SONY SOFTWARE users ("SONY Site"), the
associated media and any "on-line" or electronic
documentation and all updates and upgrades
thereto.
You may use the SONY SOFTWARE only with a
single computer. By installing, copying or
otherwise using the SONY SOFTWARE, you agree
to be bound by the terms of this EULA. If you do
not agree to the terms of this EULA, SONY is
unwilling to license the SONY SOFTWARE to you.
In such event, you may not use or copy the SONY
SOFTWARE.
SONY SOFTWARE LICENSE
The SONY SOFTWARE is protected by applicable
copyright laws and international copyright treaties,
as well as other intellectual property laws and
treaties. The SONY SOFTWARE is licensed, not
sold.
GRANT OF LICENSE
This License grants you the following right:
Software. You may install and use one copy of the
SONY SOFTWARE on a single computer.
Storage/Network Use. You may not use the SONY
SOFTWARE over an internal network or distribute
the SONY SOFTWARE to other computers over an
internal network.
DESCRIPTION OF REQUIREMENTS,
RESTRICTIONS, RIGHTS AND LIMITATIONS
Limitation on Reverse Engineering, Decompilation and
Disassembly. You may not modify, reverse engineer,
decompile, or disassemble the SONY SOFTWARE
in whole or in part.
Separation of Components. The SONY SOFTWARE is
licensed as single product. Its component parts may
not be separated for use on more than one
computer.
Single COMPUTER. The SONY SOFTWARE may
only be used with a single COMPUTER.
Rental. You may not rent or lease the SONY
SOFTWARE.
Software Transfer. You may permanently transfer all
of your rights under this EULA only as part of a
sale or transfer of the SONY SOFTWARE, provided
that you retain no copies, transfer all of the SONY
SOFTWARE (including all copies, component parts,
the media and all versions and any upgrades of the
SONY SOFTWARE and this EULA), and the
recipient agrees to the terms of this EULA .
Termination. Without prejudice to any other rights,
SONY may terminate this EULA if you fail to
comply with the terms and conditions of this EULA.
In such event, you must destroy all copies of the
SONY SOFTWARE and all of its component parts.
Confidentiality. You agree to keep information
contained in the SONY SOFTWARE which is not
publicly known confidential to yourself, and not to
disclose such information to others without SONY's
prior written approval.
COPYRIGHT
All title and copyright in and to the SONY
SOFTWARE (including but not limited to any
images, photographs, animation, video, audio,
music, text and "applets", incorporated into the
SONY SOFTWARE), and any copies of the SONY
SOFTWARE, are owned by SONY or its suppliers
or licensors. All rights not specifically granted
under this EULA are reserved by SONY.
EXCLUSION OF WARRANTY ON SONY
SOFTWARE
You expressly acknowledge and agree that use of
the SONY SOFTWARE is at your sole risk. The
SONY SOFTWARE is provided "AS IS" and without
warranty of any kind and SONY and SONY's
licensors (hereinafter, SONY and SONY's licensor's

1
shall be collectively referred to as "SONY")
EXPRESSLY DISCLAIM ALL WARRANTIES,
EXPRESS OR IMPLIED, INCLUDING, BUT NOT
LIMITED TO, THE IMPLIED WARRANTIES OF
MERCHANTABILITY AND FITNESS FOR A
PARTICULAR PURPOSE. SONY DOES NOT
WARRANT THAT THE FUNCTIONS
CONTAINED IN THE SONY SOFTWARE WILL
MEET YOUR REQUIREMENTS, OR THAT THE
OPERATION OF THE SONY SOFTWARE WILL BE
CORRECTED. FURTHERMORE, SONY DOES
NOT WARRANT OR MAKE ANY
REPRESENTATIONS REGARDING THE USE OR
THE RESULTS OF THE USE OF THE SONY
SOFTWARE IN TERMS OF ITS CORRECTNESS,
ACCURACY, RELIABILITY, OR OTHERWISE. NO
ORAL OR WRITTEN INFORMATION OR
ADVICE GIVEN BY SONY OR A SONY
AUTHORIZED REPRESENTATIVE SHALL
CREATE A WARRANTY OR IN ANY WAY
INCREASE THE SCOPE OF THIS WARRANTY.
SHOULD THE SONY SOFTWARE PROVE
DEFECTIVE, YOU (AND NOT SONY OR A SONY
AUTHORIZED REPRESENTATIVE) ASSUME THE
ENTIRE COST OF ALL NECESSARY SERVICING,
REPAIR OR CORRECTION. SOME
JURISDICTIONS DO NOT ALLOW THE
EXCLUSION OF IMPLIED WARRANTIES, SO
THE ABOVE EXCLUSION MAY NOT APPLY TO
YOU.
LIMITATION OF LIABILITY
HEREINAFTER, SONY AND SONY'S LICENSORS
SHALL BE COLLECTIVELY REFERRED TO AS
"SONY", SONY SHALL NOT BE LIABLE FOR ANY
INCIDENTAL OR CONSEQUENTIAL DAMAGES
FOR BREACH OF ANY EXPRESS OR IMPLIED
WARRANTY, BREACH OF CONTRACT,
NEGLIGENCE, STRICT LIABILITY OR ANY
OTHER LEGAL THEORY RELATED TO THIS
PRODUCT. SUCH DAMAGES INCLUDE, BUT
ARE NOT LIMITED TO, LOSS OF PROFITS, LOSS
OF REVENUE, LOSS OF DATA, LOSS OF USE OF
THE PRODUCT OR ANY ASSOCIATED
EQUIPMENT, DOWN TIME AND USER'S TIME,
EVEN IF SONY HAS BEEN ADVISED OF THE
POSSIBILITY OF SUCH DAMAGES. IN ANY
CASE, SONY'S ENTIRE LIABILITY UNDER ANY
PROVISION OF THIS EULA SHALL BE LIMITED
TO ANY AMOUNT ACTUALLY PAID
ALLOCABLE TO THE SONY SOFTWARE. SOME
JURISDICTIONS DO NOT ALLOW THE
EXCLUSION OR LIMITATION OF
CONSEQUENTIAL OR INCIDENTAL DAMAGES,
SO THE ABOVE EXCLUSION OR LIMITATION
MAY NOT APPLY TO YOU.
SEVERABILITY
If any part of this EULA is held invalid or
unenforceable, the other parts will remain valid to
the extent as permissible by laws.
GOVERNING LAW
This license shall be governed by and construed in
accordance with the laws of the State of New Jersey,
except its rules regarding conflicts of law.
Should you have any questions concerning this
EULA or this limited warranty, you may contact
Sony at the following e-mail address:
louis.iacovell[email protected]m
