Loading ...
Loading ...
Loading ...
13
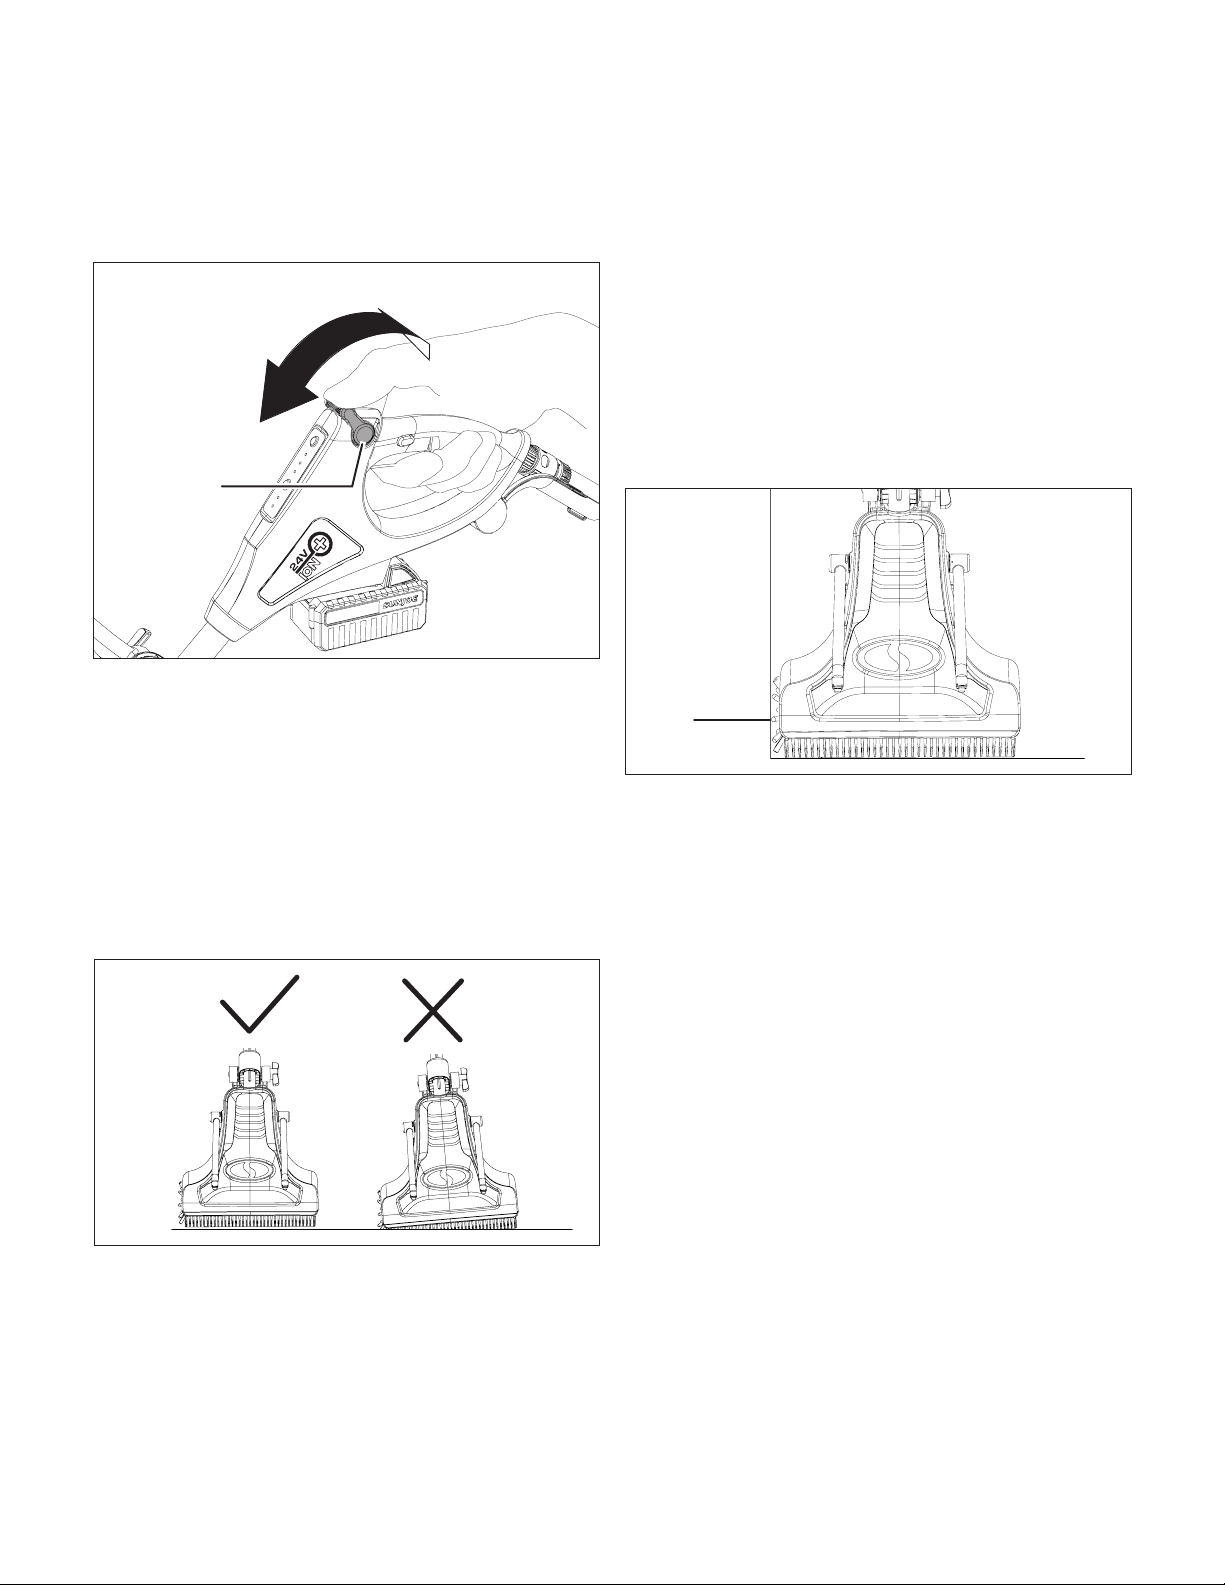
6. Open the water ow regulation valve and set the water to
a suitable ow for the task. Adjust the water ow during
operation as needed. Push the valve forward to reduce
the water ow, and pull the valve backward to increase the
water ow (Fig. 16).
Basic Cleaning Procedure
The device is intended for removal of dirt and grime from
outdoor surfaces. The device is suitable for wooden, stone or
composite material (WPC) surfaces. Do not use the device for
cleaning planted areas such as a lawn or ower bed.
1. Before cleaning, remove all the loose elements from the
surface.
2. Before starting, position the unit and make sure the
brushes are evenly placed on the surface to be cleaned
(Fig. 17).
3. Start the appliance and adjust the water ow as needed.
Guide the brushes over the surface with light pressure.
4. If you need to change brush speed or cleaning direction
during operation, make sure to close the water ow
completely by pushing the water ow regulation valve
forward before making the change.
NOTE: Once the appliance is shut o and the battery is
removed, it will return to the default setting of fast brush
speed and forward direction.
5. When cleaning delicate surfaces such as wood, it's
recommended to test the device on an inconspicuous
area. During cleaning, do not allow the appliance to
remain in one area for an extended time. Keep it moving.
NOTE: Always clean wooden surfaces in the direction of
the grain. Always clean along the oorboards or wooden
elements and down the slope.
NOTE: If the wood has previously been pre-treated, the
pre-treatment may be removed and cause an uneven
eect.
6. The rotating brush is equipped with side bristle on one
side, which is used for cleaning the bottom of walls and
steps. Walk slowly along the wall and guide the side
bristle to brush the area to be cleaned (Fig. 18).
Shutting Down
1. Push the water ow regulation valve forward to stop the
water ow. Release the trigger. Remove the battery.
2. Turn o the water source. Disconnect the garden hose
connection on the patio cleaner.
3. Before storage, drain the remaining water from the
appliance. Turn the water ow regulation valve to open
the water ow completely, stand the device upright for a
while. The remaining water will drain from the nozzles.
NOTE: An incompletely drained appliance can be
damaged by frost.
mWARNING! Do not knock the housing on the ground to
drain the remaining water.
Storage
mCAUTION! Always store your patio cleaner in a
frost-free location where the temperature will not fall below
32ºF (0ºC). FREEZE DAMAGE IS NOT COVERED BY THE
WARRANTY.
• Store the patio cleaner indoors in a dry, covered area
where it is not subject to adverse weather conditions.
• Always empty water from all hoses, attachments and unit,
before storing.
Fig. 16
Waterow
regulation
valve
Reduce
Increase
Fig. 17
Fig. 18
WALL
Side
bristle
Loading ...
Loading ...
Loading ...