Loading ...
Loading ...
Loading ...
De-Scaling Your Brewer
Mineral content in water varies from place to place. Depending on the mineral content
of the water in your area, calcium deposits or scale may build up in your Brewer. Scale
is non-toxic, but left unattended, it can hinder Brewer performance. De-scaling your
Brewer helps maintain the heating system and other internal parts of the Brewer that
come in contact with water.
The Brewer should be de-scaled every three to six months to ensure optimal
performance. It is possible for calcium deposits to build up faster, making it necessary
to de-scale more often.
The de-scale process requires the Brewer to stand for at least 4 hours. During this period, the
Brewer should not be used to brew beverages.
Prepare
Step 1 To begin, you will need:
• At least 48 oz. of undiluted white vinegar
• A large ceramic mug, at least 10 oz. (do not use a paper cup)
• A clean, empty Vue
™
pack cup
Step 2 Empty the water in the Water Reservoir.
Step 3 Disable “Auto Off” and “On/Off Time” settings (refer to pages 17 and 18).
Fill & Clean
Step 1 Pour at least 48 oz. of the vinegar into the Water Reservoir.
Step 2 Place the mug on the Drip Tray Plate. Lift the Handle and insert a clean, EMPTY
Vue
™
pack cup (refer to page 15, step 1). Lower the Handle, then press “BREW.” The
Brewer will dispense 8 oz. of hot vinegar into your mug. Dispose of the vinegar.
Step 3 Repeat the process until “Please Add Water” is indicated.
Step 4 Let the Brewer stand for at least 4 hours while still on.
Step 5 Discard the remaining vinegar from the Water Reservoir and rinse the Reservoir
thoroughly. Remove the empty Vue
™
pack from the Brewer.
Rinse
Step 1 Ensure the Water Reservoir is filled with fresh water.
Step 2 Place a large mug on the Drip Tray Plate and run a cleansing brew. Pour the
contents of the large mug into the sink.
Step 3 Repeat the cleansing brew process until “Please Add Water” is indicated.
Step 4 You may need to perform additional cleansing brew cycles (refer to page 15)
if you notice any residual taste.
SECTION 5
Caring For Your Brewer
Cleaning & Maintenance
CLEANING EXTERNAL PARTS
Cleaning of the Brewer’s external parts is recommended
one to two times per month. Never immerse the Brewer
in water or other liquids. The Housing and other external
parts may be cleaned with a soapy, damp, non-abrasive
cloth.
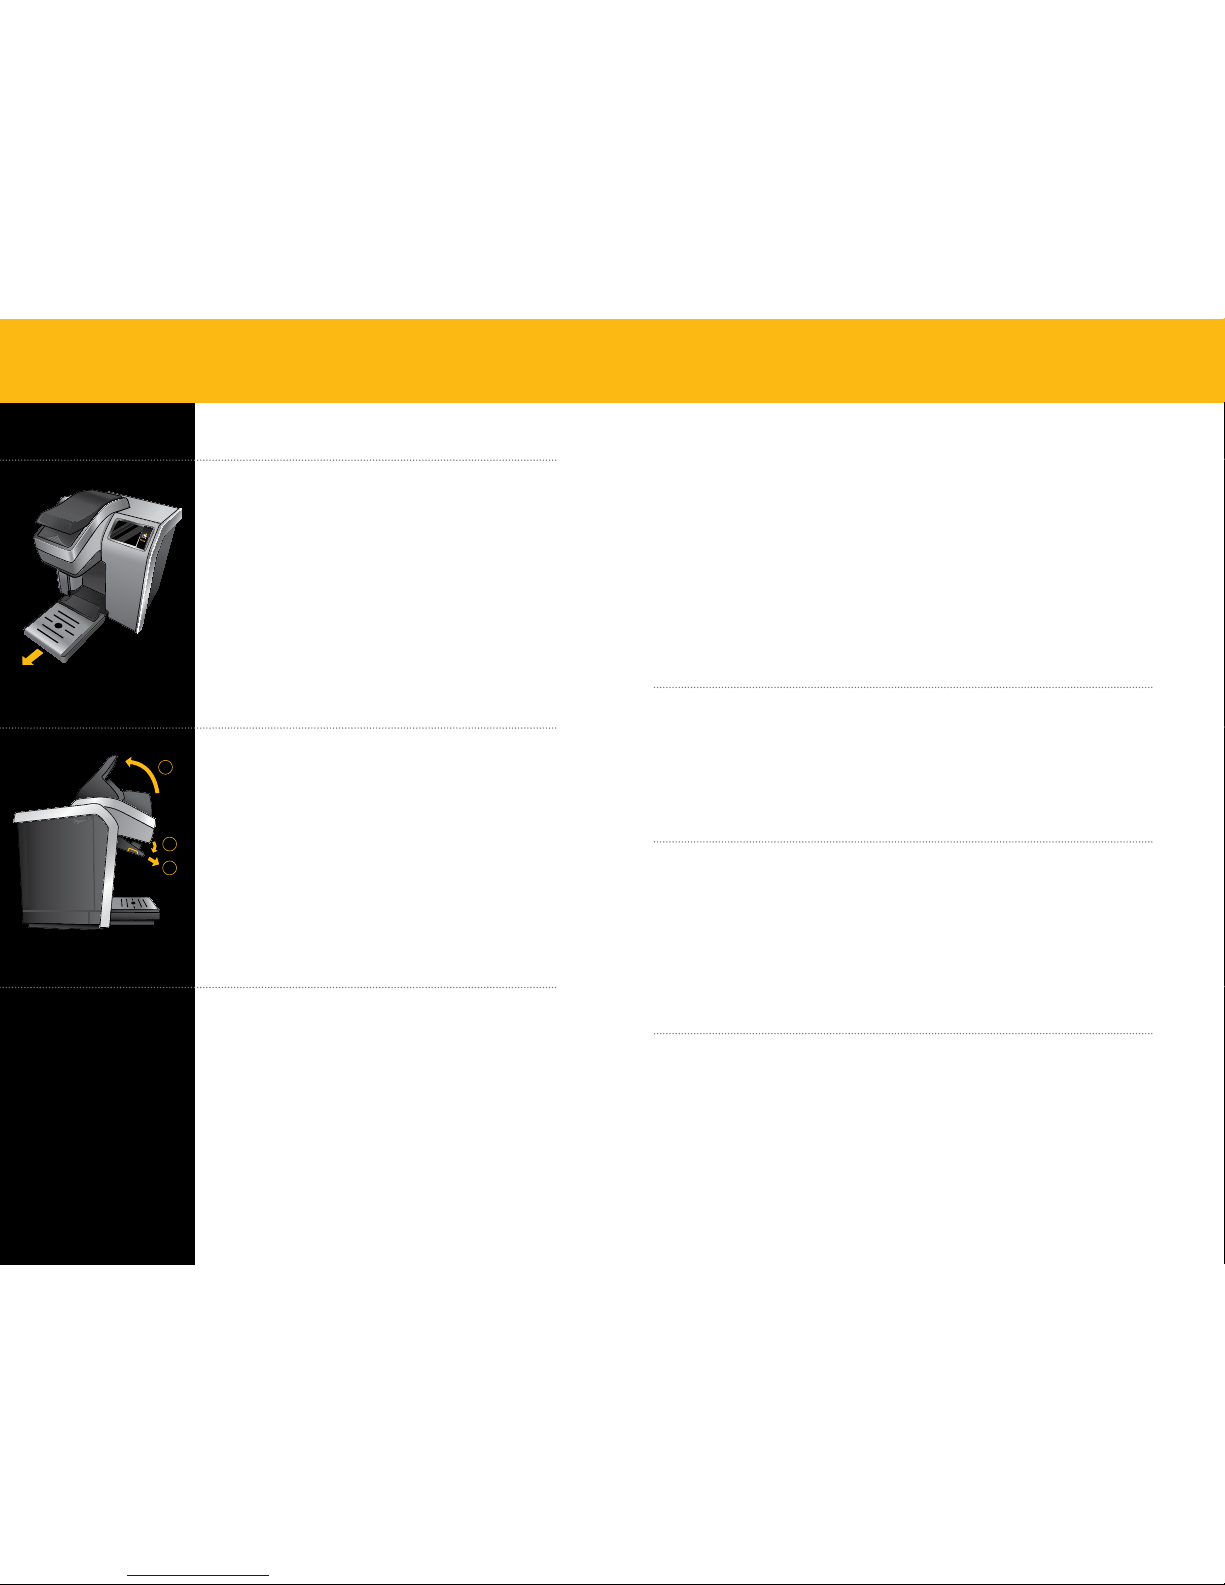
The Drip Tray can accumulate up to 13 oz. of overflow.
The Drip Tray and Drip Tray Plate should be periodically
inspected and rinsed clean. To remove the Drip Tray, simply
slide it toward you, keeping it level at all times to avoid
spilling. The Drip Tray and Drip Tray Plate should be cleaned
with a soapy, damp, non-abrasive cloth. The Drip Tray and
Drip Tray Plate should not be put in the dishwasher.
CLEANING THE BREW HEAD
Step 1 Lift the Brewer Handle.
Step 2 Grip and press the buttons on both sides of
the Brew Head and tilt it down.
Step 3 Pull the Brew Head toward you to remove.
Carefully clean the Brew Head with a soapy, damp,
non-abrasive cloth and rinse thoroughly. The Brew
Head should not be placed in the dishwasher.
Return the Brew Head by sliding it gently back into place
until you hear a click. Lower the Brewer Handle and you are
ready to brew again.
CLEANING THE WATER RESERVOIR &
WATER RESERVOIR LID
The Water Reservoir and Lid should not be put
into the dishwasher. Clean them with a damp, soapy,
non-abrasive cloth and rinse thoroughly. Do not dry
the inside of the Water Reservoir with a cloth as lint
may remain.
CAUTION: Rinse the Water Reservoir thoroughly after cleaning
to ensure that no cleaners or cleaning solutions remain in this area
as they may contaminate the water supply in the Brewer.
1
2
3
SECTION 5
Caring For Your Brewer
20 21
Downloaded from www.ManualsFile.com manuals search engine
Loading ...
Loading ...
Loading ...