Loading ...
Loading ...
Loading ...

WA R N I N G
Never attempt to light
grill if odor of gas is pres-
ent. Hood must be open
when lighting. Keep face
and body as far from
grill as possible when
lighting. Always wait at
least 5 minutes before
attempting to relight a
hot burner.
Before proceeding, make sure
you have completed the check-
list on the previous page. These
checks should be performed be-
fore each use of the grill.
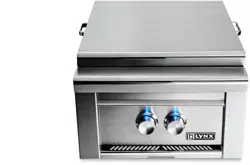
Follow these steps to light the
main brass grill burners:
1) Open hood completely. Do
not attempt to light grill with the
hood closed.
2) Check to ensure that all burner
control knobs are set to OFF.
3) Turn on main gas supply. Purge
if needed (see page 9).
4) Push in and turn burner con-
trol knob to LITE. Hold knob in for
5 seconds.
5) If burner does not light, turn
knob to OFF, wait 5 minutes to
allow gas to dissipate, and repeat
step 4 above.
PREHEATING THE GRILL
Before cooking, always preheat
the grill for best results. To pre-
heat the grill, light all main burn-
ers and set to HIGH. Close the grill
hood and allow to preheat for 10-
15 minutes, or until the tempera-
ture reaches 450°F.
After preheating, turn o all burn-
ers not required, carefully open
the hood, and adjust remaining
burners to desired cooking tem-
perature.
DO NOT LEAVE THE GRILL
UNATTENDED DURING THE
PREHEAT CYCLE OR AT ANY
TIME WHILE THE GRILL IS IN
USE. DO NOT ALLOW GRILL
TO PREHEAT FOR PRO-
LONGED PERIODS OF TIME.
OVERHEATING THE GRILL
CAN CAUSE DAMAGE TO
THE GRILL AND PERSONAL
PROPERTY.
MATCH LIGHTING
If burners will not light after sev-
eral attempts, the burners can be
match lit. If you’ve just attempt-
ed to light the burner with the
igniter, allow 5 minutes for any
accumulated gas to dissipate.
Make sure all knobs are in the
OFF position. Keep your face as
far away from the grill as possible.
With the hood open, pass the al-
ternate lighting rod with a lit pa-
per match installed to the ports
of the burner. Push and turn the
corresponding control knob of
the burner to LITE. If the burner
does not light in 4 seconds, turn
the knob o and wait 5 minutes
before attempting again (see g-
ure 14-1).
Figure 14-1
- Alternate
lighting rod.
LOW HEAT ADJUSTMENT
The valves on the grill feature
an adjustable low setting. Due
to uctuations in gas pressure,
heating value or gas conversion,
you may feel it necessary to ad-
just gas ow in the low position.
Do not adjust the infra-red rotis
or ProSear burners.
1) Light the burner.
2) Turn the control knob to the
lowest setting (all the way coun-
ter-clockwise).
3) Remove the knob.
4) While holding the valve shaft
with pliers, insert a thin at tipped
screwdriver into the shaft and
while viewing the burner, adjust
to a minimum stable ame (see
gure 14-2).
Figure 14-2
- Adjusting
brass burner low heat setting.
knob
removed
valve
stem
Lighting the Brass Burners
14
Loading ...
Loading ...
Loading ...