Loading ...
Loading ...
Loading ...
- 12 -
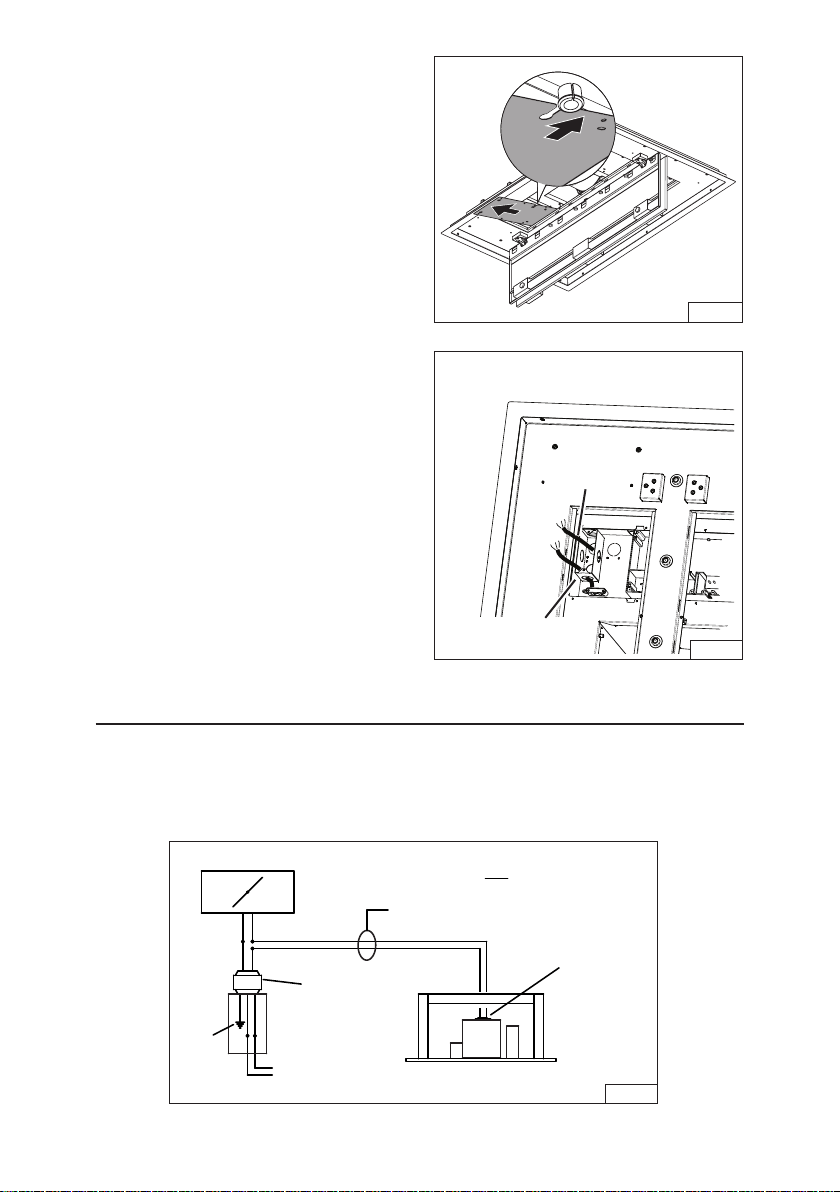
CONNECT WHITE-TO-WHITE,
BLACK-TO-BLACK, GREEN-TO-GROUND
FIG. 16
FIG. 17
120 VAC
LINE IN
BOX MARKED
“120VAC INPUT”
3. From the room interior, pull down both
closure panels. Fig. 16.
4. Remove (4) screws from the electrical
compartment access panel. Slide the
panel sideways to expose the electrical
wiring box.
5. From the electrical box marked “120 VAC
Inlet”, remove (2) screws that secure the
cover to the metal wiring box. Fig. 17.
6. Pull 120VAC electrical power cable into
the box and secure with an appropriate
cable clamp.
7. Make electrical connections inside the
box. Connect white-to-white, black-to-
black and green-to-ground.
8. Replace the wiring box cover and the
screws. Make sure wires are not pinched
between the cover and box.
9. Replace the electrical compartments ac-
cess panel and (4) screws.
MAKE-UP AIR DAMPER
The hood is compatible with Broan Make-Up Air Damper Model MD6T, Model MD8T or Model
MD10T (optional). Purchase separately.
Make the connection to the Make-Up Air Damper with low voltage wiring, as shown. See
Make-Up Air Damper instructions for additional information. (Fig. 18)
MAKE-UP AIR DAMPER
HOOD
24V
TRANSFORMER
(INCLUDED)
GRD
WIRE BOX
FOR LOW
VOLTAGE
CONNECTION
MAKE UP DAMPER CONNECTION
(switched low voltage)
20 GAUGE BELL WIRE FOR LOW
VOLTAGE CONNECTION ON
TOP OF HOOD
120 VAC
60 HZ
FIG. 18
Loading ...
Loading ...
Loading ...