Loading ...
Loading ...
Loading ...
- 11 -
INSTALL THE HOOD
CAUTION: At least two installers are
recommended because of the large size
and weight of this range hood.
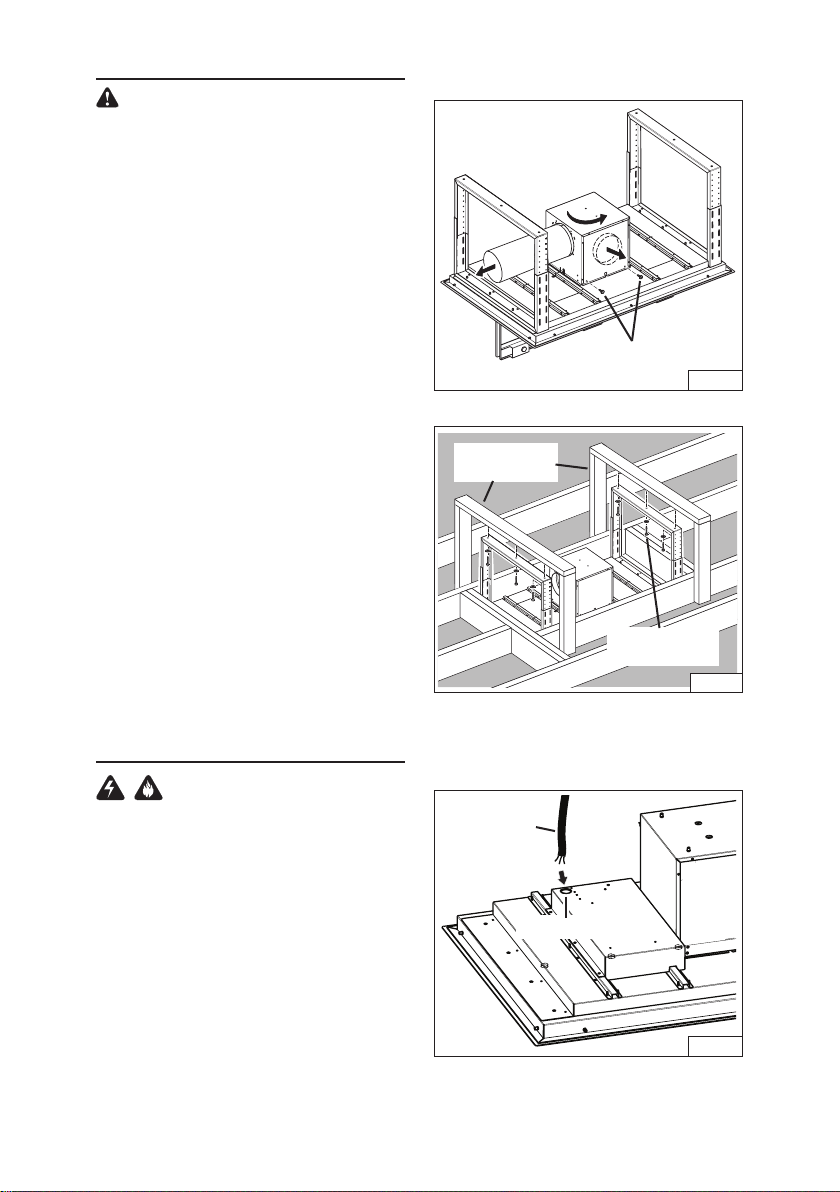
1. Hood is shipped in the horizontal duct
discharge position and is ready to be
installed.
2. To change direction of the duct without
using elbows. Fig. 13:
• Remove(2)screwsfrominsideofblower
box.
• Remove(4)screwsfromsidesofblower
box.
• Removeblower,turnblower90degrees,
reinstall (4) screws.
3. Lift range hood into the ceiling opening.
4. Secure each support frame to the wooden
hood support frame using (6) 6 x 70 mm
lag bolts and washers provided. Fig. 14.
5. Adjust height of the telescoping support
frame to ensure a tight fit between the
hood and finished ceiling.
6. At the blower discharge collar, connect
ductwork that exhausts air to the outside
discharge.
7. Duct tape all joints to ensure an air tight
seal.
FIG. 13
SCREWS (4)
FIG. 14
2 X 4 WOOD
FRAME
(6) WASHERS
& LAG BOLTS
CONNECT THE WIRING
WARNING: All electrical wiring
should be done by a qualified person (s)
in accordance with all applicable codes
and standards. This range hood must be
properly grounded.
Do not turn blower on at the service panel
until all wires have been connected.
1. Run 2-wire plus ground, 120 VAC electrical
power cable to the ¾” knockout located on
the back of the hood. Fig. 15.
2. Remove ¾” electrical knockout from the
back of the hood.
FIG. 15
2-WIRE PLUS
GROUND
120 VAC
LINE IN
KNOCKOUT
Loading ...
Loading ...
Loading ...