Loading ...
NOTE: Refer to the Installation Instructions that came
with the washer or dryer when uninstalling and rein-
stalling the washer or dryer.
WARNING
To reduce the risk of personal injury, two people are
required to lift the unit onto the pedestal.
W526
Homestyle Washer Installation
(PDR108W, PDR108B, PDR108U,
PDR108G, PDR108D Pedestal)
1. Disconnect electrical power to unit.
2. Turn off water supply and disconnect fill hoses.
3. Disconnect drain hose from drain receptacle.
4. Install the shipping brace before tipping washer to remove
leveling legs.
5. Remove existing leveling legs from bottom of unit. When tak-
ing off legs, tip unit back to get access to legs. This will re-
quire assistance.
IMPORTANT: DO NOT tip the washer onto its side.
Only tip toward front or back.
NOTE: Save leveling legs for future use.
6. Install leveling legs included with pedestal onto bottom of
pedestal.
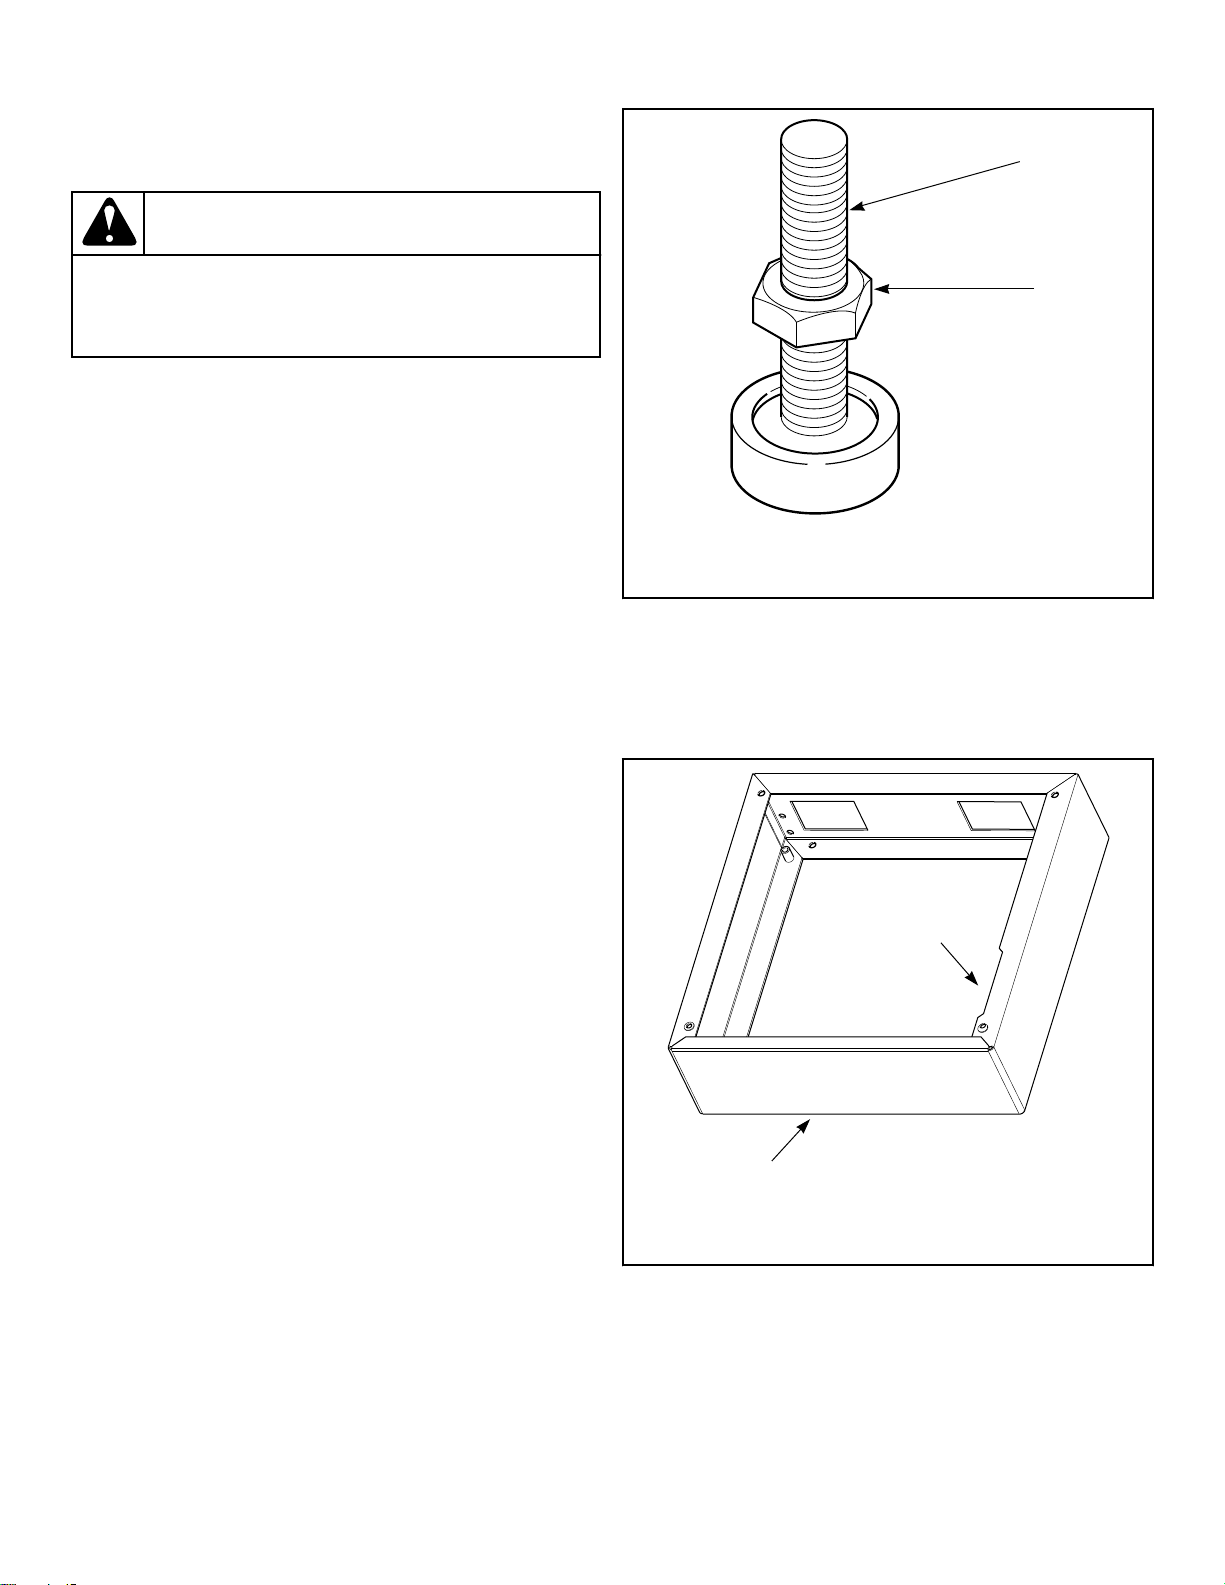
a. Place rubber feet on all four leveling legs.
b. Thread each nut down to within one inch of the bottom of
each leveling leg. Leave room for a wrench to fit for ad-
justing leg and tightening nut. Refer to Figure 1 .
FLW33K_SVG
1
2
1. Leveling Leg
2. Nut
Figure 1
c. Screw leveling legs with nuts into bottom flange of the
elevated base pedestal.
7. Place pedestal into desired final location. Position pedestal so
the notch is in the top right corner. Refer to Figure 2 .
FLW127K_SVG
2
1
1. Notch in Top Right Corner
2. Front of Pedestal
Figure 2
8. Level pedestal from front to back and from side to side by
screwing leveling legs into or out of pedestal. Refer to Figure
3 . Turn leg clockwise to lift or counterclockwise to lower.
©
Copyright, Alliance Laundry Systems LLC -
DO NOT COPY or TRANSMIT
2 Form No. 7-04-47ENR14
Loading ...
Loading ...
Loading ...