Loading ...
Loading ...
Loading ...
39
IMPORTANT! READ AND FOLLOW ALL INSTALLATION AND MAINTENANCE INSTRUCTIONS, INCLUDING
CLEANING THE UNIT AS SPECIFIED, AND REPLACING GASKETS ANNUALLY, AND PARTS AS NEEDED.
ENGLAND’S STOVE WORKS IS NOT RESPONSIBLE FOR ANY DAMAGE OR INJURY INCURRED DUE TO NEGLECT, OR
DUE TO UNSAFE INSTALLATION OR USAGE OF THIS PRODUCT. CALL TECHNICAL SUPPORT WITH QUESTIONS.
REPLACING COMPONENTS
Auger Motor
1. Before beginning any component replacement, be certain the unit is unplugged and
thoroughly cooled down. Also, make sure the hopper is empty before attempting to
remove or replace the auger motor assembly.
2. Remove the side panels and back panels as previously detailed in this manual on Page 35
and in the “Exhaust Blower Cleaning” section. Before loosening any bolts, detach the
wiring harness from the auger motor.
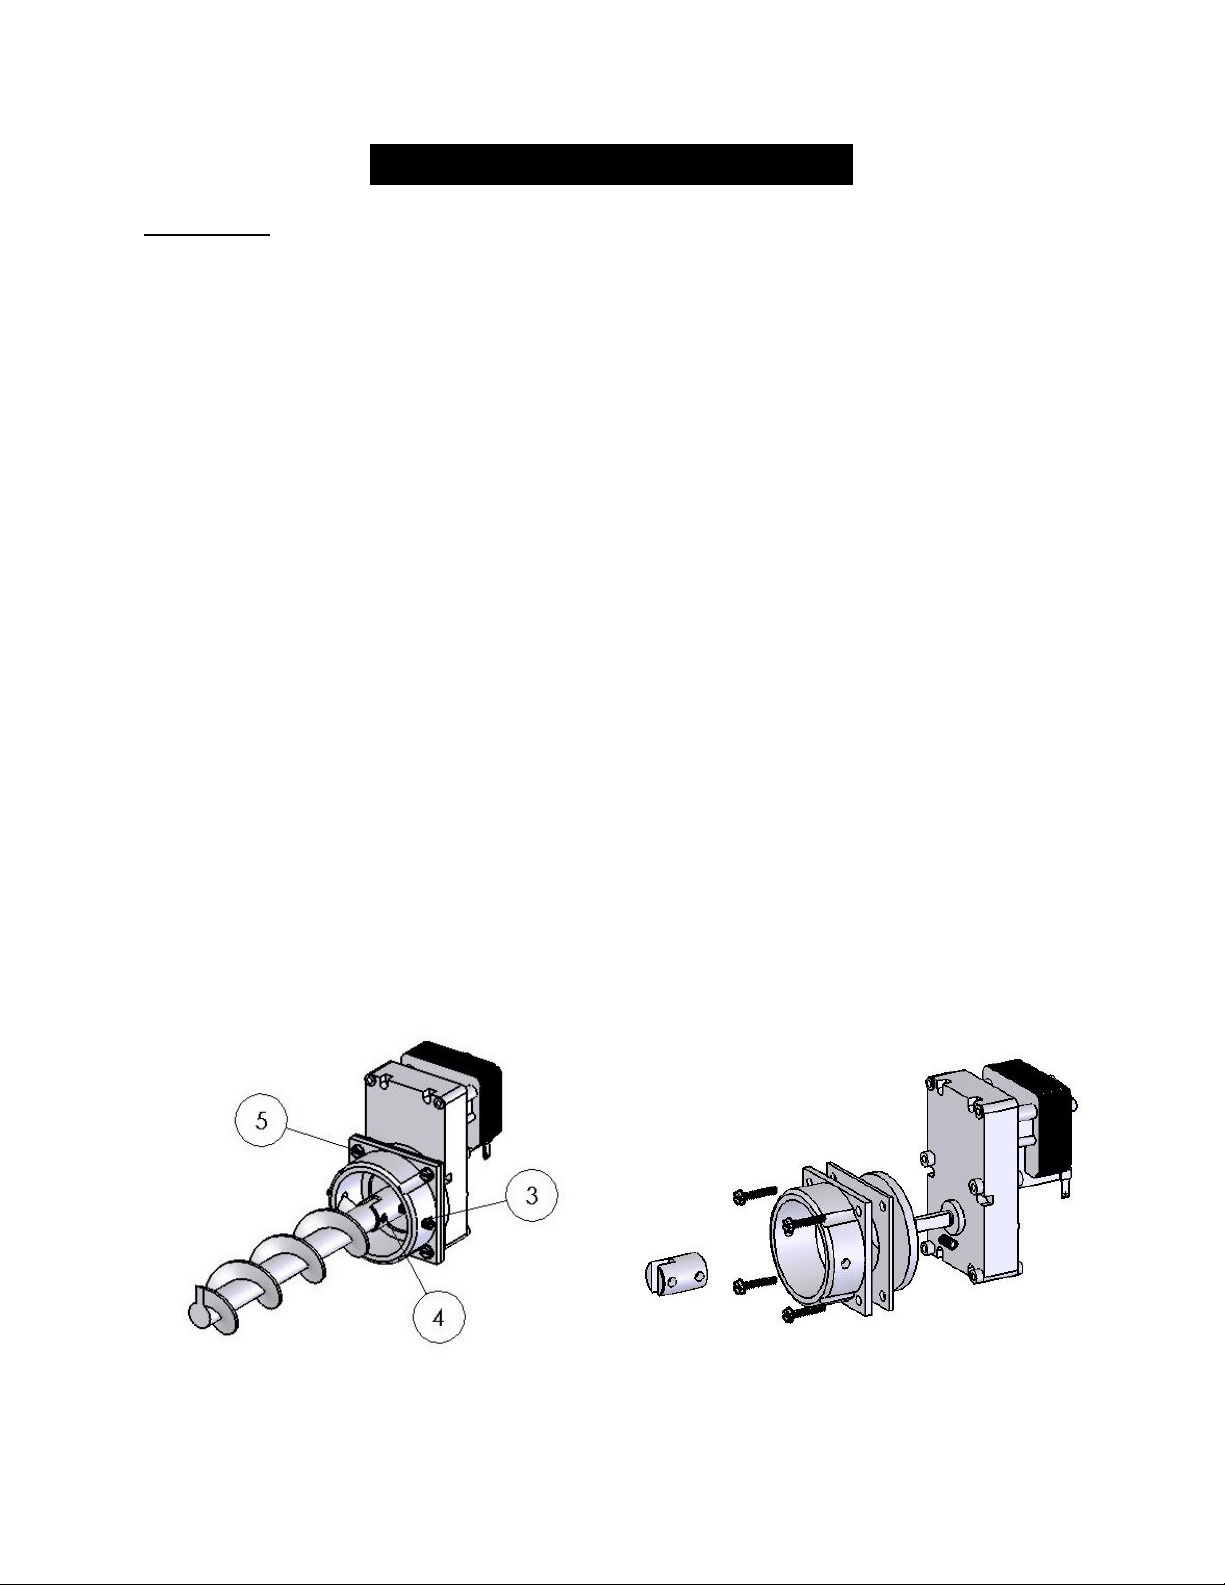
3. Locate the auger motor assembly at the rear of the stove, and begin by loosening the two
allen set screws on either side of the cast iron auger motor coupler.
4. Slide the auger assembly out of the tube enough that the allen set screw, which holds the
auger to the steel auger coupler, can be accessed. Loosen this set screw until the auger is
free from the auger motor assembly.
5. Next, remove the four screws which hold the cast iron auger motor coupler to the auger
motor, using a 5/16” wrench. Slide the cast iron auger motor coupler and the steel spacer
plate off of the auger motor.
6. Loosen the allen set screw which holds the steel auger coupler to the auger motor output
shaft, and remove the steel auger coupler, as well as the rubber vibration dampener.
7. Reinstall the parts in reverse order on the new auger motor, being careful not to over-
tighten the bolts which hold the cast iron auger coupler to the auger motor.
Loading ...
Loading ...
Loading ...