Loading ...
Loading ...
Loading ...
12
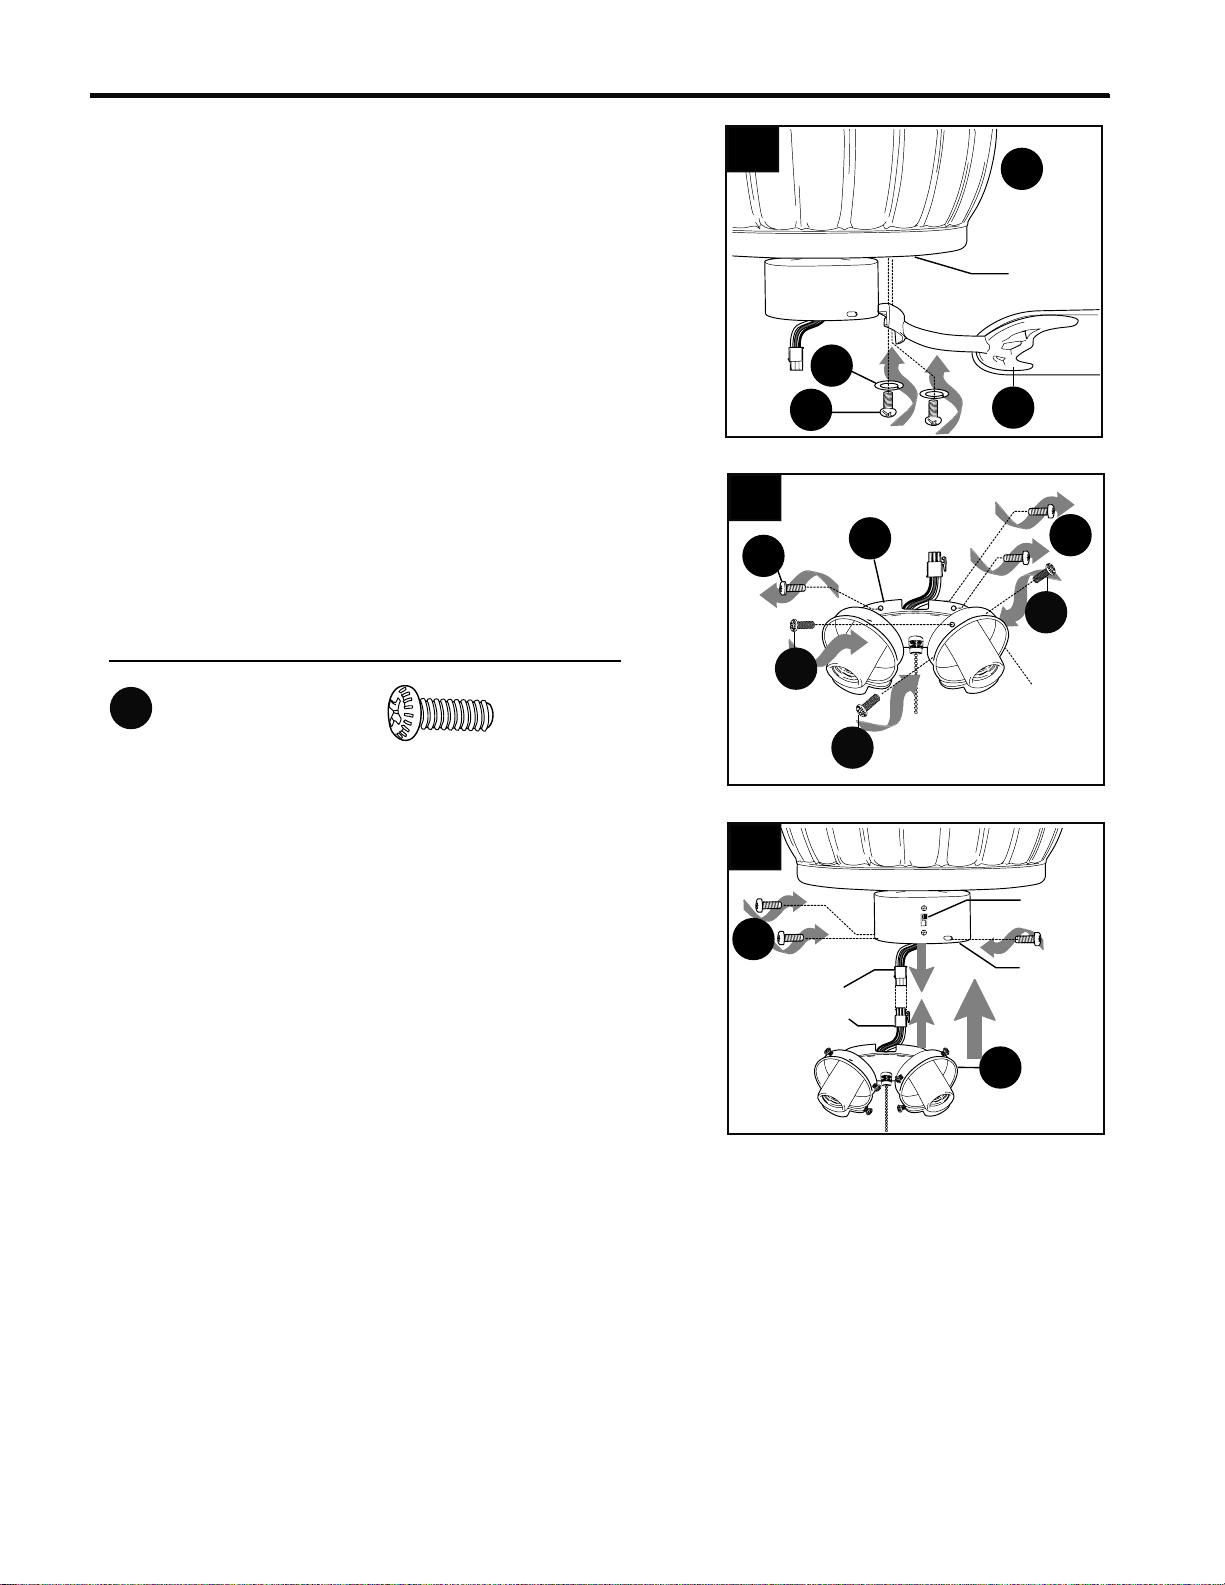
FINAL INSTALLATION
Re-connect male plug from switch housing to
female plug from light kit fitter (F). Make sure that
the plugs connect tightly. (Fig. 8)
Align holes in switch housing with holes in light kit
fitter (F)--the opening in the top edge of the light kit
fitter (F) should align with the reverse switch for a
secure fit. Attach light kit fitter (F) with the three
switch housing screws (M) that were removed in
the previous step. (Fig. 8)
8.
Switch
Housing
Reverse
Switch
Male Plug
Female Plug
8
F
M
Remove three switch housing screws (M) from light
kit fitter (F) and set aside. Then, locate thumb
screws (DD) provided in one of the hardware
packs. Partially insert thumb screws (DD) into
holes in socket covers on light kit fitter (F). (Fig. 7)
7.
Socket
Cover
F
7
DD
DD
DD
M
M
Thumb Screw x12
Hardware Used
DD
Locate motor screws (J) and lock washers (K) that
were removed in Step 5 on page 7.
Insert two motor screws (J), along with lock
washers (K), through one blade arm (D) to attach
blade arm (D) to motor. Tighten motor screws (J)
securely. (Fig. 6) Repeat with remaining blade
arms (D), making sure to completely secure each
blade arm (D) before proceeding with the next.
6.
K
J
D
6
L
Motor
Loading ...
Loading ...
Loading ...