
NAT-000
INSTRUMENT USER MANUAL
ID NOW
™
ID NOW Instrument User Manual
ID NOW
™
Instrument User Manual

USB with
Software
Update
Home
Clock
reset
User
Login
Software
Update
Power on
&
loading
Initial
Admin
Setup
Admin
password
reset
INITIAL ADMIN SETUP
ID NOW Instrument User Manual
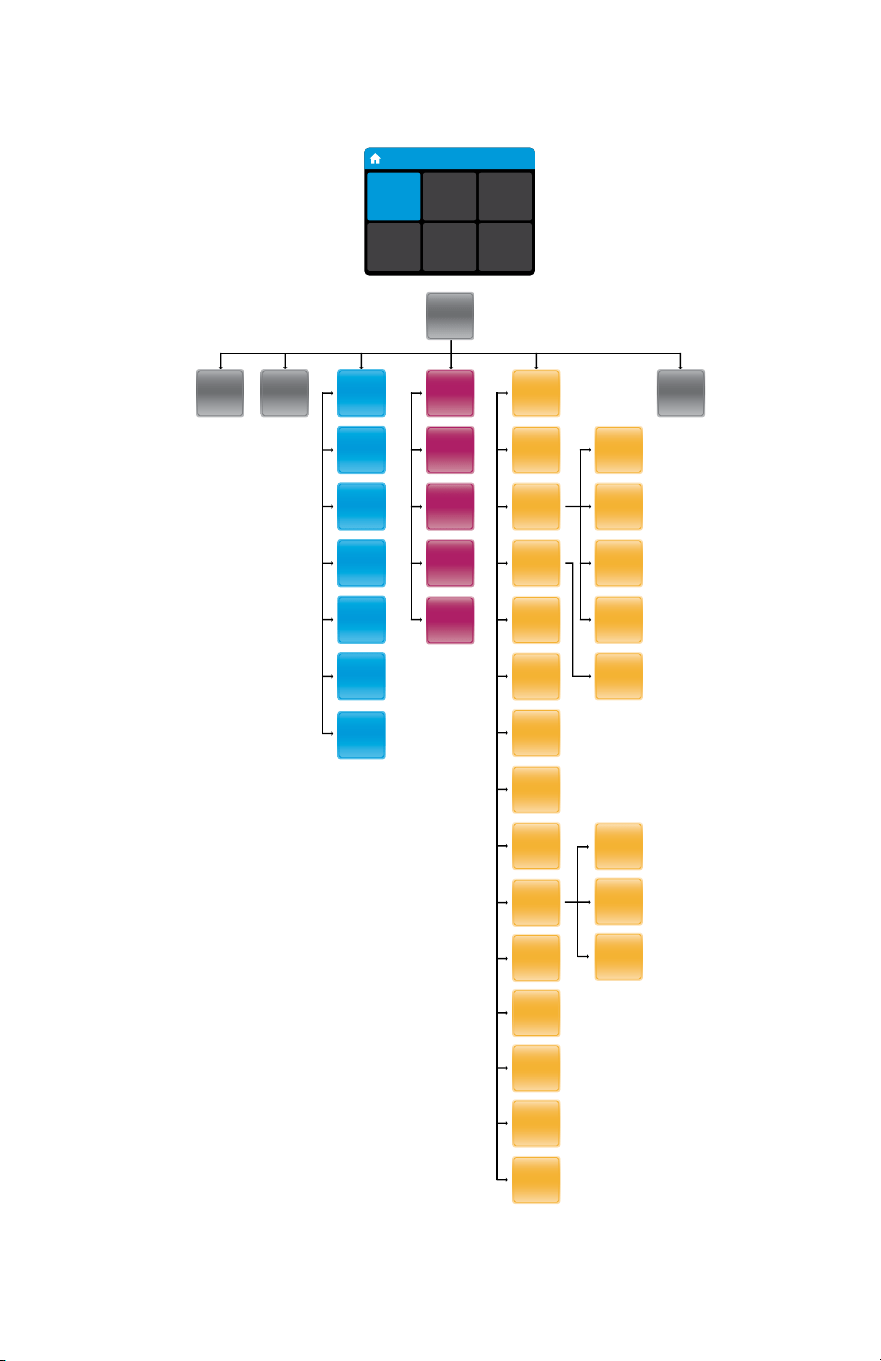
HOME SCREEN MENUS
Home
User ID
30/Jan/2018
10:12am
Run
Test
Run QC
Test
Review
Memory
Preferences Setup Log Out
ID NOW Instrument User Manual
Patient
Test
Results
Review
Memory
Export
Logle
Export
Results
Search
Results
QC Test
Results
Logout
Home
Run
QC Test
Run
Test
Export
Users
Import
Users
User
Name
New
User
Remote
Mode
Auto-
Logout
Network
Time
Date
Patient
Details
Users
Login
Setup
Preferences
About
Brightness
Sound
Language
Assay
Preference
Transmission
Status
Setup
Status
Auto-
Sending
Connectivity
Lot
Management
Auto Print
Reset to
Factory
Default
Early
Detection,
on/o
QC
Lockout
*The Connectivity Status options will only appear when the instrument has been configured
by the Admin to specify the port and address of the ASTM LIS, HL7, or POCT server.

ID NOW Instrument User Manual 1
CONTENTS
Warnings and Safe Use ............................................................... 4
1 Introduction .......................................................................... 6
1.1 Intended Use ...................................................................................................6
1.2 Product Description .......................................................................................6
1.3 Instrument Specifications ............................................................................. 7
1.3.1 Instrument ...............................................................................................7
1.3.2 12V Power Supply ................................................................................... ..8
1.4 Unpacking ....................................................................................................... 8
1.5 Instrument Calibration .................................................................................. 8
1.6 Maintenance & Cleaning ...............................................................................9
1.7 Components ....................................................................................................9
2 ID NOW
™
Instrument at a Glance .....................................10
3 Getting Started - Setup ...................................................... 12
3.1 Initial Setup ................................................................................................... 12
3.2 Instrument Status Light .............................................................................. 12
3.3 User Interface ............................................................................................... 12
3.4 Home Screen ................................................................................................13
3.5 Navigation .....................................................................................................13
3.6 Onscreen Keyboard ......................................................................................13
3.7 Admin Setup .................................................................................................14
4 Setup Menu ......................................................................... 17
4.1 Log In (Admin Access Only) ....................................................................... 17
4.2 Users ..............................................................................................................18
4.3 Assay Preferences (Admin Access Only) .................................................20
4.3.1 Sample Type Selection (Admin Access Only) ....................................21
4.3.2 Early Detection (Admin Access Only) ................................................ 21
4.4 Patient Details (Admin Access Only) ....................................................... 22
4.5 Date (Admin Access Only) ........................................................................ 22
4.6 Time (Admin Access Only) ........................................................................ 22
4.7 Auto Logout (Admin Access Only) ........................................................... 23
4.8 Network (Admin Access Only) .................................................................. 23
4.9 Remote Mode (Admin Access Only) ........................................................ 24

2 ID NOW Instrument User Manual
4.10 Connectivity (Admin Access Only) .......................................................... 24
4.11 Connectivity Setup Screen (Admin Access Only) ................................. 25
4.11.1 IP Address (Admin Access Only) ........................................................25
4.11.2 Port Number (Admin Access Only) ....................................................25
4.11.3 Clear Settings (Admin Access Only) ...................................................25
4.12 Status Screen .............................................................................................. 26
4.13 Auto-Sending Screen (Admin Access Only) ........................................... 26
4.14 Clear Sent History (Admin Access Only) ............................................... 26
4.15 QC Lockout (Admin Access Only or via POCT server) ....................... 26
4.16 Lot Management (Admin Access Only or via POCT server) ............... 29
4.17 Auto Print (Admin Access Only) .............................................................. 31
4.18 Reset To Factory Default (Admin Access Only)...................................... 31
5 Preferences Menu .............................................................. 32
5.1 Language ....................................................................................................... 32
5.2 Sound ............................................................................................................ 32
5.3 Brightness ..................................................................................................... 33
5.4 About ........................................................................................................... 33
5.5 Instrument Information............................................................................... 33
6 Running a Test ....................................................................34
6.1 User Login.....................................................................................................34
6.2 Main Menu ................................................................................................... 35
6.3 First Time Use .............................................................................................. 35
6.4 Running A Test ............................................................................................. 35
7 Running a QC test ............................................................. 37
7.1 Run QC Test .................................................................................................37
7.2 QC Test Results ...........................................................................................38
8 Printing Test Results .......................................................... 39
9 Review Memory..................................................................40
9.1 Patient Test Results .....................................................................................40
9.1.1 Actions Key ............................................................................................42
9.2 QC Test Results ........................................................................................... 42
9.3 Search Results ..............................................................................................43
9.4 Export Results ..............................................................................................43
9.5 Export Logfile ...............................................................................................44

ID NOW Instrument User Manual 3
10 Software Updates ...............................................................45
11 Accessories ......................................................................... 47
11.1 Universal Printer .......................................................................................... 47
11.2 Barcode Scanner .......................................................................................... 47
11.3 ID NOW
™
USB Drive ................................................................................. 47
12 Errors and Warnings ...........................................................48
12.1 Errors ............................................................................................................48
12.1.1 Power On & Loading Error .................................................................48
12.1.2 Initial Admin Setup Error ...................................................................48
12.1.3 User Login Errors ................................................................................49
12.1.4 Home Errors ........................................................................................51
12.1.5 Run Test / Run QC Test Errors ..........................................................51
12.1.6 Printing Result Error ...........................................................................53
12.1.7 Review Memory Error ........................................................................53
12.1.8 Search Results Error ...........................................................................54
12.1.9 Export Results & Export Logfile Errors ............................................54
12.1.10 New User Errors .................................................................................. 54
12.1.11 User Details Errors .............................................................................. 55
12.1.12 Import Users Errors ............................................................................56
12.1.13 Export Users Errors.............................................................................56
12.1.14 Network Errors .................................................................................... 56
12.1.15 Admin Password Errors ......................................................................57
12.1.16 Miscellaneous Errors ...........................................................................58
12.2 Warnings ....................................................................................................... 59
12.2.1 Home Warnings ...................................................................................59
12.2.2 Run Test/Run QC Test Warnings ....................................................... 60
12.2.3 Setup Warnings ....................................................................................61
12.2.4 User Warnings ...................................................................................... 61
13 Symbols............................................................................... 62
14 Ordering and Contact Information...................................64
15 Warranty ............................................................................. 65

4 ID NOW Instrument User Manual
The following warnings are to be used as an aide in risk mitigation.
Caution: Use only the power supply that is provided with the instrument. Use
the appropriate power supply for the region. The correct power supply is required
to maintain the safety and electromagnetic compatibility of the system.
Caution: The power supply that is provided should only be used with the
IDNOW Instrument.
Caution: Hot Surfaces. The Sample Receiver holder in this instrument operates
at up to 60ºC (140ºF) and may cause contact burns or damage to materials in
contact with this area.
Caution: Always operate this instrument on a clean, flat, level and stable surface
not in direct sunlight. Do not drop the instrument. Ensure that air flow to the
ventilation openings located on the back and base of the instrument are not
restricted.
Caution: Never move the instrument while a test is in progress.
Caution: Follow proper infection control guidelines for handling all specimens
and related items. Properly dispose of all contaminated waste according to
federal, state, and local requirements.
Caution: Risk of electrical shock. Do not operate the instrument or the power
supply if it has been opened, damaged or exposed to moisture, condensation or
rain.
Caution: Do not disassemble or attempt to repair the IDNOW Instrument
or other accessories as there is a risk of damage to the instrument. This
instrument does not contain serviceable parts and should be returned for repair.
Disassembling the instrument will also void the warranty.
Caution: Only operate the instrument for its intended purpose and in
accordance with this user manual and warnings. If the instrument is used in a
manner not specified in the user manual, protection provided by the equipment
will be impaired. This instrument (including power supply) is designed to operate
within the manufacturer’s specifications. Do not exceed the manufacturer
specifications when in use.
WARNINGS and SAFE USE

ID NOW Instrument User Manual 5
Caution: Position the unit with clear access to connectors. Keep connected
cables clear of work areas such that tripping or catching will not pull the unit off
its work bench. The mains socket outlet intended for use with IDNOW power
supply should be located near the instrument and be readily accessible. Abbott
recommends that cables are disconnected when not in use for an extended
period.
Caution: USB and Ethernet Interfaces. If intended for connection to external
equipment, please ensure that interfaces of such equipment are separated from
mains by double or reinforced insulation and present no risk of electrical shock.
Caution: If any assay components are dropped, cracked, found to be damaged or
open when received, DO NOT USE and discard.
Caution: Due to the high sensitivity of the assays run on the instrument,
contamination of the work area with previous positive samples may cause false
positive results. Handle samples according to standard laboratory practices.
Clean instruments and surrounding surfaces according to instructions provided
in Section 1.6, Maintenance & Cleaning.
Caution: Once reacted, the Test Base contains large amounts of amplified
sample (Amplicon). Do not disassemble the Test Base and Transfer Cartridge.
In the case of a positive sample this could lead to amplicon leakage and potential
false positive IDNOW test results.
Caution: To avoid contamination, do not move the IDNOW Instrument during a
run or until all assay components have been removed from the instrument.

6 ID NOW Instrument User Manual
1.1 Intended Use
The IDNOW
™
Instrument is a fluorescence-based instrument for the processing
and analysis of IDNOW tests.
This document describes the setup, configuration and operation of the IDNOW
Instrument, which utilizes isothermal nucleic acid technology for the qualitative
detection of a range of infectious diseases. It is intended to aid in the diagnosis of
these diseases.
1.2 Product Description
IDNOW utilizes isothermal nucleic acid amplification technology for the qualitative
detection of infectious diseases. Consumables such as Test Bases and Sample
Receivers are required to run each assay.
The reaction tubes in the Test Base contain the reagents required for amplification of
the target nucleic acid and an internal control. IDNOW utilizes a pair of templates
(similar to primers) for the specific amplification of the target nucleic acid and
a fluorescently-labeled molecular beacon designed to specifically identify the
amplified targets.
To perform the assay, the Sample Receiver and Test Base are inserted into the
IDNOW Instrument. The sample is added to the Sample Receiver and transferred
via the Transfer Cartridge to the Test Base, initiating target amplification. Heating,
rotation and detection is provided by the instrument, with results automatically
reported.
Additional assay specific information and work flows are detailed in the respective
product inserts.
1 INTRODUCTION

ID NOW Instrument User Manual 7
1.3 Instrument Specifications
1.3.1 Instrument
Color Touch Screen 3.5”
Communications
10/100 Mbps Ethernet Port for Data Transfer
3 x USB Ports for data export, barcode reader and
printer
Data storage
999 patient test results
99 QC test results
Memory allows search and retrieval
Archive or export via USB
Power Supply
12V DC from external AC/DC supplied
plug pack
DC Voltage fluctuation: ±10%
DC Current consumption: 12V DC, 3.0 Amps
Dimensions
8.15” W x 5.71” H x 7.64” D
207 mm W x 145 mm H x 194 mm D
Weight 3.0 kg
Operating
Environment
Indoor Use
15ºC to 30ºC (50ºF to 86ºF)
10% to 80% RH (non-condensing)
0m (1.01 bar) to 2000m (0.763 bar)
IP20
Storage
15ºC to 30ºC (50ºF to 86ºF)
10% to 80% RH (non-condensing)
0m (1.01 bar) to 2000m (0.763 bar)

8 ID NOW Instrument User Manual
1.3.2 12V Power Supply
Rated input voltage: 100-240VAC
Rated input frequency: 50/60Hz
Rated input current: 1.2 Amps
Operating environment: As per instrument
Storage environment: As per instrument
Output voltage: 12V
Output current: 3.5 Amps
1.4 Unpacking
Unpack the IDNOW Instrument and place on a clean, flat, level and stable surface
within reach of an electrical outlet. The IDNOW Instrument has a carrying handle
located on the back of the instrument for transport purposes. Use the carrying
handle when removing the instrument from the box and when transporting short
distances. Place instrument in a location where the air vents located in the back of
the instrument will not be blocked. Avoid placing the instrument in direct sunlight.
Inspect for any obvious signs of damage. Report any damage immediately
to Abbott. Allow the instrument to equilibrate to room temperature for at least
30 minutes.
1.5 Instrument Calibration
The IDNOW Instrument is factory calibrated and does not require any further
calibration and verification.
However, if the instrument was transported or moved, a performance check
using IDNOW positive and negative controls is recommended to ensure proper
functionality.

ID NOW Instrument User Manual 9
1.6 Maintenance & Cleaning
The IDNOW Instrument is maintenance-free and has no serviceable parts. In the
case of instrument failure or damage, contact Abbott Technical Support.
Acceptable cleaning agents include the following:
• 70% ethanol - available in commercial wipes or on a damp, lint free cloth
• 10% bleach - on a damp, lint free cloth only
Do not spray or pour solution directly onto instrument when cleaning. Ensure no
excess liquid is used when cleaning as it may damage the instrument.
Abbott recommends that the exterior instrument surfaces and the surfaces visible
under the open lid be cleaned daily. Clean surrounding bench area. Clean instrument
and surrounding areas immediately after possible patient sample contamination.
Do not disassemble the instrument for cleaning.
Do not immerse in water or cleaning solutions.
Do not clean with soap or other solutions.
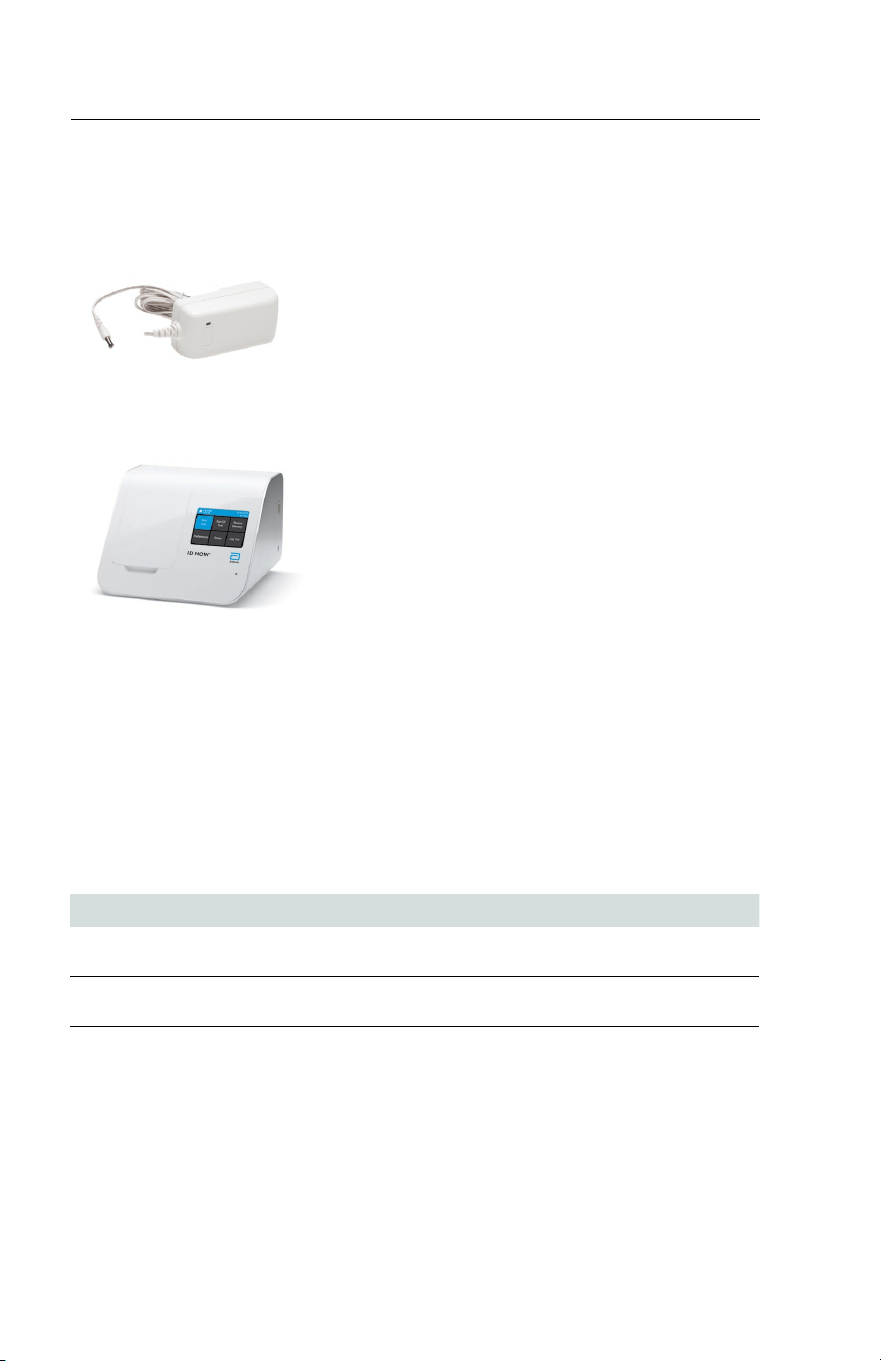
1.7 Components
The following items are supplied with the IDNOW Instrument:
• Power Supply and Adaptor
• IDNOW Instrument User Manual
• IDNOW Instrument Quick Start Guide
10 ID NOW Instrument User Manual
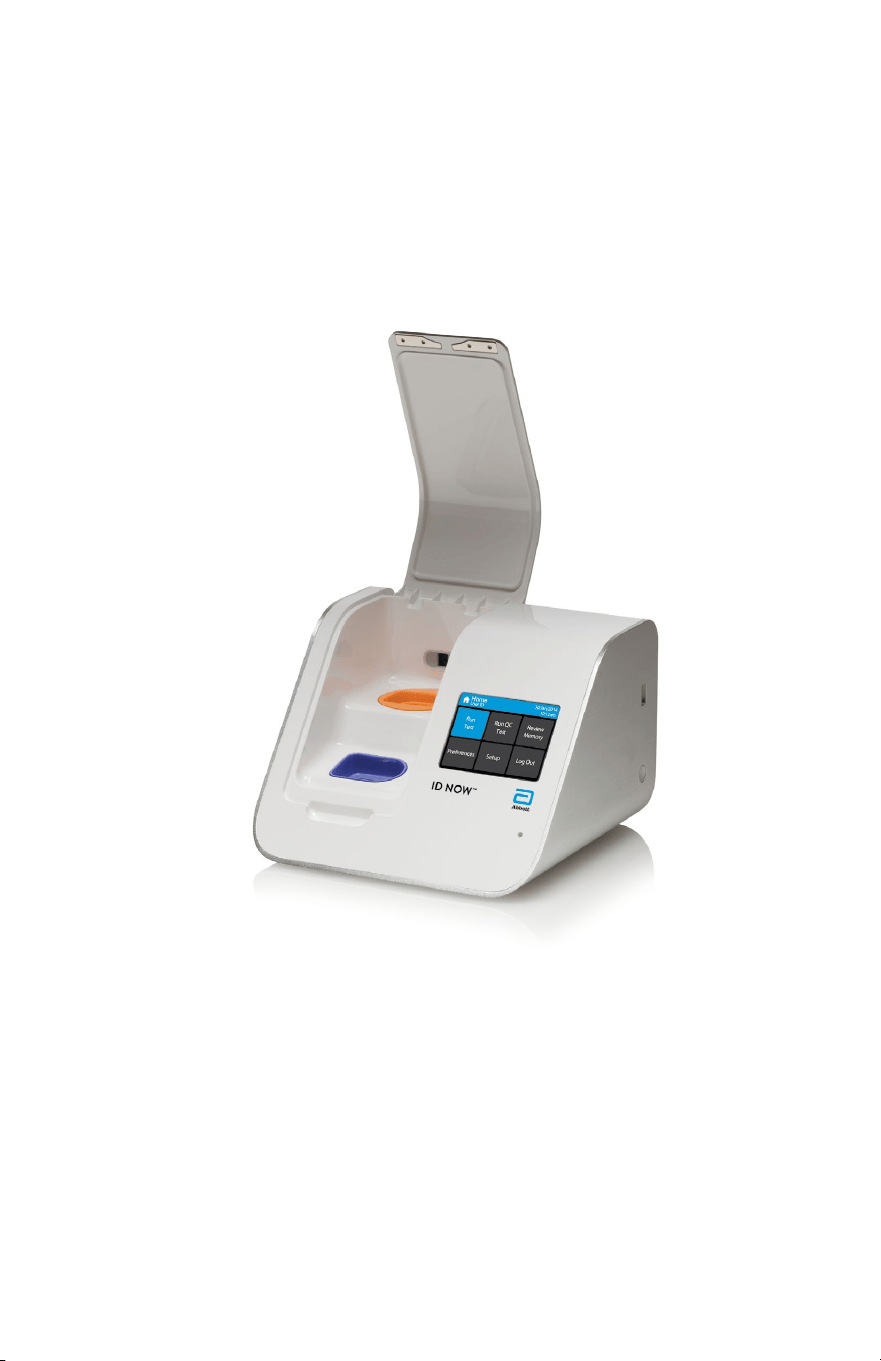
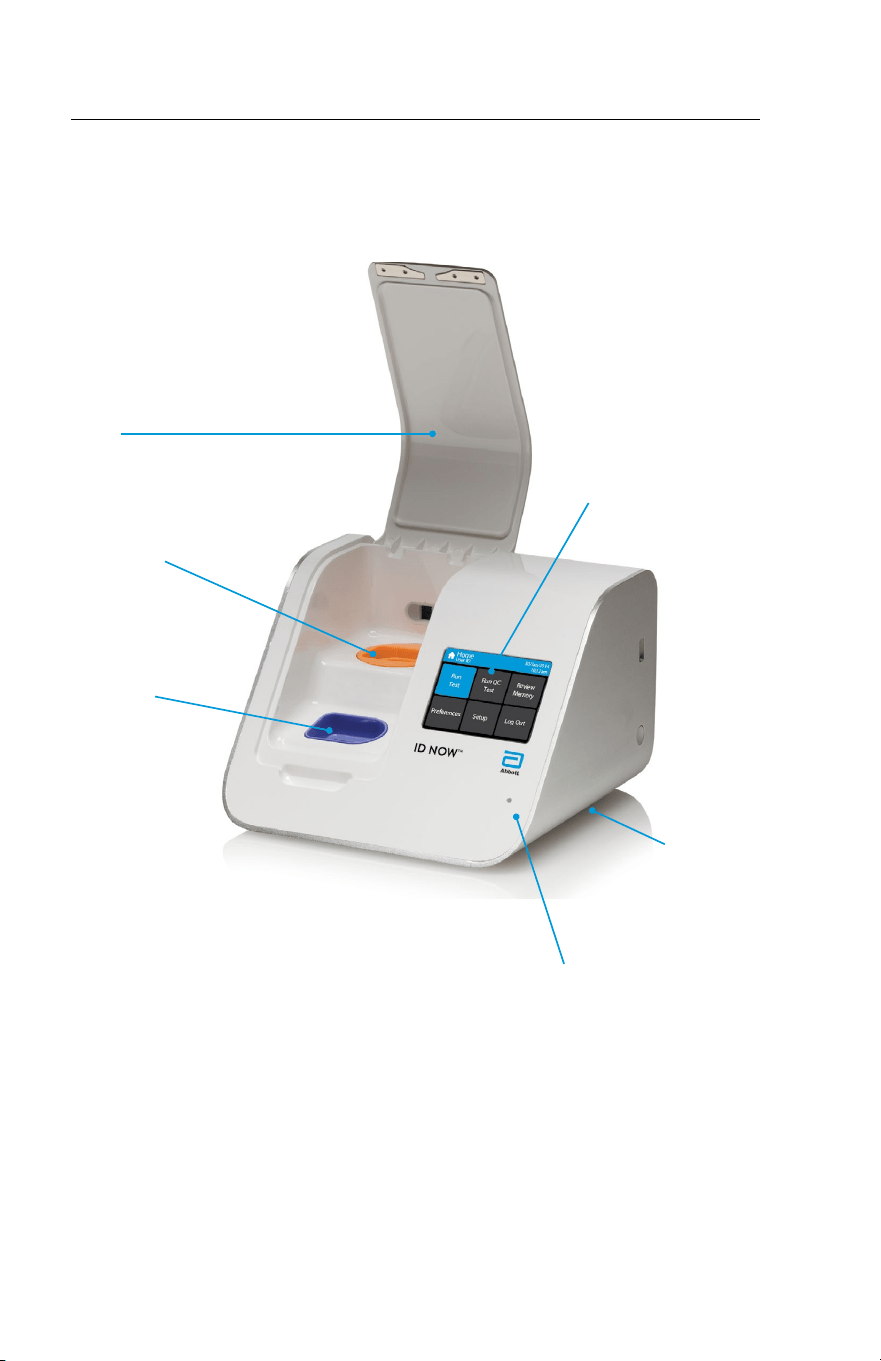
ID NOW
™
Instrument, Front View
2 ID NOW
™
INSTRUMENT at a GLANCE
Lid
Test Base
Holder
Sample Receiver
Holder
LED Status Indicator
LCD Color
Display Screen
Audio
Speaker
ID NOW Instrument User Manual 11
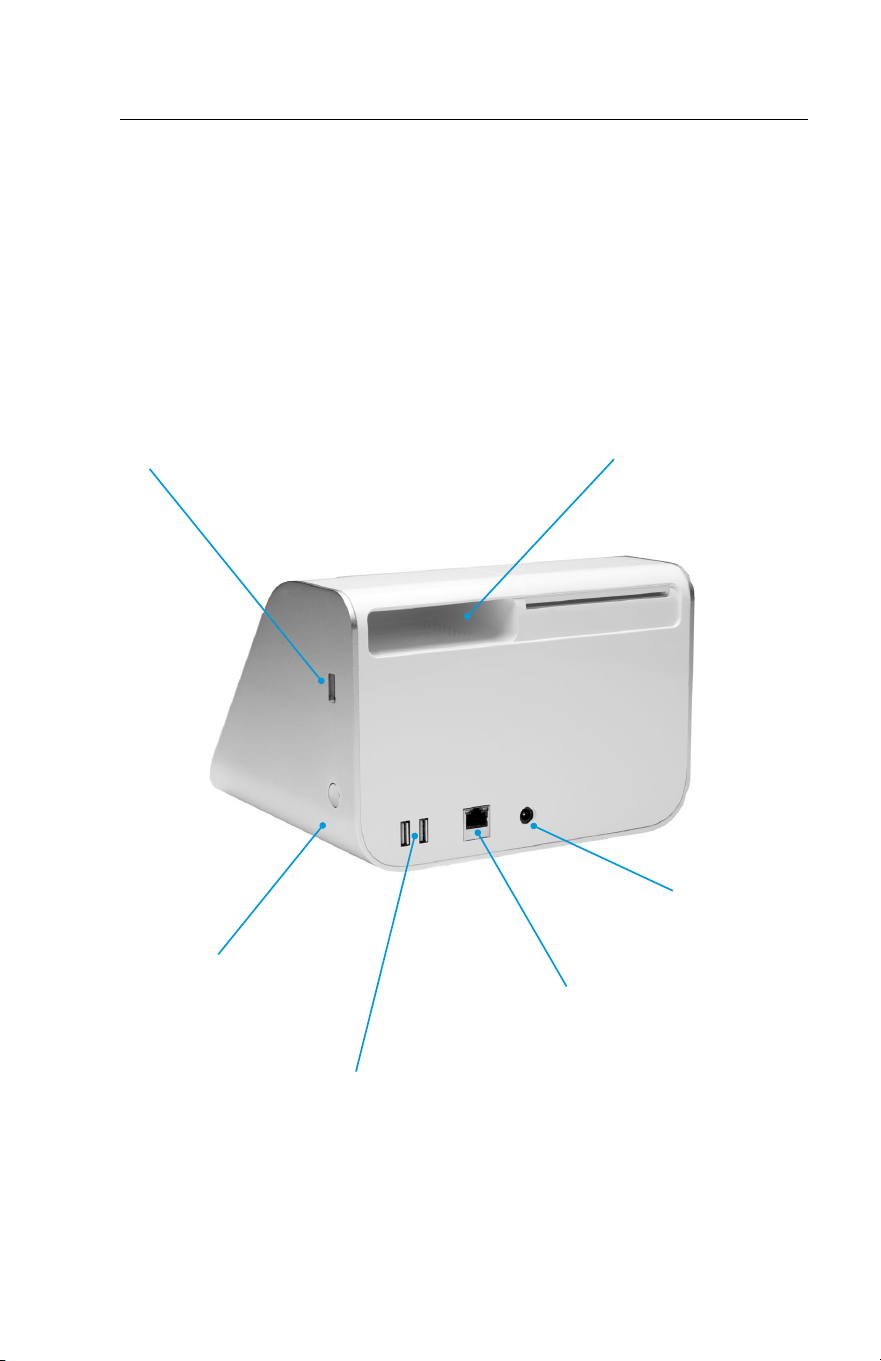
ID NOW
™
Instrument, Back View
USB Connection
Power
Button
USB Connection x 2
Ethernet
Connection
Carrying Handle
Power
Connection
12 ID NOW Instrument User Manual
3 GETTING STARTED - SETUP
For unpacking and calibration, see Sections 1.4 and 1.5.
3.1 Initial Setup
Connect the 12V power supply to the instrument.
Plug the appropriate, country specific adapter into
an appropriate electrical outlet.
Power Up: Once the power is connected, press
and hold the Power Button on the right side of the
instrument to power up and start the instrument.
Once the instrument is running, it may be turned
off (shut down) by pressing and holding the Power
Button for 3 seconds
or longer.
If the unit is unattended for one hour, the instrument will switch to power save
mode, and the screen will go black. Touch the screen to return the unit to active
display operation.
3.2 Instrument Status Light
The lower right side of the front panel of the IDNOW Instrument includes a white
light. This light should illuminate immediately when the instrument is powered up.
The light statuses are:
State Indication
Slow flash Starting up/ heaters not at temperature
On solid Heaters at temperature
Fast flash Software updates, Hardware fault, or shutting down
3.3 User Interface
All Operator interactions with the IDNOW Instrument are performed using the
instrument touch screen.
ID NOW Instrument User Manual 13
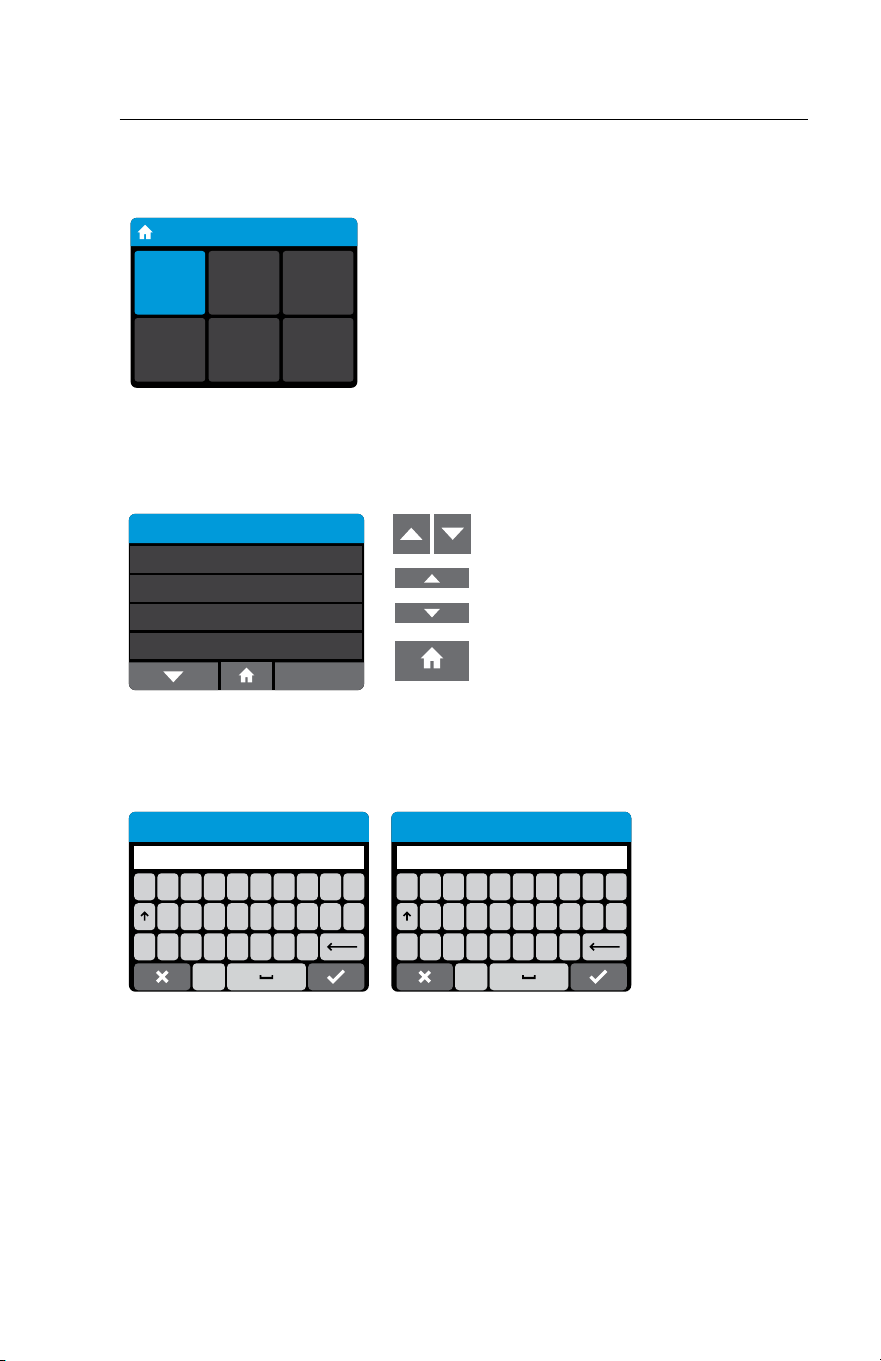
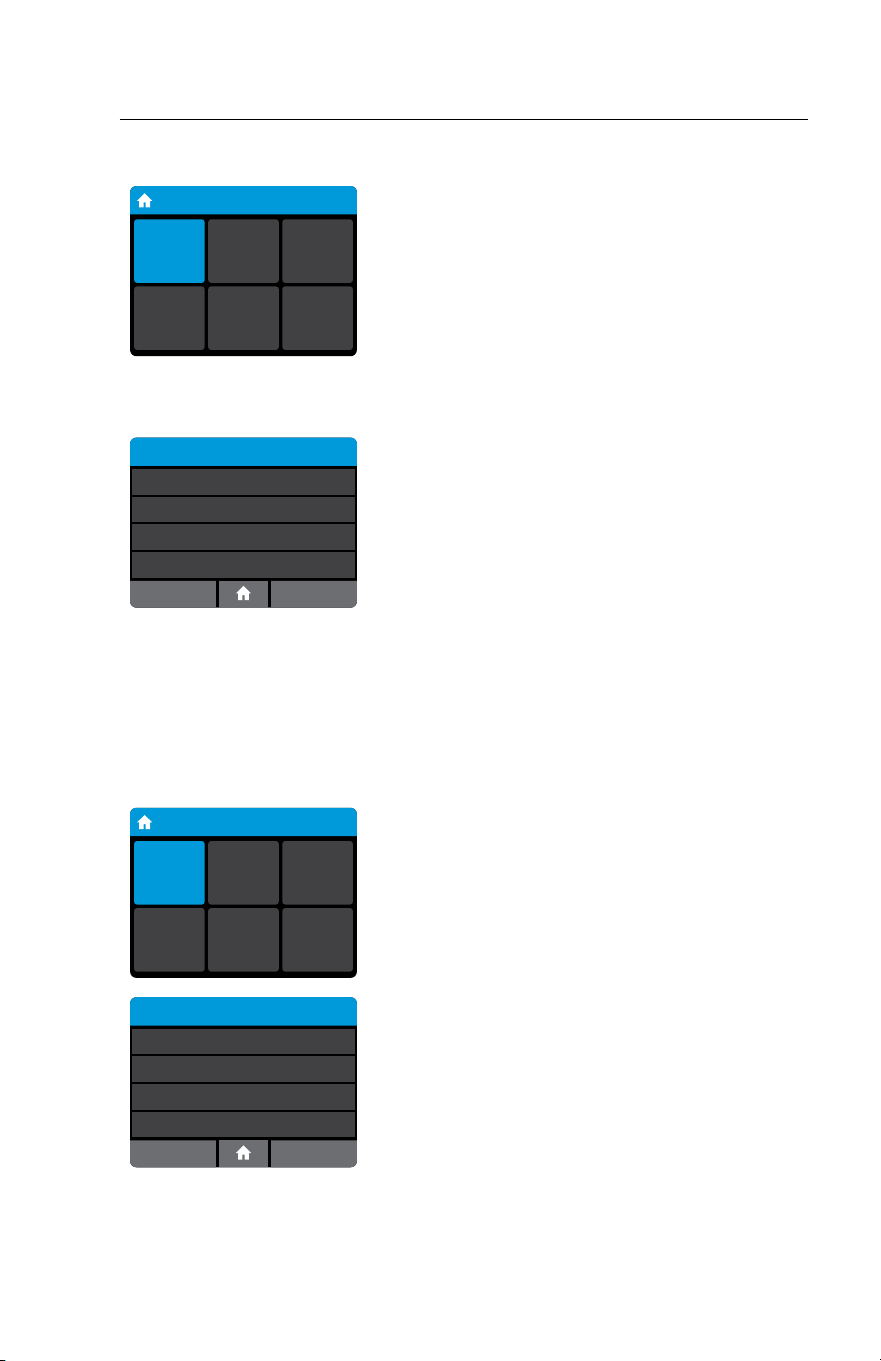
3.4 Home Screen
Home Screen: Displays buttons for access to:
Home
User ID
30/Jan/2018
10:12am
Run
Test
Run QC
Test
Review
Memory
Preferences Setup Log Out
• Run Test
• Run QC Test
• Review Memory
• Preferences
• Setup (Admin Access Only)
• Log Out
The current set time and date is displayed in the top
right hand corner of the screen.
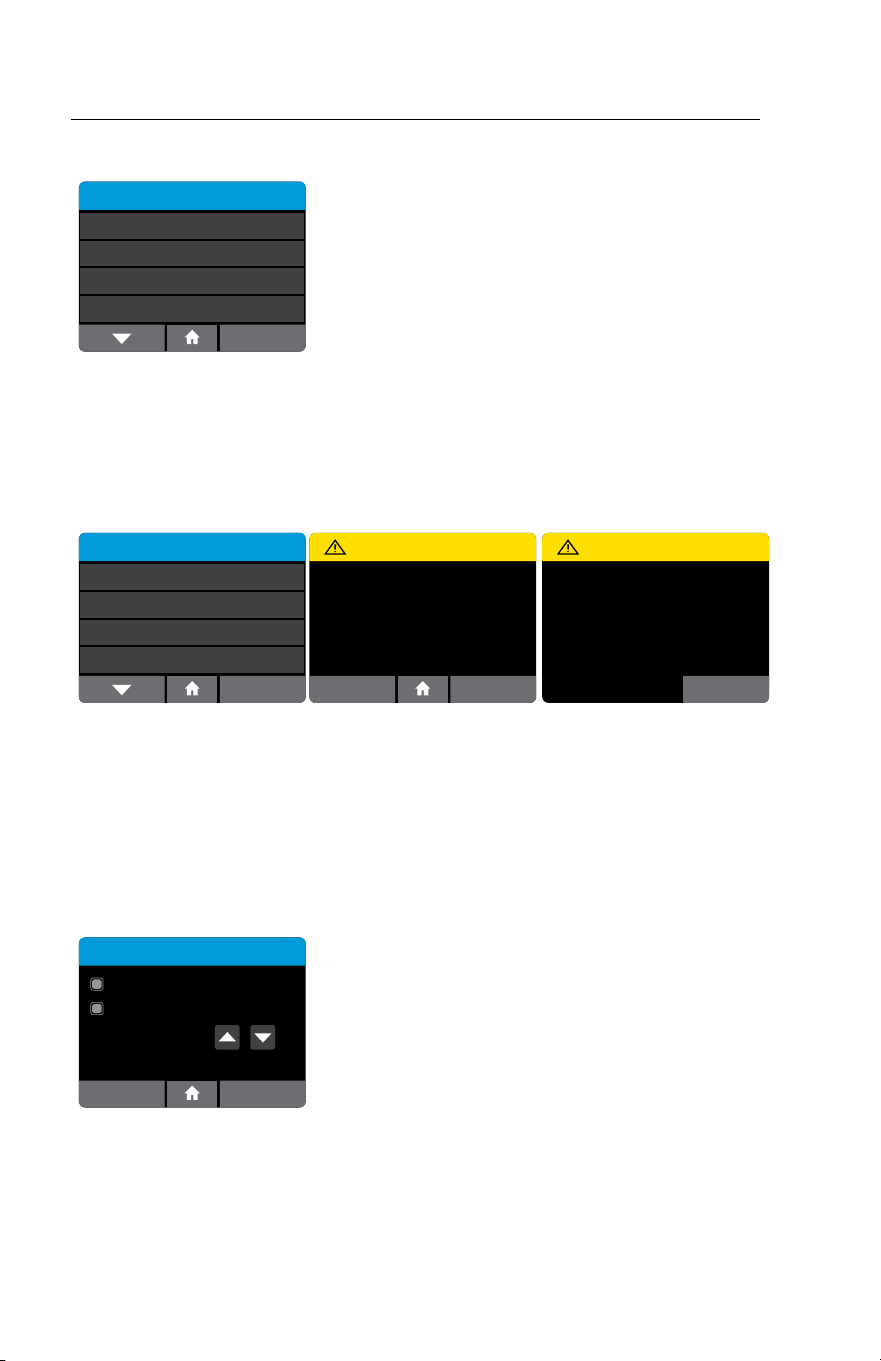
Main Menu – Home Screen
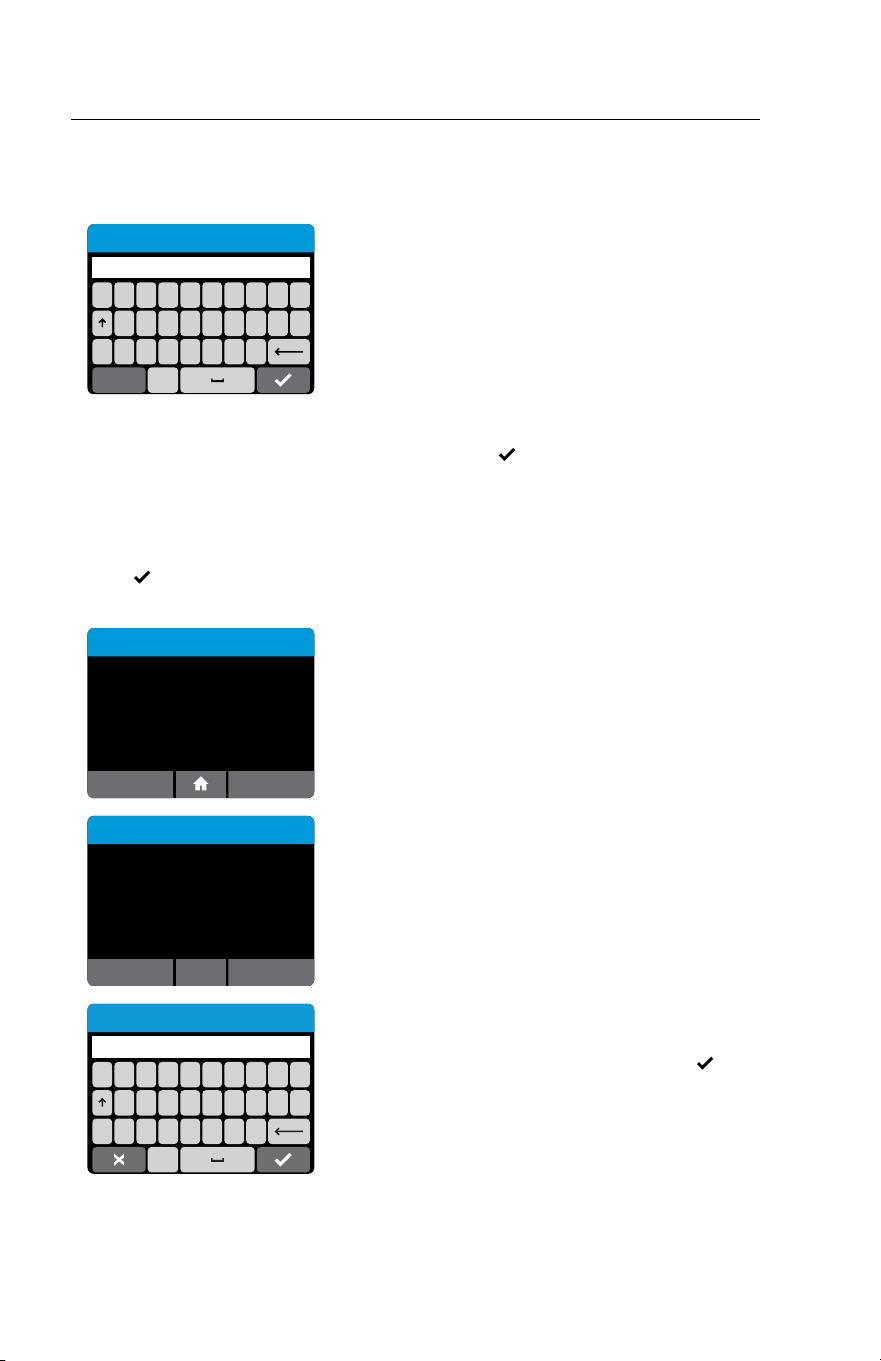
3.5 Navigation
Preferences
Language
Sound
Brightness
English
Enabled
50%
About
Example of Navigation Bar
Up & Down Arrows:
Enable navigation to scroll through
menus and increase/decrease
setting values.
Home:
Select Home at any time to return
to the Home screen.
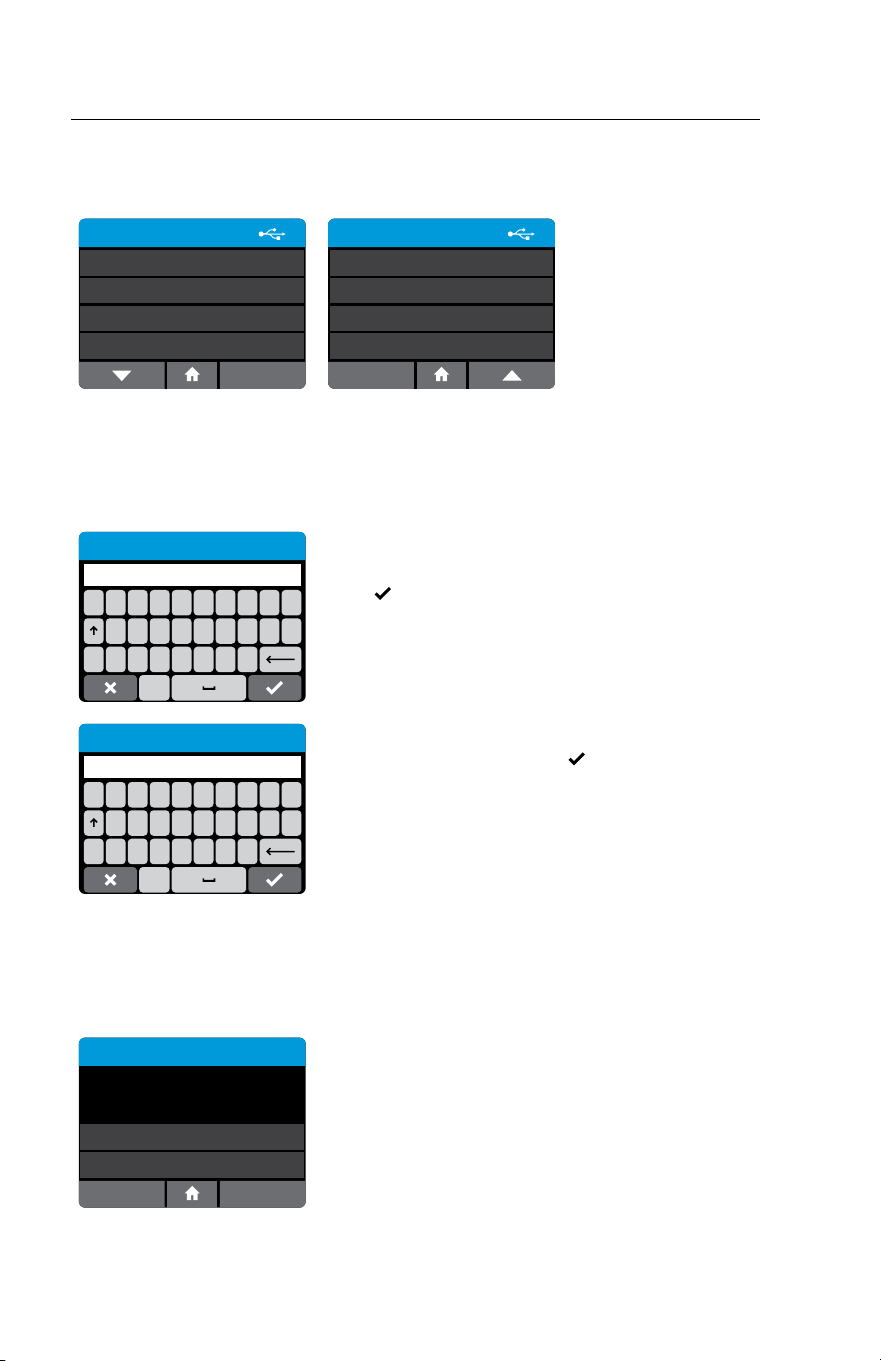
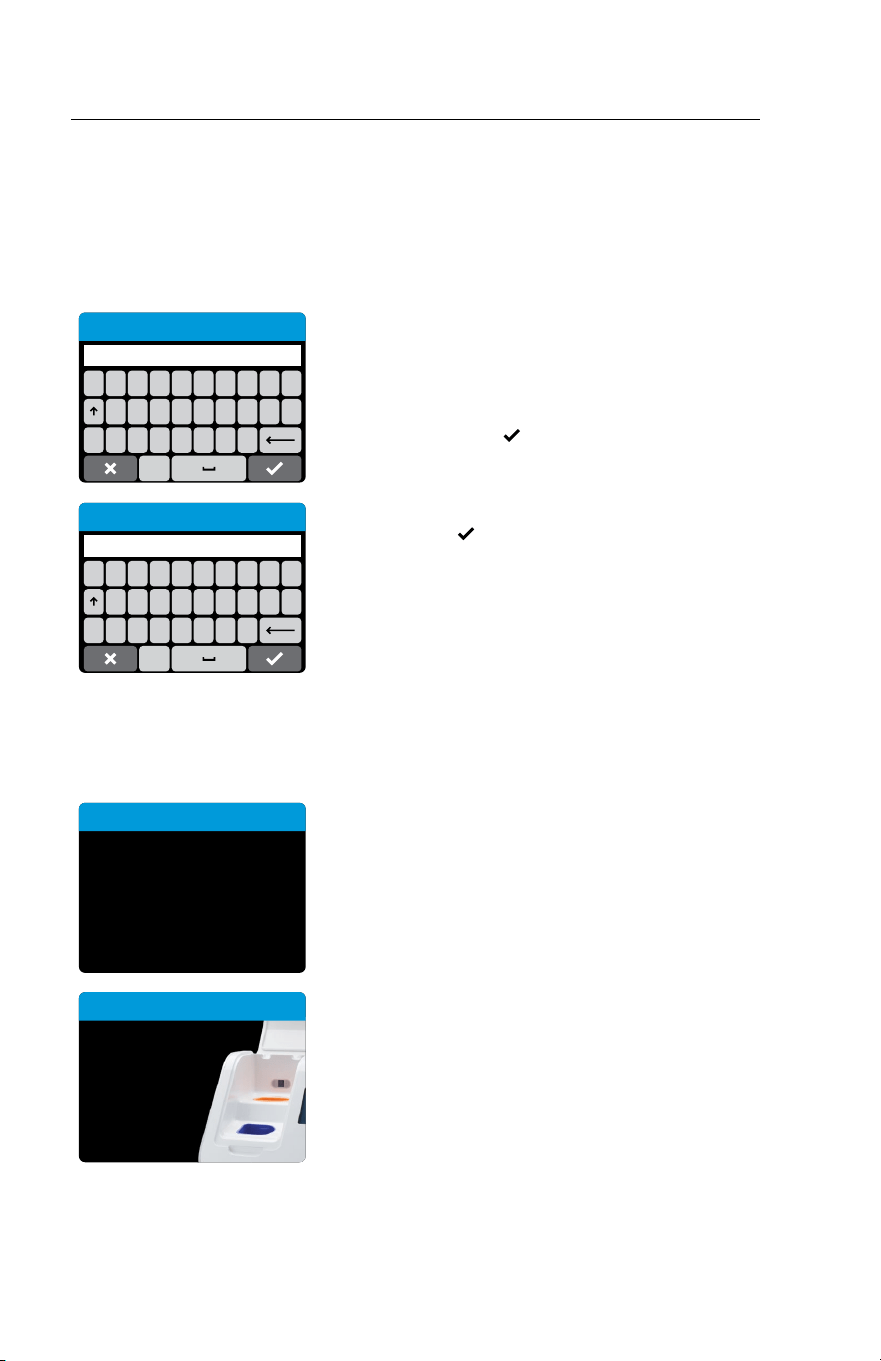
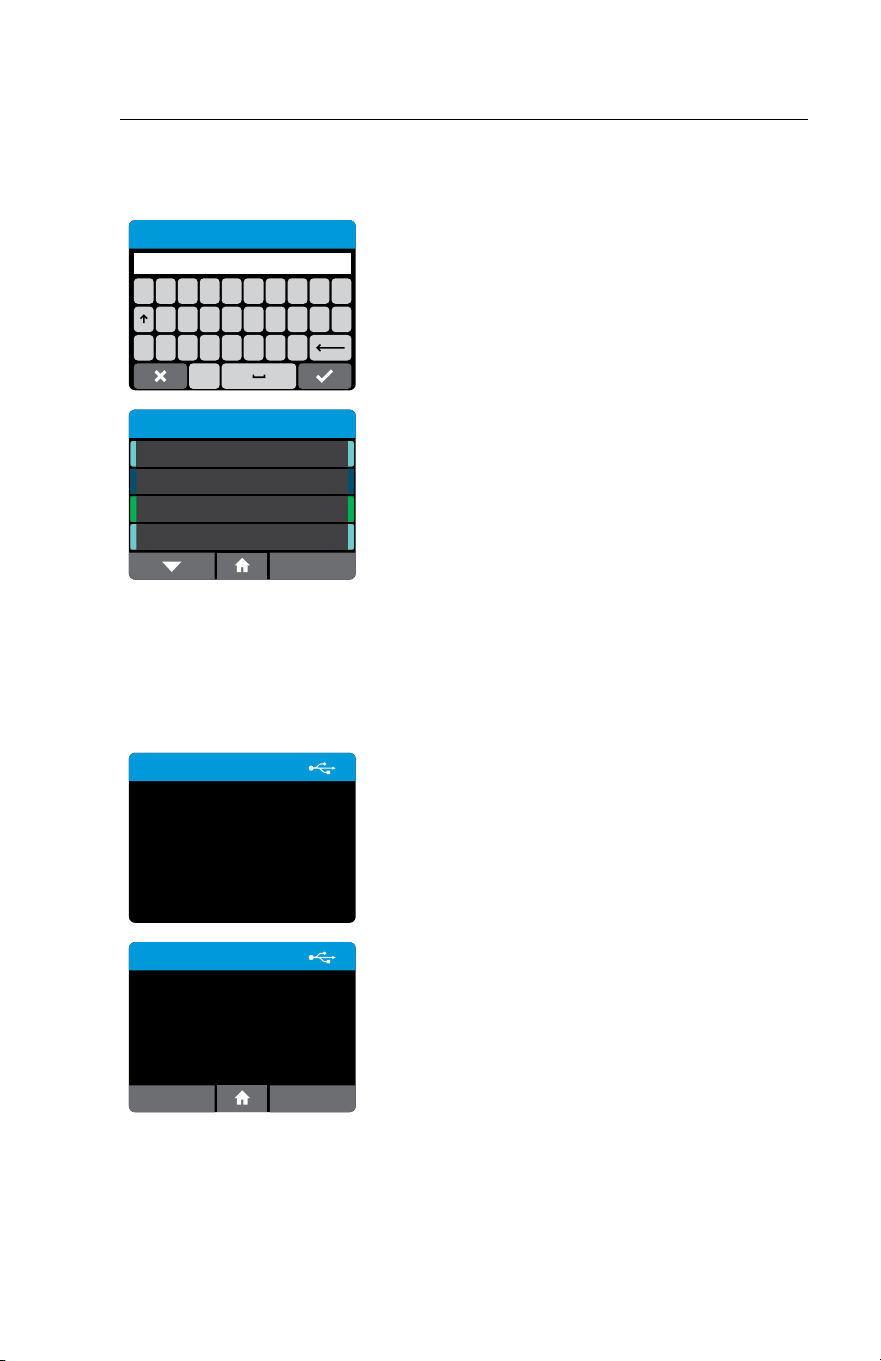
3.6 Onscreen Keyboard
QWERTYUI
#ZXCVBNM
OP
ASDFGH JKL
123
12345678
#+=. ,?!‘
90
/:;()$&@“
ABC
Onscreen QWERTY Keyboard & Numeric Keypad
The Onscreen QWERTY Keyboard & Numeric Keypad enable user input into the
IDNOW Instrument. Press ‘123’ or ‘ABC’ to swap between text and number entry.
Note: Barcode input will operate at any time in these screens and can add text as if
entered via the onscreen keypad.
Note: If Chinese language is selected, the Pinyin keyboard will be available. If Japanese
is selected, Romaji will be available.
14 ID NOW Instrument User Manual
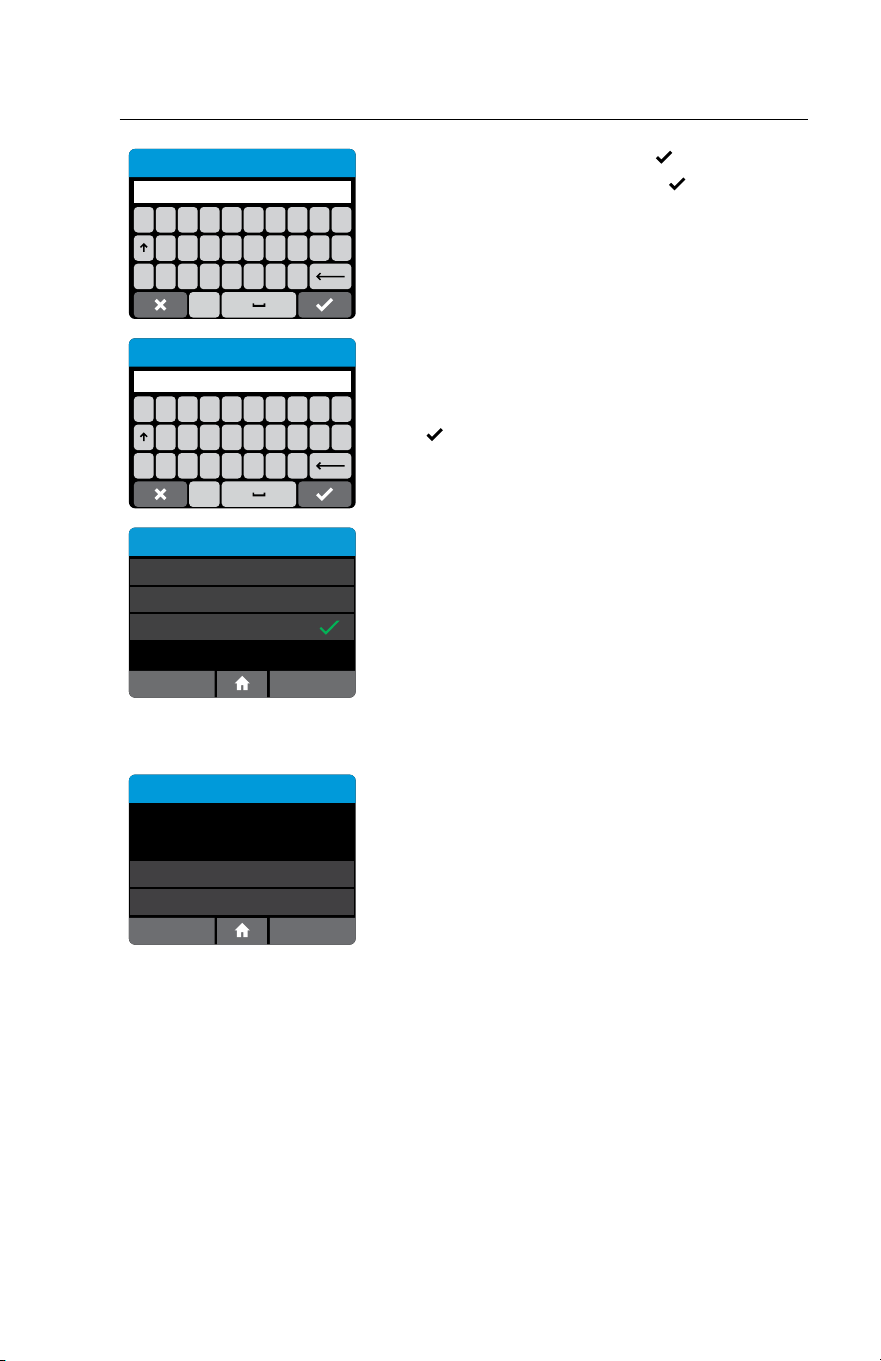
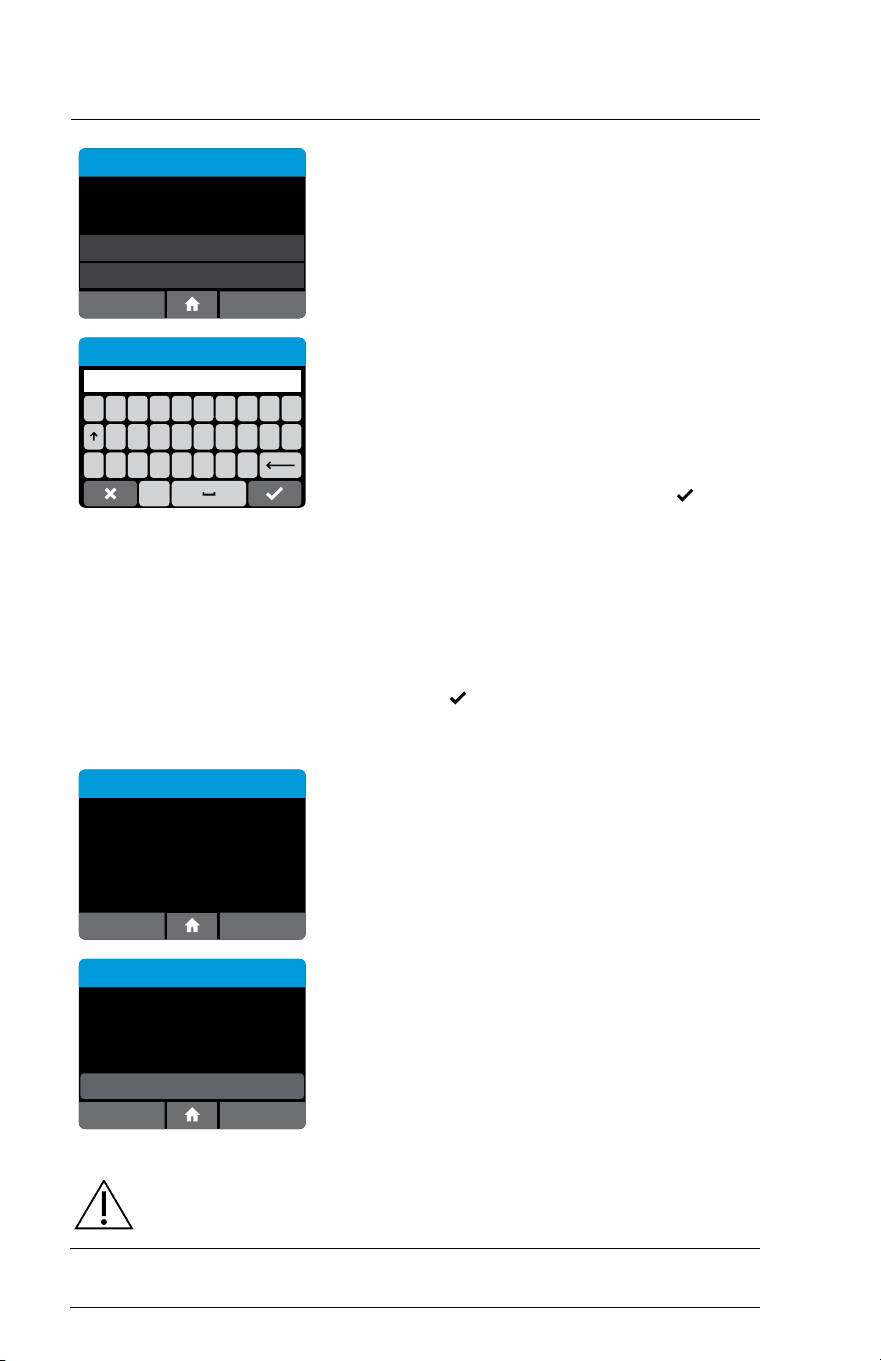
3.7 Admin Setup
Creating the Admin ID
QWERTYUI
#ZXCVBNM
OP
ASDFGH JKL
123
Create Admin Password
The instrument requires one Admin user to be set
up. The user-name is automatically set to ‘Admin’,
but the password must be chosen.
Admin User Name: Admin
Admin Password chosen by Admin.
After power-up, the Create Admin Password screen will be displayed. The Admin
user must type in their chosen password and press
.
Passwords are case-sensitive and must be alphanumeric. The password cannot
contain spaces. Passwords must be 2-20 characters.
The instrument will ask for confirmation of the password. If password is correct,
press
to advance to the next screen. If password is incorrect, press Cancel to
return to the Create Admin Password screen.
Rescue Password
Yes
No
Would you like to dene a Rescue
Password that can restore access
if the Admin password is lost?
The Admin can set a rescue password in case the
original is lost or forgotten.
Recovery Key
OKCancel
Please refer to user manual.
Recovery Key:
####-####-####
Use keyboard to enter the rescue password and reset
password.
If rescue password is lost, an error screen will indicate
'Password Not Recognized'. Admin can choose 'Reset'
and a Recovery Key will be automatically generated by
the instrument.
QWERTYUI
#ZXCVBNM
OP
ASDFGH JKL
123
Enter Reset Code
[####-####-####]
Contact Abbott Technical Support with the
Recovery Key. A Reset Code will be provided.
Use Keyboard to enter reset code and press
to advance to Enter a New Password.
ID NOW Instrument User Manual 15
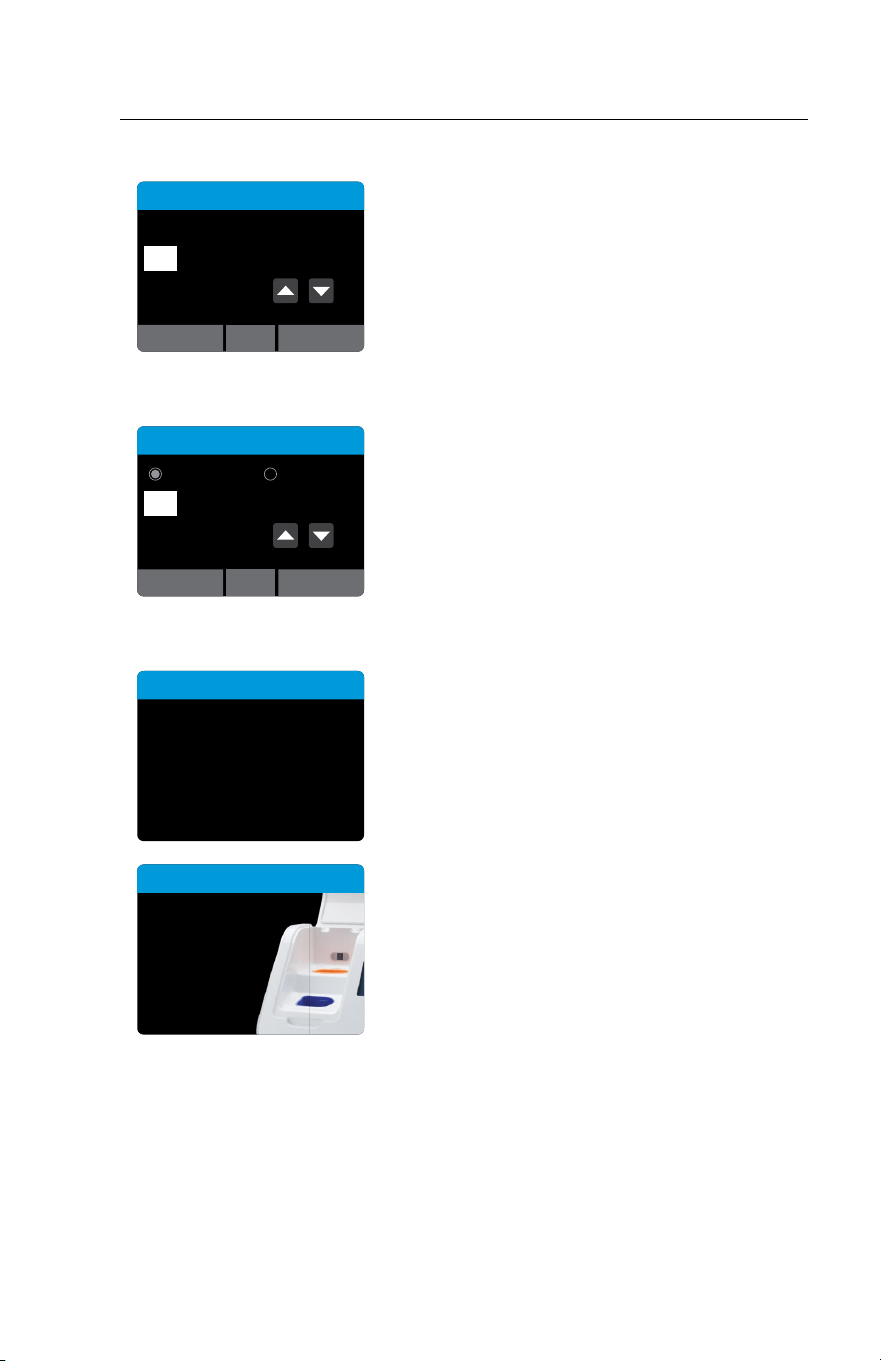
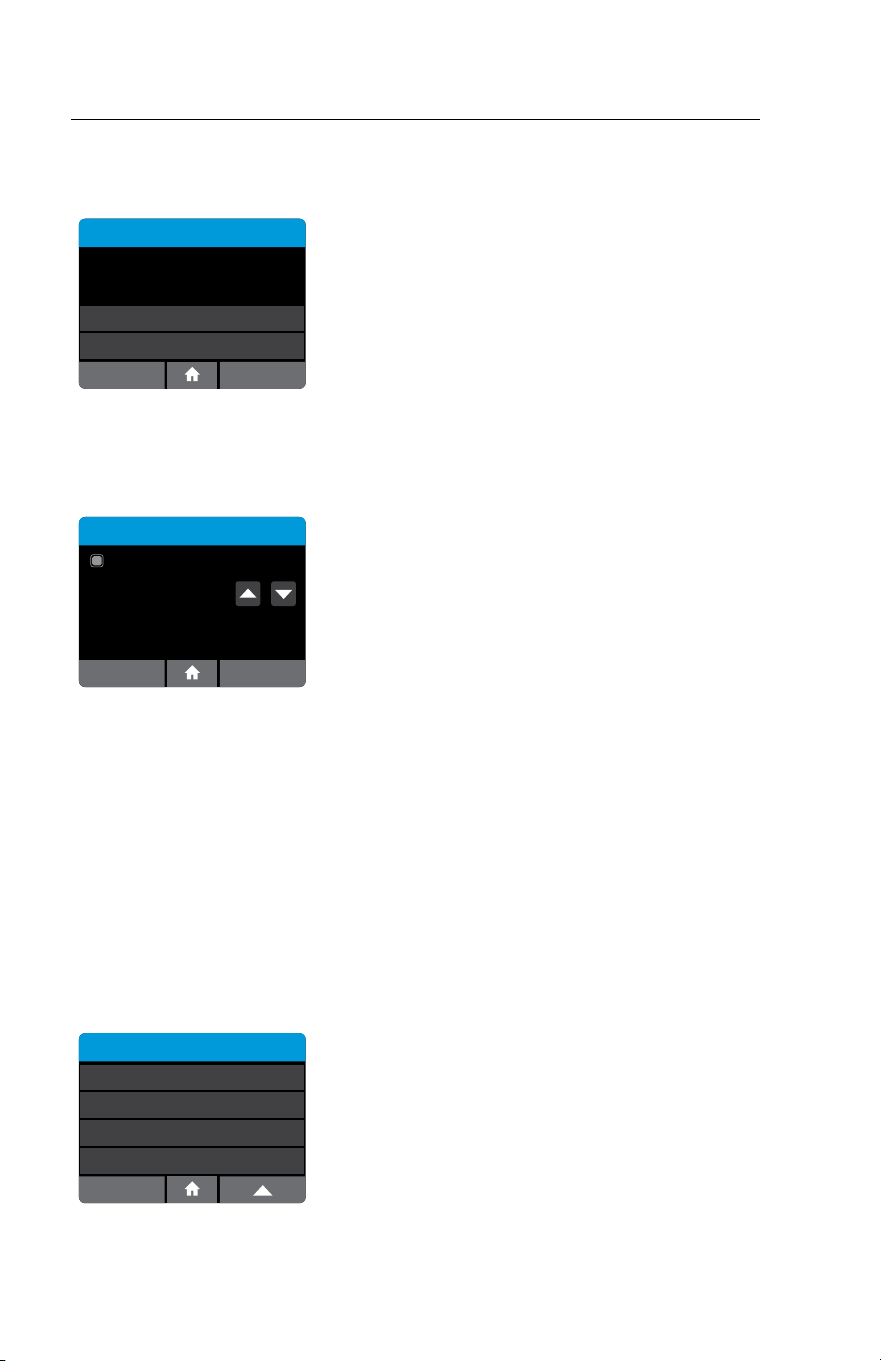
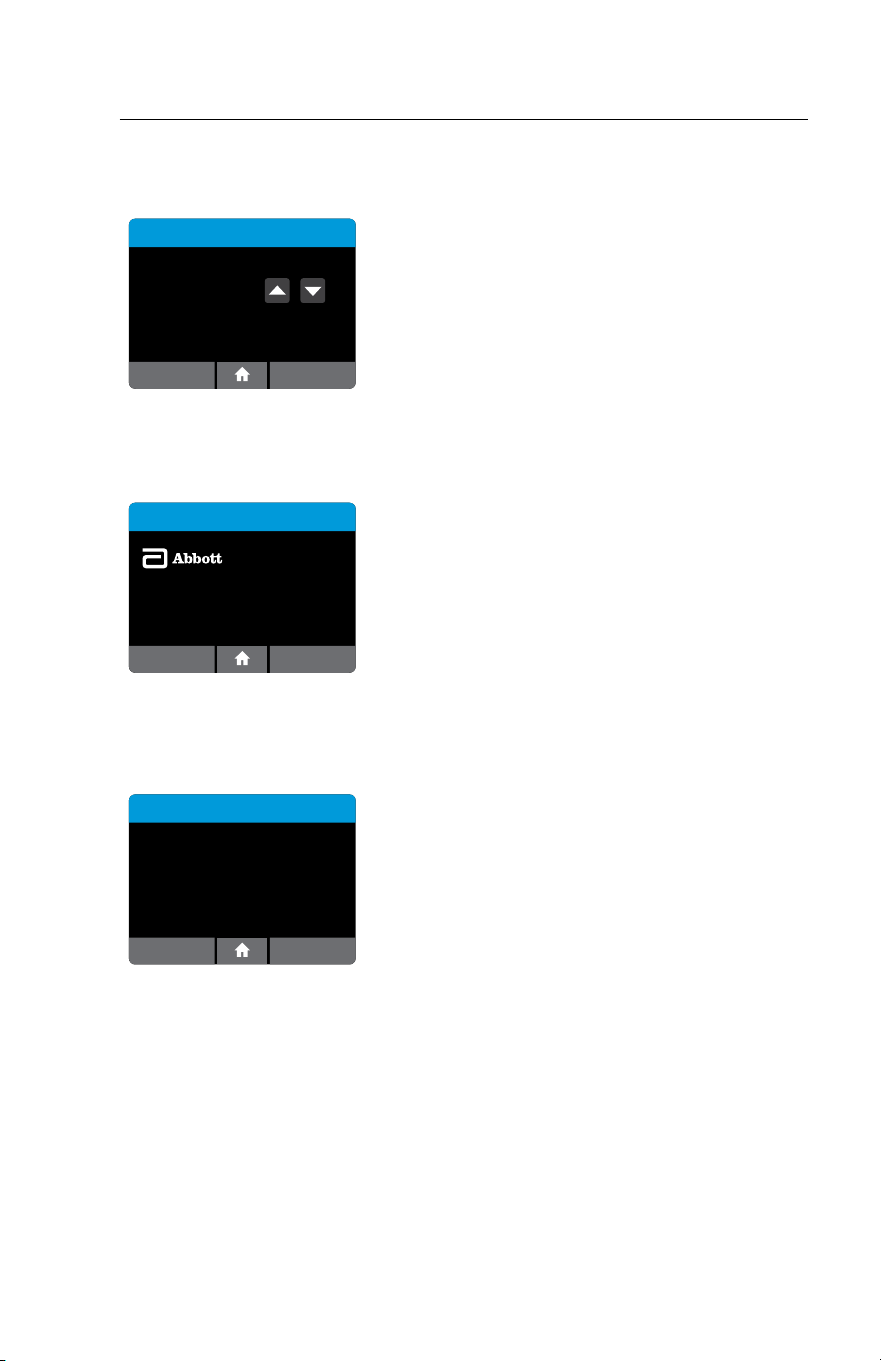
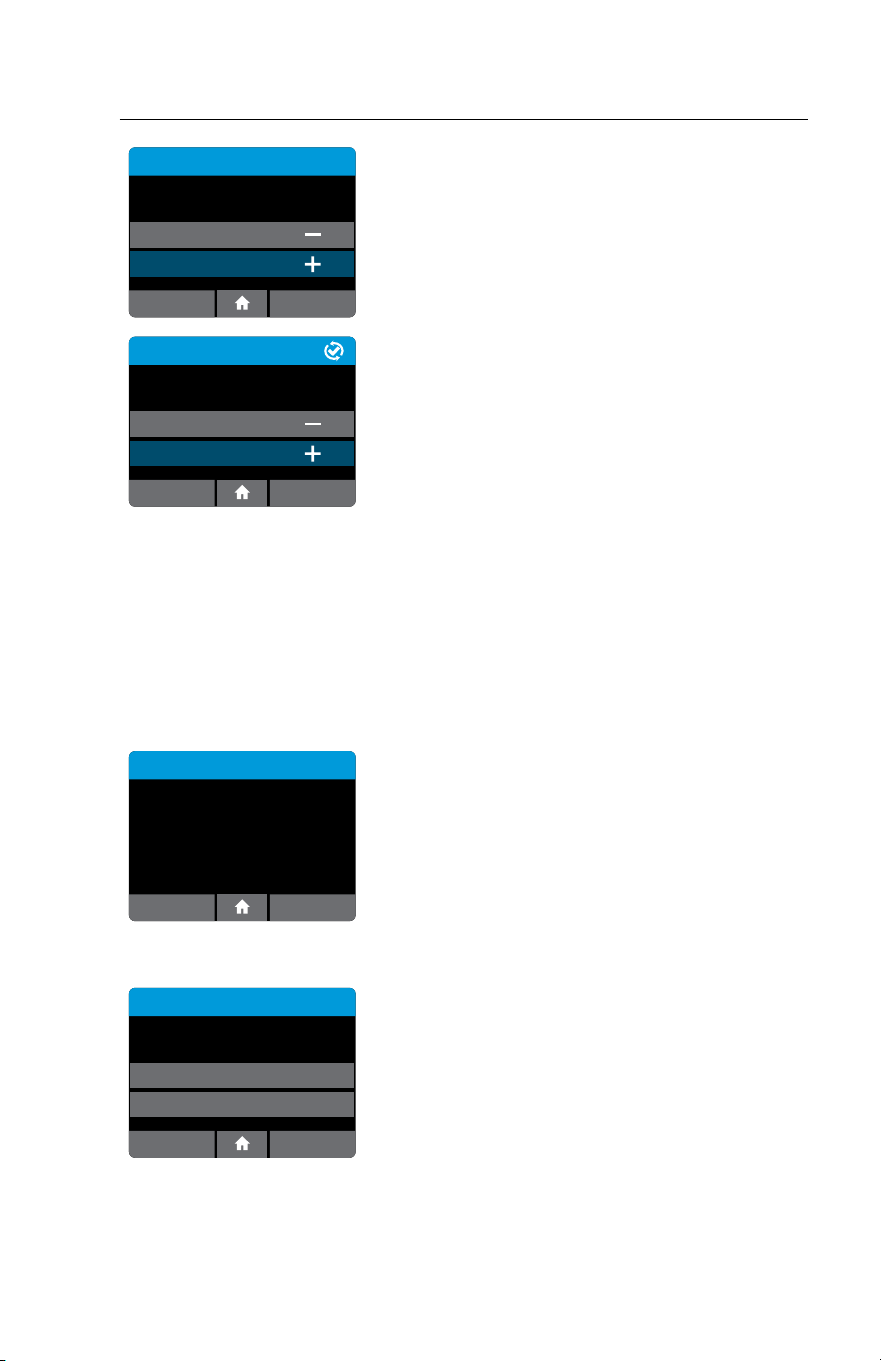
Setting the Date
Date
3 / NOV / 2013
OK
Set the correct date using the up and down arrow
keys and the touch screen to move between day,
month and year.
This screen will be displayed automatically following
creation of Admin Password.
Press OK to advance.
Setting the Time
Time
12 Hour 24 Hour
11 : 35 PM
OK
Set the correct time using the up and down arrow
keys, and choose between a 12 Hour or 24 Hour
display using the touch screen.
This screen will be displayed automatically once the
date is set.
Press OK to advance.
Self Test
Self Test
Running self test,
please wait ...
The instrument will now run a Self Test before
proceeding to the Home screen.
Close lid to
proceed.
Self Test
If the instrument lid is open, the instrument
will prompt to close the lid before running the Self
Test. The Self Test will not proceed until the lid is
closed.

16 ID NOW Instrument User Manual
Home
Home
User ID
30/Jan/2018
10:12am
Run
Test
Run QC
Test
Review
Memory
Preferences Setup Log Out
When initial set-up is complete, the Home screen
will be displayed, with the current time and date
shown in the top right, and User ID in top left
corner of the screen.
Abbott recommends that the Admin selects Setup
to finish configuring the instrument and to add
additional users. See Section 4 for details.
Alternatively, the Admin can run a test by selecting Run Test. When an assay or
the instrument is used for the first time, or following a software upgrade, the user
is required to run both a positive and a negative successful QC test before patient
testing is allowed. See Sections 6 and 7 for details.
If not ready to continue set up or run tests, Abbott recommends that the Admin
logs out by selecting Log Out.
ID NOW Instrument User Manual 17
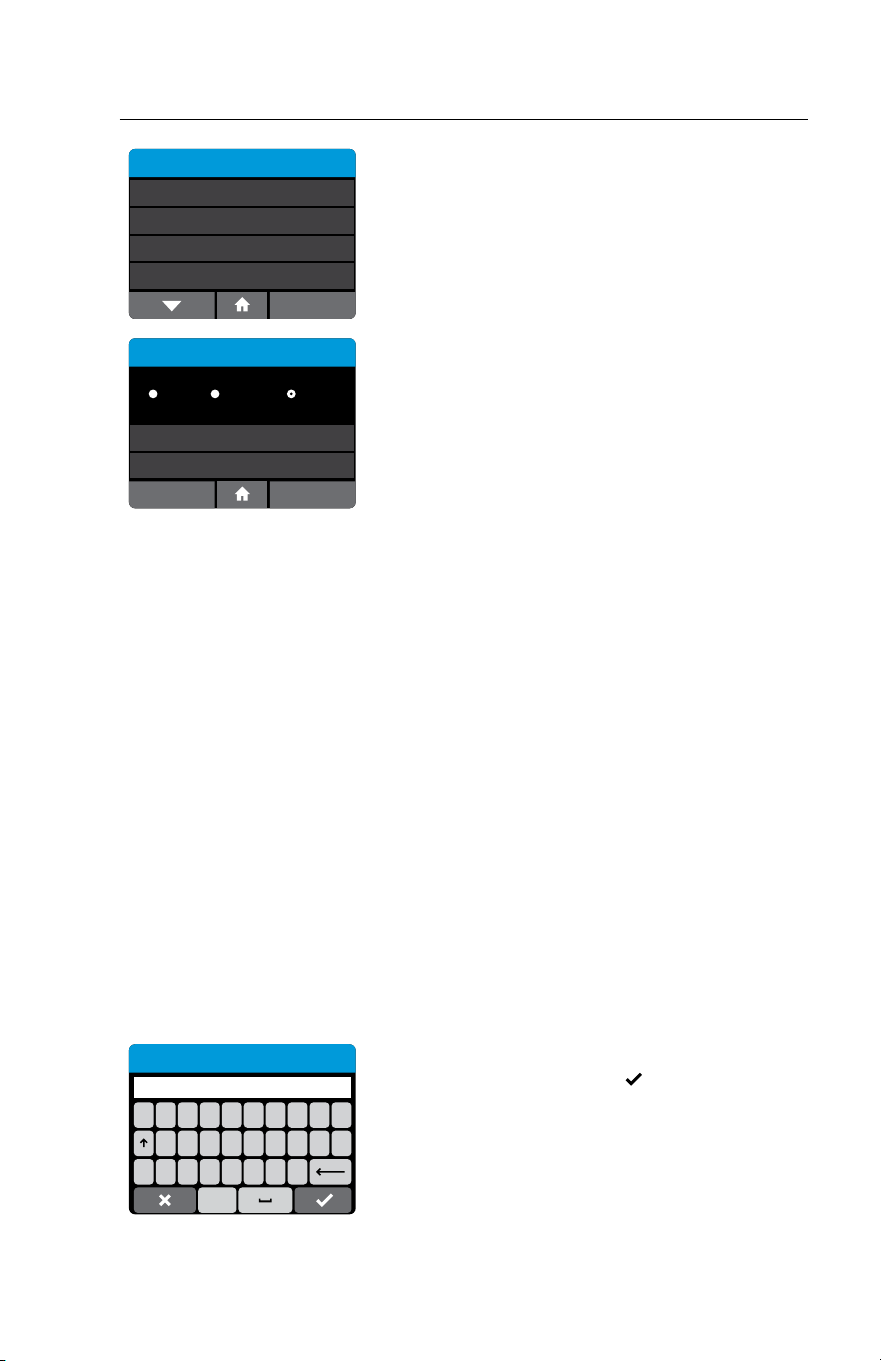
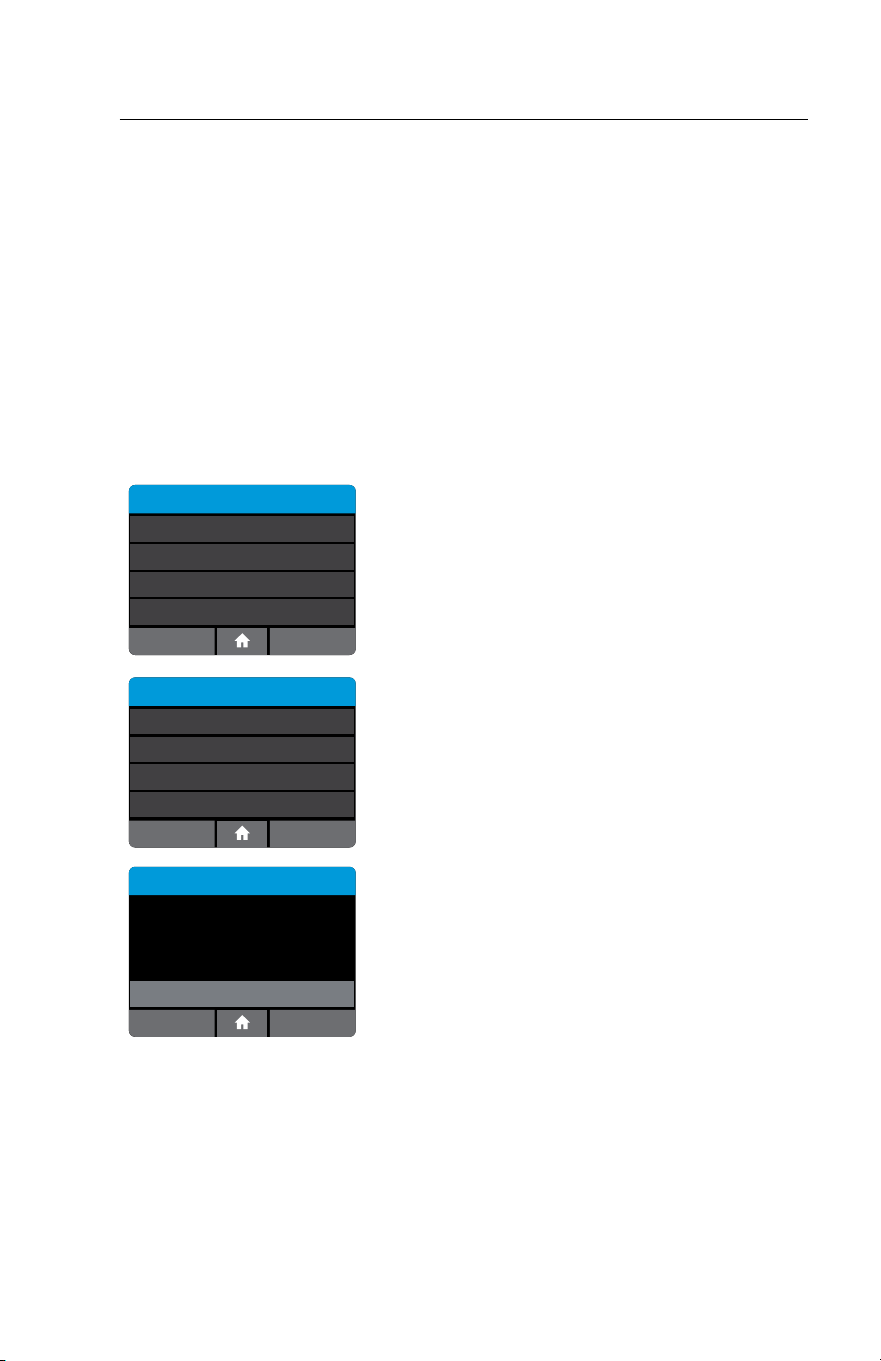
4 SETUP MENU
Home>Setup
Setup
Login
Users
Assay Preferences
ID & Password Required
Patient Details
99
The Setup screen allows the Admin to configure the
instrument. Use the up and down arrows to scroll
through menus.
Settings are saved even when power is off.
Settings include:
• Login
• Users
• Assay Preferences
• Patient Details
• Date
• Time
• Auto-logout
• Network
• Remote Mode
• Connectivity
• QC Lockout
• Lot Management
• Auto-Print
• Reset to Factory Default
Chosen options are displayed to the right of each
setting.
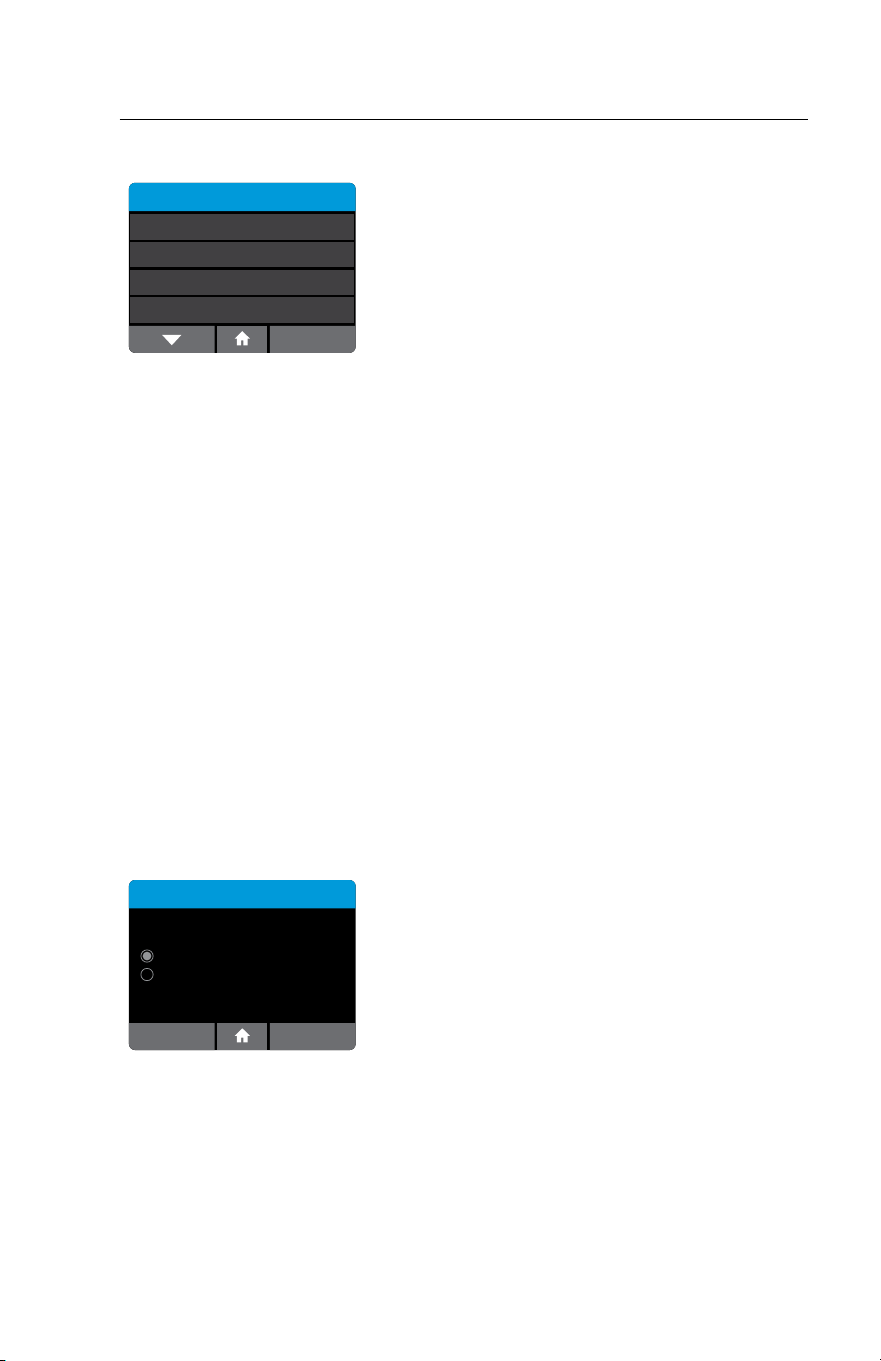
4.1 Log In (Admin Access Only)
Home>Setup>Login
Log In
User ID Only
OK
User ID & Password
Log In allows the Admin to choose User ID
password requirements to allow access to the
instrument.
If Users do not require passwords, select ‘User ID
Only’ and press OK. If a password is preferred,
select ‘User ID & Password’ and press OK.
The selected option will apply to all Users with the exception of the Admin, who
will always be required to use a password when logging on as ‘Admin’.
If the system is changed from User ID & Password to User ID Only, existing
passwords are retained in the event the Admin selects User ID & Password in the
future.
If the system is changed from User ID Only to User ID & Password, user
passwords are set to ‘password’ as a default, if a password has not been set
previously for the user. The Admin can change each User’s password individually,
as needed.
18 ID NOW Instrument User Manual
4.2 Users
Home>Setup>Users
Users
New User
ADMIN
Import Users
Export Users
Users
JAN
CINDY
MARSHA
The User Menu allows the Admin to add, delete and edit the list of instrument
users.
New User: Home>Setup>Users>New User (Admin Access Only)
QWERTYUI
#ZXCVBNM
OP
ASDFGH JKL
123
Enter User ID or Scan
Enter the User ID (for example, the User’s name),
or scan User ID using an electronic barcode, then
press
.
The User ID must be 2 to 20 characters and
alphanumeric. User IDs are not case sensitive.
QWERTYUI
#ZXCVBNM
OP
ASDFGH JKL
123
Enter Password
If required, the instrument will prompt Admin to
enter the password and press
.
Passwords are case-sensitive and must be
alphanumeric. The password cannot contain spaces.
Note: A unique User ID is required for each user. If a duplicate User ID is entered, the
instrument will prompt to use a different ID. All users may change their own password.
User Details: Home>Setup>Users
User Details
User Name: James
Password: 123password
Edit User
Delete
OK
The User’s password will be displayed, and can be
changed by pressing ‘Edit User’.
ID NOW Instrument User Manual 19
QWERTYUI
#ZXCVBNM
OP
ASDFGH JKL
123
Enter Existing Password
Enter existing password and press .
Then enter new password and press
.
Passwords are case-sensitive and must be
alphanumeric. The password cannot contain spaces.
QWERTYUI
#ZXCVBNM
OP
ASDFGH JKL
123
Enter New Password
Note: If the Admin user has been selected, neither the
password nor the delete button will be displayed on this
screen.
Press
to return to the previous screen.
Edit User
password
Change Password
Certifications
Rescue Password
OK
Certifications are managed by the POCT system
and indicate which assays the user is certified to
run. Users can use the Edit User Screen to change
their password and view current Certifications.
Admin will also have option to set Rescue Password.
Note: Users not managed by POCT system will not
see certifications.
Deleting a User: Home>Setup>Users (Admin Access Only)
User Details
User Name: James
Password: 123password
Edit User
Delete
OK
To delete a current User, press delete.
A warning will be displayed confirming to delete
user.
Press OK to delete User and return to the Setup
Users screen.
Press Cancel to return to the Users screen without
deleting the user.
Note: Deleting a User is permanent. Once deleted, the User profile will be lost.
Test results already stored in the instrument performed by this User will not be affected.
20 ID NOW Instrument User Manual
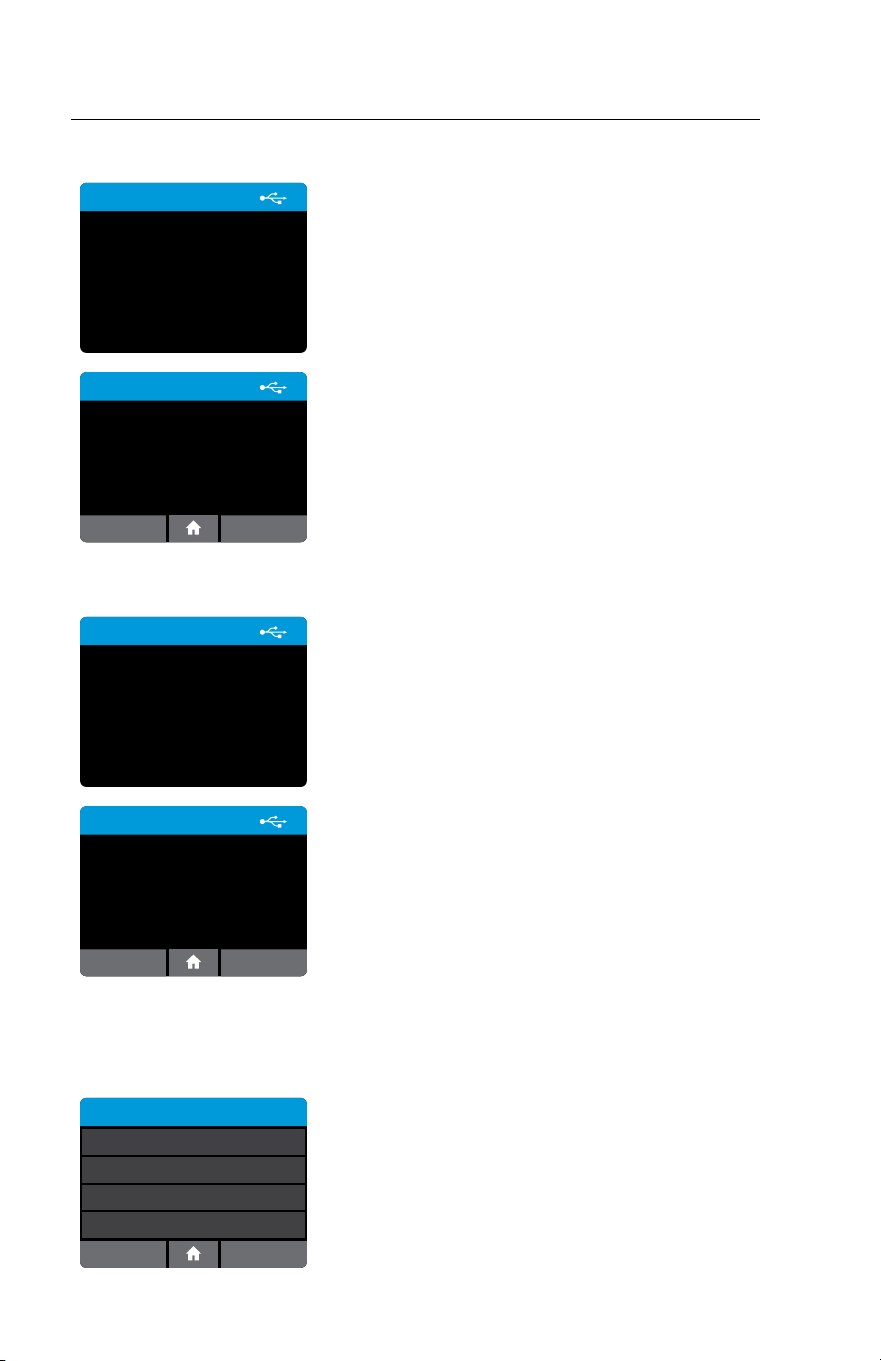
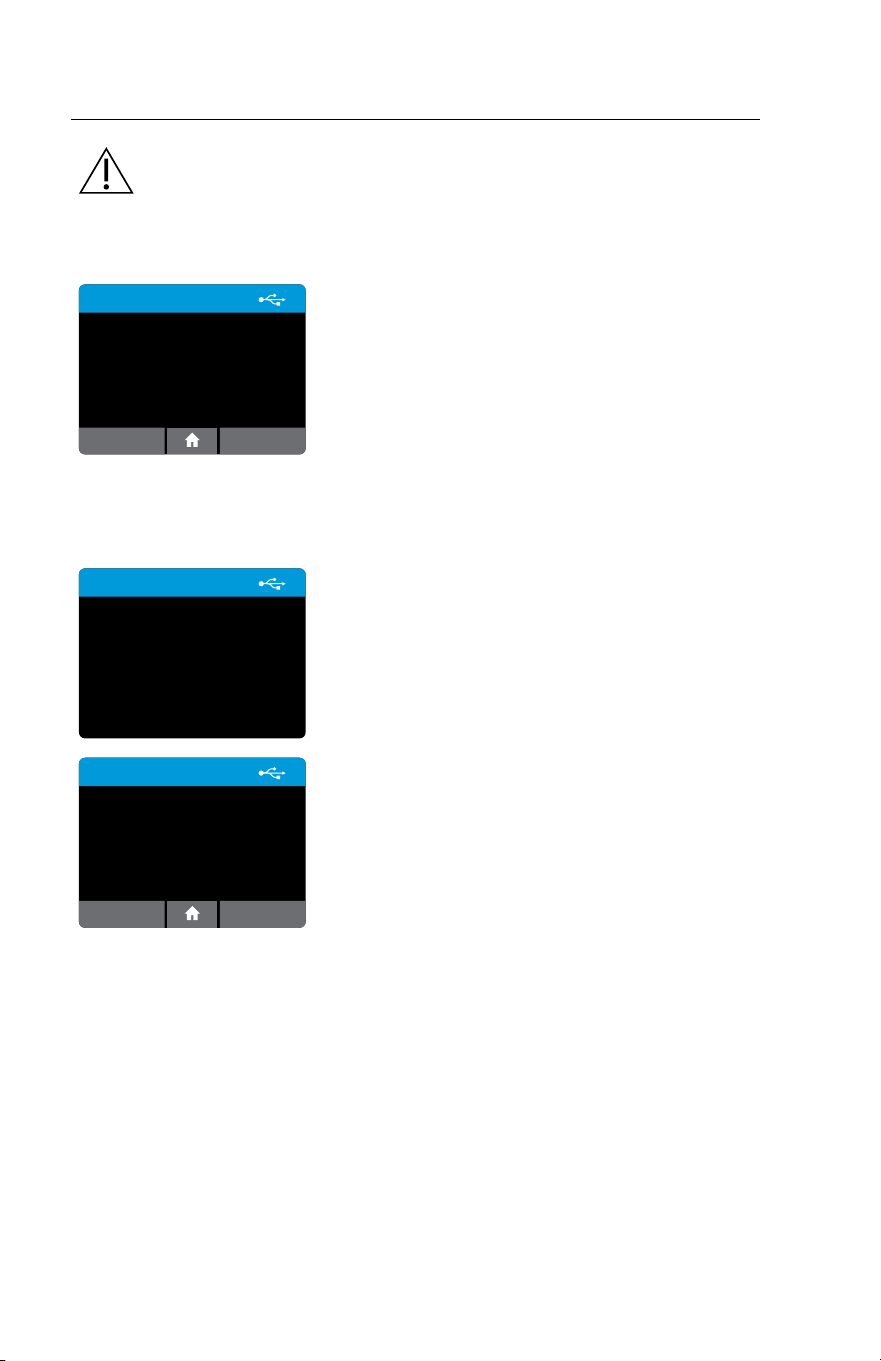
Export Users: Home>Setup>Users>Export Users
Export Users
Exporting users to USB device ...
Export all configured users to a USB drive
connected to the instrument.
This user list can then be imported to another
IDNOW Instrument, to the same instrument
following a reset to factory settings or after
software upgrades.
Press OK to return to the Users screen.
Export Users
Exported 12 users.
OK
Import Users: Home>Setup>Users>Import Users
Import Users
Importing users from USB
device...
Import a complete user list that has been exported
from an IDNOW Instrument, using a USB drive
connected to the instrument.
Press OK to return to the User screen.
Note: Only Users exported from an ID NOW
Instrument can be imported.
Import Users
Imported 8 users.
OK
4.3 Assay Preferences (Admin Access Only)
Home>Setup>Assay Preferences
Select Test
User Select
Enabled
Swab
Enabled
User Select
Enabled
ID NOW Assay 1
ID NOW Assay 2
ID NOW Assay 3
The Assay Preferences Menu allows the Admin to
enable or disable a particular assay.
The Admin can select the desired assay from the
Select Test menu.
ID NOW Instrument User Manual 21
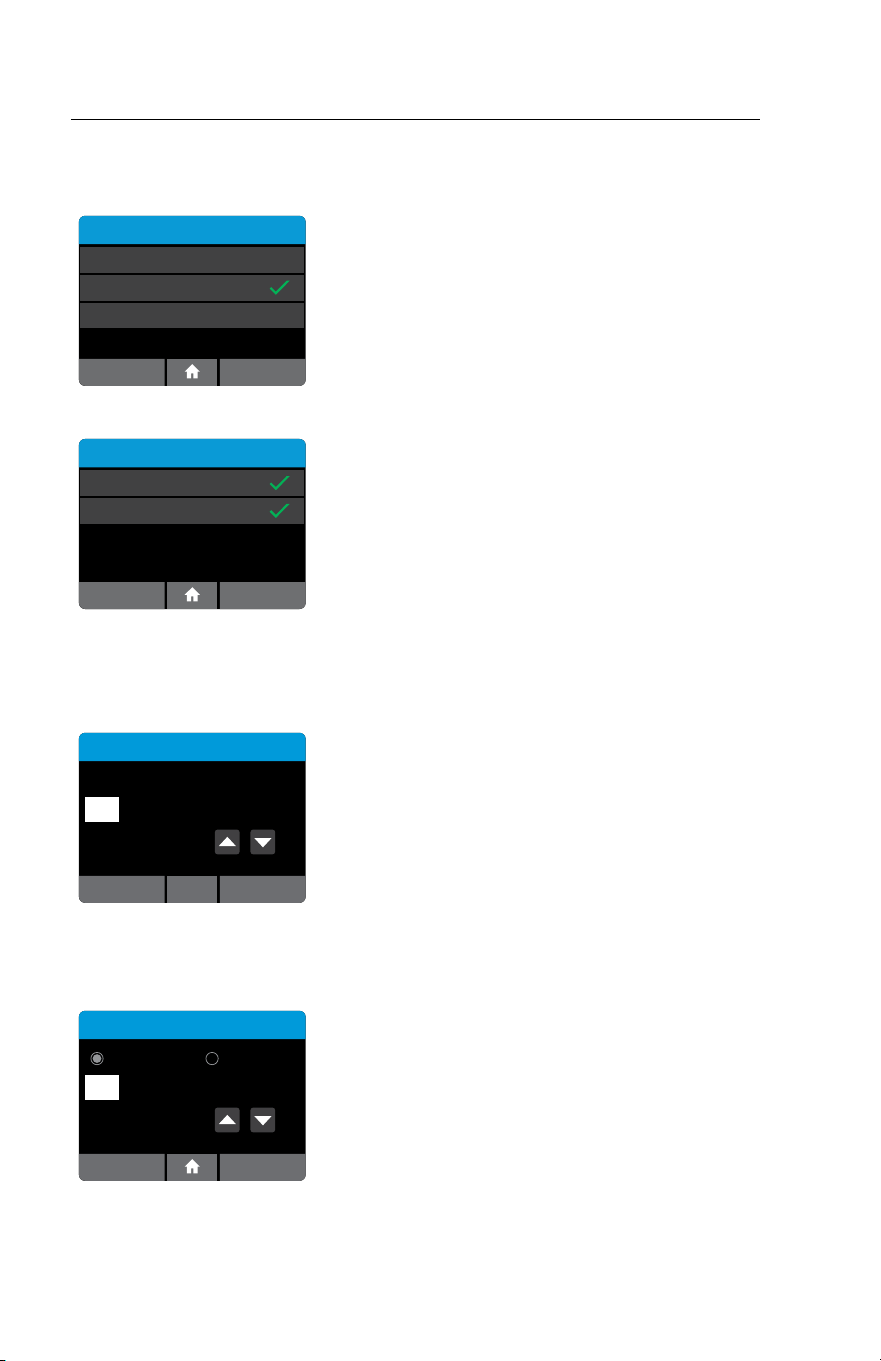
Home>Setup>Assay Preferences
Strep A Preferences
Assay Enabled
OK
SwabSample Type
When the Assay Enabled indicator is set to on
(default mode) the assay is selected and will appear
on the Assay menu choice. In this example, Strep A
is enabled.
4.3.1 Sample Type Selection (Admin Access Only)
Home>Setup>Assay Preferences> <Assay Name> >Sample Type
If the assay has more than one sample type available to them, the Admin will be allowed
to choose the applicable sample types for that assay on the instrument.
Sample Type - Flu A & B
Swab
OK
Viral Transport Media
Select Per Test
As an example, the Influenza A & B test is shown.
If Swab is selected, only the swab method will be
shown when running a test.
If Viral Transport Media (VTM) is selected, only the
VTM method will be shown when running a test.
Choose Select per Test if the instrument is intended to run both Swabs and VTM
samples. Users will be required to select the appropriate Sample Type each time
they run a test.
Press OK to save the settings and return to the Setup Menu.
4.3.2 Early Detection (Admin Access Only)
Home>Setup>Assay Preferences> <Assay Name>
Inuenza A & B Preferences
Assay Enabled
OK
Early Detection Enabled
SwabSample Type
Some Assays offer an Early Detection feature:
The Early Detection feature allows a multi-target
assay to end as soon as a positive result is detected
in one of the targets. The second target will not be
reported.
TO TURN ON EARLY DETECTION: ensure that
the Early Detection Enabled box is ticked.
TO TURN OFF EARLY DETECTION: ensure that
the Early Detection Enabled box is clear.
22 ID NOW Instrument User Manual
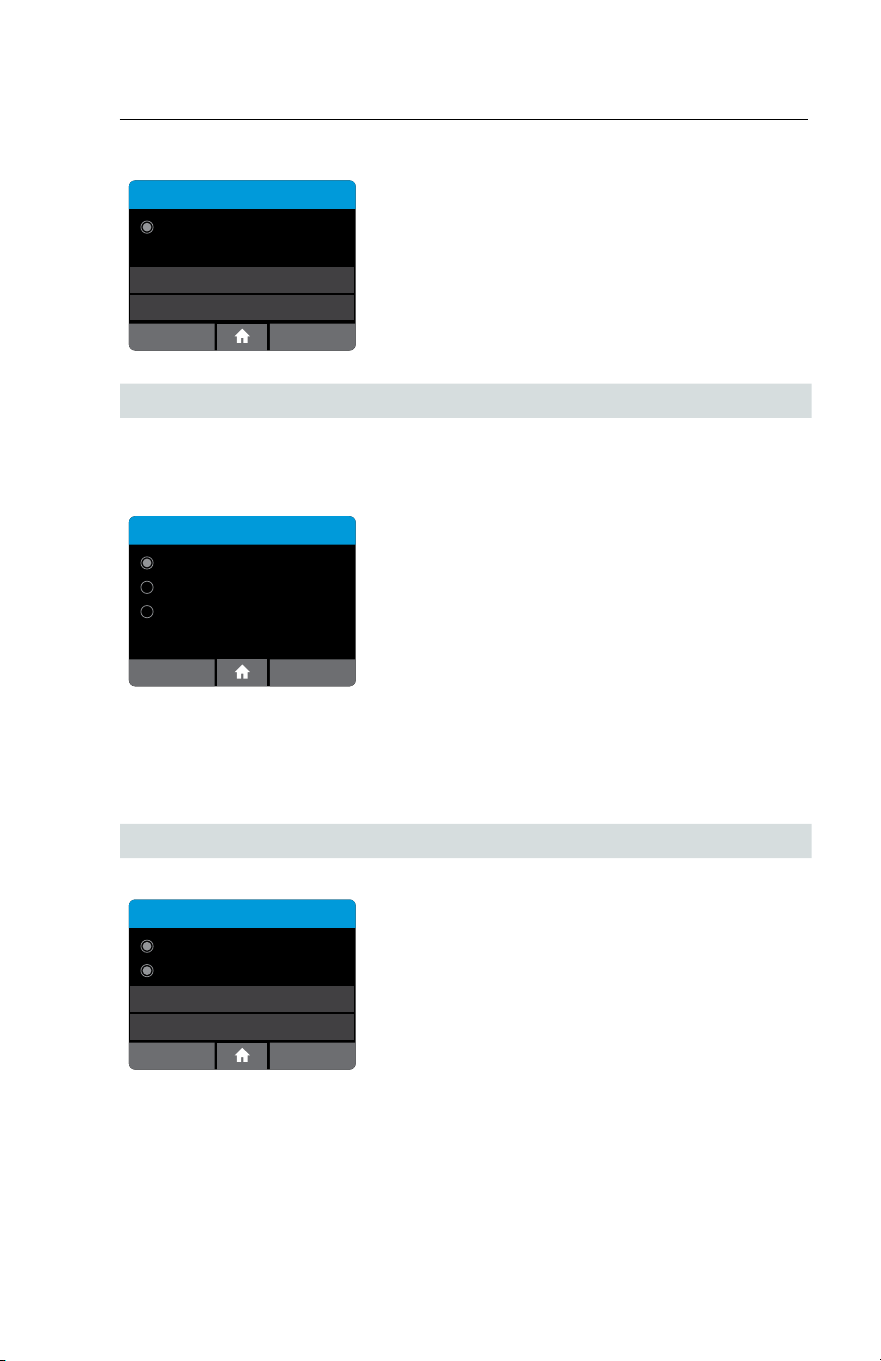
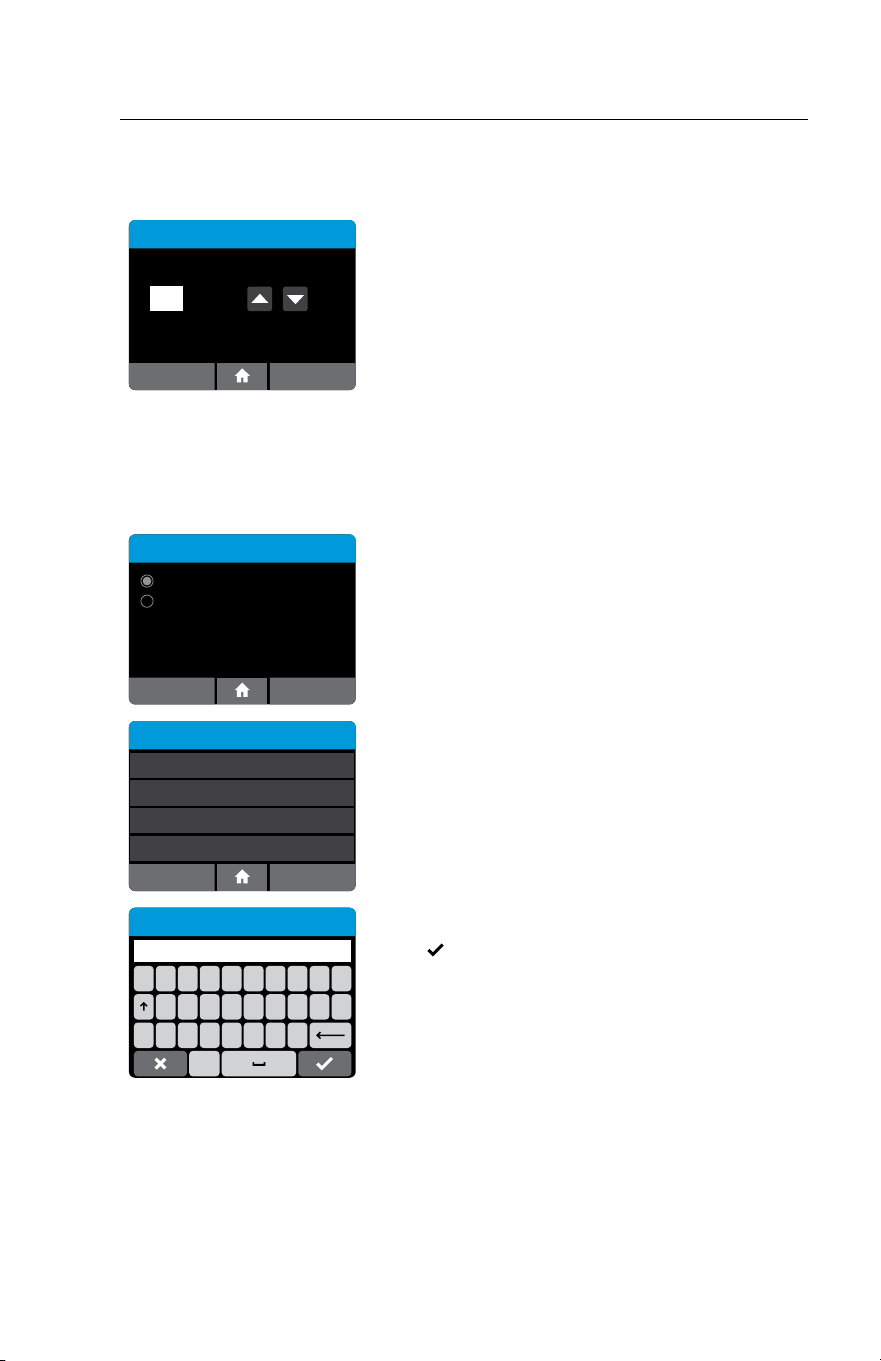
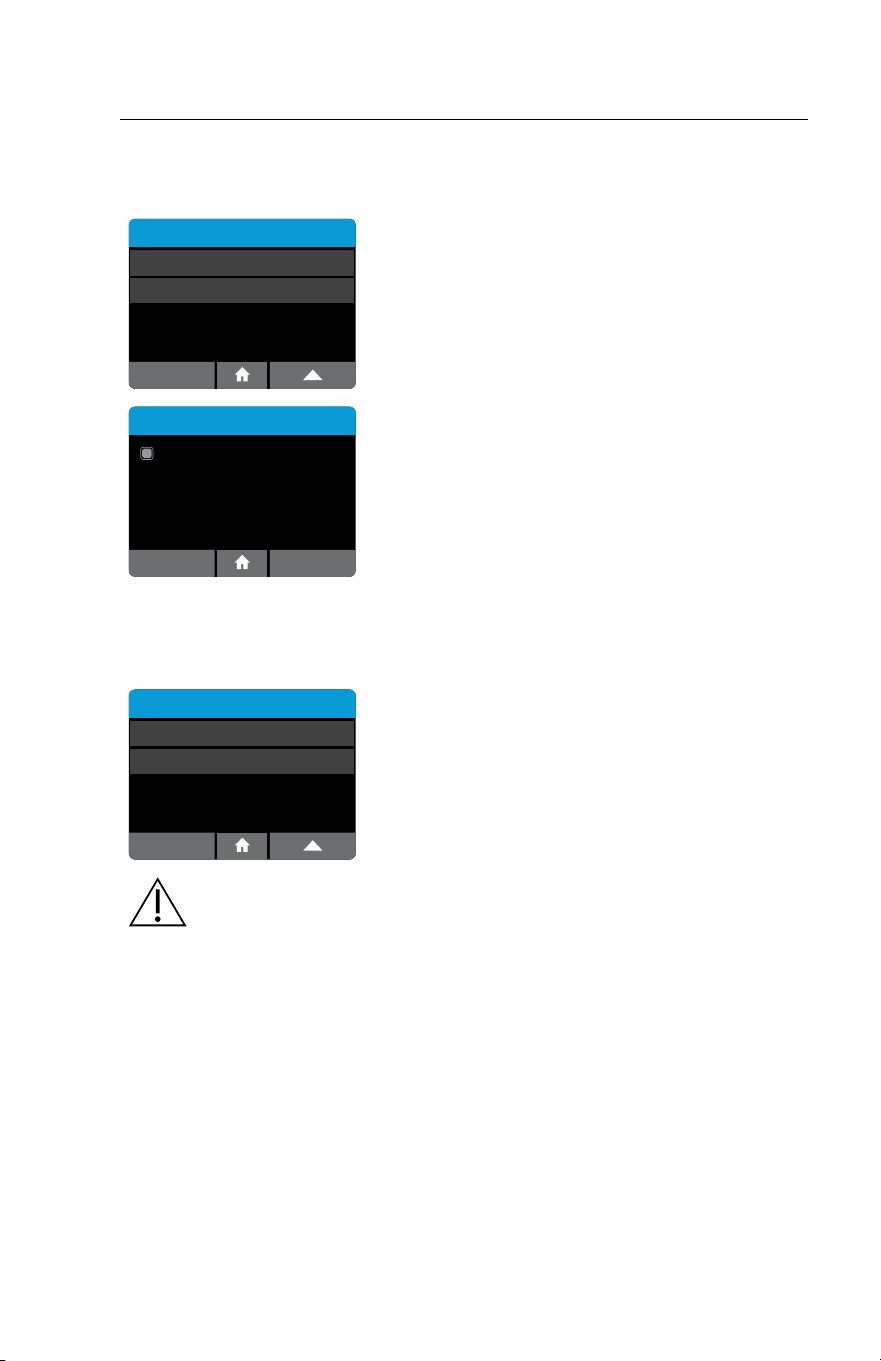
4.4 Patient Details (Admin Access Only)
Home>Setup>Patient Details
Patient Details
Positive Patient ID
Always Prompt
Display Patient Info
OK
Use the Patient Details menu option to enable
a confirmation step in the Read Test workflow
to verify the identity of the patient. This
Positive Patient ID feature is only enabled when
connectivity is set to POCT-1A.
Press Always Prompt to toggle between on
(checked) and off (unchecked).
Note: The POCT server can enable/disable Positive Patient
ID.
Display Patient Info
On Screen
On Printout
OK
Patient Info can be displayed on Screen or on
Printout by pressing Display Patient Info which
will advance to a screen to choose On Screen and/
or On Printout. Press OK to accept changes and
return to Home screen.
4.5 Date (Admin Access Only)
Home>Setup>Date
Date
3 / NOV / 2013
OK
The Date Menu allows the Admin to set the correct
date.
Use the up and down arrow keys and the touch
screen to change the date and move between day,
month and year.
Press OK to save the settings and return to the
Setup Menu.
4.6 Time (Admin Access Only)
Home>Setup>Time
Time
12 Hour 24 Hour
11 : 35 PM
OKCancel
The Time Menu allows the Admin to set the correct
time.
Use the up and down arrow keys and touch screen
to change the time and choose between a 12 Hour
or 24 Hour display.
Press OK to save the settings and return to the
Setup Menu.
ID NOW Instrument User Manual 23
4.7 Auto Logout (Admin Access Only)
Home>Setup>Auto-Logout
Auto-Logout
OK
5 Min
Cancel
The Auto-Logout Menu allows the Admin to select
when the instrument automatically logs a User out
after 5 minute and up to 60 minutes of inactivity.
Use the up and down arrow keys to change Auto-
Logout time in 5 minute intervals.
To turn feature off, scroll up from 60 Min.
Press OK to save the settings and return to the
Setup Menu.
4.8 Network (Admin Access Only)
Home>Setup>Network
Network
DHCP
OK
Static
IP Address: 10.0.1.121
255.255.0.0Subnet Mask:
Gateway: 10.0.1.121
255.255.255.0DNS Address:
Cancel
Edit Addresses
IP Address
Subnet Mask
Gateway
255.255.255.0
DNS Address
100.100.100.100
100.100.100.100
100.100.100.100
Cance
lO
K
12345678
#+=. ,?!‘
90
/:;()$&@“
ABC
10.0.1.121
IP Address
The Network menu allows the Admin to configure
the network settings on the Instrument.
Functions supported include:
• Select between DHCP and Static IP address
assignment.
• Configure IP Address.
• Configure Subnet Mask.
• Configure Gateway
• Configure DNS
The default is DHCP. To switch to static IP, an IP
address, Subnet Mask, Gateway, or DNS Address
must be entered manually using Edit Addresses
screen. The details will show on right of screen, if
set.
Press
to save the settings and return to the
Setup Menu.
Some networks require registration of a device before they are assigned an IP
address. Please consult with your Network Administrator or IT Help Desk, as
needed.
24 ID NOW Instrument User Manual
4.9 Remote Mode (Admin Access Only)
Home>Setup>Remote Mode
Remote Mode
Remote Mode Enabled
Client connections: 0
IP Address: 172.16.0.161
Cancel
Remote Mode is currently not available for use by
end users.
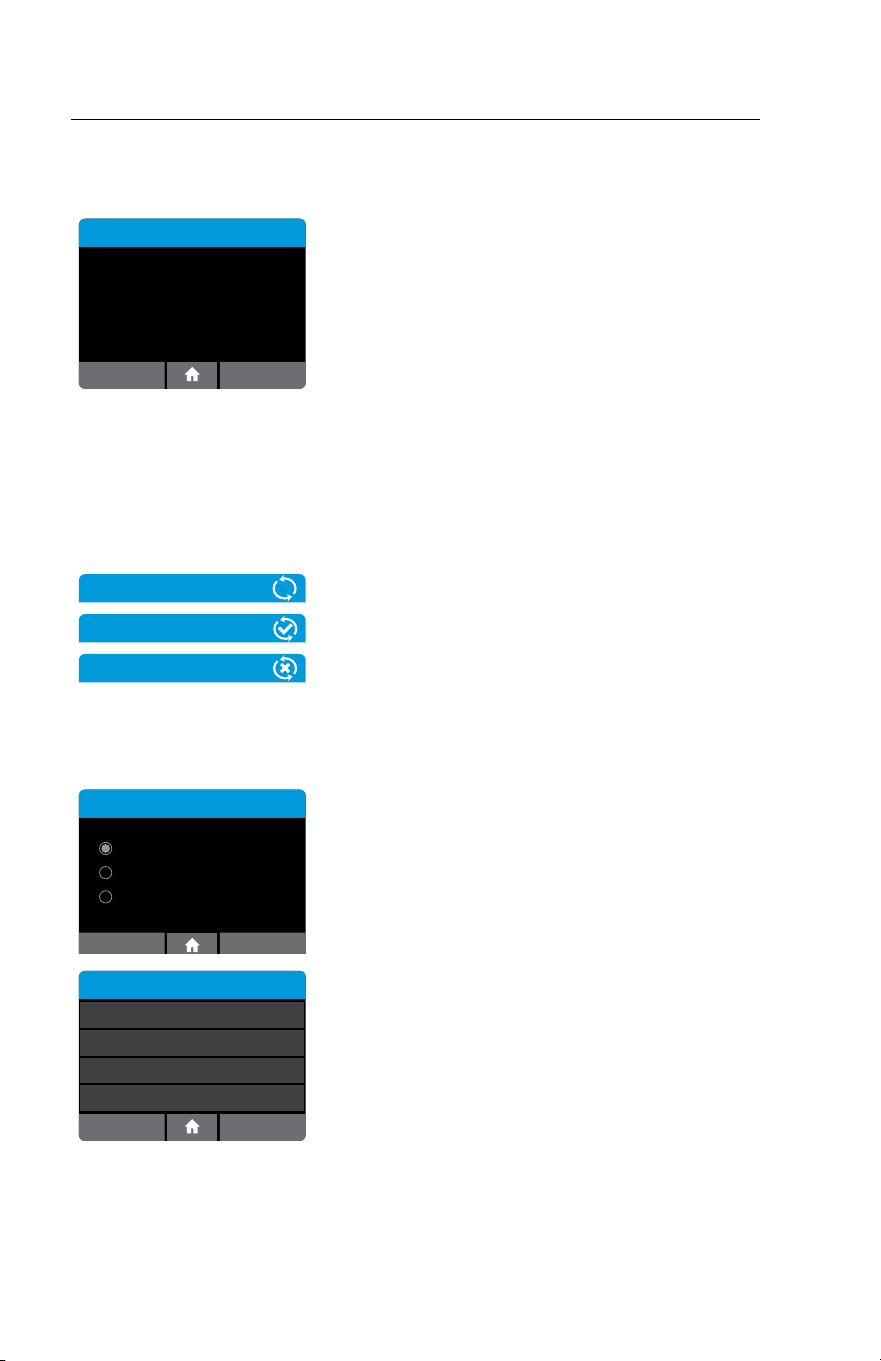
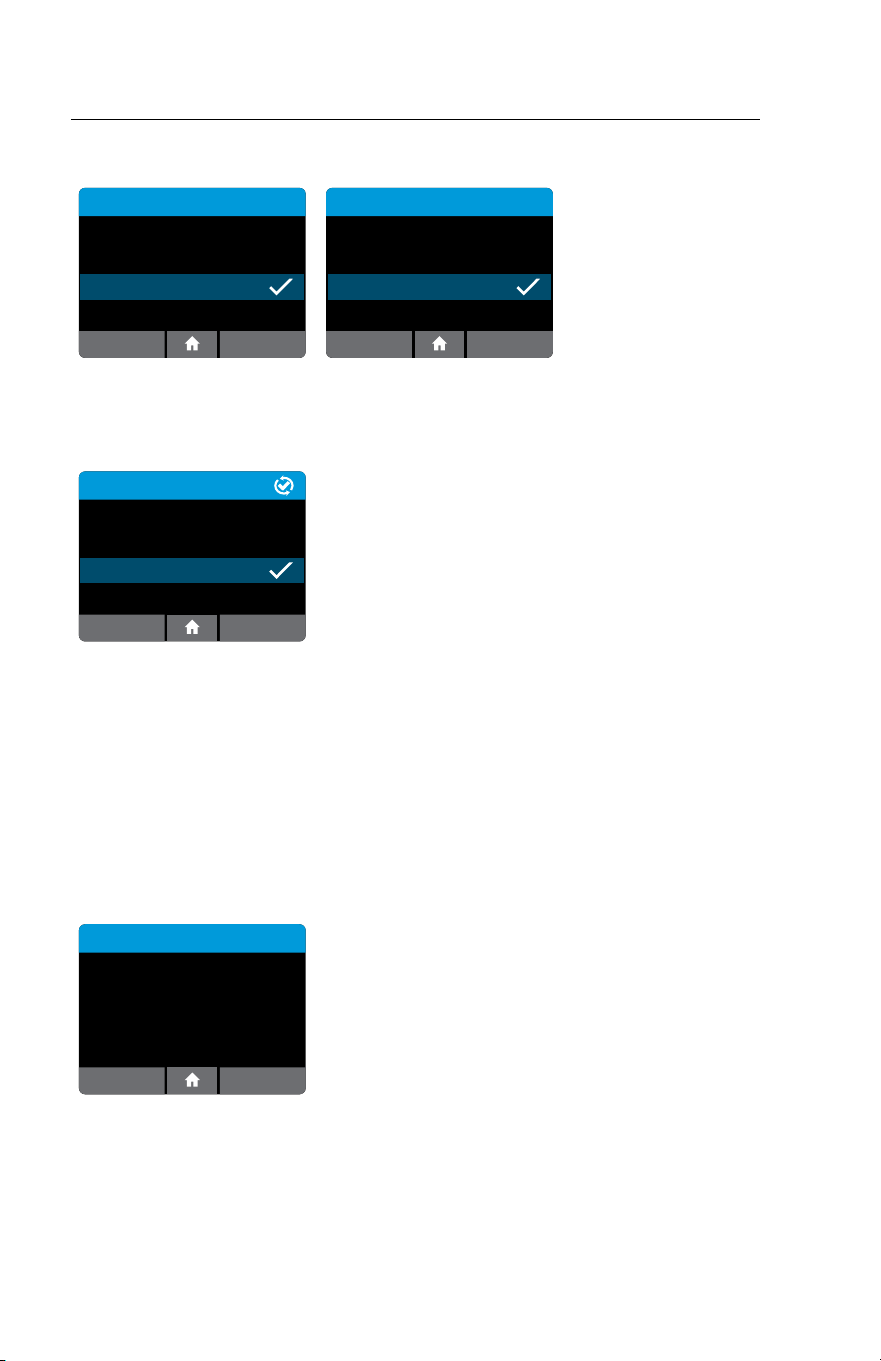
4.10 Connectivity (Admin Access Only)
Records may be transmitted to a Laboratory Information System (LIS) or Point of
Care Data Management System (POC DMS).
Icons
Icons appear at the upper right on certain screens
when Connectivity activity occurs.
The top icon indicates an activity is in progress.
The middle icon indicates successful completion.
The bottom icon indicates an error occurred during
a connectivity activity.
Home>Setup>Connectivity
Connectivity
ASTM LIS
OK
HL7
POCT-1A
The Connectivity Menu allows the Admin to
configure, edit, or control sending messages to a
Laboratory Information System or the Point of
Care Data Management system via the Ethernet
network connection. Choose either ASTM LIS,
HL7, or POCT and press OK to select.
Connectivity
Setup
Status
Auto-Sending
nnn Unsent
Clear Sent History
Enabled, 5 Min
ID NOW Instrument User Manual 25
4.11 Connectivity Setup Screen (Admin Access Only)
Home>Setup>Connectivity>Setup
Setup
IP Address
Port Number
Test Connection
51122
Clear Settings
Success
100.100.100.100
Cancel
The Admin can set the IP Address and Port
corresponding to the Laboratory Information
System or Point of Care Data Management
System.
Test Connection can be used to determine if the
instrument can reach a compatible server at the
configured address and port.
Changes to the IP Address and Port Number are
only persisted if the user presses the OK button;
Cancel will discard changes.
4.11.1 IP Address (Admin Access Only)
Home>Setup>Connectivity Setup>IP Address
12345678
#+=. ,?!‘
90
/:;()$&@“
10.0.1.121
IP Address
ABC
Note: This is for entering the IP address of the LIS , HL7
or POCT server, not of the IDNOW instrument itself.
4.11.2 Port Number (Admin Access Only)
Home>Setup>Connectivity Setup>Port Number
12345678
#+=. ,?!‘
90
/:;()$&@“
51122
Port Number
ABC
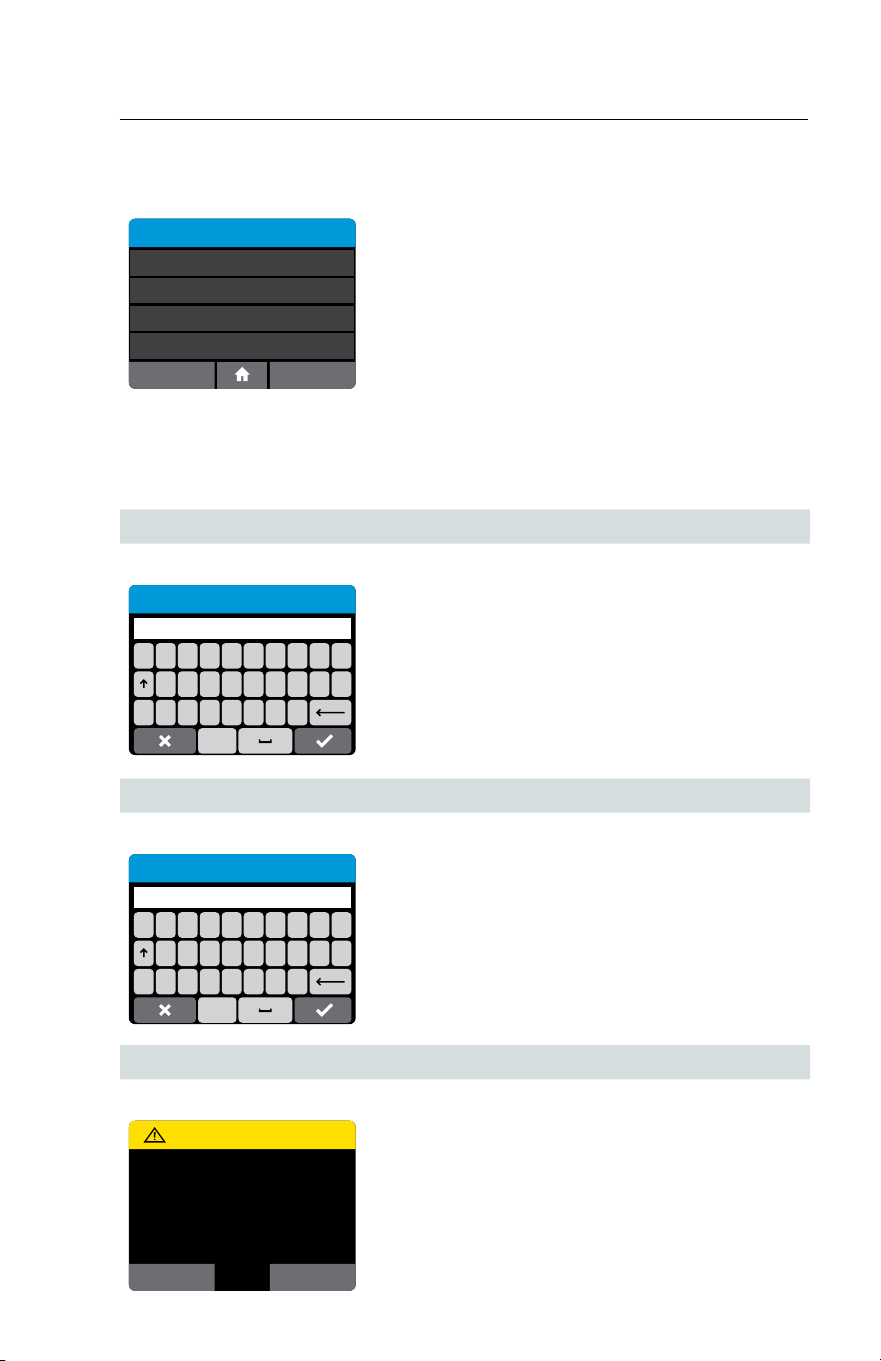
4.11.3 Clear Settings (Admin Access Only)
Home>Setup>Connectivity Setup>Clear Settings
Warning
OK
Are you sure you want to clear
all the current connection
settings?
Cancel
Selecting OK will return connectivity IP Address
and Port Number to “Not Set” and return to the
Connectivity menu.
26 ID NOW Instrument User Manual
4.12 Status Screen
Home>Setup>Connectivity Status
Status
Unsent Results:
Total Results:
Test Connection
4
Send All Unsent
Success
2
Back Stop
Status shows how many total records are
in memory and how many have not been sent
to the connectivity server. This number includes
both QC test results and patient test results.
Test Connection tests connectivity to the server, as
seen under Connectivity Setup.
Send All Unsent sends all records to the server that
have not previously been successfully sent.
4.13 Auto-Sending Screen (Admin Access Only)
Home>Setup>Connectivity>Auto-Sending
Auto-Sending
OK
Auto-Sending
5 MinAuto-Send Period:
When Auto-Sending is enabled, the instrument
will regularly attempt to send all unsent records to
the connectivity server at the configured period.
The available selections are 5, 10, 15, or 30
Minutes, 1 Hour, and 1 Day.
4.14 Clear Sent History (Admin Access Only)
Home>Setup>Connectivity>Clear Sent History
Clear Sent History erases the time and date record for all results sent successfully.
This feature may be used if switching to a new laboratory information system or if
the user wants to re-transmit all test results.
4.15 QC Lockout (Admin Access Only or via POCT server)
Home>Setup>QC Lockout
The Admin can enable the QC Lockout function to ensure that a QC negative and
positive test must be run before patient testing is allowed on each new assay lot.
Note: When using POCT, the remote server can update these settings.
Setup
Connectivity
Lot Management
QC Lockout
Reset to Factory Default
Select QC Lockout to configure QC Lockout
options.
ID NOW Instrument User Manual 27
QC Lockout
ID NOW Assay 1
ID NOW Assay 2
ID NOW Assay 3 O
O
O
Select each assay from the QC Lockout menu to
configure QC Lockout.
QC Lockout - ID NOW Assay 1
Warn
Units
Frequency 100
Days
OK
Cancel
O Lockout
The QC Lockout Menu allows the Admin to
configure QC lockout options for the assay
selected.
Select Off to disable QC Lockout (default)
Select Lockout or Warn to prevent any patient
tests being performed with a new lot until negative
and positive QC has passed for that lot.
The QC Lockout function when enabled (warn or
lockout mode) also allows the Admin to configure
a testing interval for the assay chosen (lot
independent).
In the Lockout mode when the assay frequency
expires, the user will be prompted to run a QC test
for that particular assay before a patient test can
be run.
In the Warn mode, when the assay frequency
expires it will present the user with an option to
proceed.
Units are set as either days or number of tests
performed by pressing the units button.
Frequency can be set between 1-1000. (If testing
interval is not required set frequency at 1000
days.)
Press Frequency to proceed to the touchscreen
keypad.
12345678
#+=. ,?!‘
90
/:;()$&@“
Frequency
1000
ABC
To set the Frequency enter the number of days
or tests. Press X to reselect or
to confirm and
continue.

28 ID NOW Instrument User Manual
QC Lockout - ID NOW Assay 1
Warn
Units
Frequency 100
Days
OK
Cancel
O
Lockout
The screen will indicate selected Units and
Frequency. Press Cancel to return to previous
screen. When parameters are set as desired, press
OK to confirm and continue.
QC Lockout
ID NOW Assay 1
ID NOW Assay 2
ID NOW Assay 3 O
Warn - 100 Tests
Lockout - 30 Days
The QC Lockout screen will provide a summary for
each assay enabled on the instrument.
When the QC Lockout function is enabled (warn or lockout) the user will be
prompted to run QC negative and positive controls before a patient test can be
run. Alternatively, the user can change to a different lot (which has had a valid QC
negative and positive control associated with it.)
Run QC Test
Positive QC Test
Negative QC Test
Both QC negative and QC positive tests must
generate valid results before the instrument can run
a patient test. Select Run QC Test and follow the
steps in Section 7.
ID NOW Instrument User Manual 29
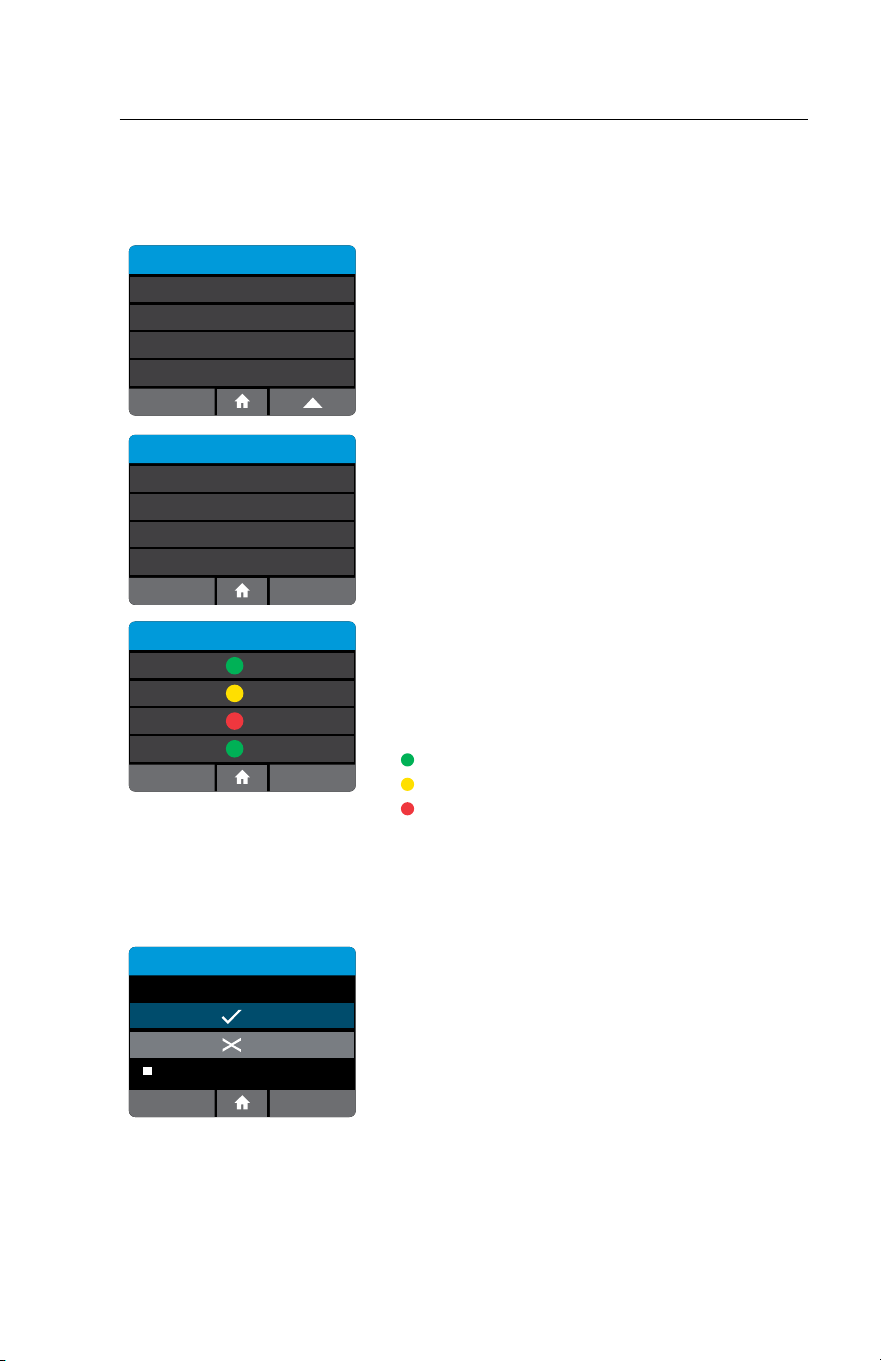
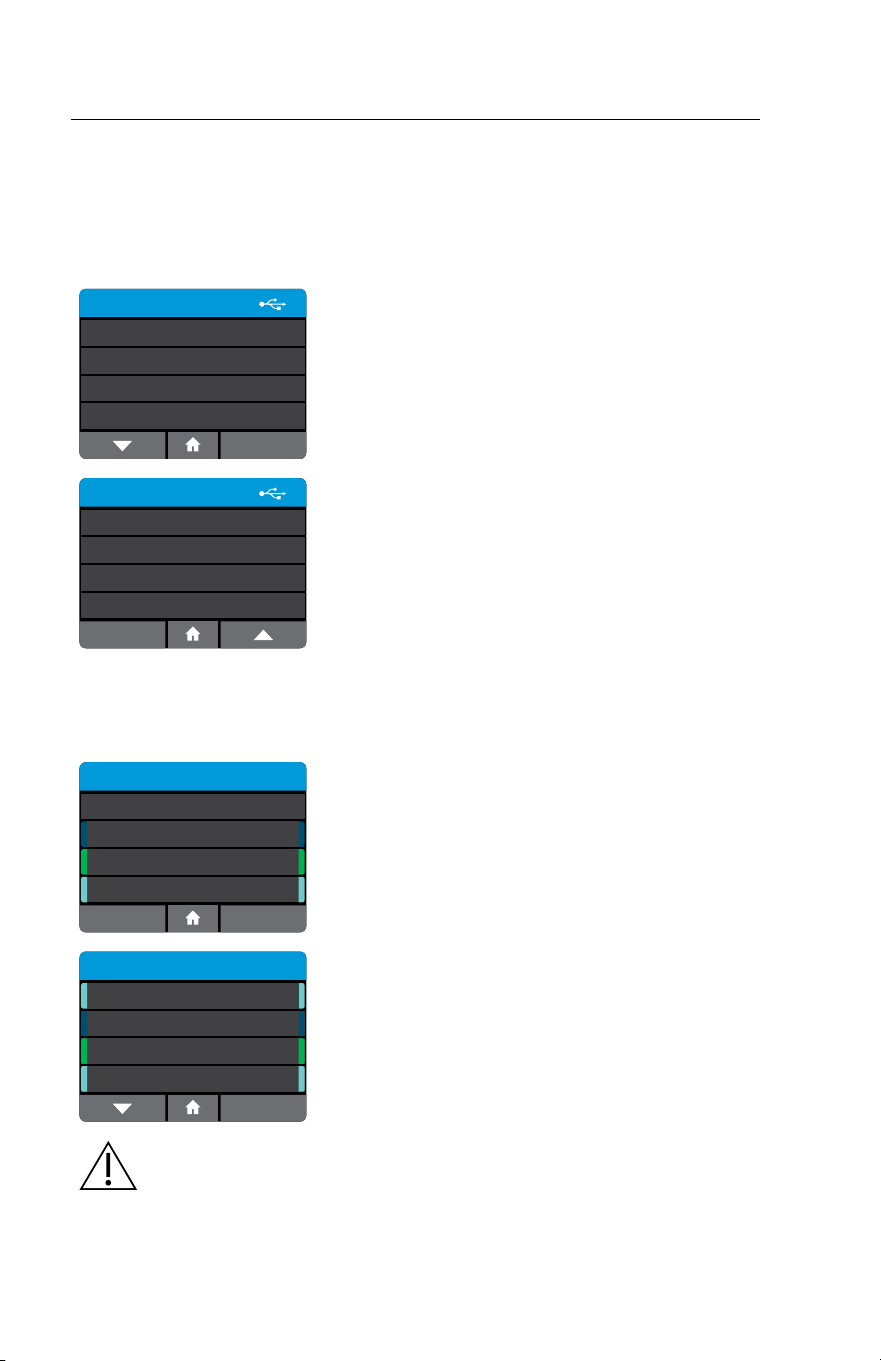
4.16 Lot Management (Admin Access Only or via POCT server)
Home>Setup>Lot Management
This feature allows the Admin to review detailed Lot information.
Setup
Remote Mode
QC Lockout
Connectivity
Lot Management
Select Lot Management to review QC test of lots
on instrument as well as to Export and/or Import
lots to and from instrument
Lot Management
View All Lots
Search Lots
Import QC Results
Export QC Results
Lot List
0123456
0246810
0369121
0451548
ID NOW Assay 1
ID NOW Assay 2
ID NOW Assay 3
ID NOW Assay 2
Lot Management allows Admin to:
• View All Lots on the instrument
• Search for specific lots using assay,
date range, or status
• Import QC Results onto the instrument from
USB Drive
• Export QC Results on instrument to USB
Drive
Select View All lots to view a list of all lots currently
on the instrument. The Lot Status and Assay will be
visible.
Pos and Neg QC results passed
Incomplete Pos or Neg QC results
Pos or Neg or both QC results failed
Lots will be listed chronologically from newest
qualification to oldest.
Select Search Lots to search for a specific Lot or all
Lots run for a specific assay.
Lot - 0123456
Test Type: Influenza A & B
Lockout
Positive QC
Negative QC
13/JAN/2018
SN: A2ED6618
OKCancel
N/A
Select a lot to see its details. In this example, the
Assay name as well as instrument serial number and
the Date and Time of its QC runs will be displayed.
The Admin has the option to Lockout the chosen
Lot here, regardless of current status. Press Cancel
to return or OK to continue.
Note: If the lot is transmitted from POCT server,
instrument serial number and date will not be present.

30 ID NOW Instrument User Manual
QWERTYUI
#ZXCVBNM
OP
ASDFGH JKL
Search Lots
123Cancel OK
Enter Lot number or Assay name. Press OK to
continue.
Export QC Results
Exporting lot QC Results
to USB device...
Chose Export QC Results to export all lots
on instrument.
1. Enter USB drive
2. Select Export QC Results
This screen will appear to confirm export is in
process.
Export QC Results
Exported 8 lot QC Results.
OK
This screen confirms Export completed successfully.
Import QC Results
Importing lot QC Results
to USB device...
Choose Import QC Results to import lots from a
USB drive that contains exported lot files.
1. Enter USB drive
2. Select Import QC Results
This screen will appear to confirm import is in
process.
Import QC Results
Imported 12 lot QC Results.
OK
This screen confirms Import completed
successfully.
Note: For any particular lot, information on USB drive
will replace information already on the instrument.
ID NOW Instrument User Manual 31
4.17 Auto Print (Admin Access Only)
Home>Setup>Auto Print
Setup
On
Auto-Print
Reset to Factory Default
Use the Auto Print menu option to configure the
instrument to print the test result immediately
after running a test.
Setup
OKCancel
Auto-Print Enabled
Use toggle to enable or disable Auto Print.
Click OK to continue.
4.18 Reset To Factory Default (Admin Access Only)
Home>Setup>Reset to Factory Default
Setup
On
Auto-Print
Reset to Factory Default
Reset to Factory Default can be accessed through
the Setup screen and allows the Admin to return
the instrument to the default factory settings.
Caution: This will delete all users, patient test results, and QC results
from the instrument. It is recommended that any desired data be
exported before performing this function.
32 ID NOW Instrument User Manual
5 PREFERENCES MENU
Home>Preferences
Preferences
Language
Sound
Brightness
English
Enabled
50%
About
Preferences allow the modification of the
instrument settings.
Settings include:
• Language
• Sound
• Brightness
The About screen displays information about the instrument.
Chosen options are displayed to the right of each setting.
5.1 Language
Home>Preferences>Language
Language
English
Italiano
Français
Deutsch
Active
Warning
OK
Change language?
XXXXXXX
Cancel
Warning
OK
Language changed.
Reboot required.
Language allows the selection of a preferred language.
Select the desired language from the list. When prompted, press OK to save the
settings. The instrument will prompt to reboot the instrument for languages to take
immediate effect.
5.2 Sound
Home>Preferences>Sound
Sound
Volume level: 80
OK
Keyboard Clicks On
Alerts On
The Instrument uses sound for the following
functions:
• A click whenever the touch screen
is used.
• Tones will sound to indicate when the
instrument warm up routine is complete,
when the transfer cartridge is recognized, and
when the test is complete, as well as for alerts
and warnings.
Keyboard clicks and alert sounds can be turned on or off by using the touch
screen. Volume can be increased or decreased using the up and down arrows.
Press OK to save the settings and return to the Preferences Menu.
ID NOW Instrument User Manual 33
5.3 Brightness
Home>Preferences>Brightness
Brightness
OK
Brightness
Brightness Level: 30%
The screen brightness may be adjusted using the up
and down arrows. The default and recommended
setting is 50%.
Press OK to save the settings and return to the
Preferences Menu.
5.4 About
Home>Preferences>About
About this Device
InfoBack
Serial No. CB8EC413
Software © 2013-2019 Axxin, used under license.
2018-2019 Abbott. All rights reserved. All trademarks
referenced are trademarks of either the Abbott group of
companies or their respective owners.
Information about the instrument is
displayed here.
Press Info to display further instrument
information.
5.5 Instrument Information
Home>Preferences>About>Info
About this Device
Serial No: BB8F3616
Baseboard Ver: 3 Core Ver: 4
FAM-3.0.8 ROX-3.0.8 Tray-4.1.0 Baseboard-2.00
Application Ver: 5.0.2
IP Address: 172.16.0.16
MAC Address: 00:04:A3:E5:AB:F9
Rev ID: d74c027fea3f
Update Number: 0553 RAM: 255068 KB
Conguration: C.1.0.0
Back
The Info screen displays the following information:
• Instrument Serial Number
• Baseboard Version
• Coreboard Version
• Firmware Versions
• Application Version
• IP Address
• MAC Address
• Revision ID
• Software Update Number
• Total Memory (RAM)
• Assay Configuration
34 ID NOW Instrument User Manual
6 RUNNING a TEST
If the instrument is being used for the first time, it must be set up by the Admin
before a test can be run. For further details refer to Section 3 for Admin setup.
• Refer to Section 4.2 to add Users.
• Refer to Section 5.1 to select language preferences.
6.1 User Login
QWERTYUI
#ZXCVBNM
OP
ASDFGH JKL
123
Enter User ID or Scan
When the instrument is switched on, or after
another User has logged out, the Enter User ID or
Scan screen will be displayed.
Enter the User ID, or scan using an electronic
barcode reader, press
to advance.
If a password is required (as specified by the Admin
during Setup), a prompt will appear to enter the
password. Press
to advance.
QWERTYUI
#ZXCVBNM
OP
ASDFGH JKL
123
Enter Password
The instrument will automatically perform a Self Test.
Self Test:
Self Test
Running self test,
please wait ...
The instrument will run a Self Test before
proceeding to the Home screen.
Close lid to
proceed.
Self Test
If the instrument lid is open, the instrument will
prompt to close the lid before running the Self Test.
The Self Test will not proceed until the lid is closed.
ID NOW Instrument User Manual 35
6.2 Main Menu
Home
User ID
30/Jan/2018
10:12am
Run
Test
Run QC
Test
Review
Memory
Preferences Setup Log Out
Once Self Test is complete, the Home screen is
displayed.
6.3 First Time Use
Run QC Test
Positive QC Test
Negative QC Test
When an assay or the instrument is used for the
first time the user is required to QC the instrument
by running both a QC negative and QC positive
external control before patient testing is allowed.
Both QC negative and QC positive tests must generate valid results before the
instrument can run a patient test. Select Run QC Test and follow the steps in
Section 7.
6.4 Running A Test
From the Home screen, select Run Test.
Home
User ID
30/Jan/2018
10:12am
Run
Test
Run QC
Test
Review
Memory
Preferences Setup Log Out
Run Test
ID NOW Assay
Select the desired test from the list of assays
available. Refer to Running a Test in the assay
specific IDNOW product insert for further details.
36 ID NOW Instrument User Manual
Run Test
Please Select Sample Type
Sample type 1
Sample type 2
Select your sample type.
If the assay chosen has multiple sample types to
choose from, the user will be prompted to select
their sample type.
QWERTYUI
#ZXCVBNM
OP
ASDFGH JKL
123
Enter or Scan Patient ID
Enter Patient ID using on screen keyboard or
barcode scanner.
The Patient ID must be a minimum of 2 and
maximum of 20 characters, is case-sensitive, and
must be alphanumeric.
If the ID has been entered manually, press
when
complete.
If the ID has been scanned and the Patient
ID is valid, if the barcode scanner is set up to
automatically advance, the instrument will
automatically advance to the next screen.
If the barcode scanner is not set up to automatically
advance, press
.
Confirm Patient ID.
Run Test
Patient ID:
10AX425
OKCancel
Check that the Patient ID information is correct
and press OK to confirm.
If the Patient ID is not correct, press Cancel to
return to the Enter Patient ID screen.
Run Test
Edit Info
Patient ID:
10AX425
Name: Earl Johansen
DoB: 11/Nov/1959
Positive Patient ID: One Match
OKCancel
Note: If user is connected to LIS system via POCT-1A,
and the Positive Patient ID is enabled, the instrument will
query LIS for that patient's ID. It will return patient data to
be confirmed by pressing OK. If not found, or if multiple
matches are found, press Edit Info to enter Given Name,
Family Name, and Date of Birth (DoB).
Note: If Always Prompt Feature is enabled, press Edit Info
to advance to edit screens.
Caution: Confirmation is required as Patient ID is not editable once
testing has commenced.
It is essential that the on-screen prompts are followed throughout the testing
process. See specific test product inserts for further information.
ID NOW Instrument User Manual 37
7 RUNNING a QC TEST
IDNOW test kits contain Positive and Negative External Controls. When an assay
or the instrument is used for the first time, or when the software is upgraded, the
User is required to run both a positive and a negative successful QC test before
patient testing is allowed. See specific test product inserts for further information
regarding QC test frequencies. Further controls may be tested in order to conform
with local, state and/or federal regulations, accrediting groups, or the lab’s standard
Quality Control procedures.
Select Run QC Test on the Home screen.
7.1 Run QC Test
Select the QC test to be run
Run QC Test
ID NOW Assay
Select the desired assay from the list of available
assays.
Run QC Test
Positive QC Test
Negative QC Test
Select and confirm a Positive or Negative QC test.
Confirm the test type to match the QC sample
intended for testing by pressing OK and follow the on
screen prompts to complete testing.
If the incorrect QC test has been selected, press
Cancel to return to the QC Test Menu screen.
Press OK to confirm. To edit sample ID, press Edit
QC Sample for optional keyboard entry.
The QC test is run in the same manner as a patient
test.
For QC test procedure refer to the specific test
product inserts for running a test.
Run QC Test
Confirm test:
Strep A Test
Positive QC Test
QC Sample ID
10AX425
OKCancel
Edit QC Sample ID
38 ID NOW Instrument User Manual
7.2 QC Test Results
Positive QC Test Results
1/Jan/2013
User ID: Abbottuser1
QC Sample ID: ########
11:22am
Procedural
Control Valid
Flu A/B Positive QC Pass
PrintNew Test
Negative QC Test Results
Flu A/B Negative QC Pass
PrintNew Test
1/Jan/2013
User ID: Abbottuser1
QC Sample ID: ########
11:22am
Procedural
Control Valid
QC test results will be displayed on the screen upon test completion.
These examples show positive and negative QC results for an Influenza
A & B Test.
QC Test Results
11:22am
Procedural
Control Valid
Flu A/B Negative QC Pass
ActionsNew Test
1/Jan/2013
User ID: Abbottuser1
QC Sample ID: ########
Sent: DD/MMM/YYYY hh/mm am/pm
When Connectivity has been configured, the status
of each result is displayed on the QC Test Results
screen:
• Not Sent
• Queued for sending (as Not Sent, but
Auto-Sending is enabled, which will
eventually send the record)
• Connecting…
• Sending…
• Failed to send
• Failed to send, retrying…
• Sent (followed by the send date and time)
If a test result fails to transmit correctly, the instrument will attempt to send it
again up to 5 additional times, with a 30 second wait between attempts.
QC Test Results
OK
No results saved.
This screen will be displayed if the instrument has
not yet been used or following export and deletion
of all results.

ID NOW Instrument User Manual 39
8 PRINTING TEST RESULTS
To print results, attach the Universal Printer to the IDNOW Instrument. See
Section 11, Accessories, for further details and ordering information.
Patient ID: abcd123
Date: 12/Jul/2014
Time: 11:22 AM
Inuenza A: Positive
Inuenza B: Negative
Procedural Control Valid
Lot number: 0708530
Test ID: 1ef614e5-2283-43
User ID: admin
Instrument serial number: BAAC7715
30-a109-7df6e533b9d9
Inuenza A & B Test
ID NOW
A single report for a single test of interest
may be printed at the completion of a
test or from the review memory screen
(Home>Review Memory).
Attach the Universal Printer to the
instrument. Select Print. The instrument
will print a report on a tear-off sticker.
The IDNOW Instrument will set the
default printer to the “connected” printer
if only one Universal Printer is connected.
If more than one printer is connected,
the instrument will set the "first printer"
connected printer as default.
It is recommended that the IDNOW
Instrument is used with only one
connected Universal Printer.
Abbott also recommends that only the Universal Printer be used with the
IDNOW Instrument.
Note: Data printed will vary depending on selections in Setup>Patient Details.
40 ID NOW Instrument User Manual
9 REVIEW MEMORY
The IDNOW Instrument’s memory screens enable a user to search through the
stored data.
Select Review Memory from the Home menu screen.
Home>Review Memory
Review Memory
Patient Test Results
QC Test Results
Search Results
Export Results
Navigate through the instrument memory by
viewing a list of Patient Tests or QC Tests.
Review Memory
Export Logfile
Transmission Status
Pending
nnn Unsent
Patient and QC Test Results are exported in JSON
format. A Logfile that records all the instrument
actions can also be exported.
The Status selection is accessible to all users from
this screen.
9.1 Patient Test Results
Home>Review Memory>Patient Test Results
Patient Test Results
All
Inuenza A & B
Strep A
RSV
Back
Select to choose what subset of test results to
view. Selecting "All" will display all of the Patient
Test Results on the instrument, whereas choosing a
specific assay will display only Patient Test Results
that match that assay type.
Patient Test Results
4 of 10
Patient9
Patient8
Patient7
RSV
27/Sep/2018 07:28
Inuenza A & B
26/Sep/2018 07:28
Strep A
25/Sep/2018 07:28
RSV
24/Sep/2018 07:28
Patient6
A list of all stored Patient Test Results will be
displayed, showing the first 8 characters of the
Patient ID. Use the up and down arrows to scroll
through the list, and the touch screen to select and
view a particular result.
Caution: Saved data should be archived regularly to prevent loss. See
Section 9.4, Export Results.
ID NOW Instrument User Manual 41
Test Results
User ID: Abbottuser1
1/Jan/2014
11:22am
Procedural
Control Valid
Flu A: Negative
Flu B: Positive
PrintNew Test
10AX425
Example of a Test Result, viewed in the instrument
memory.
User ID: Abbottuser1
1/Jan/2013
11:22am
Procedural
Control Valid
Flu A: Negative
Flu B: Positive
ActionsBack
Test Results
10AX425
When Connectivity has been configured, the
connectivity status of each result is displayed on the
Test Results screen:
• Not Sent
• Queued for sending (as Not Sent, but
Auto-Sending is enabled, which will
eventually send the record)
• Connecting…
• Sending…
• Failed to send
• Failed to send, retrying…
• Sent (followed by the send date and time)
No Results Saved
Patient Test Results
OK
No results saved.
This screen will be displayed if the instrument has
not yet been used for patient testing or following
export and deletion of all results.
Invalid Test Results
Flu A: Invalid
Flu B: Invalid
PrintNew Test
Test Results
User ID: Abbottuser1
1/Jan/2014
11:22am
Procedural
Control Valid
10AX425
If a test completes but the instrument failed to
determine a result, the test will display an Invalid
message for that result and will archive it in the
instrument memory.
This example shows an Influenza A & B Invalid test
result. Refer to the relevant Package Insert for
further details.
Repeat the test using new test pieces. An invalid test may occur due to:
• Patient sample interference.
• Instrument malfunction.
• Malfunction of one or more of the test pieces.

42 ID NOW Instrument User Manual
9.1.1 Actions Key
Test Results
Cancel
Print
Send Result
QC Test Results
Cancel
Print
Send Result
When Connectivity has been configured, instead of
Print, the Actions key is displayed.
This opens the Test Actions menu, which contains
Print (as before) and Send Result.
Send Result will send only the selected result.
It may also be used to send a result that was
previously sent.
9.2 QC Test Results
Home>Review Memory>QC Test Results
QC Test Results
All
Inuenza A & B
Strep A
Back
RSV
Select to choose what subset of test results to view.
Selecting "All" will display all of the QC Test Results
on the instrument, whereas choosing a specific
assay will display only
QC Test Results that match that assay type.
QC Test Results
10 of 99
Positive
Negative
Negative
Strep A
14/Nov/2012 11:22am
Inuenza A & B
14/Nov/2012 6:23pm
Strep A
14/Nov/2012 11:13am
RSV
13/Nov/2012 11:22am
Positive
A list of all stored QC Test Results will be displayed,
showing the date and time the test was run. Use
the up and down arrows to scroll through the list,
and the touch screen to select and view a particular
result
Negative QC Test Results
01/Jan/2013
User ID: Abbottuser1
QC Sample ID: ########
04:32 pm
Procedural
Control Valid
Flu A/B Negative QC Pass
PrintBack
Negative QC Test Results
11:22 am
Procedural
Control Valid
Flu A/B Negative QC Pass
ActionsBack
1/Jan/2013
User ID: Abbottuser1
QC Sample ID: #######
Sent: DD/MMM/YYYY hh/mm am/pm
Examples of
QC Test Results,
viewed in the
instrument memory.
ID NOW Instrument User Manual 43
9.3 Search Results
Home>Review Memory>Search Results
QWERTYUI
#ZXCVBNM
OP
ASDFGH JKL
123
Search Results
Use the Search Results function to search for
particular Patient Test Results.
The instrument will search Patient IDs and Date/
Times, based on the text entered.
Patient Test Results
4 of 10
Patient9
Patient8
Patient7
RSV
27/Sep/2018 07:28
Inuenza A & B
26/Sep/2018 07:28
Strep A
25/Sep/2018 07:28
RSV
24/Sep/2018 07:28
Patient6
For example: Searching for the text “Jan” will return
any test results where the Patient ID contains
the text “Jan”, and also any test results that were
obtained during the month of January.
A list of results matching the search criteria will be displayed and results may be
selected and viewed.
9.4 Export Results
Home>Review Memory>Export Results
Export Results
Exporting results to USB
device ...
To export results, for example when the instrument
memory is full, a USB drive must be inserted into
one of the instrument USB ports. Individual test
results are exported in JSON format. A summary
of all test results on the instrument will be in CSV
format.
Export Results
Results successfully exported
to USB device.
Delete local results?
OKCancel
After successfully exporting the results, the
instrument will give the option to delete all results
stored in the instrument.
44 ID NOW Instrument User Manual
Caution: The ID NOW Instrument holds up to 999 patient results and
up to 99 QC test results. A warning will appear prior to a full memory.
Test and QC results must be exported before the memory is full, or
memory will be overwritten.
Export Results
Local results deleted.
OK
Archive saved data regularly to prevent loss.
9.5 Export Logfile
Home>Review Memory>Export Logfile
Export Logle
Exporting logle to USB
device ...
If there is an issue using the instrument, Abbott
Technical Support may request to export a Logfile
and email it to them. Abbott Technical Support
will use the information in the log file to assist with
diagnosis of the issue.
Export Logle
Logle exported.
OK
To export Logfile, a USB drive must be inserted
into one of the instrument USB ports. Logfiles
are not readable by users. Send log files to Abbott
Technical Support to assist with instrument
diagnosis.
Press OK to return to the Review Memory screen.

ID NOW Instrument User Manual 45
10 SOFTWARE UPDATES
USB Software Update:
Caution: Stored test data and users may be deleted during the software update
process. Test results and users stored on the IDNOWInstrument must be
exported to an external formatted, USB Flash Memory Drive prior to
performing a software update. Users may be reimported after the update.
Caution: DO NOT REMOVE USB DRIVE DURING SOFTWARE
UPDATE. USB Flash Memory Drive can be removed from the
IDNOWInstrument as per the software update sequence detailed below.
Update Sequence:
Step 1: Prior to software update, export test results and users stored on the
instrument.
Step 2: Turn the instrument off by pressing and holding the power button for 3
seconds or longer.
Step 3: Attach USB Flash Memory Drive with the required software update
(provided by Abbott) to the instrument via the USB port located on the
side of the instrument.
Step 4: Power up the IDNOW Instrument by pressing and holding the power
button. The instrument will automatically display the start-up status bar.
Follow the on-screen instructions to initiate the software update.
Step 5: Press OK to install the configuration file.
This step is necessary to enable any new
Assay Types.
Step 6: When complete, the instrument will advance to the Login screen.
(Note: Due to a firmware update, the instrument may reboot on its own.
Repeat Step 5 if this occurs.)
Warning
OK
Install conguration le?
Press OK to install.
This will clear all Assay QC
Statuses.
Cancel

46 ID NOW Instrument User Manual
Step 7: Remove the USB drive. Turn the instrument off by removing the power
cable from the instrument. (Do not use the power button to power off the
instrument.) Wait 10 seconds and then reattach the power cable to the
instrument. Power up the IDNOW Instrument by pressing and holding
the power button. The instrument will power up as normal.
Prior to running an assay with the new software for the first time, the user is
required to run a positive and negative successful QC test before patient testing is
allowed. See Section 6.
If expected QC results are not obtained or you are unable to complete the software
update, please contact Abbott Technical Support.
Note: Only one USB drive may be present during the software update process.

ID NOW Instrument User Manual 47
11 ACCESSORIES
Accessories for use with IDNOW Instrument are available separately:
• Universal Printer
• Barcode Scanner
• IDNOW USB Drive
11.1 Universal Printer
Order Number: 55115
Replacement Sticker Roll: 26333
Data Cable: EQ005002
Refer to Universal Printer User Manual for more information. Abbott recommends
using the Universal Printer with the IDNOW Instrument.
11.2 Barcode Scanner
Order Number: OPR2001ZWU1-201
Refer to the Barcode Scanner User Manual for more information. Only use the
Barcode Scanner provided by Abbott with the IDNOW Instrument.
11.3 ID NOW
™
USB Drive
Order Number: EQ004001
Abbott recommends using the IDNOW USB Drive with the IDNOW Instrument.
Alternatively, other commercially available USB Flash Memory Drives can be used.
The USB must meet the following requirements:
• Formatted for FAT32, min 512 MB with only 1 partition.
• The USB Flash Memory Drive does not perform CD-ROM emulation.
• The USB Flash Memory Drive does not require proprietary software loaded to run it.

48 ID NOW Instrument User Manual
12 ERRORS and WARNINGS
This section provides troubleshooting steps for specific error and warning codes.
Once the steps listed below are executed, if the error or warning persists, contact
Abbott Technical Support. Contact numbers can be found at the end of the User
Manual.
12.1 Errors
[Note: These are arranged in order of the time they may appear in
the process]
Example Screen:
Error
Must be 2 to 20 characters.
OK
Invalid Password
12.1.1 Power On & Loading Error
Error: Please Set Clock
If the internal battery fails, the instrument will lose the time and date.
Action: The Admin must log in and reset the date and time:
Home>Setup>Date; Home>Setup>Time.
If this error occurs in a subsequent power up of the instrument, there may be an
on-going time and date fault.
12.1.2 Initial Admin Setup Error
Error: Invalid Password
Passwords must be 2 to 20 characters long, are case-sensitive, and must be
alphanumeric. The password cannot contain spaces.
Action: Choose a password that meets the above criteria.

ID NOW Instrument User Manual 49
12.1.3 User Login Errors
Error: User ID Not Recognized
The instrument does not recognize the User ID entered.
Action: Press OK to try again. If the error persists, the Admin must log in to
check that the User ID has not been deleted. If it has, or if this is a new User, the
Admin must set up the User ID:
Home>Setup>Users or
Home>Setup>Users>New User.
User IDs are not case sensitive.
Error: Password Not Recognized
The instrument does not recognize the password entered.
Action: Press OK to try again. If the error persists, the Admin can log in to check
or change the password: Home>Setup>Users.
A Reset button is visible on Error screen only to the Admin. Admin can Press to enter
Rescue Password or to retrieve the Recovery Key for Reset Code. See section 3.7.
Note: Passwords must be 2 to 20 characters long, are case-sensitive, and must be
alphanumeric. The password cannot contain spaces.
Error: Firmware Communications Error
The instrument cannot conduct its Self Test.
Action: Press OK to try again. If the error persists, reboot the instrument by
turning it off and on again.
If this error persists, tests cannot be run on the instrument. However, stored data
can be viewed: Home>Review Memory.
Error: Rotor Hardware Error
The instrument has failed its Self Test due to a rotor fault.
Action: Open the lid and ensure there are no consumable parts or other items
blocking movements of the test rotor.
If no obstruction is found and error persists, discontinue using the instrument and
contact Technical Services.

50 ID NOW Instrument User Manual
12.1.3 User Login Errors
Error: Reading Error – Empty Well
The instrument has failed the Self Test due to the empty wells having a high
fluorescence reading.
Action: Ensure that the Test Base is not in the Test Base holder, and press OK to
try again. If the Test Base is not present, clean the Test Base well using a swab and
ethanol and press OK to try again.
If this error persists, tests cannot be run on the instrument. However, stored data
can be viewed: Home>Review Memory.
Error: Reading Error – High Side
The instrument cannot conduct its Self Test. The instrument has failed its Self Test
due to a target in the instrument not providing sufficient response.
Action: Press OK to try again, press Home to return to the Home menu. Without
successfully completing Self Test the user can review results and instrument
details but cannot run a test.
If this error persists, tests cannot be run on the instrument. However, stored data
can be viewed: Home>Review Memory.
Error: Discard Pieces for Self Test
The instrument cannot conduct its Self Test if parts of the test are inside the
instrument.
Action: Remove test pieces as shown under Running a Test, and press OK to try
again.
If this error persists or if there are no test pieces in the instrument, check that
there is not a foreign object or contamination obscuring the detector window in
the bottom of the sample receiver heater block as this may be registered by the
instrument as a sample receiver consumable being in place.
Press OK to try again, press Home to return to the Home menu. Without
successfully completing Self Test the user can review results and instrument
details but cannot run a test.
If this error persists, tests cannot be run on the instrument. However, stored data
can be viewed: Home>Review Memory.

ID NOW Instrument User Manual 51
12.1.4 Home Errors
Error: QC Test Failed
The QC test failed for the selected assay and must be repeated successfully
before patient samples can be tested.
Action: Press OK to return to the Home screen and run a QC test again
(Home>Run QC Test).
If this error persists, tests cannot be run on the instrument. However, stored data
can be viewed: Home>Review Memory.
Error: The Last Self Test Failed
The instrument’s last Self Test failed.
Action: Press OK to return to the Home screen. Log out (Home>Logout) and try
logging in again.
If this error persists, tests cannot be run on the instrument. However, stored data
can be viewed: Home>Review Memory.
12.1.5 Run Test / Run QC Test Errors
Error: No Configuration File Installed
A configuration file has not been installed on the instrument.
Action: Press OK to return to the Home screen. Contact Abbott Technical
Services.
Error: Invalid Patient ID
Patient ID must be 2 to 20 characters long, are not case-sensitive, and must be
alphanumeric. The Patient ID cannot contain spaces.
Action: Press OK to try again. If the error persists while using the barcode
scanner, enter the patient ID manually.
Error: Barcode Not Recognized
The instrument has not recognized the barcode on the Test Base and cannot start
the testing process.
Action: Press OK to try again. The instrument will ask to remove the Test Base.
The instrument will then perform a Self Test. Once complete, try again using the
same Test Base.
If the error persists, dispose of the Test Base and try a new Test Base.
Note: The barcode on the Test Base must face the back of the instrument to be
recognized.

52 ID NOW Instrument User Manual
12.1.5 Run Test / Run QC Test Errors
Error: Timeout
The instrument has timed out during any ofthe steps in the testing process. More
than the defined amount of time elapsed during one of the steps outlined below.
For example:
1. Between inserting the Test Base and inserting the Sample Receiver.
2. Between the completion of the warm up and the addition and confirmation of
the sample
3. Between adding the sample and transferring it from the Sample Receiver to the
Test Base.
4. Between transferring the sample and closing the lid.
Action: Press OK. Remove and dispose of all test pieces and repeat with a new
test. Follow the on-screen instructions closely.
Error: Lid Open
The lid must not be opened during the testing process.
Action: Press OK. Remove and dispose of all test pieces and repeat with a new
test.
Error: Test Failed
The test has encountered an unrecoverable error.
Action: Press OK. Remove and dispose of all test pieces and repeat with a new
test.
Error: Invalid Frequency
If the User enters a non-numeric or numerical value greater than 1000, for the
QC frequency, this Error will appear.
Action: Press OK and enter a numeric value between 1 and 1000.
Error: QC Incomplete
For assays configured with QC Lockout set to Warn or Lockout, this Error will
appear when a new patient test is attempted with a lot that does not have a valid
QC Positive and Negative result.
Action: Select OK to stop the patient test and proceed to conduct a QC run for
the lot OR the user must use a different lot of consumables for the run.

ID NOW Instrument User Manual 53
12.1.5 Run Test / Run QC Test Errors
Error: Assay Locked Out
If a frequency is set under lockout within the QC Lockout function, when the
assay Frequency expires and a user attempts to conduct a patient test for that
assay; this error message will appear.
Action: Proceed to conduct a QC run for the assay before a patient test can be run.
Error: Lot Locked Out
If the consumable lot detected has been locked out by the administrator, this error
message will appear.
Action: Press OK and Contact Administrator
12.1.6 Printing Result Error
Error: Printer Not Found
The instrument has not recognized the printer.
Action: If printer is not connected, connect it. If it is connected, check the printer
connection. Press OK to try again.
If this error persists, completely unplug the printer, reconnect to the instrument
and press OK to try again.
Confirm the printer power supply is connected and the printer is turned on.
Confirm printer power LED is illuminated. Confirm USB data cable is connected
at the printer and the instrument.
If the problem persists, remove USB connector at the instrument,
wait 10 seconds, and reconnect.
Repower the instrument and try again. The test result can be printed from the
Review Memory screen.
12.1.7 Review Memory Error
Error: Test Result Not Valid
The stored result has been corrupted and cannot be viewed.
Action: Press OK to return to the list of test results.

54 ID NOW Instrument User Manual
12.1.8 Search Results Error
No Results Found.
No results have been found matching the search criteria.
Action: Press OK and try searching again using new search criteria
12.1.9 Export Results & Export Logfile Errors
Error: USB Device Not Found
The instrument has not recognized the USB drive.
Action: If a USB drive is not connected, connect it. If it is connected, check the
connection. If this error persists, try using a different USB drive.
Press OK to return to the Review Memory screen.
Error: Export Failed
The export was not successful.
Action: Repeat the export process. If this error persists, try using a different USB
drive.
Press OK to return to the Review Memory screen.
12.1.10 New User Errors
Error: Maximum Users Reached
A maximum of 999 users plus the Admin user can be set up.
Action: Press OK to return to the User screen to review the Users and delete
Users no longer needed. This will not affect saved data.
Note: The Admin cannot be deleted.
Error: Invalid User ID
The User ID is in an invalid format. It must be 2 to 20 characters and
alphanumeric. User IDs are not case sensitive.
Action: Press OK to try again. If the error persists, enter the User ID manually.
Error: User ID Already Exists
The User ID already exists.
Action: Press OK to try again. If this is a different user, assign a unique User ID.

ID NOW Instrument User Manual 55
12.1.10 New User Errors
Error: Invalid Password
Passwords must be 2 to 20 characters long, are case-sensitive, and must be
alphanumeric. The password cannot contain spaces.
Action: Press OK to try again. Choose a password that meets the above criteria.
12.1.11 User Details Errors
Error: Password Not Recognized
The instrument does not recognize the password entered.
Action: Press OK to try again. Note that passwords are case-sensitive.
If error persists, the Admin can log in to check or change the password:
Home>Setup>Users.
Error: Invalid Password
Passwords must be 2 to 20 characters long, are case-sensitive, and must be
alphanumeric. The password cannot contain spaces.
Action: Choose a password that meets the above criteria.
Error: Certification Expired
If user certification has expired for running an assay, this error will appear
(When connected to middleware system).
Action: Contact Admnistrator
Note: If connected to LIS system, user would not be included in user list.
Error: USB Drive Not Found
The instrument has not recognized the
USB drive.
Action: If a USB drive is not connected, connect it. If it is connected, check the
connection.
If this error persists, use a different USB drive.
Error: Import Failed
The import was not successful.
Action: Repeat the import process. If this error persists, ensure that the USB
drive contains the user list. If the error continues, try exporting the user list again
from the source IDNOW Instrument, if available, and import again.
If error persists, export the list to a different USB drive and import again.

56 ID NOW Instrument User Manual
12.1.12 Import Users Errors
Error: USB Device Not Found
The instrument has not recognized the USB drive.
Action: If a USB drive is not connected, connect it. If it is connected, check the
connection.
If this error persists, use a different USB drive.
Error: Import Failed
The import was not successful.
Action: Repeat the import process. If this error persists, ensure that the USB
drive contains the user list. If the error continues, try exporting the user list again
from the source IDNOW Instrument, if available, and import again.
If error persists, export the list to a different USB drive and import again.
12.1.13 Export Users Errors
Error: USB Drive Not Found
The instrument has not recognized the USB drive.
Action: If a USB drive is not connected, connect it now. If it is connected, check
the connection.
If this error persists, use a different USB drive.
Error: Export Failed
The export was not successful.
Action: Repeat the export process. If this error persists, ensure that the USB drive
has available memory.
If the error persists, use a different USB drive.
12.1.14 Network Errors
Error: IP Address Invalid
The instrument does not recognize the
IP Address entered.
Action: Press OK to try again. The IP Address must consist of four sets of
numbers, separated by “.” (i.e. 111.222.333.444).
If this error persists, contact your Network Administrator or IT Help Desk to
ensure that the IP Address is correct. Press Cancel to return to the User Settings
screen or Home to return to the Home screen.

ID NOW Instrument User Manual 57
12.1.14 Network Errors
Error: Subnet Mask Invalid
The instrument does not recognize the Subnet Mask entered.
Action: Press OK to try again. The Subnet Mask must consist of four sets of
numbers, separated by “.” (i.e. 111.222.333.444).
If this error persists, contact your Network Administrator or IT Help Desk to
ensure that the Subnet Mask is correct. Press Cancel to return to the User
Settings screen or Home to return to the Home screen.
Error: Network Error
The instrument encountered a network error while trying to apply settings.
Action: Select OK and the instrument will try again.
Check the network connection, and apply the changes again. If the error persists,
reboot the instrument by turning it off and then on again, and attempt the
changes again.
Error: Port Number Invalid
Valid ports are whole numbers between 1 and 65535, as configured and
appropriate to the laboratory information system.
Action: Use a valid port number meeting the criteria described above.
12.1.15 Admin Password Errors
Error: User ID Not Recognized
The instrument does not recognize the Admin ID entered.
Action: Press OK to try again. Ensure that the correct ID was entered. Admin ID:
Admin.
Error: Invalid Password
Passwords must be 2 to 20 characters long, are case-sensitive, and must be
alphanumeric. The password cannot contain spaces.
Action: Choose a password that meets the above criteria.

58 ID NOW Instrument User Manual
12.1.16 Miscellaneous Errors
Error: Critical Error
The software has encountered a critical error and the application can only restart
to recover.
Action: Press OK to reboot the instrument
Error: Temperature Out of Range
The heater temperature is not at the required temperature to perform a test.
Action: Make sure that the lid is closed and wait 5 minutes for the heater to warm
the sample receiver and test base receiver. Repeat the test. If the error persists,
reboot the instrument by turning it off and then on again.
Error: Reading Error – Low Side
The instrument has failed its Self Test due to a target in the instrument not
providing a correct response.
Action: Press OK to try again or press Home to return to the Home menu.
Without successfully completing Self Test the user can review results and
instrument details but cannot run a test.
Error: Hardware Timeout
The instrument hardware encountered an internal hardware response error.
Action: Repeat the test. If the error persists, reboot the instrument by turning it
off and then on again.
Error: Configuration file cannot be installed
There was an error during the installation of a software update.
Action: Power off the instrument, insert the USB containing the software update,
power the instrument back on.
If the issue persists, contact Abbott Technical Services to obtain the latest version
of software.

ID NOW Instrument User Manual 59
12.2 Warnings
[Note: These are arranged in order of the time they may appear in the process]
Example Screen:
Warning
OK
Memory Is Full
12.2.1 Home Warnings
Warning: Memory Almost Full
The instrument can run only 50 more patient tests or 9 more QC tests before the
memory is full.
Action: Press OK to continue to run the current test. With each additional test or
QC test carried out, a similar error will be displayed showing the number of tests
remaining. The Admin must export the stored test results before the memory is
full, or results will be overwritten. See Section 9.4, Export Results.
Warning: Memory Is Full
The instrument can store up to 999 patient test and 99 QC results, and is now full.
Action: To avoid overwriting stored data, the Admin must export the data. See Section
9.4, Export Results.
Alternatively, Press OK to continue to run the current test.
Note that this will overwrite stored data.
Warning: Heater Not At Temperature
The instrument has not yet reached the required temperature.
Action: Press OK to return to the Home screen and wait for the white light on
the front of the instrument to stop flashing before trying again.
If the error persists, power off the instrument, disconnect the DC power input
connector, wait 10 seconds, reconnect and turn on the instrument. When the
white light on the front of the instrument stops flashing, try again.
If this error persists, tests cannot be run on the instrument. However, the stored
data can still be viewed: Home>Review Memory.

60 ID NOW Instrument User Manual
12.2.2 Run Test/Run QC Test Warnings
Warning: Incorrect Test Type
A test base was inserted that does not match the test type initially selected from
the menu.
Action: The test must be restarted. Remove the test base and close the lid to allow
the instrument to perform a self test. Restart the test, as desired.
Warning: Stop Test
The Home button was pressed during testing. Testing cannot be stopped and then
resumed after one or more test pieces have been placed in the instrument.
Action: To continue testing, press Cancel. The timeouts will continue counting
even with this screen displayed.
To cancel the test, press OK. Remove and dispose of all test pieces.
Warning: QC Frequency Exceeded
If a frequency is set under warn within the QC Lockout function, when the assay
Frequency expires and a user attempts to conduct a patient test for that assay;
this warning message will appear.
Action: Select OK to proceed with the run or select Cancel to stop the patient
test and proceed to conduct a QC run for the assay.
Warning: QC Frequency Low
For all assays; this warning message will appear when the testing interval has been
configured and the number of days remaining has either reached 3 (unit set to
days) or when number of tests remaining is at 10%.
Action: Select OK to proceed with the run or select Cancel to stop the current
patient test and proceed to conduct a QC run for the assay.

ID NOW Instrument User Manual 61
12.2.3 Setup Warnings
Warning: Reboot Required
This Warning will display in the Connectivity sub-menu when switching between
Connectivity protocol types.
Warning: Reset Factory Default
If the instrument is reset to factory default settings, all Users, patient and QC
results, preferences and chosen settings, including language, will be lost.
The instrument will start up as it did when first received from the manufacturer,
and can be reconfigured by the Admin.
Abbott suggests exporting all user, patient and QC results to a USB drive prior to
resetting to factory default.
Press Cancel to return to the Setup menu. Press OK to reset to factory default.
12.2.4 User Warnings
Warning: Delete User
If a User is deleted, all data associated with the User will be lost. However, stored
data files will not be affected.
Action: Press OK to permanently delete the user. Press Cancel to return to the
Setup Users screen
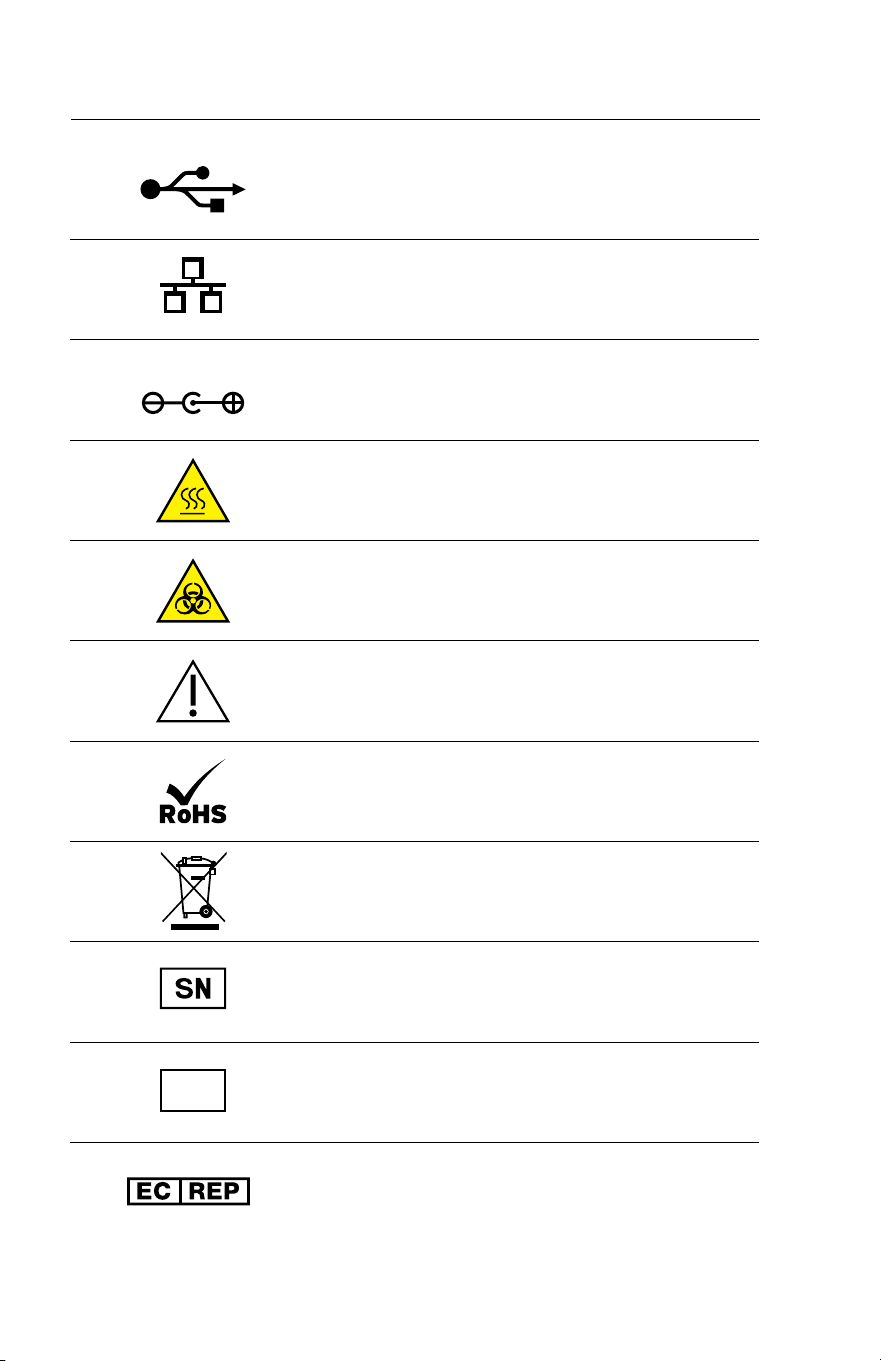
62 ID NOW Instrument User Manual
USB 2.0 High Speed interface connector
Wired Ethernet, 10/100 Mb/s connector
12V DC
DC Power connector, for connection with supplied
external. Power Supply and Adaptor. 12VDC, 3.0
Amp maximum
Hot Surface
Biological Hazard
Caution, consult accompanying documents
Restriction of Hazardous Substances Compliant
Waste Electrical and Electronic Equipment
Directive Compliant
Serial Number
IVD
In Vitro Diagnostics
EC REP
13 SYMBOLS

ID NOW Instrument User Manual 63
CE Mark
Manufacturer
On-Off Power Button
This device complies with part 15 of the FCC Rules. Operation is subject to the
following two conditions: (1) This device may not cause harmful interference, and (2)
this device must accept any interference received, including interference that may
cause undesired operation.

64 ID NOW Instrument User Manual
Reorder numbers:
#NAT-000: IDNOW Instrument
OUS +1 321 441 7200
Technical Support
Advice Line
Further information can be obtained from your distributor, or by contacting
Technical Support on:
USA
+1 855 731 2288 [email protected]
Africa, Russia, CIS
+44 161 483 9032 [email protected]
Asia Pacific
+61 7 3363 7711 [email protected]
Canada
+1 800 818 8335 [email protected]
Europe & Middle East
+44 161 483 9032 [email protected]
Latin America
+57 (1) 4824033 L[email protected]
14 ORDERING and
CONTACT INFORMATION

ID NOW Instrument User Manual 65
14 ORDERING and
CONTACT INFORMATION
15 WARRANTY
Warranty
Limited 2 Year Warranty
Use of the IDNOW Instrument
The IDNOW Instrument is a fluorescence-based instrument for the processing and
analysis of IDNOW tests utilizing isothermal nucleic acid amplification technology
for the qualitative detection of infectious diseases. Proper adherence to the
instructions in the User Manual and package insert are critical to proper operation.
WARNING: Failure to comply with the User Manual could lead to inaccurate results.
Limited Warranty
Manufacturer guarantees to the original purchaser of the Instrument that
the Instrument is free from material defects for two years from the date of
purchase. This warranty does not guarantee the uninterrupted operation of the
Instrument. Manufacturer's only liability and Purchaser's exclusive remedy under
this warranty is that during the warranty period Manufacturer shall replace or
repair, at no charge, and at the Manufacturer's sole discretion, any Instrument
with a defective component. MANUFACTURER MAKES NO OTHER
WARRANTIES AND EXPRESSLY EXCLUDES ANY IMPLIED WARRANTY
OF MERCHANTABILITY, NONINFRINGEMENT OR FITNESS FOR A
PARTICULAR USE.
There are no user-serviceable parts in the Instrument. Tampering with any portion
of the Instrument, abusing the Instrument or using the Instrument in a manner
inconsistent with its User Manual will void this warranty. This warranty does not
apply to any component that is damaged by improper storage in environmental
conditions outside the recommended range, accident, or that is subject to alteration,
misuse, tampering or abuse. Purchaser must file a warranty claim in writing and
within the applicable warranty period to the Manufacturer.
Please contact Technical Support prior to returning any defective components.
Refer to Ordering and Contact Information section of the User Manual for
additional information.

66 ID NOW Instrument User Manual
MANUFACTURER'S ENTIRE LIABILITY IN CONNECTION WITH THE
INSTRUMENT, REGARDLESS OF THE LEGAL OR EQUITABLE BASIS OF ANY
CLAIM, IS LIMITED TO THE PURCHASE PRICE OF THE INSTRUMENT. IN NO
EVENT WILL MANUFACTURER BE LIABLE FOR ANY INCIDENTAL, INDIRECT,
SPECIAL, CONSEQUENTIAL, OR PUNITIVE LOSS OR DAMAGES IN ANY WAY
RELATED TO THE INSTRUMENT, OR ANY THIRD PARTY CLAIMS, EVEN IF
MANUFACTURER OR ITS DISTRIBUTORS ARE AWARE OF THE POSSIBILITY
OF SUCH CLAIM OR DAMAGES AND NOTWITHSTANDING THE ESSENTIAL
PURPOSE OF ANY REMEDY.

© 2020 Abbott.All rights reserved.All trademarks referenced are trademarks of either
the Abbott group of companies or their respective owners.
Software © 2020 Axxin, used under license.
All trademarks referenced are trademarks of their respective owners.
INNAT000 Rev. 11 2020/01
Abbott Diagnostics Scarborough, Inc.
10 Southgate Road
Scarborough, Maine 04074 USA
www.abbott.com/poct
IVD

Abbott
ID NOW
Instrument User Manual (OUS)
Size:
210 mm x 297 mm
PMS 2925 C
Primary Blue
PN: INNAT000
Rev: 11
PMS 303 C
Dark Blue
Date of Last Revision:
11.7 2020/01/31
CMYK