Before using your new product, please read these instructions to prevent any damage.
Features
• Produces custom lighting with 16 color options
• Attaches to TVs, cabinets, and other objects
• Fun eects such as strobe or fade lighting
• Adjust the brightness level with a multi-step dimmer
• Change LED color from anywhere with included RF remote
• Cuts to whatever length is needed
• Reduces eye strain from TVs and monitors
• Powered by AC power
• Built and backed by Best Buy
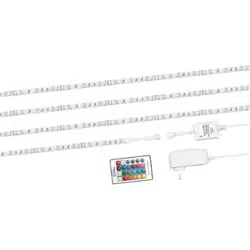
Tape light
Package contents
• LED tape light
• Remote control
• Screws (2)
• Double-sided tape
• RF controller box
• Quick Setup Guide
16 ft. Full-Color
LED Tape Light
Quick Setup Guide
BE-LED16RGB19
P
O
W
E
R
R
F
R
e
m
o
te
C
o
n
tr
ol
l
e
r
R
G
B-
2
4
Bu
tto
n
s
I
np
u
t
: D
C
1
2V 2
A
Out
p
u
t : D
C
1
2
V 2A
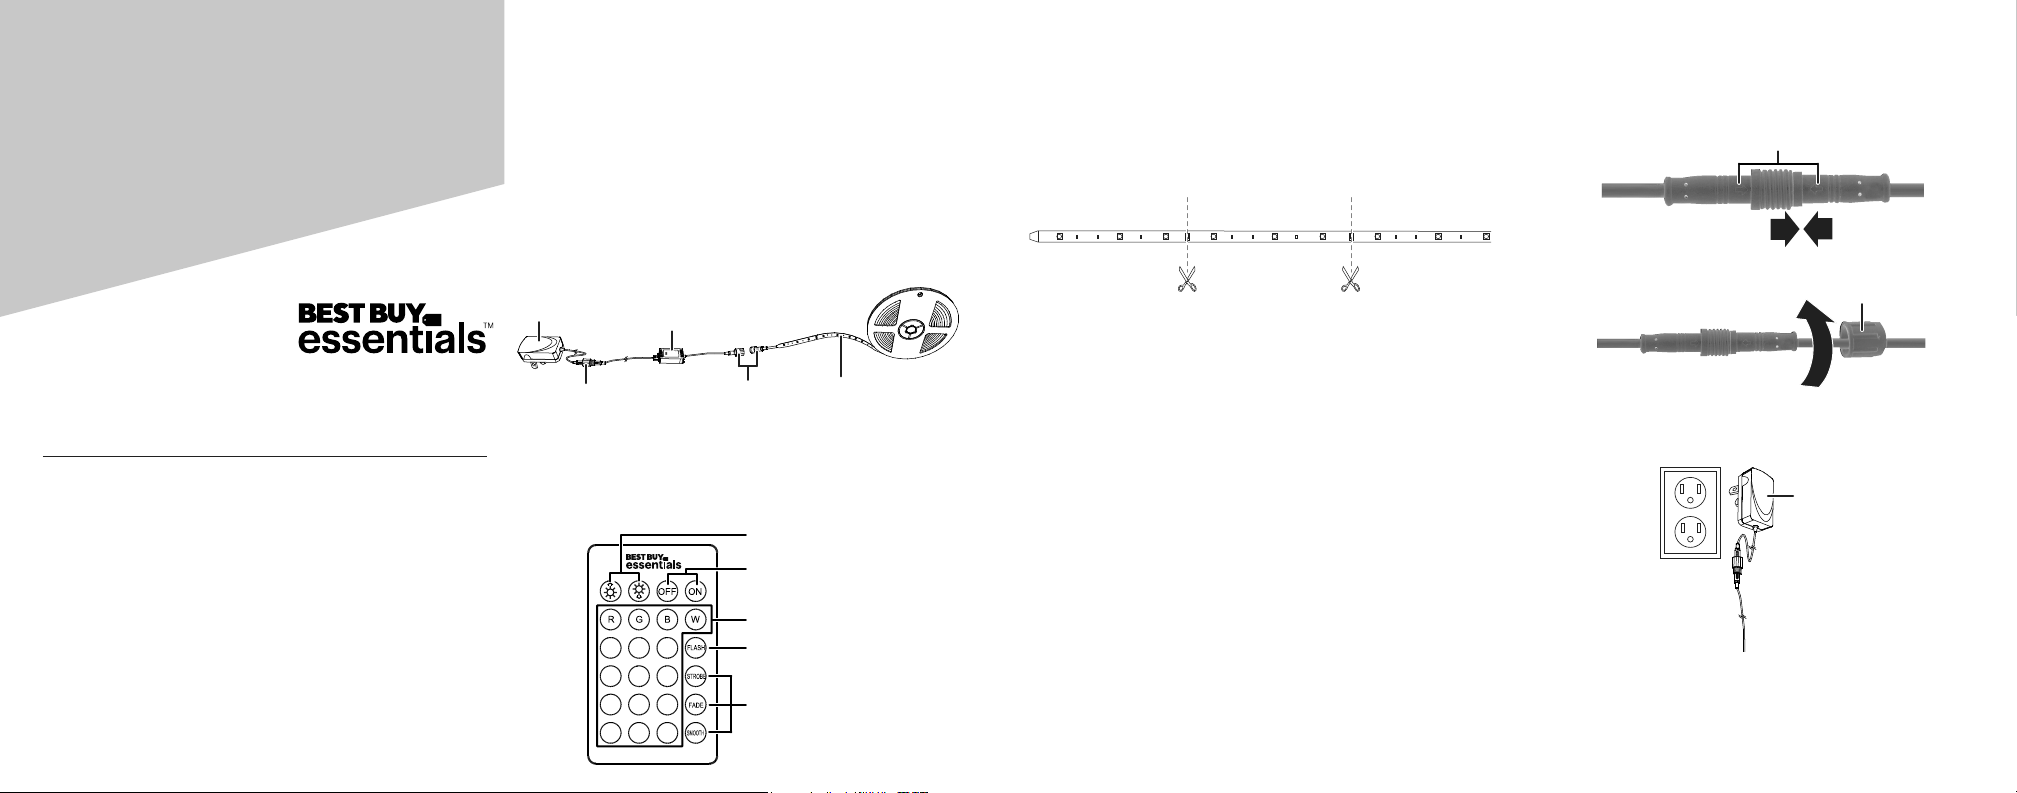
AC adapter
Waterproof connector
Waterproof connector
RF controller box
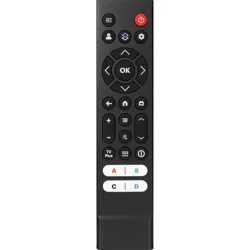
Remote control
Cut line
Using your tape light
Shortening your tape light
• Use a pair of scissors to cut on a cut line. Cut lines are about
3.9 in. (9.9 cm) apart.
Warning: Do not cut the silver solder markings. Only cut in the
center of the copper-colored pads, as shown.
Attaching your lights
1 Peel the adhesive backing o the lights, then adhere the
lights where you want them.
2 Optional: Attach the double-sided tape to the back of the
RF controller box, then adhere it where you want it.
OR
Attach the RF controller box to a surface using the included
screws. There are two holes on the controller box to allow
for a rm attachment.
Notes:
• Make sure that the tape light is unrolled, otherwise it can
damage the tape light or cause a re.
• Every surface is dierent, and additional adhesive may be used
if the LED tape detaches from the surface. Small pieces of clear
tape can be used.
Connecting to power
1 Push both ends of the waterproof connectors together,
making sure that the arrows line up.
2 Turn the cap until it is secure.
3 Plug the AC adapter into a power outlet.
4 Remove the plastic battery-saver tab from the remote
control.
Adjusts brightness and speed
Turns on and o
Selects a color
Changes the various transition modes
Cycles through red, green, and blue
WARNING: Unroll before use. Never plug in the LED lights when rolled up, as this can
result in product damage or a re.
Cut line Cut line
AC adapter
Cap
Arrows
RMT-BELED16RGB19
BE-LED16RGB19_BE-LED16RGB19-C_20-0894_QSG_V1_EN_Final.ai 1 2/9/2021 1:15:29 PM

V1 ENGLISH 20-0894
Specications
• Input: 12V DC, 2A
• LED Tape Length: 16.4 ft. (5 m)
• LED quantity: 150
• LED life: 30,000 hours (approximate)
• Remote control battery: CR2025
• Remote control range: 30 ft. (9.1 m)
Troubleshooting
LEDs will not turn on.
• Press the power button to make sure that your light is
turned on, then select the color or mode you want.
• Make sure that all of the connectors are connected
properly and the AC adapter is plugged into a power
outlet.
• Make sure that you have removed the plastic
battery-saver tab from the remote before use. If you
already removed the battery-saver tab, make sure that the
battery still works. If the battery does not work, replace
the battery and try again.
LEDs icker or turn on and o.
• Make sure that the power cable is not damaged.
• Make sure that both of the connectors are rmly connect-
ed and screwed together tightly.
Safety Information
• To avoid damage to the tape light, do not sharply twist or
bend the tape light 90° or more.
• Do not cut the silver solder markings. Only cut in the
center of the copper-colored pads.
• Do not plug in your lights when they are coiled. This can
generate excess heat, which can result in product damage
or a re.
Legal notices
This device complies with part 15 of the FCC Rules. Operation is subject to the
following two conditions: (1) This device may not cause harmful interference, and
(2) this device must accept any interference received, including interference that
may cause undesired operation.
This equipment has been tested and found to comply with the limits for a Class B
digital device, pursuant to Part 15 of the FCC Rules. These limits are designed to
provide reasonable protection against harmful interference in a residential
installation. This equipment generates, uses, and can radiate radio frequency
energy and, if not installed and used in accordance with the instructions, may cause
harmful interference to radio communications. However, there is no guarantee that
interference will not occur in a particular installation. If this equipment does cause
harmful interference to radio or television reception, which can be determined by
turning the equipment o and on, the user is encouraged to try to correct the
interference by one or more of the following measures:
• Reorient or relocate the receiving antenna.
• Increase the separation between the equipment and receiver.
• Connect the equipment into an outlet on a circuit dierent from that to which the
receiver is connected.
• Consult the dealer or an experienced radio/TV technician for help.
Warning: Changes or modications to this unit not expressly approved by the
party responsible for compliance could void the user’s authority to operate the
equipment.
WARNING: Chemical Burn Hazard. Keep batteries away from
children.
This product contains a lithium button/coin cell battery. If a new
or used lithium button/coin cell battery is swallowed or enters the body, it can
cause severe internal burns and can lead to death in as little as two hours. Always
completely secure the battery compartment. If the battery compartment does not
close securely, stop using the product, remove the batteries, and keep it away from
children. If you think batteries might have been swallowed or placed inside any part
of the body, seek immediate medical attention. The cells shall be disposed of
properly, including keeping them away from children. Even used cells may cause
injury.
One-year limited warranty
Visit www.bestbuy.com/bestbuyessentials for details.
Contact Best Buy Essentials
For customer service, call 866-597-8427 (U.S. and Canada)
www.bestbuy.com/bestbuyessentials
Best Buy Essentials is a trademark of Best Buy and its aliated companies.
Distributed by Best Buy Purchasing, LLC
7601 Penn Ave South, Richeld, MN 55423 U.S.A.
©2021 Best Buy. All rights reserved.
BE-LED16RGB19_BE-LED16RGB19-C_20-0894_QSG_V1_EN_Final.ai 2 2/9/2021 1:15:30 PM