Loading ...
Loading ...
Loading ...
21
INSTALLING STACKED WASHER/DRYER
Route Drain Hose
Proper routing of the drain hose avoids damage to your oor
due to water leakage. Read and follow these instructions.
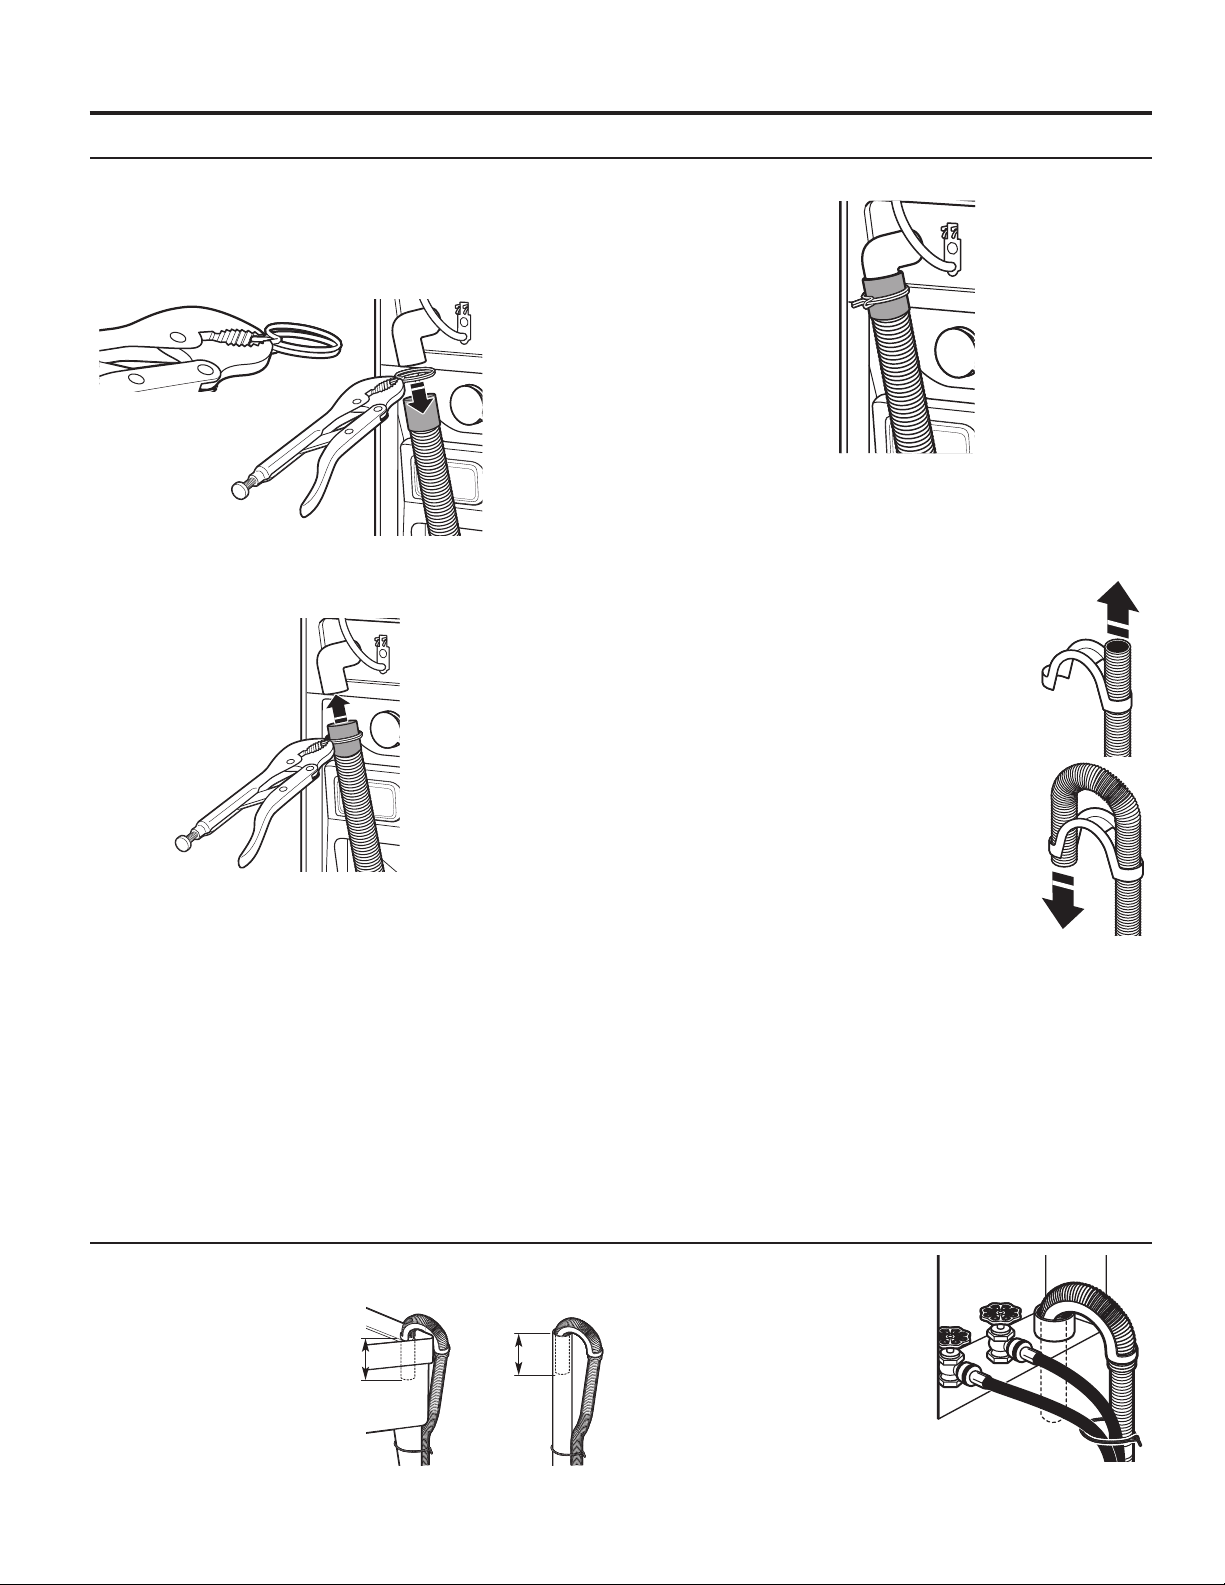
Remove drain hose from the washer drum
1. Using locking pliers, squeeze hose clamp tabs together
and insert over the end of the drain hose.
2. Slide the drain hose onto the washer connection.
Laundry tub drain or standpipe drain
Connect the drain hose form to the corrugated drain hose.
Snap either end of the drain hose form to the
drain hose at the point where the corrugation
begins.
Bend drain hose over drain hose form and
snap into place.
NOTE: Hose must not extend more than 1"
(25 mm) past the end of the U bend.
To keep drain water from going back into the washer:
n Do not straighten the drain hose; do not force excess
drain hose into standpipe. Hose should be secure, but
loose enough to provide a gap for air.
n Do not lay excess hose on the bottom of the laundry tub.
Floor drain
You may need additional parts. See “Alternate Parts.”
Secure Drain Hose
1. Drape the power cord over the washer top.
2. Move the washer to its nal location.
3. Place the drain hose
in the laundry tub or
standpipe as shown.
4. Secure the drain hose
using the supplied beaded
tie strap.
4
1
/2"
(114 mm)
4
1
/2"
(114 mm)
3. Once the drain hose is in place, release the pliers.
4. The washer drain system can be installed using a oor drain,
wall standpipe, oor standpipe, or laundry tub.
5. If the washer faucets and the
drain standpipe are recessed, put
the hooked end of the drain hose
in the standpipe as shown.
NOTES:
n Do not force excess drain hose
back into the rear of the washer.
n To avoid siphoning, do not
seal the drain hose into
the standpipe.
Loading ...
Loading ...
Loading ...