Loading ...
Loading ...
Loading ...
15
Cleaning the pre-ground coee funnel
Check regularly (about once a month ) that the pre-ground
coee funnel is not blocked� If necessary, remove coee
deposits�
Cleaning the infuser
The infuser (A11) must be cleaned at least once a month�
Important!
The infuser may not be extracted when the machine is on�
1� Make sure the machine is correctly turned o (see “Turning
the appliance o” on page 10)�
2� Remove the water tank�
3� Open the infuser door (g� 29) on the right side�
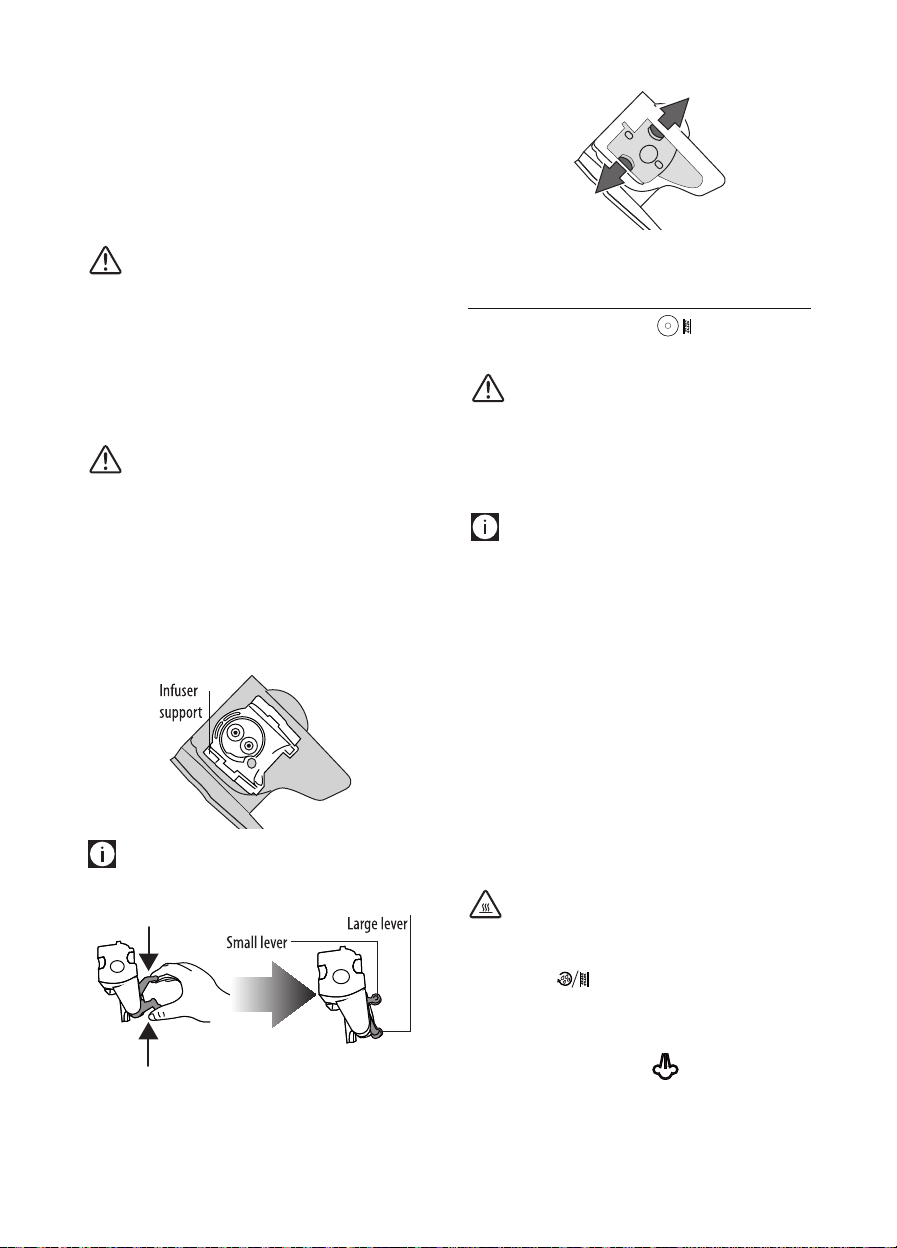
4� Press the two red release buttons inwards and at the same
time pull the infuser outwards (g� 30)�
Important!
Clean the infuser without using washing up liquid as it
could be damaged�
5� Soak the infuser in water for about 5 minutes, then rinse
under the tap�
6� Clean coee residues from the support where the infuser
rests�
7� After cleaning, replace the infuser by sliding it onto the
internal support, then push the PUSH symbol fully in until
it clicks into place�
Please note :
Iftheinfuserisdiculttoinsert,beforeinsertion,adaptitto
the right size by pressing the two levers shown in the gure�
8� Once inserted, make sure the two red buttons have
snapped out�
PUSH
8� Close the infuser door�
9� Replace the water tank�
DESCALE
Descale the appliance when the light on the control
panel ashes (g� 31)�
Important!
Descaler contains acids which may irritate the skin and eyes�
It is vital to respect the manufacturer’s safety warnings given on
the descaler pack and the warnings relating to the procedure to
follow in the event of contact with the skin and eyes�
Please note :
Use De’Longhi descaler only�
Under no circumstances should you use sulphamic or acetic
based descalers� Their use invalidates the guarantee�
Failure to descale the appliance as described also invalidates
the guarantee�
1� Turn the appliance on and wait until it is ready for use�
2� Empty the water tank (A12) and remove the softener
lter, if present�
3� Pour the descaler into the tank up to the level A
(corresponding to a 100 ml pack) marked on the back of
the tank (g� 32A), then add water (1l) up to level B (g�
32B)�
Place an empty container with a minimum capacity of 1�5
litres under the cappuccino maker �
4� Wait for the coee lights to come on steadily�
Important! Danger of burns
Hot water containing acid ows from the cappuccino maker�
Avoid contact with splashes of water�
5� Press the button and hold it down for at least 5
seconds to conrm that you have added the solution
and begin the descaling procedure� The light in the
button remains on steadily to indicate that the descaling
programme has begun� The light ashes telling you
to turn the steam dial to the l position�
6� Turn the steam dial a half turn anticlockwise to the I po-
sition� The descaler solution ows out of the cappuccino
maker into the underlying container�
Loading ...
Loading ...
Loading ...