Loading ...
Loading ...
Loading ...
11
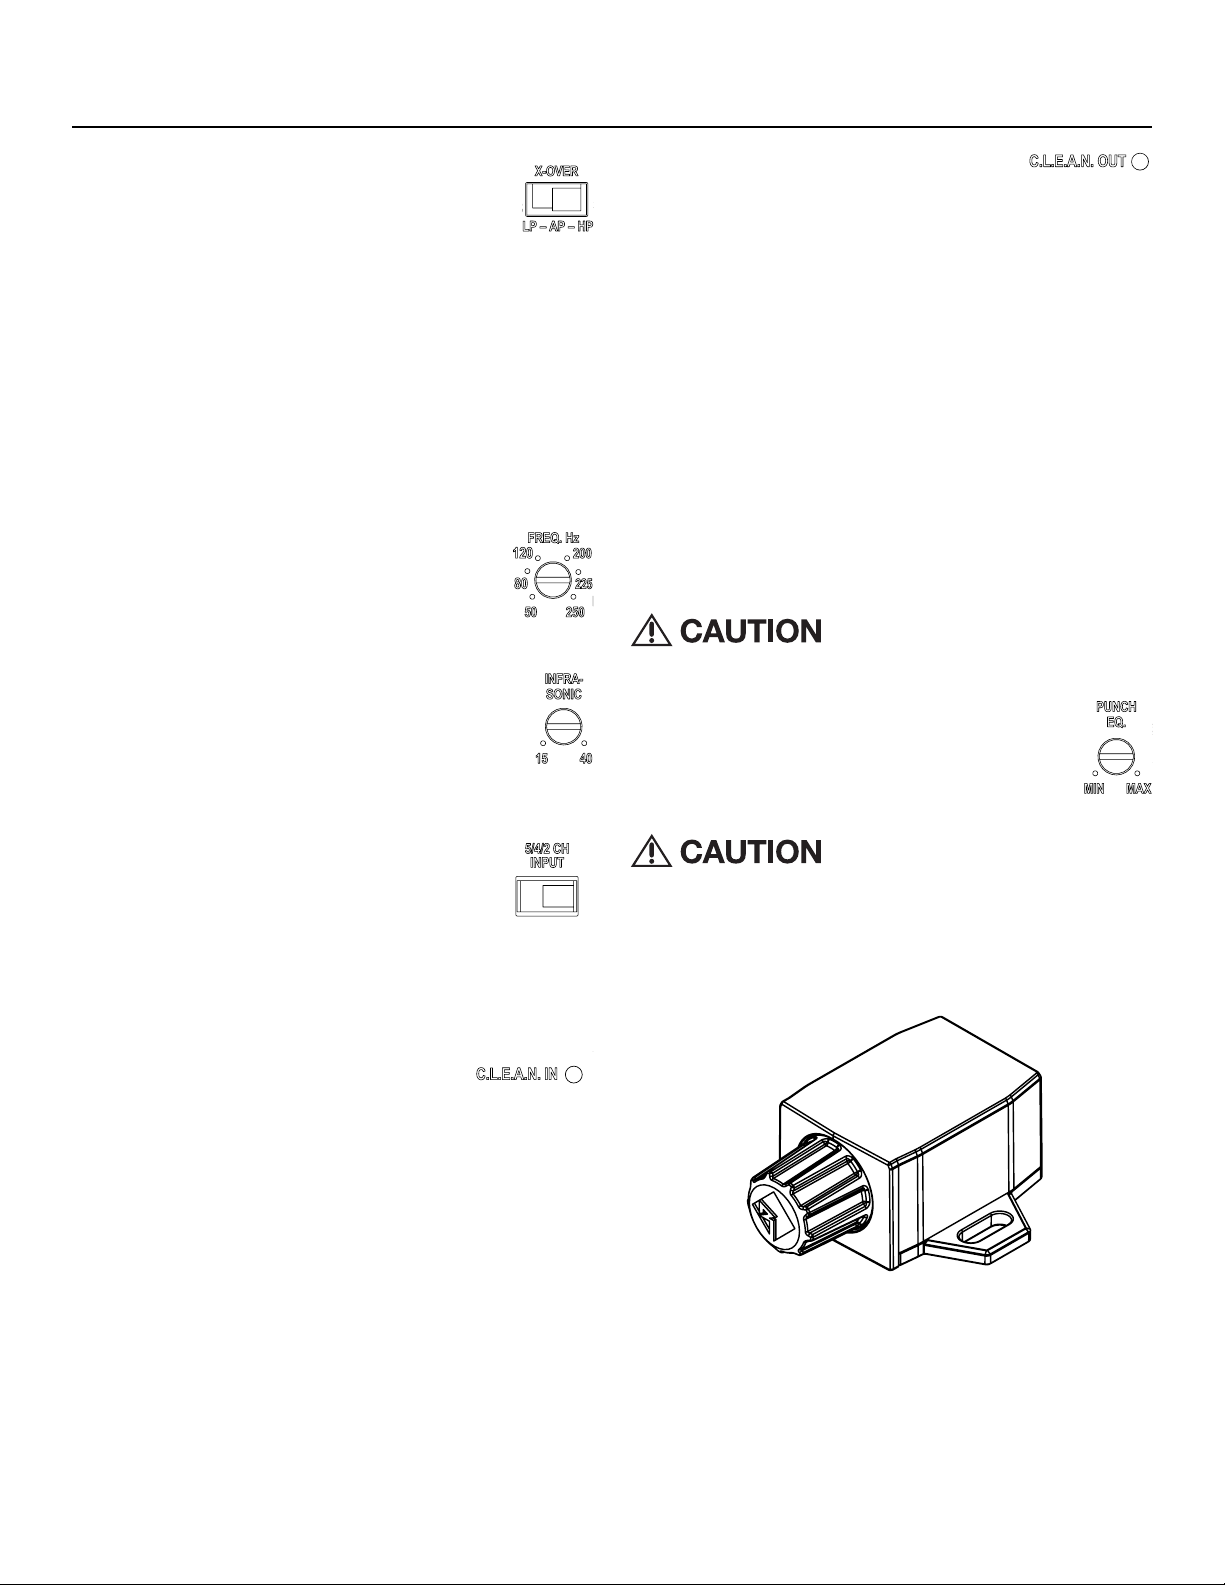
Setting the Crossover
Complete the following steps for each channel.
Place the X-OVER switch in the correct position for the
speaker type.
AP – All Pass – This allows all frequencies to pass thru no matter
where the FREQ. Hz dial is set.
NOTE: This should only be used if using source unit or DSP with HP/
LP filter being used.
HP – High Pass – This allows only frequencies above where the
FREQ. Hz dial is set to pass thru (used for mid-range speakers).
LP – Low Pass – This allows only frequencies below where the
FREQ. Hz dial is set to pass thru (used for Sub-woofers).
Recommended settings for speakers
Sub-woofers – 50 – 80 Hz
Mid-range (6X9 – 5.25”) 80 – 120 Hz
INFRA-SONIC
The INFRA-SONIC filter eliminates frequencies below the
set point of the dial from going to your subwoofer’s. This
will help control the woofer, especially in ported/tuned
enclosures from overextending its mechanical limits.
We recommend setting this between 25 and 30 Hz.
Input Switch
This is used to determine how many inputs are being
used (High level or Low level). This allows you to run 1,
2 or 3 sets of inputs to send signal to all the amplifier’s
outputs.
2 CH – This will utilize the FRONT inputs.
4 CH – This utilizes the FRONT and REAR/SUB inputs
5 CH – This utilizes the FRONT, REAR and SUB inputs.
C.L.E.A.N. IN
NOTE: You can use Music or Test Tones to setup C.L.E.A.N. IN. Before
setup, disconnect the speakers from the amplifier outputs. Test
tones can be downloaded at https://rftech.custhelp.com/app/answers/
detail/a_id/1126/. Scroll to the bottom of the page and download your
preferred format.
1. Turn the source unit all the way down and make sure the gains
on the amplifier are set to 1.
Note: If equipped, make sure the LOUD feature is turned OFF on
your source unit.
2. In the source unit, make sure Bass, Treble and Mid are flat.
3. Choose your source to play music (CD, Bluetooth, etc.)
4. Increase the volume on the source unit until the C.L.E.A.N. IN
RED LED illuminates.
5. Now reduce the volume level until the RED LED turns o. This
will be the max undistorted level of the source unit.
C.L.E.A.N. OUT
Before you adjust the gain:
Make sure that the speakers are not connected to the amplifier
outputs.
Make sure the Bass, Treble and Midrange are all set flat and the RLC (if
equipped) is turned all the way up/ maximum output position.
Setup should be performed at the maximum level of the source unit
that was determined using the C.L.E.A.N. IN.
Using Music to set C.L.E.A.N. OUT - Increase the amplifiers gain
until the indicator turns RED, then turn the gain down until the light
turns OFF.
Using Test Tones to set C.L.E.A.N. OUT - Increase the
amplifiers gain until the indicator turns RED, then turn the gain
down until the light turns OFF. Your gain is now set. Use 1KHz/-5dB
for midrange drivers and 40Hz/-10dB for subwoofer’s.
Avoid setting the Gain to high as this could
increase noise and distortion which can
damage your speakers.
Punch EQ
Punch EQ will add a Bass Boost that can be adjusted by the
dial from Min (0dB) to Max (18dB). This should be adjusted
aer all other adjustments are made. If you have already
adjusted C.L.E.A.N. OUT you will need to readjust aer
adjusting Punch EQ.
Over excursion and subsequent damage
could occur using high levels of boost.
Setup
Remote Level Control (RLC) – When connected, the RLC allows
control of the output up and down from the front of the vehicle. (Sub
channels only)
1.14”
29mm
.12”
3mm
1.97”
50mm
.59”
15mm
1.57”
40mm
.91”
23mm
1.49”
38mm
Loading ...
Loading ...
Loading ...