Loading ...
Loading ...
Loading ...
INSTALLING THE RAINSHOWER AND MAGNETIC HANDSHOWER DOCK
STEP 9:
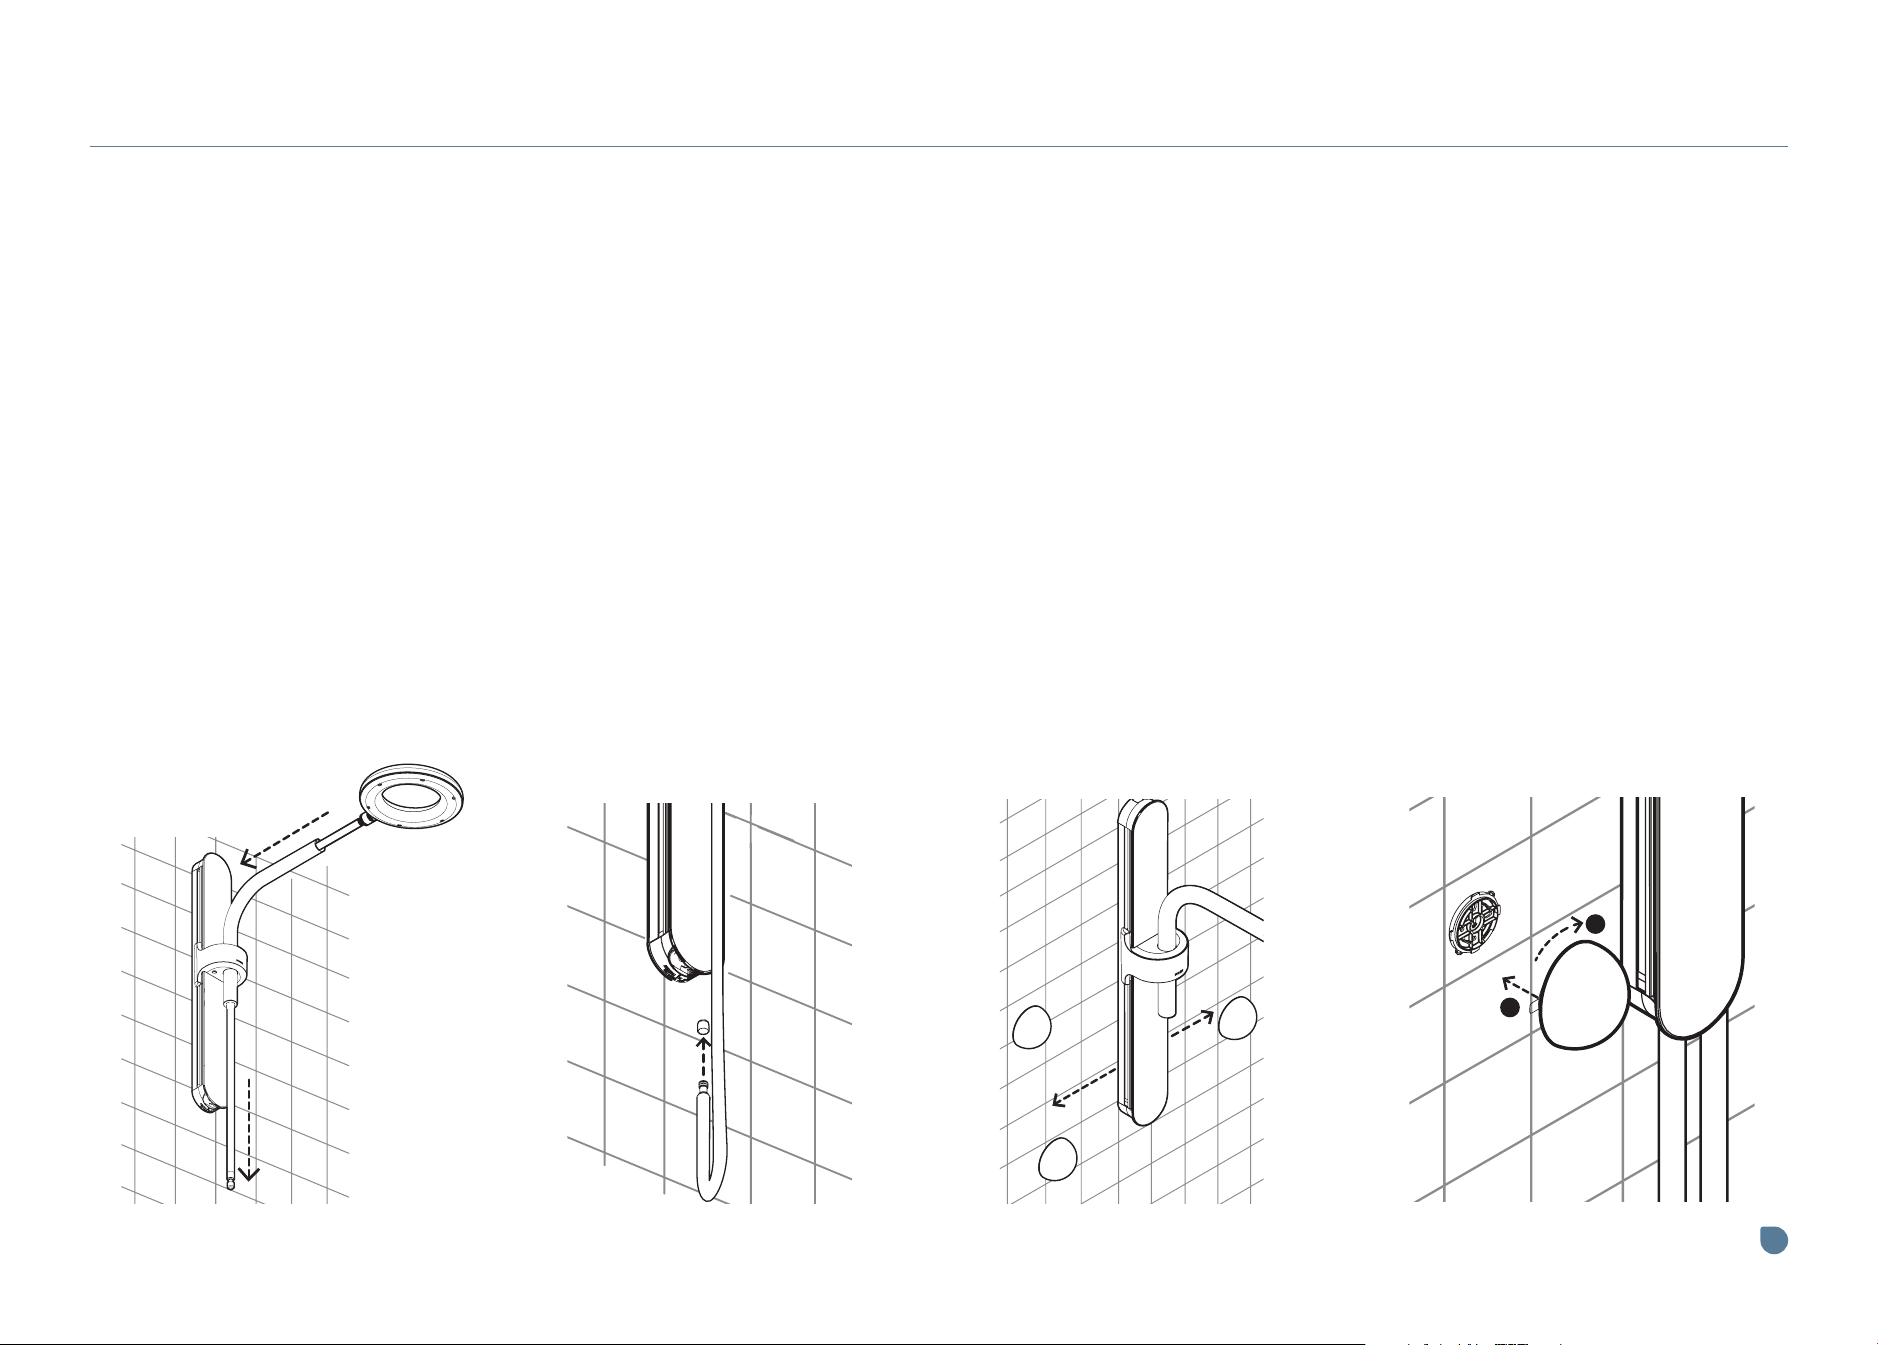
To install the rainshower, feed
the rainshower hose all the way
through the shower arm. Push
the rainshower into the arm until
you hear a click.
Helpful Tip: Slide the shower arm down
on the base so it’s easier to reach.
STEP 10:
Remove and discard the protective
cap on the plastic end of the
rainshower hose. Insert this end
into one of the quick-connect
plugs on the bottom of the
bracket. If you plan to have your
handshower dock to the right of
the bracket, install the rainshower
hose on the left. If you plan to
have your handshower dock to the
left, install the rainshower hose
on the right. Push until you hear a
“click” and tug gently to test the
connection.
STEP 11:
Your handshower includes a
magnetic dock that you can place
wherever you like on your shower
wall. You can even purchase
additional docks and place them
at varying heights, depending on
your showering preferences or to
accommodate different users.
Once you’ve selected a location,
clean your shower walls with
alcohol pads and dry thoroughly
— removing all soap residue.
Helpful Tip: For the best full-coverage
experience, use the Nebia by Moen
handshower like a body spray and install
it at hip or torso height, 8 inches to the left
or right of the bracket.
STEP 12:
Optional mounting screws and
anchors provided. See optional
steps on page 9 before installing
the dock adhesive. Peel away the
adhesive liner from the back of
the magnetic dock’s wall bracket.
Stick it to the wall, and firmly
push it in place for about 1
minute. For optimal adhesive
strength, allow to cure 24 hours
before sliding the dock onto the
bracket. Slide the dock over the
bracket and twist it until you hear
a “click.”
7
Visit moen.com/nebia for tips and videos.
8"
8"
1
2
Loading ...
Loading ...
Loading ...