Loading ...
Loading ...
Loading ...
PREPARING FOR INSTALL
STEP 2:
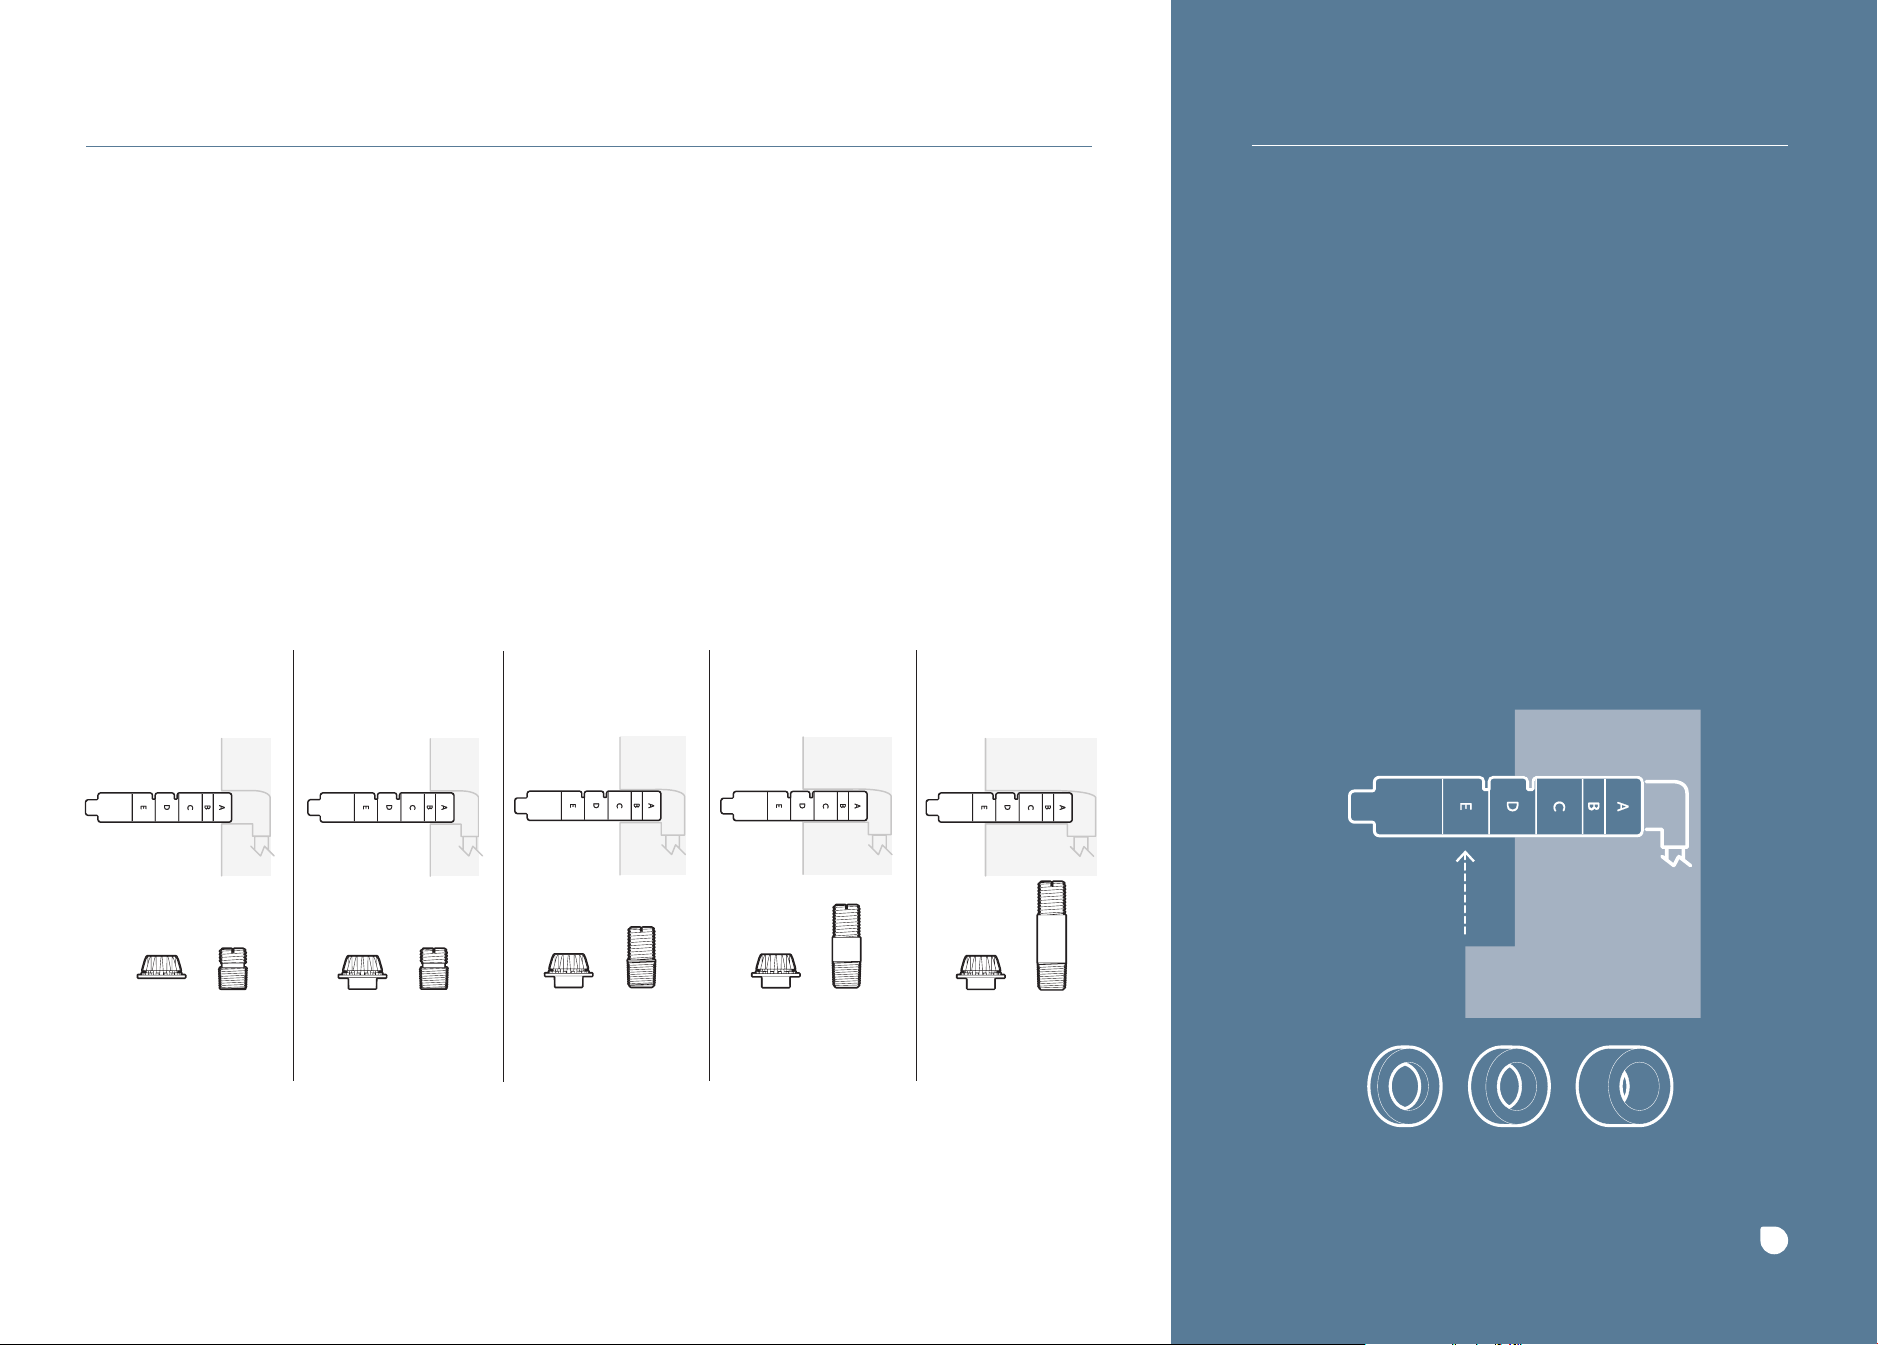
Use the installation key tool (G) (it looks
like a small ruler) to determine the depth
of the hole where your shower arm used
to be. Stick the flat end of the key in the
hole, and use a permanent marker to
mark where it meets the edge of the
wall. Take a look at the letter you’ve
marked on the key: A, B, C, D or E.
This measurement will be critical in
choosing the correct adapter and
collar for your installation.
STEP 3:
Using the letter you marked in Step 2 as
your guide, grab the correct adapter
(H1, H2, H3 or H4) (brass tube-like piece)
and collar (M1 or M2) (black plastic
funnel-shaped part). See the chart
below. There are several options
included in your box. You will only use
one of each. For example, if you marked
letter A on your installation key tool, you
will need the short collar (M1) and the
shortest adapter (H1).
STEP 3A: IF YOU HAVE A LEDGE
A
Collar
M1
Collar
M2
Collar
M2
Collar
M2
Collar
M2
Adapter
H1
Adapter
H1
Adapter
H2
Adapter
H3
Adapter
H4
B C D E
4
Visit moen.com/nebia for tips and videos.
Spacer
SMALL
L1
Spacer
MEDIUM
L2
Spacer
LARGE
L3
If your Nebia by Moen base will overlap a
ledge on your wall — like a decorative tub
surround — mark this outside depth instead.
The installation key letter that aligns with the
ledge (not the wall) will indicate the correct
combination of adapter and collar. Then you
must choose the correct spacer to fill the gap
between the back of your collar and the wall
before installing your Nebia by Moen.
To do this, compare your ledge to the widths
of the different spacers provided (L1, L2 or
L3) and select one that best fills the gap.
(See page 2 for letter references in bold.)
Loading ...
Loading ...
Loading ...