Loading ...
Loading ...
Loading ...
Visit moen.com/nebia for tips and videos.
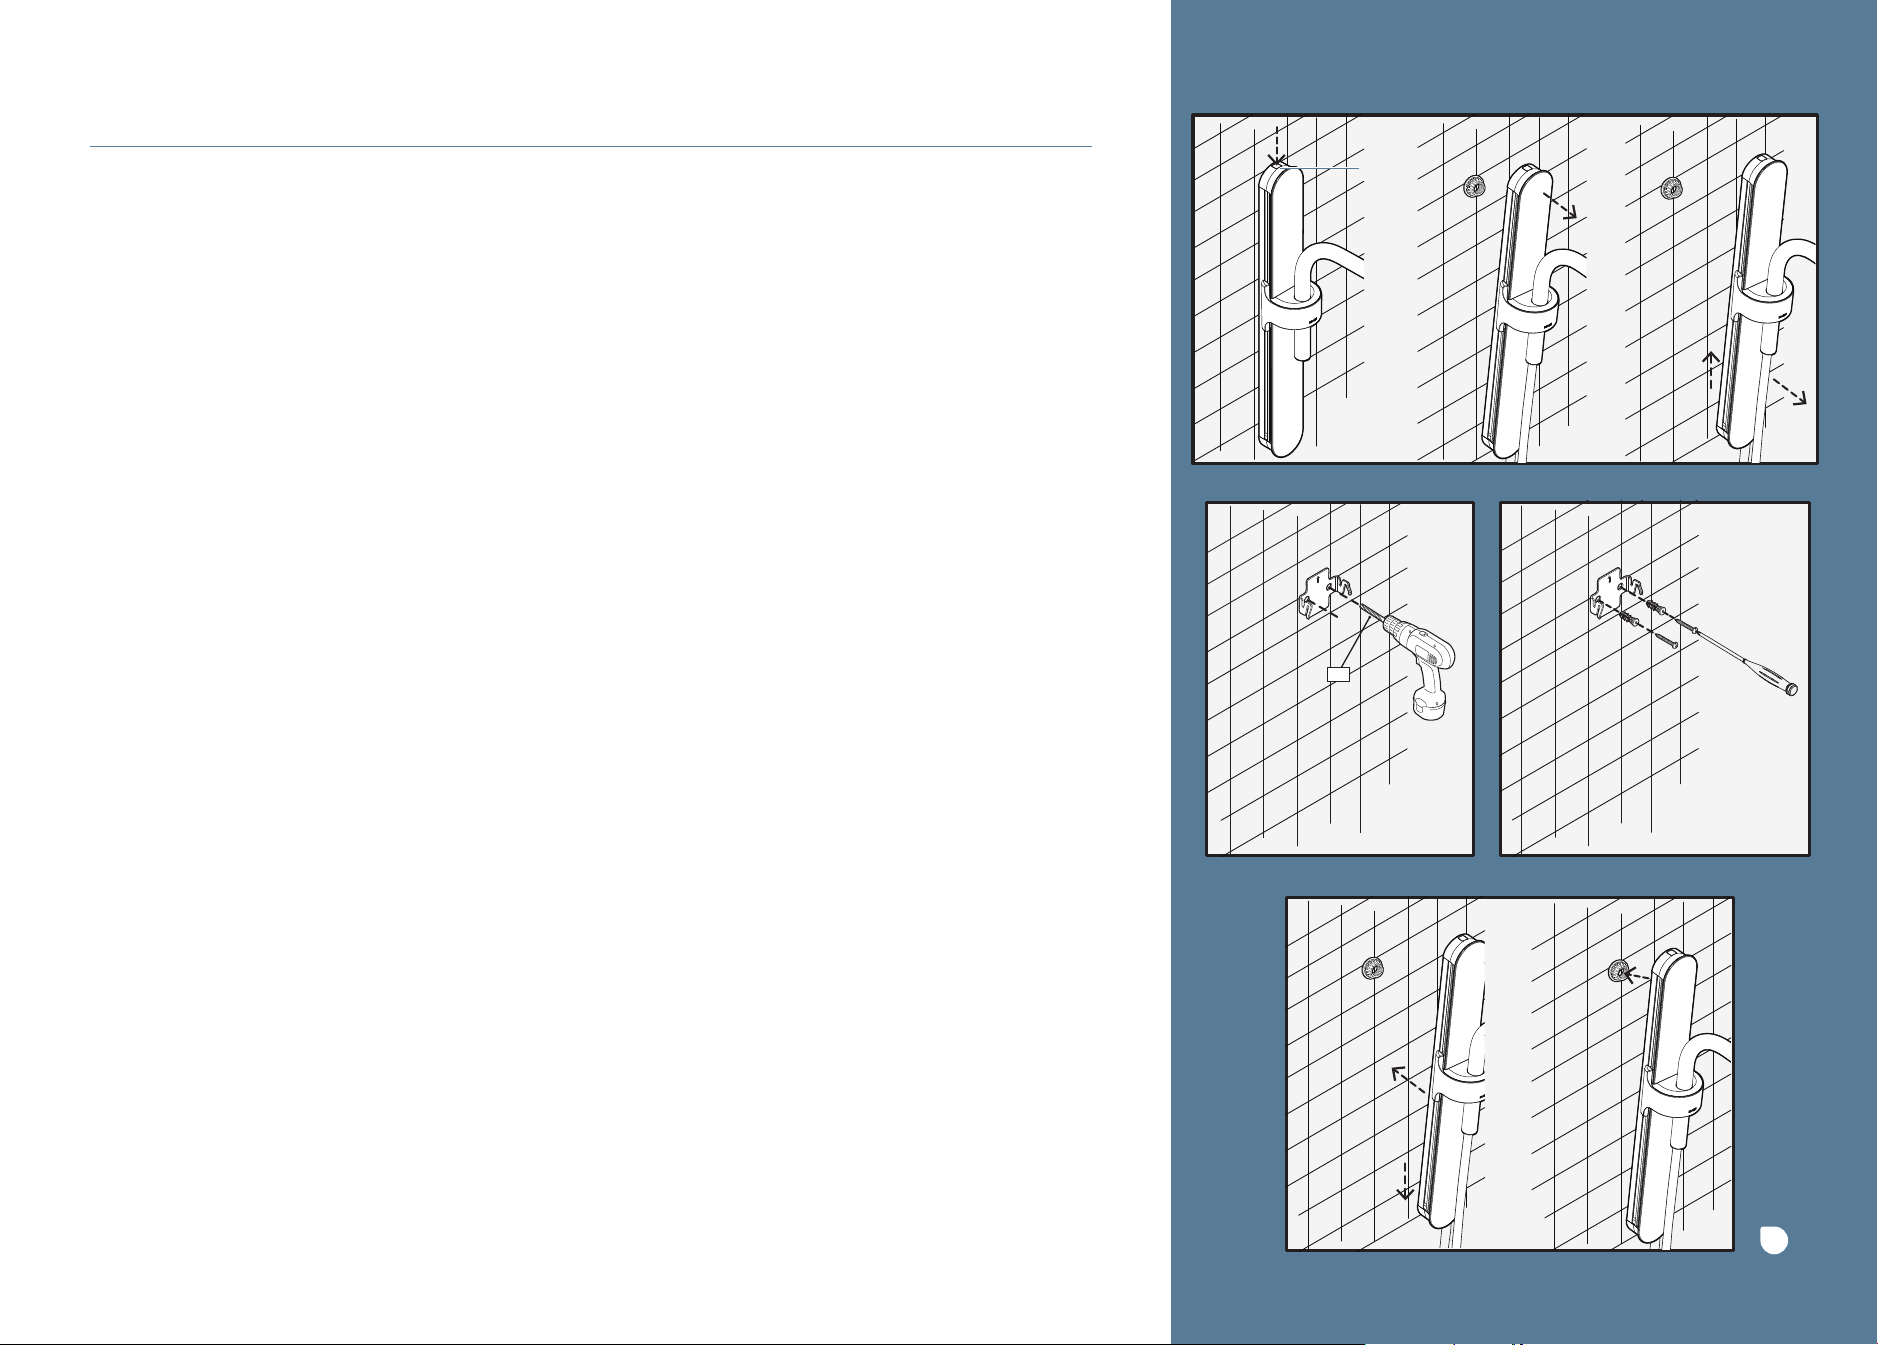
OPTIONAL LOWER BRACKET MOUNTING WITH SCREWS
STEP B1:
Push the button on the top of the bracket to release the top of the bracket from the wall.
Tilt the top toward you until the tube comes out of the adapter. Lift the bracket up, then
pull off of the wall to remove. The lower bracket will remain on the wall.
STEP B2:
For tile: use a ¼” drill bit, and drill holes through the holes in the lower mounting
bracket into the wall.
STEP B3:
For tile: use a ¼” drill bit, and drill holes on the marks. Insert the anchors into
the holes. Insert the screws.
STEP B4:
Line up the bottom of the bracket to reinstall, then pull down, and push the tube
back into the adapter until you hear a “click”.
Button
¼"
10
Loading ...
Loading ...
Loading ...