Loading ...
Loading ...
Loading ...
20 21
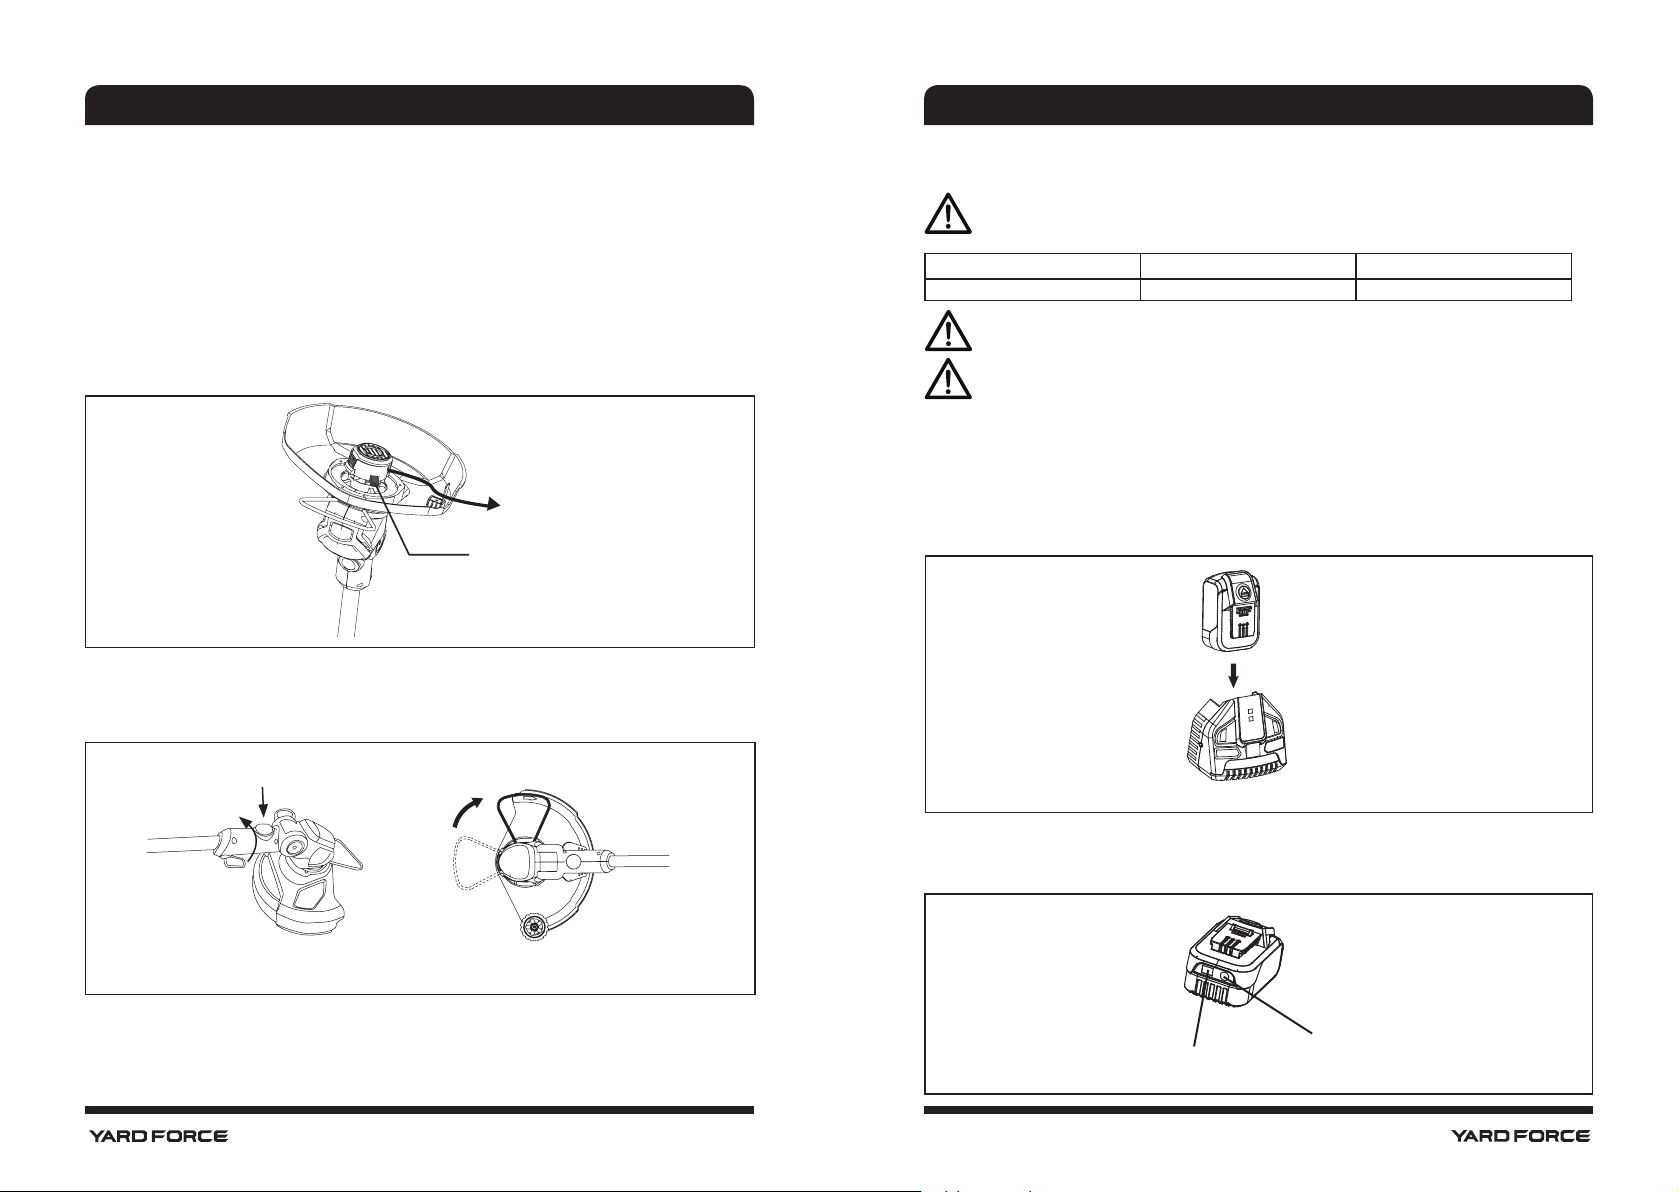
Manual adjust the length of cutting line (Fig 7)
This device has an automatic line feeding system. (This function will be introduced in later
section).
It also allows you to manual adjust the length of cutting line. Especially, at the beginning of
work, due to the cutting line is too short, cannot be pull out by it centrifugal force. In this case,
the function of manual adjust is quite useful.
Press the release button with one hand and pull out the nylon line with the other hand.
This is viewed as one cycle. Each cycle you can pull several centimeters line out. It may
requires several cycles to get sufcient length of wire, so that the device can feed the cutting
line automatically.
Fig 7
Releasing button
Cutting wire
Charging the battery(Fig 9)
NOTE: the battery pack will be fully charged after 60mins or 90 mins. Remove it
from the charger after it has been fully charged.
Different battery cell, need different charging time.
2.5Ah battery pack 2.0Ah battery pack
Charger (40V 2A ) 90 mins Less than 60 mins
NOTE: this battery pack has been shipped in a low charge condition. It should be
fully charged before rst use.
NOTE : make sure the main voltage is the same as rating label which located on the
charger.
1. Plug the charger into an appropriate power supply. When connected, there will be a
green LED light.
2. To insert the battery pack into the charger, align the battery pack with the corresponding
receptacle on the charger, push the battery pack downward until it has been locked in
place.
3. Battery pack fully charges in 90mins, when charged a green LED light will show.
Fig 9
Power indicator button
Power indicator
Checking the battery capacity (Fig. 10)
Push the power indicator button, the remaining percentage of battery capacity will show on
screen.
Fig 10
ADJUSTMENT
Edging function (Fig 8)
1. Adjust the trimmer head to 90 degrees for edging by pressing the locking button.
2. Twist the plant protector to an angle of 90°.
Fig 8
90
o
90
o
SAFETY INFORMATION
OPERATION
Loading ...
Loading ...
Loading ...