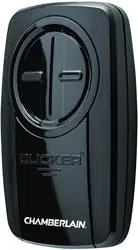
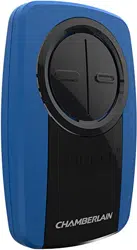
3-BUTTON REMOTE CONTROLS MODELS 953EV, 953EVC, 956EV AND 956EVC
For use with Chamberlain 315 MHz or 390 MHz garage door openers manufactured after January 1, 1993. The garage door opener activates when the programmed button on the remote control is pressed. The remote control can activate up to three garage door openers.
Make sure the garage door opener has a working light bulb because it is a programming indicator.
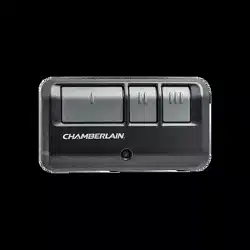
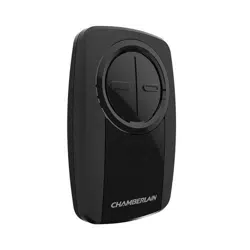
GARAGE ACCESS SYSTEM REMOTE
MODELS 953EV AND 953EVC
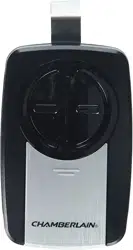
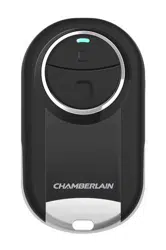
GARAGE ACCESS SYSTEM KEYCHAIN REMOTE
MODELS 956EV AND 956EVC
WARNING: To prevent possible SERIOUS INJURY or DEATH from a moving gate or garage door:
ALWAYS keep remote controls out of reach of children. NEVER permit children to operate or play with remote controls.
Activate gate or door ONLY when it can be seen clearly, is properly adjusted and there are no obstructions to door travel.
ALWAYS keep gate or garage door in sight until completely closed. NEVER permit anyone to cross path of moving gate or door.
PREPARE
Locate the Learn button on the garage door opener.
NOTE: Your garage door opener may look different.
Locate the Program button on the remote control.
PROGRAM THE REMOTE CONTROL (953EV & 953EVC)
1. Press and hold the program button the remote control until the LED on the front of the remote control turns on.
2. Press and release the remote control button you wish to use the number of times that corresponds with the garage door opener type:
# of Presses
Garage Door Opener Type
1
Security+ 2.0TM (Yellow Learn Button)
2
315 MHz Security+® (Purple Learn Button)
3
390 MHz Security+® (Red/Orange Learn Button)
4
390 MHz Billion Code (Green Learn Button)
3. To exit programming mode, press any remote control button except the button that was just programmed.
4. Press and release the Learn button on the garage door opener.
The Learn LED will light
Within 30 seconds...
5. Press the remote control button 7 programmed in step 2 until the garage door opener lights flash or two clicks are heard.
6. To test, press the programmed button on the remote control...
The garage door opener will activate.
7. Install the visor clip.
PROGRAM THE REMOTE CONTROL (956EV & 956EVC)
1. Press and hold the program button the remote control until the LED on the front of the remote control turns on
2. Press and release the remote control button you wish to use the number of times that corresponds with the garage door opener type:
# of Presses
Garage Door Opener Type
1
Security+ 2.0TM (Yellow Learn Button)
2
315 MHz Security+® (Purple Learn Button)
3
390 MHz Security+® (Red/Orange Learn Button)
4
390 MHz Billion Code (Green Learn Button)
3. To exit programming mode, press any remote control button except the button that was just programmed.
4. Press and release the Learn button on the garage door opener.
The Learn LED will light.
Within 30 seconds...
5. Press the remote control button programmed in step 2 until the garage door opener lights flash or two clicks are heard
6. To test, press the programmed button on the remote control...
The garage door opener will activate.
BATTERY
The LED on your remote will stop flashing when the battery is low and needs to be replaced. To replace battery, open the case as shown. Insert battery positive side up (+). Replace the battery with only 3V CR2032 coin cell batteries. Dispose of old battery properly
953EV & 953EVC
Pry open the case first in the middle (1), then at each side (2 and 3) with the visor clip.
956EV & 956EVC
Pry open the case with a screwdriver blade
WARNING: To prevent possible SERIOUS INJURY or DEATH:
NEVER allow small children near batteries.
If battery is swallowed, immediately notify doctor.
To reduce risk of fire, explosion or chemical burn:
Replace ONLY with 3V CR2032 coin batteries.
DO NOT recharge, disassemble, heat above 212° F (100° C) or incinerate.
NOTICE: To comply with FCC and or Industry Canada rules (IC), adjustment or modifications of this receiver and/or transmitter are prohibited, except for changing the code setting or replacing the battery. THERE ARE NO OTHER USER SERVICEABLE PARTS.
This device complies with Part 15 of the FCC rules and IC RSS210. Operation is subject to the following two conditions: (1) this device may not cause harmful interference, and (2) this device must accept any interference received, including interference that may cause undesired operat
WARRANTY
ONE YEAR LIMITED WARRANTY
The Chamberlain Group, Inc. warrants to the first retail purchaser of this product that is free from defect in materials and/or workmanship for a period of 1 year from the date of purchase.