®
®
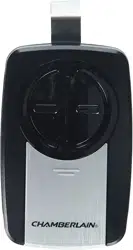
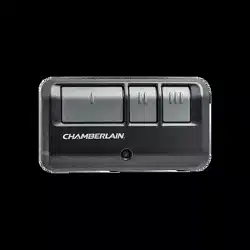
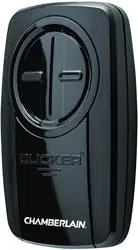
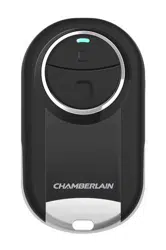
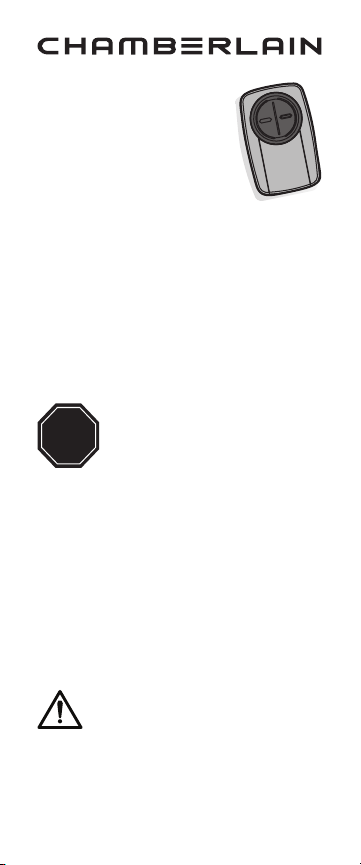
MODEL KLIK3U-BK2
MODEL KLIK3U-SS
MODEL KLIK5U-BK2
MODEL KLIK5U-SS
UNIVERSAL REMOTE CONTROL
Your remote control can be programmed to operate
up to two devices, such as a garage door opener,
gate operator, or commercial door operator and has
a SMART/ LEARN button. Each button on the
remote control works independently of the other
and must be programmed separately. The images
throughout this manual are for reference only and
your product may look different.
STOP
Read instructions thoroughly
BEFORE beginning. If you are using
this product with residential door
openers, this product must be used
only with door openers manufactured
starting January 1, 1993 that use photoelectric
sensors located near the bottom of the door track.
IMPORTANT: The remote will activate your door or
gate during programming. Be sure the door is clear
of ALL obstructions. Start with the garage door
closed. Make sure the garage door opener has a
working light because it is a programming indicator.
WARNING: This product can expose you
to chemicals including lead, which are
known to the State of California to cause
cancer or birth defects or other reproductive harm.
For more information go to
www.P65Warnings.ca.gov
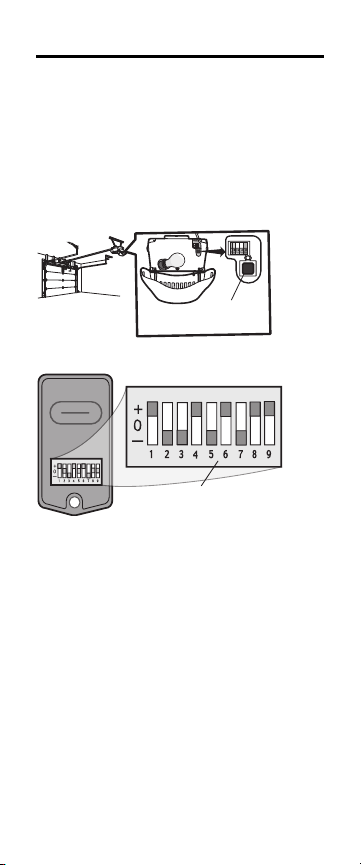
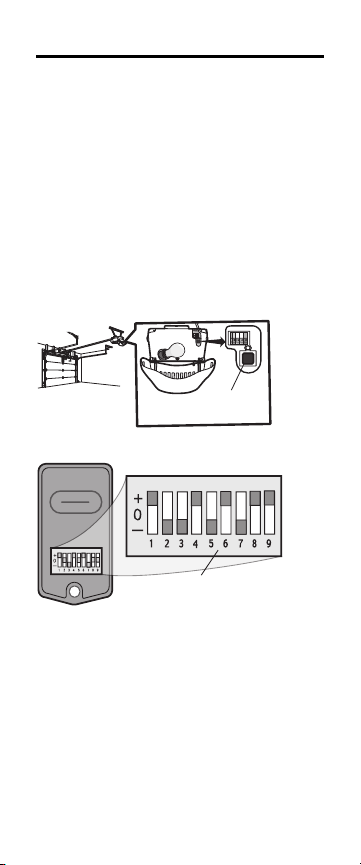
GETTING STARTED
Determine if the product you are programming the
remote control to has a SMART/LEARN button or
DIP Switches. The SMART/ LEARN button or DIP
Switches are located either on the product or in an
external receiver on or near the product. The
following instructions are for a garage door opener
with a SMART/LEARN Button. For DIP Switch
programming instructions or additional help, see
support.chamberlaingroup.com.
SMART/
LEARN Button
OR
DIP Switch
NOTE: DIP Switch is only available in KLIK3U
models.

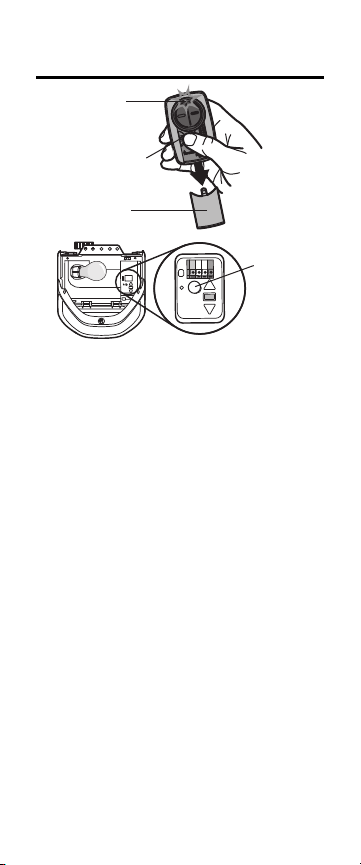
PROGRAM TO GARAGE DOOR OPENERS
WITH A YELLOW LEARN BUTTON
If your remote was previously programmed to
another type of opener, follow the programming
instructions on the next page to reprogram to a
yellow LEARN button.
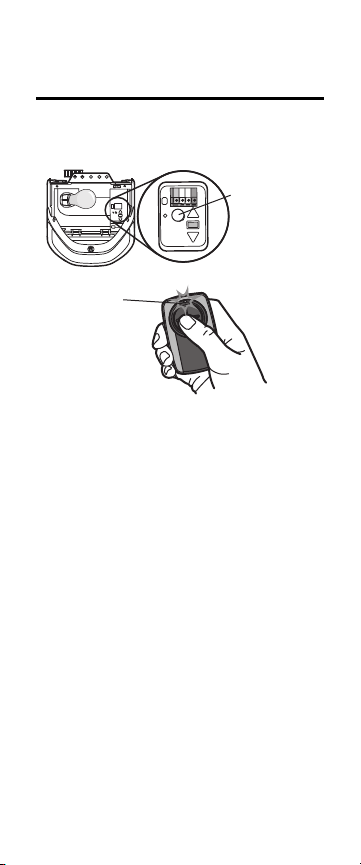
Yellow
LEARN
Button
LED
1. Start with the garage door closed.
2. Press and immediately release the yellow
LEARN button. The Learn LED glows steady
for 30 seconds. Within 30 seconds...
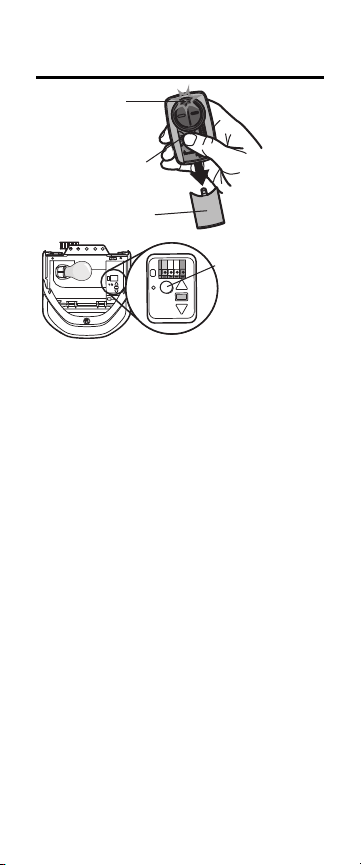
3. Press and hold the button on the remote
control you wish to use.
4. Release the button when the garage door
opener lights blink or two clicks are heard.
5. Test by pressing the button you just
programmed. The opener activates.
To program the remote to Chamberlain accessories,
refer to the manual provided with the accessory.
PROGRAM TO COMPATIBLE GARAGE
DOOR OPENERS
LED
Program
Button
Cover
SMART/
LEARN
Button
1. Start with the garage door closed.
2. Remove the remote control cover. Press and
hold the program button until the LED turns
on.
3. Press and release the SMART/ LEARN button
on your garage door opener.
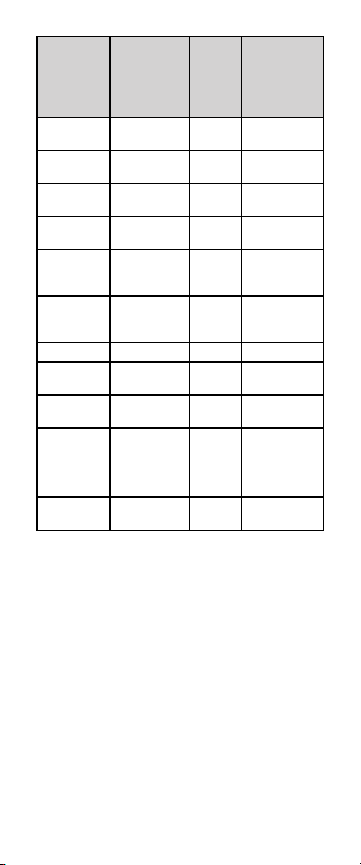
4. Select a button to program on the remote
control. Press and release the button the
specified number of times according to the
following chart. NOTE: Make sure the LED
stops flashing between each press of the
button. The garage door opener will respond
by clicking, blinking or activating.

Garage Door
Opener Brand
Type/Color of
SMART/LEARN
button
Year Times to
press
remote
button
Linear
®
Mega-Code
'97-
Current
1
Chamberlain
®
* Orange/Red '97-'03 2
Chamberlain
®
* Purple
'05-
Current
3
Chamberlain
®
* Green '93-'96 4
Genie
®
**
Overhead Door
®
Intellicode
'05-
Current
5
Genie
®
Overhead Door
®
Intellicode
'95-
Current
6
Stanley
®
Secure Code '98 7
Chamberlain
®
* Yellow
'11-
Current
8
Wayne Dalton
®
Rolling Code '99 9
Xtreme
Garage
®***
Guardian
®***
Black
'05-
Current
10
Sommer*** Black
'98-
Current
11
* LiftMaster, Do-It Master Mechanic, Raynor, True Value
and Sears Craftsman are compatible with Chamberlain
technology.
** Find Genie Intellicode II instructions at
support.chamberlaingroup.com.
*** Compatible with KLIK5U-BK2 and KLIK5U-SS only.
5. Press the program button on the remote
control to save.
6. Test by pressing the button you just
programmed. The opener activates.
To program the remote to Chamberlain accessories,
refer to the manual provided with the accessory.
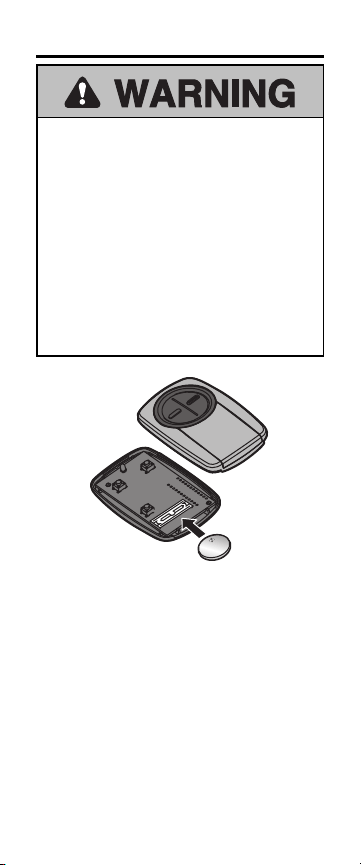
BATTERY
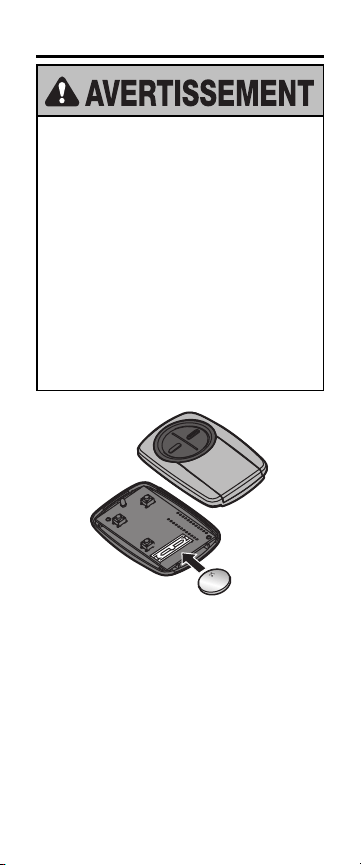
To prevent possible SERIOUS INJURY or
DEATH:
• NEVER allow small children near batteries.
• If battery is swallowed, immediately notify
doctor.
To reduce risk of fire, explosion or chemical
burn:
• Replace ONLY with 3V CR2032 coin
batteries.
• DO NOT recharge, disassemble, heat above
212°F (100°C) or incinerate.
Dispose of batteries properly.
Replace ONLY with 3V CR2032 coin batteries.

NEED HELP?
Go to support.chamberlaingroup.com for more
information.
NOTICE: This device complies with part 15 of
the FCC rules and Innovation, Science and
Economic Development Canada license-exempt
RSSs. Operation is subject to the following two
conditions: (1) This device may not cause
harmful interference, and (2) this device must
accept any interference received, including
interference that may cause undesired
operation. Any changes or modification not
expressly approved by the party responsible for
compliance could void the user's authority to
operate the equipment.
All trade names used herein are trademarks of
respective manufacturers listed.

© 2020, The Chamberlain Group, Inc.
All Rights Reserved
114-5461-000C
®
®
MODÈLE KLIK3U-BK2
MODÈLE KLIK3U-SS
MODÈLE KLIK5U-BK2
MODÈLE KLIK5U-SS
TÉLÉCOMMANDE UNIVERSELLE
Votre télécommande peut être programmée pour
activer jusqu’à deux dispositifs, comme un ouvre-
porte de garage, et est dotée d’un bouton
INTELLIGENT/D’APPRENTISSAGE. Chaque
bouton sur la télécommande fonctionne
indépendamment l’un de l’autre et doit être
programmé séparément. Les illustrations de ce
manuel ne sont fournies qu’à titre de référence;
votre produit peut avoir une apparence différente.
ARRÊT
Lire attentivement les instructions
AVANT de commencer. Si ce produit
est utilisé avec des ouvre-portes de
garage résidentiels, il ne peut l’être
qu’avec des ouvre-portes fabriqués à
partir du 1erjanvier 1993 qui utilisent des capteurs
photoélectriques situés près du bas du rail de la
porte.
IMPORTANT: La télécommande activera la porte
ou barrière pendant sa programmation. S’assurer
que la porte est libre de TOUTE obstruction.
Commencer alors que la porte du garage est fermée
Vérifier que l’ouvre-porte de garage est muni d’une
ampoule en bon état, parce qu’elle sert d’indicateur
de programmation.
AVERTISSEMENT : Ce produit peut
vous exposer à des produits chimiques
comme le plomb, reconnu par l’État de la
Californie comme cause de cancers, d’anomalies
congénitales et d’autres problèmes liés à la
reproduction. Pour plus d’information, visitez
www.P65Warnings.ca.gov
POUR COMMENCER
Déterminer si le produit qui sera programmé à la
télécommande est doté d’un bouton
intelligent/d’apprentissage (SMART/LEARN) ou de
commutateurs DIP. Le bouton
INTELLIGENT/D’APPRENTISSAGE ou les
COMMUTATEURS DIP sont situés sur le produit ou
dans un récepteur extérieur ou encore, à proximité
du produit. Les instructions suivantes servent à
programmer un ouvre-porte de garage à l’aide d’un
bouton intelligent/d’apprentissage
(SMART/LEARN). Pour les instructions de
programmation de commutateur DIP ou pour
obtenir une assistance supplémentaire, voir
support.chamberlaingroup.com.
Le bouton INTELLIGENT/
D’APPRENTISSAGE
OU
Les COMMUTATEURS DIP
REMARQUE: Le commutateur DIP est offert
uniquement sur les modèles KLIK3U .
PROGRAMMATION AUX OUVRE-
PORTES DE GARAGE AVEC UN BOUTON
D’APPRENTISSAGE JAUNE
Si votre télécommande a déjà été programmée à un
autre type d’ouvre-porte, voir les instructions de
programmation à la page suivante pour
reprogrammer à un bouton d’apprentissage jaune.
Bouton
d’apprentissage
jaune
LED
1. Commencer alors que la porte du garage est
fermée.
2. Appuyer sur le bouton d’apprentissage jaune
et le relâcher immédiatement. Le voyant à DEL
du bouton d’apprentissage s’allumera en
continu pendant 30secondes. Dans les
30secondes...
3. Tenir enfoncé le bouton de la télécommande
qui sera utilisé.
4. Relâcher le bouton lorsque l’éclairage de
l’ouvre-porte de garage clignote ou que deux
déclics se font entendre.
5. Tester en appuyant sur le bouton qui vient
d’être programmé. L’ouvre-porte de garage
s’active.
Pour programmer la lampe avec d’autres
accessoires, consulter le manuel de l’accessoire
concerné.
PROGRAMMATION AUX OUVRE-
PORTES DE GARAGE COMPATIBLES
LED
Bouton de
programmation
Couvercle
BOUTON
INTELLIGENT/
D’APPRENTISSAGE
1. Commencer alors que la porte du garage est
fermée.
2. Retirer le couvercle de la télécommande.
Enfoncer et tenir le bouton de programmation
jusqu’à ce que la DEL s’allume.
3. Enfoncer et relâcher le bouton
d’apprentissage de l’ouvre-porte de garage.
4. Sélectionner un bouton à programmer sur la
télécommande. Enfoncer et relâcher le bouton
le nombre de fois précisé dans le tableau
suivant. REMARQUE: S’assurer que la DEL
s’arrête de clignoter entre chaque pression
exercée sur le bouton. L’ouvre-porte de
garage réagira en émettant un déclic, en
activant le clignotement d’un témoin ou en
s’activant.
Marque
d’ouvre-
porte de
garage
Type/couleur
du bouton
SMART/LEARN
Année Nombre de
pressions
répétées sur le
bouton de la
télécommande
Linear
®
Mega-Code
'97-
Présent
1
Chamberlain
®
*
Orange/rouge '97-'03 2
Chamberlain
®
*
Mauve
'05-
Courante
3
Chamberlain
®
*
Verte '93-'96 4
Genie
®
**
Overhead
Door
®
Intellicode
'05-
Courante
5
Genie
®
**
Overhead
Do
or®
Intellicode
'95-
Présent
6
Stanley
®
Secure Code '98 7
Chamberlain
®
*
Jaune
'11-
Présent
8
Wayne
Dalton
®
Sans code fixe '99 9
Xtreme
Garage
®
***
Guardian
®
***
Noir
'05-
Présent
10
Sommer*** Noir
'98-
Présent
11
* LiftMaster, Do-It Master Mechanic, Raynor, True Value
et Sears Craftsman sont compatibles avec la technologie
Chamberlain.
** Des instructions pour Genie Intellicode II sont
accessibles à support.chamberlaingroup.com.
***Compatible UNIQUEMENT avec KLIK5U-BK2 and
KLIK5U-SS.
5. Enfoncer le bouton de programmation sur la
télécommande pour mettre en mémoire.
6. Tester en appuyant sur le bouton qui vient
d’être programmé. L’ouvre-porte de garage
s’active.
Pour programmer la lampe avec d’autres
accessoires, consulter le manuel de l’accessoire
concerné.
PILE
Pour éviter des BLESSURES GRAVES, voire
MORTELLES:
• Ne JAMAIS laisser des enfants s’approcher
de la batterie.
• Appeler immédiatement un médecin en cas
d’ingestion d’une pile.
Pour réduire le risque d’incendie, d’explosion
ou de brûlure chimique:
• La remplacer UNIQUEMENT par une pile
bouton de 3V CR2032.
• NE PAS recharger, démonter, chauffer à
plus de 100°C (212°F) ou incinérer les
piles.
Mettre la pile usée au rebut de manière appropriée.
Remplacer UNIQUEMENT par des piles boutons de
3V CR2032.

BESOIN D’AIDE?
Voir support.chamberlaingroup.com pour plus
d’information.
AVERTISSEMENT: Cet appareil est conforme
aux dispositions de la partie15 du règlement de
la FCC et de l’exemption de licence des appareils
radio d’Innovation, Sciences et Développement
économique Canada. L’utilisation de cet
équipement est assujettie aux deux conditions
suivantes:(1) ce dispositif ne peut causer de
brouillage nuisible, et (2) ce dispositif doit
accepter tout brouillage reçu, y compris tout
brouillage pouvant causer un fonctionnement
indésirable. Tout changement ou toute
modification non expressément approuvé par la
partie responsable de la conformité peut avoir
pour résultat d'annuler l’autorité de l’utilisateur
de faire fonctionner l’équipement
Toutes les marques utilisées aux présentes sont des
marques de commerce de leurs fabricants
respectifs.

© 2020, The Chamberlain Group, Inc.
Tous droits réservés
114-5461-000C