Loading ...
Loading ...
Loading ...

10
N
0
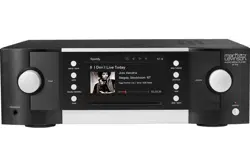
519 AUDIO PLAYER / OWNER’S MANUAL
QUICK SETUP AND LISTEN
REMOTE CONTROL
Your remote control comes with two preinstalled AAA alkaline
batteries. To replace the batteries, remove the remote control’s
battery cover using the included screwdriver, insert the batteries
and replace the battery cover. Be sure to observe proper battery
polarity.
When using the remote control, aim it toward the front-panel IR
receiver. Make sure that no objects, such as furniture, block the
remote’s view of the receiver. Bright lights, fluorescent lights,
and plasma video displays may interfere with the function of the
remote.
• The remote has a range of about 17 feet (5m), depending on
the lighting conditions
• You can use the remote at an angle of up to 45°
• Placing the unit behind tinted glass will reduce the remote
control’s effective range
INITIAL CONNECTIONS
CAUTION: Before making connections, make sure the unit and
all associated components are powered off and disconnected
from electrical outlets.
1. Connect your amplifiers’ or preamplifier’s inputs to the
player’s output connectors. Mark Levinson recommends
using the Balanced output connectors if your amplifier(s) or
preamplifier have balanced input connectors. Otherwise, use
the Single-ended output connectors.
2. Connect digital source components’ outputs to the player’s
digital audio inputs and USB drive(s) to the rear-panel inputs.
If you are connecting a computer via USB, download and
install the USB Audio driver software from the product web
page at marklevinson.com, under the Downloads tab.
3. Connect the supplied Wi-Fi antenna to the unit’s rear panel.
4. If possible, connect the unit to your network via router or
other network connection using a Cat5 or higher cable. If
connected via Wired network, the antenna is optional.
Mark Levinson recommends using a wired network
connection for the best performance and stability. If you
do not have access to a wired network connection where
your unit is located, follow the Wi-Fi Setup steps below. The
unit will connect via wired OR wireless network method, so
if you have access to a wired network connection, there is
no need to follow the Wi-Fi Setup steps.
5. Connect the supplied power cable to the player’s AC Mains
connector and into an electrical outlet. Turn the rear-panel
Power switch on the unit to On, and turn on all associated
components.
6. When the system has completed starting up, and the display
is dark with Standby indicator slowly flashing, press the front-
panel Standby button or the Standby button on the remote
control.
7. Make sure the player’s or preamplifier’s volume is set to a
reasonable level. It is best to start low and turn up to avoid
unintentionally damaging your equipment.
8. Turn the Input knob or press the Input buttons on the remote
to select the input that corresponds to an input to which you
connected a source component, or insert a CD.
9. Download the Mark Levinson Audio Player app, available
from the Apple iOS App Store or Android Google Play.
Optional: if you would like to control your № 519 from your
computer type the player’s IP address into your web browser.
This is the number that appears in gray on the opening screen.
You can also find the player’s IP address from the Settings
Menu under Network.
A NOTE ABOUT DSD FILES
The № 519 will play back both DSD64 and DSD128 encoded files.
When playing music encoded in these formats, audio will only
be present at the analog (and headphone) outputs. Because of
the nature of DSD-encoded data, it cannot be transmitted via
standard digital interconnections like Toslink or coaxial.
If you are using your № 519 as a digital source connected to a
preamplifier’s DAC, you will need to also connect the № 519s
analog outputs to an input on the preamplifier to listen to your
DSD-encoded data.
QUICK SETUP AND LISTEN
Loading ...
Loading ...
Loading ...