Loading ...
Loading ...
Loading ...
15
Programming the oven
There are different ways to programme the oven. Programming
the type of heating, temperature or grill power. The oven can be
programmed with the cooking time (duration) and the end time
for each dish. For more information, see the chapter Setting the
time functions.
Note: We recommend preheating the oven before inserting the
food in order to avoid condensation on the oven glass.
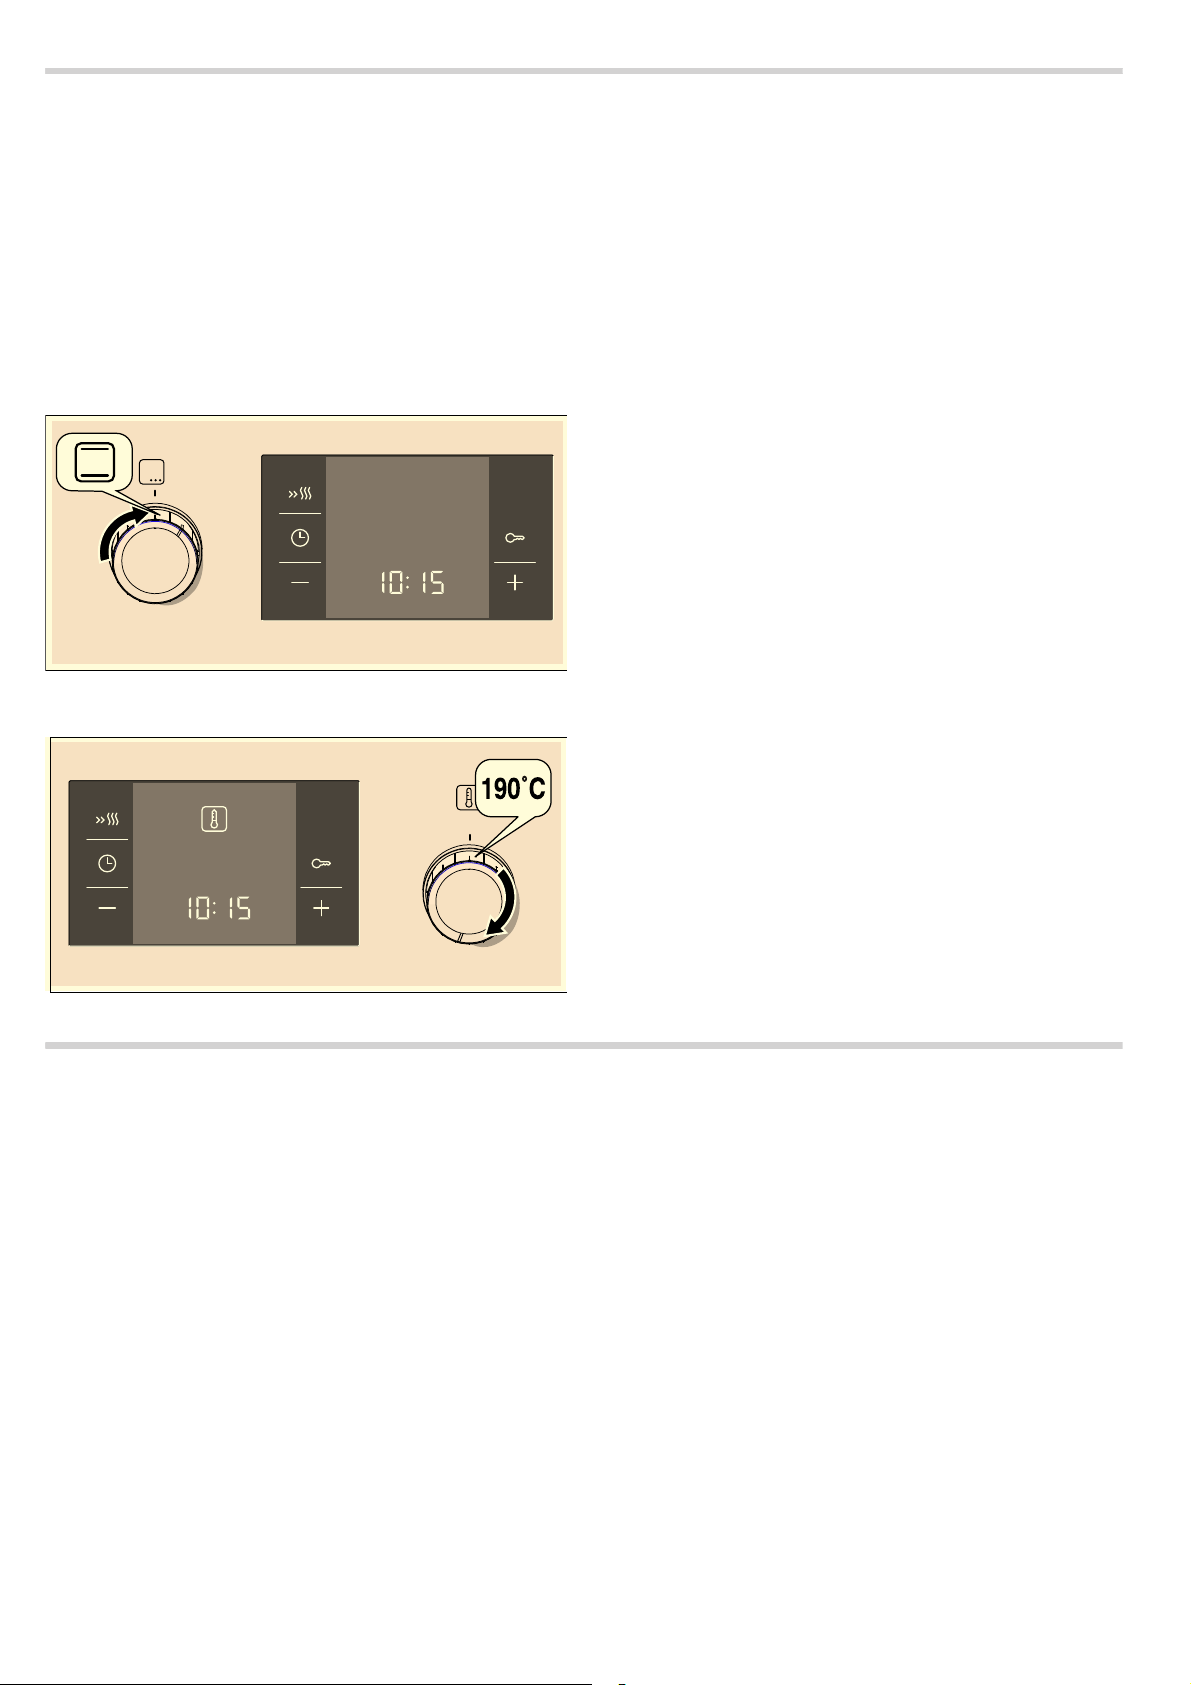
Type of heating and temperature
Example in the picture: Top/bottom heating at 190 °C %.
1. Use the function selector to set the type of heating.
2. Set the temperature or grill setting using the temperature
selector.
The oven heats up.
Switching off the oven
Turn the function selector to the off position.
Changing the settings
The type of heating and temperature or grill setting can be
changed at any time using their respective selectors.
Rapid heating
With the rapid heating function, the oven reaches the
programmed temperature very quickly.
Rapid heating must be used for temperatures of more than
100 ºC. The following types of heating are appropriate:
■ 3D hot air <
■ Top and bottom heating %
To ensure uniform cooking, the food must not be put into the
oven until rapid heating has been completed.
1. Select the temperature and type of heating required.
2. Briefly press the c button.
The display panel shows the
c symbol. The oven will begin to
heat up.
End of rapid heating
A beep will sound. The
c symbol disappears from the display
panel. Put the food in the oven.
Cancelling rapid heating
Press the
c button. The c symbol disappears from the
display panel.
Setting the time functions
This oven has various time functions. The 0 sensor activates
the menu and moves through the different functions. The time
symbols remain lit up while settings are programmed. The
square brackets [ ] indicate the time function selected. You can
modify an already programmed time function directly with the
sensors
@ or A, provided the time symbol is situated between
square brackets [ ].
Timer
The timer works independently of the oven. The timer has its
own beep. This can be used to distinguish whether the time set
for the timer or the automatic oven shut-off have finished
(cooking time).
1. Press the button once 0.
The time symbols light up on the display panel, the square
brackets are next to
U.
2. Set the timer using the @ or A buttons.
Value suggested for the
@ button = 10 minutes.
Value suggested for the
A button = 5 minutes.
The programmed time is shown after a few seconds. The time
set for the timer starts to count down. The symbol [
U] lights up
on the display panel and the timer's progress is shown. The
other time symbols switch off.
The time set for the timer has elapsed
A beep will sound. The display panel will show
‹‹:‹‹. Switch
off the timer using the
0 button.
Changing the time on the timer.
Change the time set for the timer using the
@ or A buttons. The
new time is shown after a few seconds.
Cancelling the timer
Resetting the timer to
‹‹:‹‹ with the button A. The new time
is shown after a few seconds. The timer switches off.
Viewing the time settings
If several time functions are programmed, the corresponding
symbols light up on the display panel. The symbol for the time
function in the foreground is in brackets.
To view the timer
U, the cooking time r, the end time p or
the actual time
0, press the 0 sensor repeatedly until the
brackets are around the required symbol. The corresponding
value will be shown for a few seconds on the display panel.
Loading ...
Loading ...
Loading ...