Loading ...
Loading ...
Loading ...
47
CHANGING THE PORT
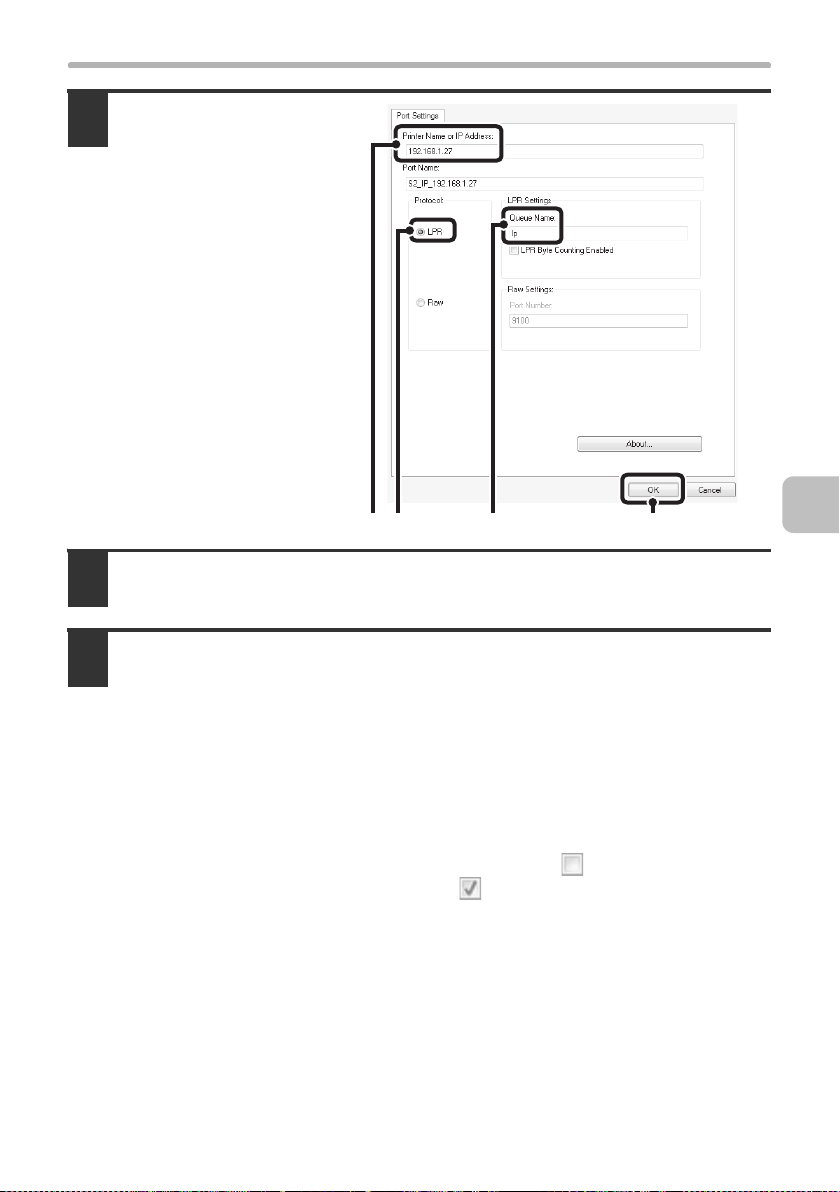
5
Create the new port.
(1) Enter the
machine's IP
address.
☞ Checking the IP
address of the
machine
(page 7)
(2) Make sure that
[LPR] is selected.
(3) Make sure that
[lp] is entered.
(4) Click the [OK]
button.
6
Click the [Close] button in the screen of step 4.
In Windows 98/Me, this step is not required. Go to the next step.
7
Make sure the created printer port is selected in the printer properties
window and then click the [Apply] button.
X When using a port created with "Standard
TCP/IP Port"
When using a port created using "Standard TCP/IP Port" in Windows
2000/XP/Server 2003/Vista/Server 2008, in the screen that appears after
you click the [Configure Port] button in the screen of step 3, make sure the
[SNMP Status Enabled] checkbox is not selected ( ). If the [SNMP
Status Enabled] checkbox is selected ( ), it may not be possible to print
correctly.
(4)
(1) (2) (3)
!mxc381_us_ins.book 47 ページ 2008年8月19日 火曜日 午前10時42分
Loading ...
Loading ...
Loading ...