INSTRUCTIONS FOR USE Blender
IMPORTANT SAFEGUARDS
• Read all instructions before operating.
• To protect against electrical shock, do not immerse cord, plug or blender body in water or any other liquid.
• Always use the appliance on a dry, level surface.
• Always switch the appliance to OFF, and then remove the plug from the outlet when the appliance is not being used and before cleaning.
• Avoid contacting moving parts.
• Blades are sharp. Handle carefully.
• To reduce the risk of injury, never place cutter-assembly blades on the base without the pitcher properly attached.
• Always operate the blender with the cover in place.
• The use of attachments, which are not recommended or sold by the manufacturer may cause a risk of injury to persons, fire or electric shock.
• Do not remove blender pitcher from the motor base while blender is in operation.
• Do not place hands in the pitcher unless the unit is disconnected from the power outlet. Disconnect blender from the power outlet before removing the pitcher from the base.
• Keep hands or utensils out of the blender pitcher while the blender is operating to reduce the risk of severe injury to persons or damage to the blender. A plastic or rubber spatula may be used but only when the blender is not running and has been unplugged.
• Do not use this blender for anything other than food or beverage preparation.
• Do not blend a dry, thick or heavy mixture for more than 60 seconds without turning the blender off and then stirring the ingredients before continuing to blend.
• When blending hot liquids, remove the center piece measuring cup of two-piece pitcher lid.
• Make sure the motor and blade have completely stopped before disassembling.
• Regularly inspect the supply cord, plug and actual appliance for any damage. If found damaged in anyway, immediately cease use of the appliance and call Breville Customer Service on 1-866-BREVILLE.
• The appliance is not intended for use by young children or infirm persons without supervision.
• Do not leave the appliance unattended when in use. Young children should be supervised to ensure that they do not play with the appliance.
• Do not let the cord hang over the edge of a table or counter, touch hot surfaces, or become knotted.
• Do not place this appliance on or near a hot gas or electric burner, or where it could touch a heated oven.
• This appliance is for household use only. Do not use this appliance for anything other than its intended use. Do not use outdoors.
• Always assemble the pitcher and blade assembly first, before attaching to motor assembly. Never place blade assembly on motor base without pitcher.
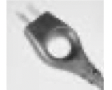
 Your Breville appliance comes with the unique “Assist Plug™”, conveniently designed with a finger hole in the power plug, for easy and safe removal from the outlet. For safety reasons it is recommended you plug your Breville appliance directly into the power outlet. DO not use in conjunction with a power strip or extension cord.
IMPORTANT: TO CRUSH ICE Place 1 cup of ice cubes into the pitcher. Replace lid and push the PULSE button in short bursts until a snowy textured ice is achieved. This will take approximately 15 seconds. When crushing ice, place your hand on the pitcher lid.
ELECTRIC CORD STATEMENT
Your blender has a short cord as a safety precaution to prevent personal injury or property damage resulting from pulling, tripping or becoming entangled with the cord. Do not allow children to be near or use this appliance without close adult supervision. If you must use a longer cordset or an extension cord when using the appliance, the cord must be arranged so it will not drape or hang over the edge of a countertop, tabletop or surface area where it can be pulled on by children or tripped over. To prevent electric shock, personal injury or fire, the electrical rating of the extension cord you use must be the same or more than the wattage of the appliance (wattage is marked on the underside of the appliance).
KNOW YOUR BREVILLE BLENDER
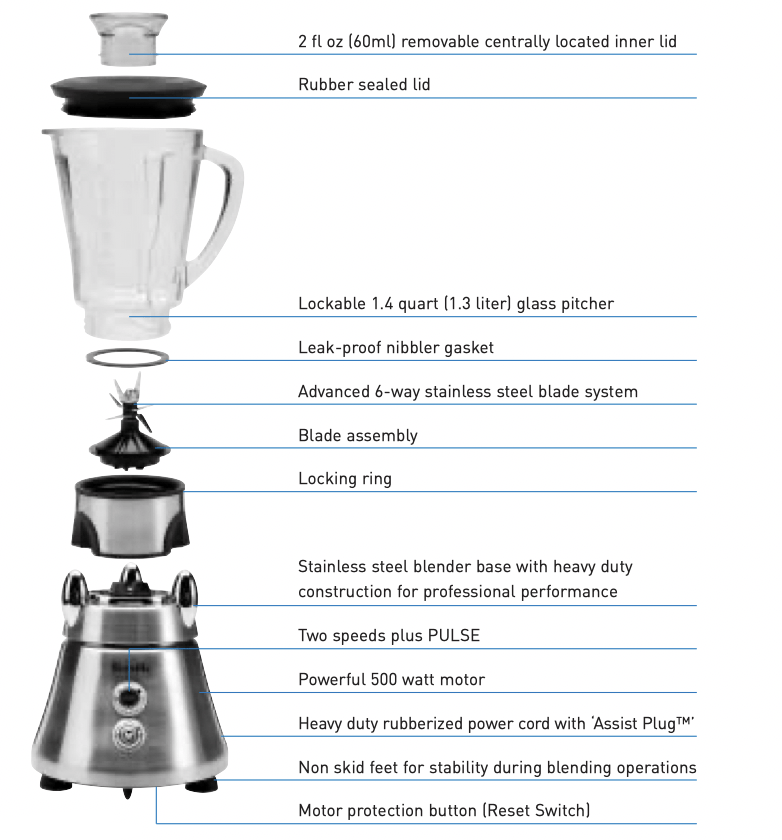
Features the unique Breville Assist Plug™. Easier to insert, easier to remove.
Registered design.
OPERATING YOUR BREVILLE BLENDER
BEFORE FIRST USE
Remove all promotional labels and wash the blender jug in warm, soapy water. Dry thoroughly.
Step 1.
Place the motor base on a flat, dry surface and ensure that the blender is unplugged and the speed control switch is set to the OFF position.
Step 2.
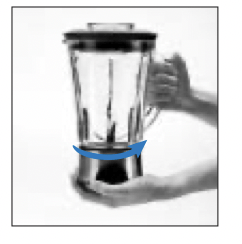
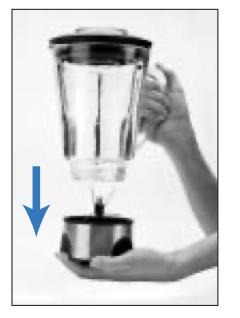
Place pitcher onto the motor base, ensuring that the pitcher is in the unlock position.
(A click will be heard when the jug is turned from the lock to the unlock position.)
(See fig 1 and 2)


Step 3.
Turn the pitcher clockwise to the locking position to operate. (see fig 3 and 4)
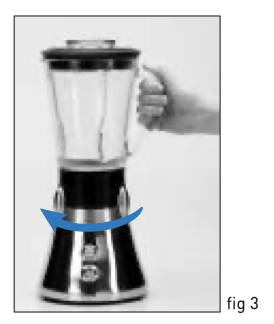
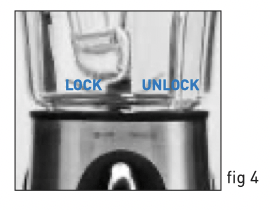
The blender will not operate unless the pitcher is locked in the correct position.
Step 4.
Add food or liquid into the pitcher and place the lid firmly into position on the top of the pitcher.
Step 5.
Then, plug into a 120V power outlet and switch on.
Step 6.
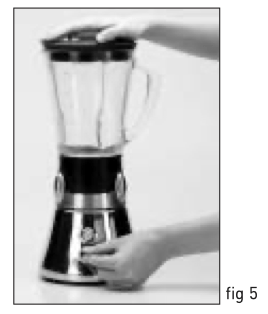
Set the speed by lifting the speed control switch to desired setting 1 or 2. The speed can be changed at any time during the blending process.
When starting to blend, firmly hold the blender lid into place. (see fig 5)
For ingredients that require short bursts of power, push the PULSE button. This is ideal for crushing ice and processing nuts.
Step 7.
During the blending process, you may find that ingredients stick to the sides of the blender pitcher. To push the food back onto the blades, first switch the unit to the OFF position and then unplug from the outlet. Use a plastic spatula to scrape down the sides of the pitcher before recommencing blending.
If any moisture or liquid appears on top of the motor base, wipe immediately with paper towelling.
 NEVER PLACE ANYTHING OTHER THAN FOOD AND LIQUIDS IN THE BLENDER WHILE THE MOTOR IS RUNNING.
ALWAYS HOLD THE LID DOWN WHEN STARTING TO BLEND.
TIPS ON HOW TO BEST USE YOUR BREVILLE BLENDER
DO
• Speed 1 is best for dressings, marinades and foods that require mixing until just combined, such as batters.
• Use the PULSE button for emulsions such as mayonnaise.
• Speed 2 is best for pureeing or making cocktails.
• Use PULSE for foods that only require short bursts of power such as processing herbs, nuts and small vegetables. The PULSE setting is recommended for crushing ice.
• Ensure all parts have been thoroughly washed and dried before assembly.
• Ensure the blender is correctly assembled before operating (see page 7).
• Ensure the base of the pitcher is thoroughly dry before placing onto blender base.
• Ensure the blender is placed on a clean, dry surface to operate.
• Liquids should be placed into blender before solid ingredients, except where specified in recipes.
• All foods should be cut into cubes approximately 1"-11 ⁄ 2 " (2-3cm) square to achieve an even result.
• When necessary use a plastic or rubber spatula to wipe food down the sides of the pitcher only when blender is in the OFF position and has been unplugged. Ensure the blades have stopped rotating. Do not use metal utensils as they may damage the blades or pitcher.
• Do hold the lid down when starting to blend.
DON’T
• Do not blend dry, thick or heavy mixture for more than 60 seconds without turning off the blender and then stirring the ingredients, before recommencing blending. For normal blending tasks such as making mayonnaise and dressings do not operate for longer than 3 minutes at one time.
• Do not place any objects, other than food into the pitcher while the motor is running.
• Do not use the pitcher to store food.
• As air does not circulate when blending, this appliance will not beat egg whites, knead dough or mash potatoes.
• Do not remove the pitcher while the blender is in operation. Always unplug the appliance before removing the pitcher.
• Overloading the blender with more than the specified quantity as stated in these instructions could cause the motor to stall. Turn the blender OFF, unplug the appliance and remove a portion of the mixture before continuing.
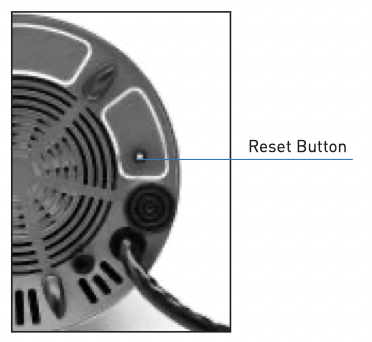
The safety reset button has been added to the blender to preserve the motor life.
The switch will be activated when the motor becomes too hot, or the load too heavy. The unit will cease to operate. The switch located under the motor base will need to be reset by depressing the red button; this can only take place after 10 minutes. The motor will need to rest for 10 minutes before blending can resume.
CARE AND CLEANING
• To clean the pitcher, particularly when a variety of food has been used, half fill the pitcher with luke warm water and a small amount of dishwashing soap. Switch to either of the speed control buttons (1 or 2) and operate briefly. Switch the blender OFF; remove the pitcher from the motor base. Rinse and dry thoroughly.
• Remove the lid and inner lid and wash in warm soapy water.
• Switch the blender OFF and then unplug the unit. Wipe the motor base with a soft, damp cloth.
Never immerse the motor base in water or any other liquid.
DISASSEMBLING THE BLENDER FOR CLEANING
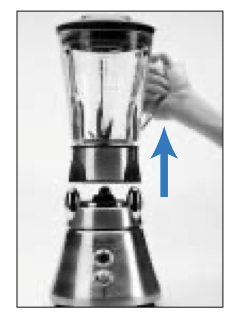
Step 1.
To unlock the pitcher from the blender base, turn the pitcher counter-clockwise to the unlock position. Lift the pitcher off the base.
Step 2.
Continue to turn the pitcher counterclockwise and unscrew with force.
Step 3.
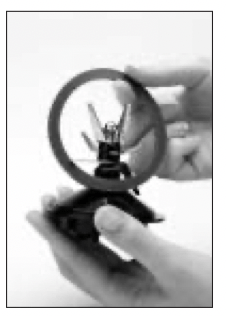
Remove locking ring from pitcher.
Step 4.
Lift the blade assembly from the locking ring.

Step 5.
Remove rubber gasket from blade assembly.
Clean parts in warm, soapy water and dry thoroughly.
To reassemble blender place the rubber gasket onto the blade assembly. Then place the blade assembly into the locking ring and screw the blender pitcher in a clockwise direction firmly into position.
Once the blender pitcher is firmly screwed into the locking ring, ensure the blender is in the unlock position before placing onto blender base.
SUGGESTED USES FOR YOUR BREVILLE BLENDER
Crush ice:
Place 1 cup of ice cubes into pitcher and blend using PULSE button until ice is crushed.
Bread crumbs:
Remove the crusts from the bread and tear into pieces. Blend enough pieces at one time to cover the blades. Up to 4 slices at one time can be crumbed. Stale bread will produce the best results.
Nuts:
Process3 ⁄ 4 cup of nuts at a time. Use the PULSE button as this will give more even results.
Drinks:
Fill the container to at least1 ⁄ 4 full, remember to leave room to allow froth to form as the drink is aerated.
Soups, sauces, purees:
The quantity blended will depend on the food/recipe used. However generally, the more liquid used, the more can be processed at one time.
Whipped cream:
Place 11 ⁄ 2 cups cream with sugar and vanilla into the pitcher. Blend until thickened.
Biscuit crumbs:
Break crackers into pieces. Blend enough pieces at one time to cover the blades.
Batters:
Place liquid ingredients, then dry ingredients into the pitcher. Using speed 1 or 2 (depending on batter type) blend until a smooth batter is formed.
QUANTITIES AND HANDY HINTS
• Thick mixtures puree more efficiently if the blender is1 ⁄ 4 to1 ⁄ 2 full.
• When using several ingredients, place liquid ingredients in the pitcher first.
• When blending thick or dry mixtures it may be necessary to stop the blender and scrape down the sides of the pitcher, once or twice during blending.
• Your blender is not designed to process meat or extract juice from fruit and vegetables.