| SYMPTOM | POSSIBLE CAUSE | TRY THIS... |
| Picture does not fill the screen or there are black bars around the picture | The picture size may need to be adjusted | - Adjust the picture size (aspect ratio). See the Picture Size option in the Options menu.
|
| I don’t see a picture when I select an input | TV is not on | - Make sure that your TV is plugged into a working power outlet, and that your TV is turned on. (Your TV has a light on the front that indicates if your TV is turned off.)
|
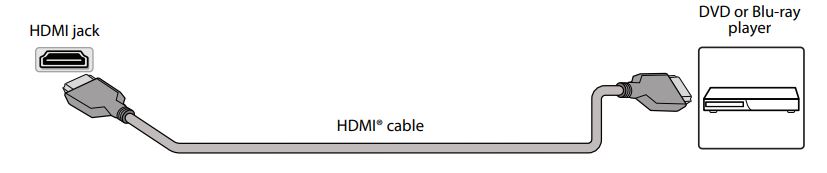
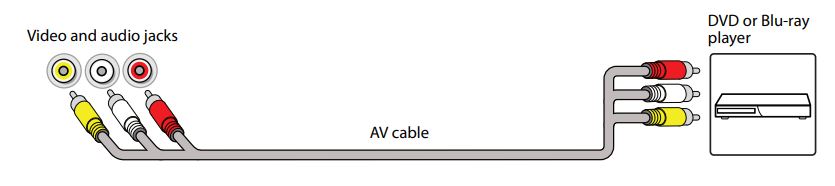
| Cables are not connected correctly | - Make sure that the video cables are connected correctly and securely to your TV.
- Make sure that the antenna or cable TV is connected correctly and securely.
|
| Picture settings may be incorrect | - Adjust the contrast and brightness. See the TV brightness option in the Settings menu or Options menu.
- Adjust the TV picture.
|
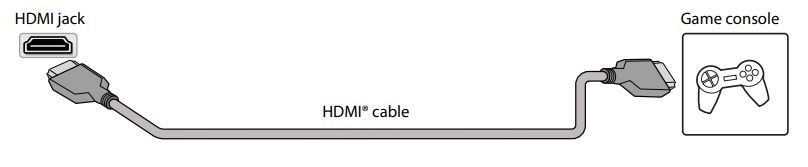
| Incorrect input may be selected | - Make sure that the correct input is selected for the device you want to view.
|
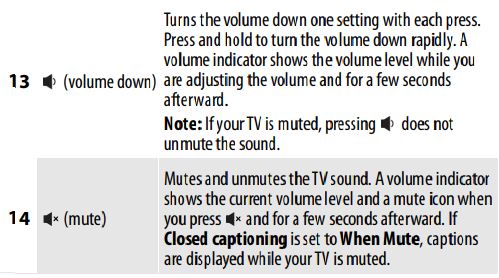
| Input source not detected | - Make sure that the device connected to the input is turned on.
- Make sure that the cord to and from the device is connected firmly and correctly to the device and your TV.
|
| TV input may be bad | - Connect a different device to the same input and check to see if it works correctly.
|
| TV channel does not appear | Broadcast TV may be experiencing problems or may not be set up | - Try another channel. The station may be experiencing problems.
- Make sure that the incoming signal is compatible.
- If you are trying to watch broadcast TV, make sure that Antenna TV is set up.
|
| Dark, poor, or no picture (screen is lit), but sound is good | Broadcast TV may be experiencing problems or may not be set up | - Try another channel. The station may be experiencing problems.
- If you are using an antenna and the signal strength is low, adjust the antenna or use a highly directional outdoor antenna or set-top antenna with a built-in amplifier.
|
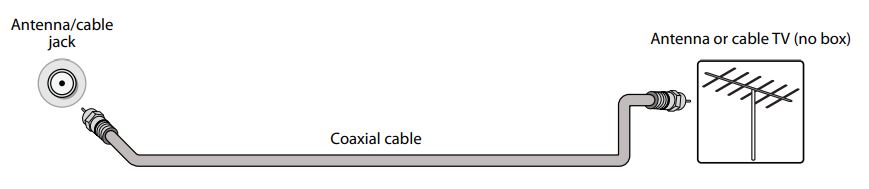
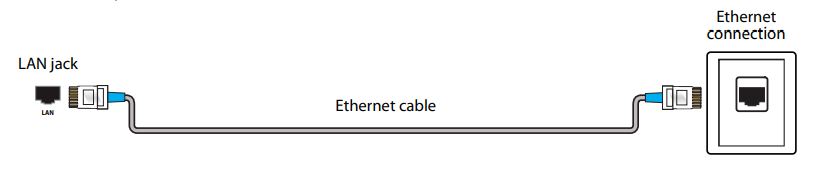
| Cables may not be connected correctly | - Make sure that the antenna or cable TV is connected correctly and securely. See Connecting a cable or satellite box or Connecting an antenna or cable TV (no box)
- Make sure that the video cables are connected correctly and securely to your TV.
- The video cable(s) you are using may be bad. Try a new set.
|
| Picture settings may be incorrect | - Adjust the brightness. See the TV brightness option in the Settings menu or Options menu.
- Change to a different picture mode. See the Picture mode option in the Options menu or Advanced Picture Settings menu.
|
| No color, dark picture, or color is not correct | Picture settings may be incorrect | - Adjust the contrast, color, and brightness settings.
|
| Broadcast TV may be experiencing problems | - Try another channel. The station may be experiencing problems.
- If you are using an antenna and the signal strength is low, adjust the antenna or use a highly directional outdoor antenna or set-top antenna with a built-in amplifier.
|
| Cables are not connected correctly | - Make sure that the antenna or cable TV is connected correctly and securely.
- Make sure that the video cables are connected correctly and securely to your TV.
- The video cable(s) you are using may be bad. Try a new set.
|
| Only snow (noise) appears on the screen | Broadcast TV may be experiencing problems or may not be set up | - Try another channel. The station may be experiencing problems.
- If you are trying to watch broadcast TV, make sure that Antenna TV is set up.
- If you are using an antenna and the signal strength is low, adjust the antenna or use a highly directional outdoor antenna or set-top antenna with a built-in amplifier.
|
| Cables may not be connected correctly | - Make sure that the antenna or cable TV is connected correctly and securely. See Connecting a cable or satellite box or Connecting an antenna or cable TV (no box)
|
| Picture quality is good on some channels and poor on others. Sound is good | Broadcast signal may be weak | - If you connect to cable without a set-top box and experience poor picture quality, you may need to install a set-top box to improve signal reception and picture quality. Contact your cable TV provider about upgrading to a set-top box.
|
| Dotted lines or stripes appear on the screen | Cables may not be connected correctly | - Make sure that the antenna or cable TV is connected correctly and securely
- Make sure that the video cables are connected correctly and securely to your TV. See Connecting a cable or satellite box or Connecting an antenna or cable TV (no box)
- The video cable(s) you are using may be bad. Try a new set.
|
| Broadcast signal may be weak | - If you are using an antenna and the signal strength is low, adjust the antenna or use a highly directional outdoor antenna or set-top antenna with a built-in amplifier.
- Other devices (for example, a surround sound receiver, external speakers, fans, or hair dryers) may be interfering with your TV. Try turning off one device at a time to determine which device is causing interference. After you have determined which device is causing interference, move it further from your TV to eliminate the interference.
|
| Double images | Broadcast signal may be weak | - If you are using an antenna and the signal strength is low, adjust the antenna or use a highly directional outdoor antenna or set-top antenna with a built-in amplifier.
- If you are using an antenna and the signal strength is low, switch to a cable or satellite box.
|
| The picture has a few bright or dark spots | This is normal in LED TVs | - A few bright or dark spots on an TV screen is normal. It does not affect the operation of your TV.
|
| Good picture, but no sound | Volume is down or muted | - Increase the volume.
- Make sure that the sound is not muted.
|
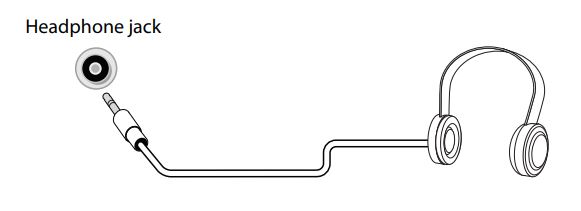
| Headphones may be connected | - Make sure that you do not have headphones connected. When headphones are connected, no sound comes from your TV speakers.
|
| TV speakers may be turned off | - If you want sound to play through your TV speakers, make sure that your TV speakers are turned on.
|
| You may need to change the audio mode | - Change to a different audio mode.
|
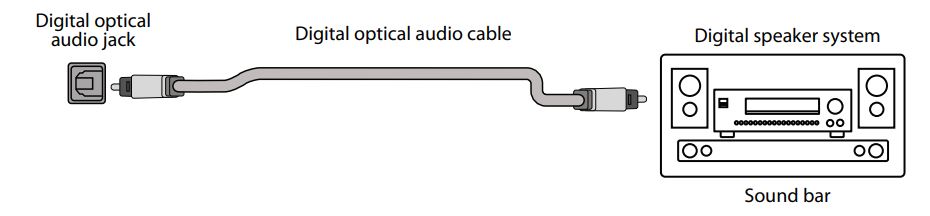
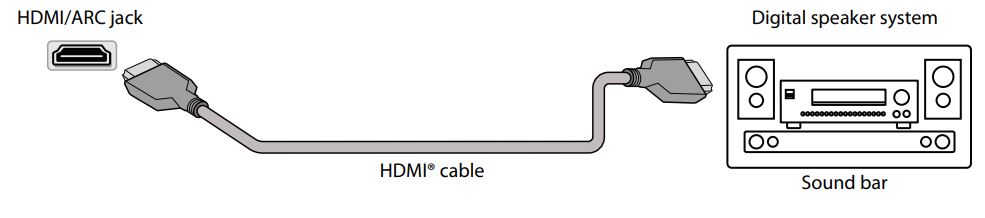
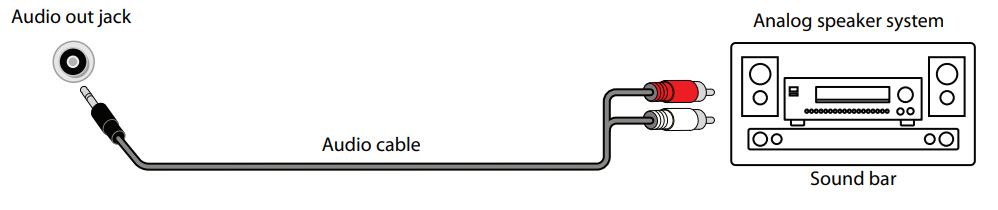
| Home theater system, sound bar, or external speaker system may not be turned on or may not be set up correctly | - If you are using a home theater system, sound bar, or external speaker system, make sure that it is turned on and is not muted and that it is set to the correct source.
- If you connected an ARC audio device to the HDMI/ARC jack, make sure that you have turned on the ARC feature.
- If you are using a home theater system, sound bar, or external speaker system and have connected it with a digital audio cable, make sure that you have set up the digital audio connection.
- Make sure that the audio cables are connected correctly and securely to your TV.
|
| Bad content, no audio | - Make sure that the selected channel or content is intended to be broadcasting with sound.
|
| Cables may not be connected correctly | - Make sure that the antenna or cable TV is connected correctly and securely. See Connecting a cable or satellite box or Connecting an antenna or cable TV (no box)
- The audio cables you are using may be bad. Try a new set.
|
| Poor picture | Light in the viewing area may be interfering | - Make sure that the room is not too bright. Light reflecting off the screen can make the picture difficult to see.
|
| A connected camera or camcorder may be interfering | - If an S-VHS camera or a camcorder is connected while another connected device is turned on, the picture may be poor. Turn off one or more devices.
|
| Audio noise | Other devices may be interfering | - Other devices (for example, a surround sound receiver, external speakers, fans, or hair dryers) may be interfering with your TV. Try turning off one device at a time to determine which device is causing interference. After you have determined which device is causing interference, move it further from your TV to eliminate the interference.
|
| After images appear | | - Do not display a still image, such as a logo, game, or computer image, for an extended period of time. This can cause a permanent after-image to be burned into the screen. This type of damage is not covered by your warranty.
|